Each time someone abandons his basket, a record has to be created in the actions list. There are several ways how data from an external system can be inserted or updated in the Selligent environment. For large volumes a scheduled task can handle inserting the data. In this case this is not real-time, every 10 minutes, 1 hour, etc. the task will fill the action list. The external system can also use the Selligent Individual API, "AddRecordToActionList" method to add a single record to an actionlist, or" AddRecordsToActionList" method to add multiple records to an action list. This is for smaller volumes, because you can only do a limited amount of web service calls at once. The data is transferred over the internet, so it depends on connection and transfer speeds.
If installed, you can find a listing of the Individual web service methods under http://YOURDOMAIN/automation/individual.asmx (replace YOURDOMAIN with your install's domain).
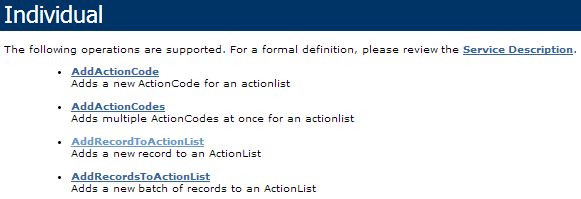
There are many Individual web API methods to manage data and users in the Selligent environment. See the Individual API manual on how to use these.
We are going to use AddRecordToActionList to add a single record to our action list. Instead of writing a .net or php script on a server, we're going to use the SoapUI software from Smartbear (http://www.soapui.org) to test. You can download and install the Open Source SoapUI software from http://sourceforge.net/projects/soapui/files/
- Create a new SoapUI project

- Enter a project name and reference to the individual wsdl location: http://YOURDOMAIN/automation/individual.asmx?wsdl
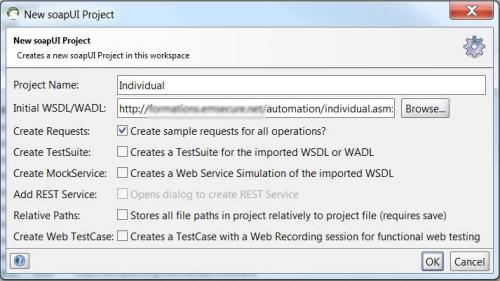
- Click 'OK'. When loaded, you should see a listing of the Individual API methods. Right-click the AddRecordToActionList method and select 'New request'
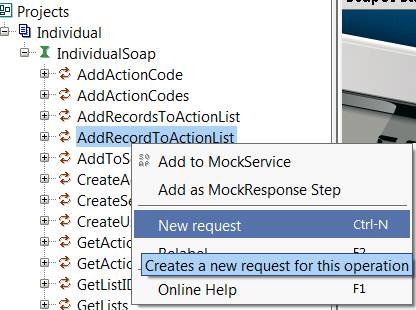
- Name the request 'Request 1'. You can see the request panel.
Create the automation user
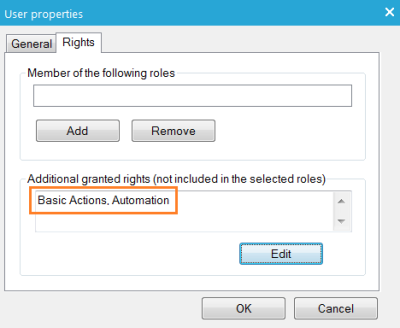
- To use the web service you’ll have to create an ‘automation’ user. Go to "Settings, Users & User groups" and create a new group and user, give it a name 'Automation' and password and only rights to 'Basic actions' and 'Automation'
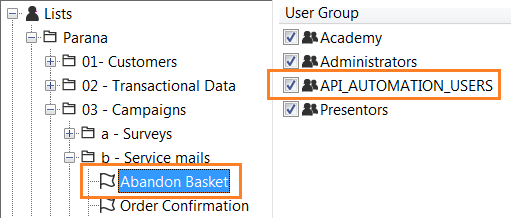
- Make sure the automation user has access to your action list. Manage access under 'Asset rights'
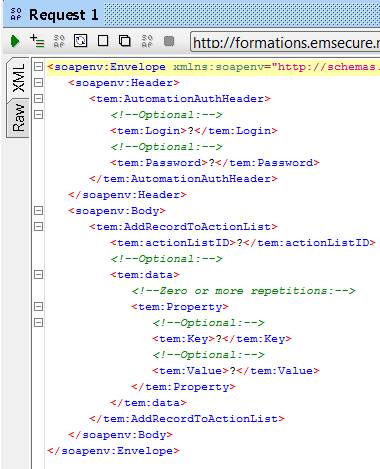
- Once created, you can fill-in the data in the request in SoapUI:
- Login and password (just created in the settings)
- ActionListID (the list ID of the action list)
- Property LISTID (the list ID of the audience list)
- Property USERID (ID of your test user in the user list)
- Property ACTIONCODE = "BASKET"
- Property BASKETCONTENT = [{"ID":1,"PARAM":"BASKET","CONTENT":{"NAME":"Item 1","PRICE":"150"}},{"ID":2,"PARAM":"BASKET","CONTENT":{"NAME":"Item 2","PRICE":"55"}}]
You can query the audience and action list id. Under
"Settings", select "Advanced scripting" and query
the LISTS table. Replace 'YOUR LIST NAME' with your audience/action list
name:
select * from lists where caption='YOUR LIST NAME'. The column, 'ID' will
show the audience/action list id.
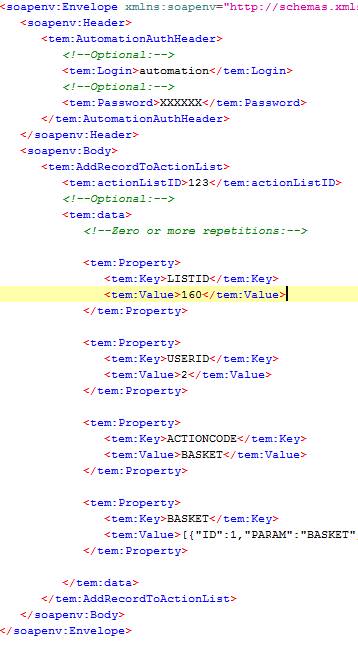
- Click on the submit request button (top left). The action record is created and the web service call returns result=0 when successfully handled


