Notification groups are used in the context of tasks, data exports, Custom Journeys, CRM Data synchronizations etc.
- In a task, users might need to be alerted when a task fails, succeeds, etc.
Instead of selecting individual users to notify, notification groups can be selected. - In a Custom Journey, you have the option to send an email to notify a user when a specific action takes place. Here you can select notification groups as well.
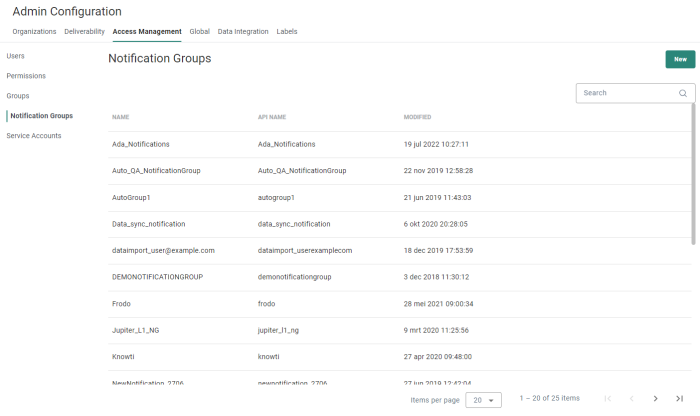
The Notification Groups overview shows all configured notification groups.
From this overview you can
- Create a new notification group — See below.
- Edit an existing notification group — By clicking on a notification group name. The properties are then displayed in a right sliding panel.
- Delete an existing notification group — By clicking on the bin icon.
- View the usage of the notification group — by clicking on the road sign. The usage is shown in the right sliding panel.
Usage is split per tab :
- Each tab corresponds to a different usage type (for example 'Tasks').
- The number of usages per type is shown between brackets (for example 'Data exports (29)').
You can click on a row to jump directly to a specific usage location.
If usage of a notification group is in an asset belonging to an Business unit in Selligent by Zeta to which the user does not have access, this is mentioned also (for example '1 assets(s) in Business unit(s) that you do not have access to').
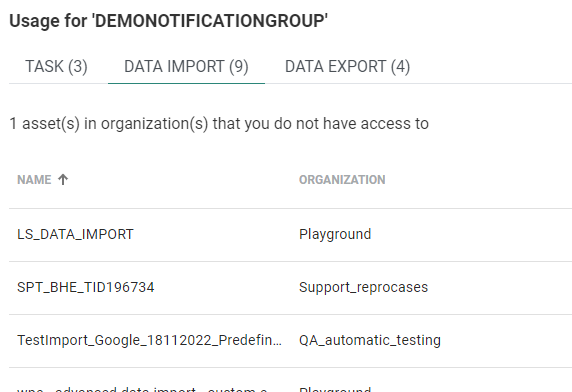
If a notification group is not used at all, a corresponding message is shown.Example of a notification group that is used in 3 tasks, 4 data exports and 9 data imports, from which the user can't access 1 asset because they do not have access to its Business unit :

Note: If the notification group is used in assets the user has no access to, then only the number of assets in which it is used is returned.

Create a notification group
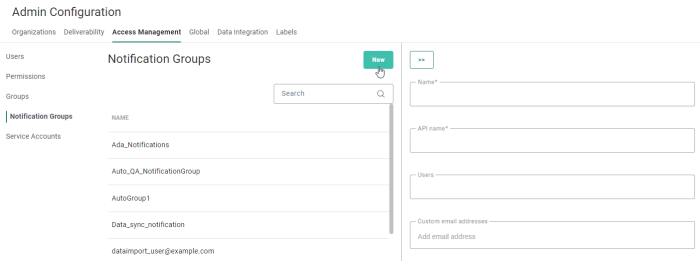
To create a new notification group, click on the New button
at the top-right.
The following properties can be configured:
- Name* — Notification group name. Make it as explicit as possible to easily recognize it in the Data Exchange section.
- API Name* — Sets the API name for the notification group so it can be managed through the API as well.
- Users — Select the users from the drop-down list of current users of the environment. All the selected users will be notified. If users are deleted afterward, they are also removed from the notification group.
- Custom email addresses — Enter the custom email addresses that should be included in this notification group. This can be used for people that are currently not a user of the environment but need to be notified anyway.
When done, click Save to create the notification group.


