
Setting up the Google Customer Match Integration
Important: From April 1 2026, the Google Customer Match via the Google Ads API is being phased out.
Existing adopters may continue using it as long as they make at least one request within a 180-day period. If no requests are made for 180 days, access to the Google Ads API will be revoked, and those adopters will be required to switch to the Google Data Manager API.
When configuring the Channel Endpoint in Selligent, users can select which API type to use. 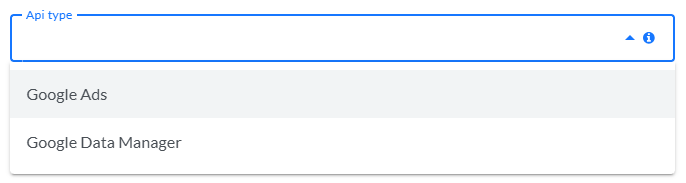
As the Google Ads API currently handles all requests for existing Google Customer Match integrations in Selligent, for those the API still remains as is to avoid any disruptions.
However, the drop-down above is a temporary option, that will be removed in the future when all configurations are updated to the Google Data Manager API usage.
Clients are therefore strongly encouraged to update their configurations to the Google Data Manager API as soon as possible. The deprecated Google Ads API will no longer receive updates from Google, and although no final shutdown date has been announced yet, it will eventually be fully discontinued.
Introduction
Configure the Plugin
Create a Social Channel Endpoint in Selligent
Create a new Social Channel endpoint for the Google Ads audience plugin in Admin Configuration > Global > Channel Endpoints. Fill out the following fields:
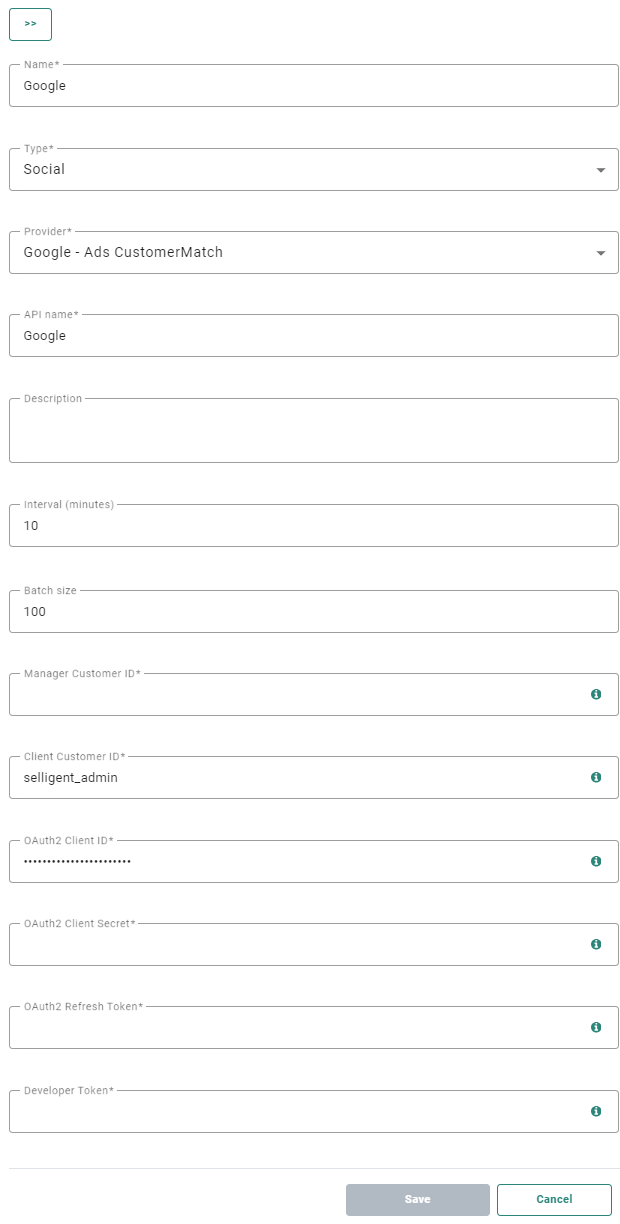
- Name * — Enter a channel endpoint name. Make sure to choose an easy recognizable name.
- Type * — Select Social as type.
- Provider * — Select Google Ads CustomerMatch.
- Api name * — The API-name attributed to the end point and used by the API.
- Description — You can enter a description for this endpoint.
- Interval — Throughput interval, expressed in minutes. (minimum is 1 minute, default is 10 minutes)
- Batch size — Throughput batch size. The default batch size is set to 100 records. A maximum of 33000 records can be processed by Google Ads. It is recommended to set the batch size to maximum 25000 records per minute to avoid memory issues. Note however, the more fields are being synchronized per record, the smaller the batch size should be set.
Note: Interval and Batch size are settings applied to records sent from Selligent to the plugin. However, the processing speed depends on the settings defined in the plugin and can be different for each plugin. The rate limits of the plugin are defined through 3 distinct parameters: Concurrency, MessagesPerrequest and RequestsPerSecond/Minute.
Note: It is important to have the latest version of the interface plugin on your environment (the previous version of the plugin only allows 10 records per defined interval).
- API type — Select between the Google Ads and Google Data Manager API.
Important: It's strongly advised to using the Google Data Manager API, as the Google Ads API is being phased out.
For now, the Google Ads API is still available to support existing configurations. After an inactivity of 180 days, access to the Google Ads API will be revoked, and it's mandatory to switch to the Google Data Manager API.
Therefor, the API type drop-down with the two options shown in the user interface, is a temporary option that will be removed in the future. - Manager Customer ID * — Your Google Manager Customer ID. (* Only required for the Google Ads API)
- Client Customer ID * — Your Google User/Client Customer ID.
- OAuth2 Client ID * — The app credentials ClientID.
- OAuth2 Client Secret * — The app credentials ClientSecret.
- OAuth2 Refresh Token * — The refresh token generated by ClientID & ClientSecret.
- Developer Token * — The developer token (app review required by google).
- CustomerMatch Terms Of ServiceStatus * — Select Accepted here, to legally confirm giving consent to use the data for ads. (* This is required for the Google Data Manager API).
Connecting your Google Instance to Your Business unit
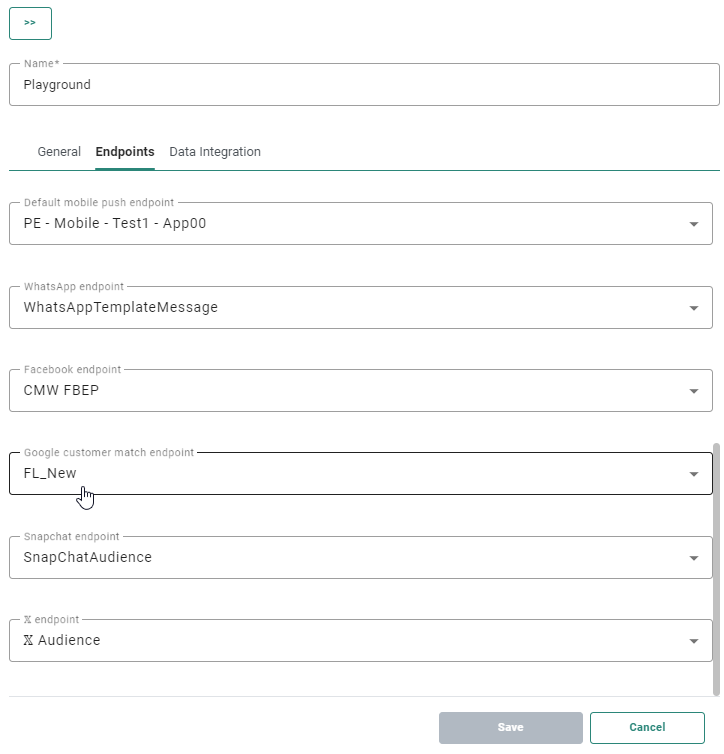
As you can create multiple instances of the Google Ads Customer Match plugin, you’ll need to define within the Admin Configuration which Google Ads Customer Match you want to use within your Business unit.
1. In the Admin Configuration, click on the Business units tab and edit the one you want to configure.

2. Select the tab Endpoints, add the desired Google Customer Match endpoints, choose the default one and click Save.
Use the Google Customer Match Component in a Custom Journey
When using the Google Customer Match Component in a journey and selecting the above instance, the list of fields used for mapping can be added manually by selecting those within the drop-down list:
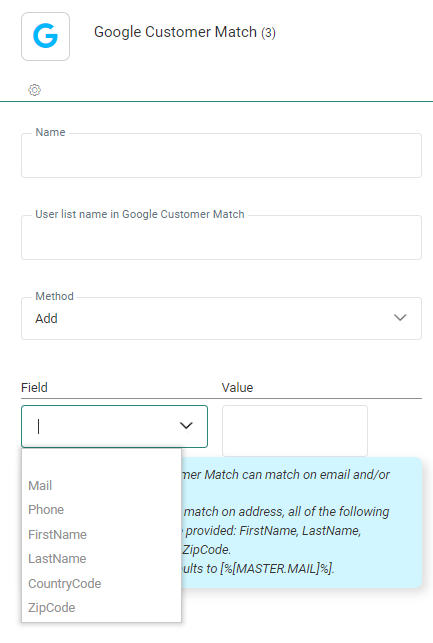
Note: All properties of the Google Customer Match Component are explained here.
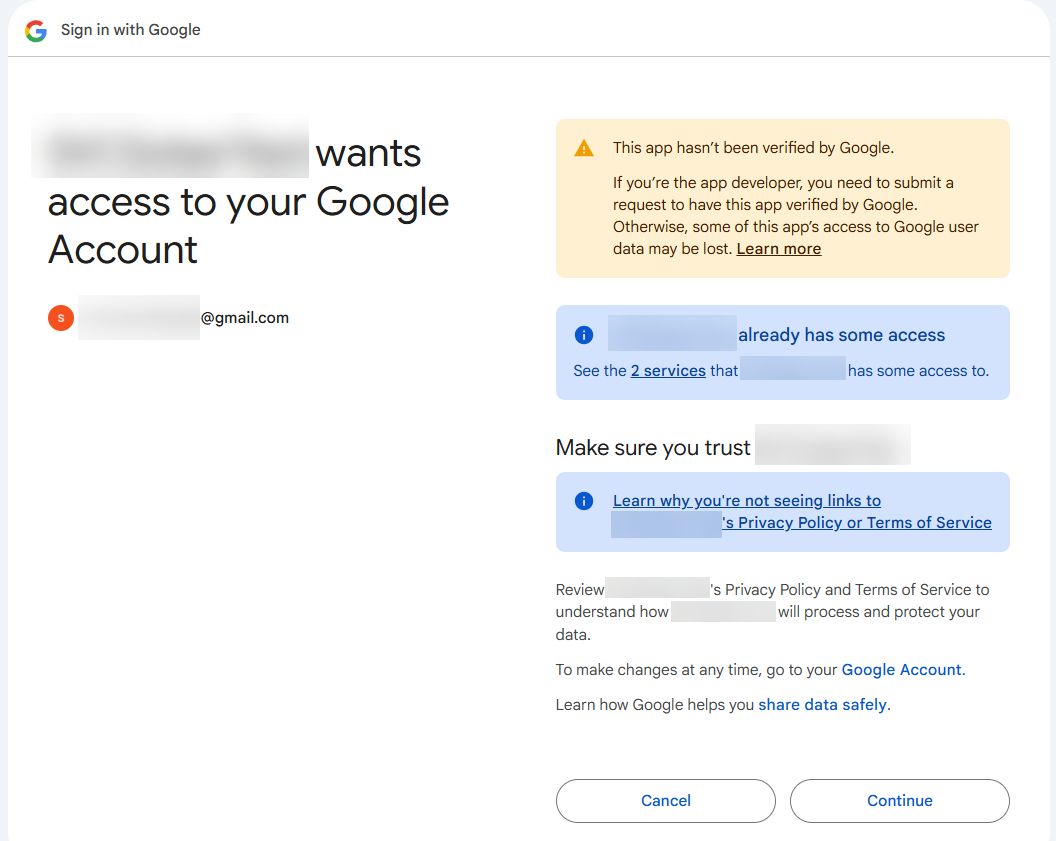
Setup in Google
It’s difficult to retrieve a Google Ads account. You will need to fill out a form with multiple questions where it’s also required to provide a documentation file on what you like to achieve.
Ones this is manually validated by Google, you will still need to create app/OAuth2 credentials & receive the refresh token.
Create a Manager Account (Getting the Developer Token)
The developer token is the main key that you will need to use within all your Google Ads applications.
1. Navigate to the following URL and click on Create Manager Account: https://ads.google.com/home/tools/manager-accounts/
2. Fill in all required information, and then click Save.
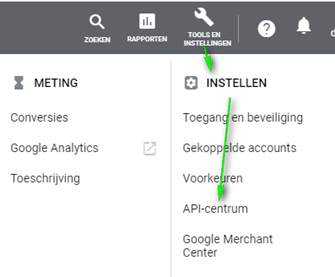
3. When you are in the portal of Google Ads, go to Tools and Settings > Setup > API Center.
Note: If you have a child account, you will not see this menu option as it is only visible within the master account.
4. Answer all required questions, and then click Create token.
Note: If your developer token is pending approval, you can start developing immediately with the pending token you received during sign up, using a test Manager Account. Your pending developer token must be approved before using it with production Google Ads accounts. Keep in mind that for our purpose, you can only test this with a production developer token
Warning: Each Google API Console project can be associated with the developer token from only one Manager Account. Once you make a Google Ads API request, the developer token is permanently paired to the Google API Console project. If switching to a developer token under a new Manager Account, you will need to create a new Google API Console project for Google Ads API requests that use the new Manager's token. If you do not use a new Google API Console project, you'll get a DEVELOPER_TOKEN_PROHIBITED error when making a request.
Your token will be available through your API Center — accessible through the Account settings menu for the Manager Account from which you applied.
Create a Client User Account
1. Select ‘Tools & Settings’. Select the tab Users and click on the + sign
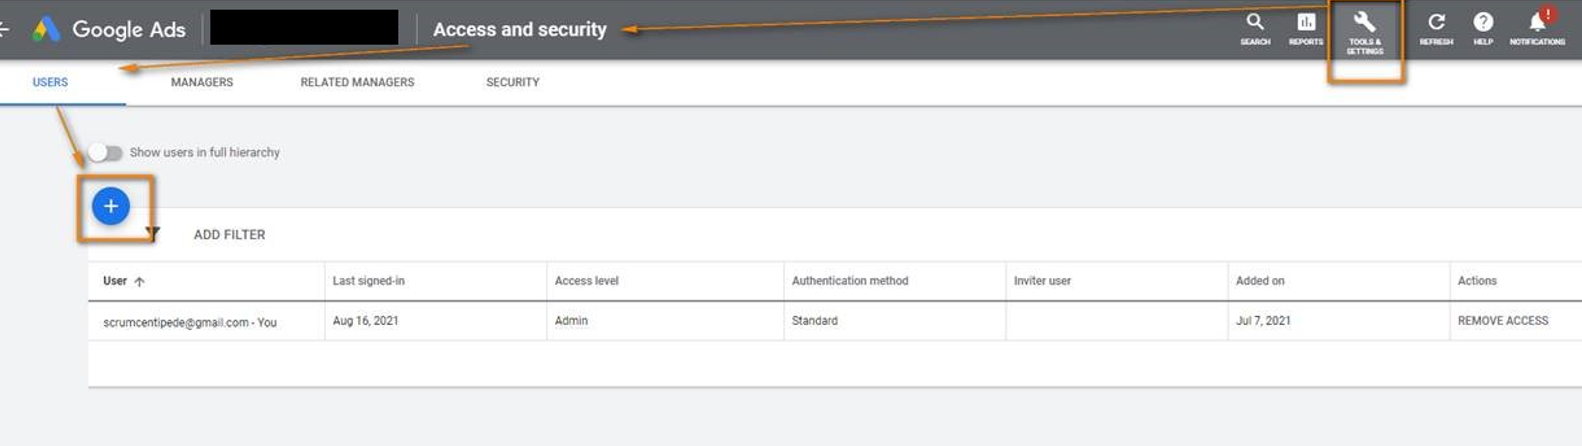
2. Enter an email address, select Admin, and then click Send Invitation.

Create OAuth2 Credentials
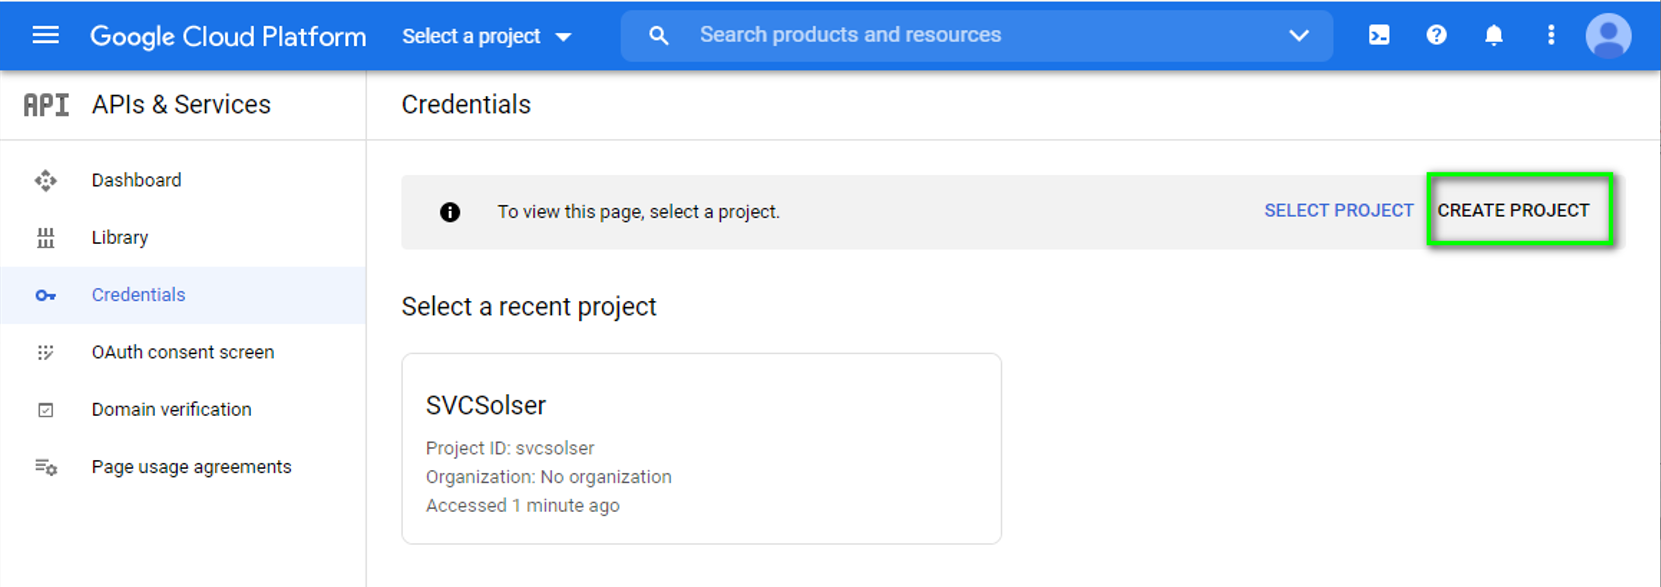
1. Navigate to the following url: https://console.cloud.google.com/apis/credentials
2. Click on the Project field to access the dialog to select an existing project or to create a new project. Click Create Project.
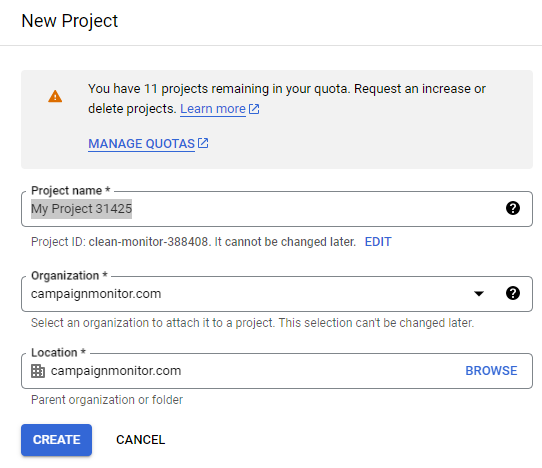
3. Enter your project name, select your location and Business unit, and then click Create.
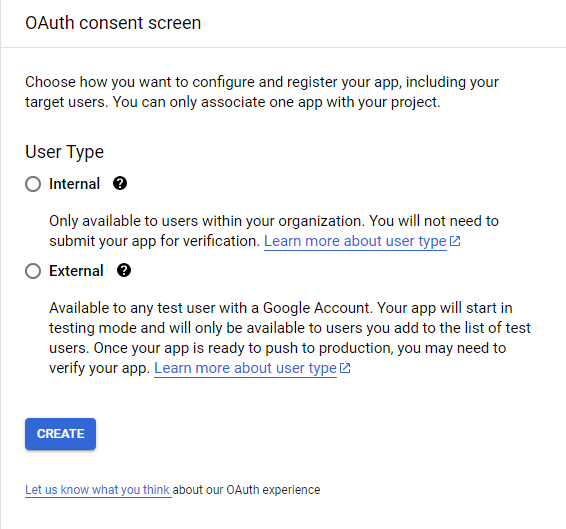
4. On the Credentials page, select Configure consent screen.
5. Select the one that you need and click Create. In most cases, you are required to create an internal one if you are using it for your own workspace.
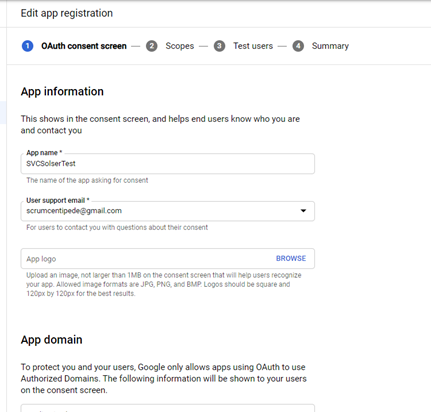
6. On the OAuth consent screen tab, complete the form, and then click Save and continue.
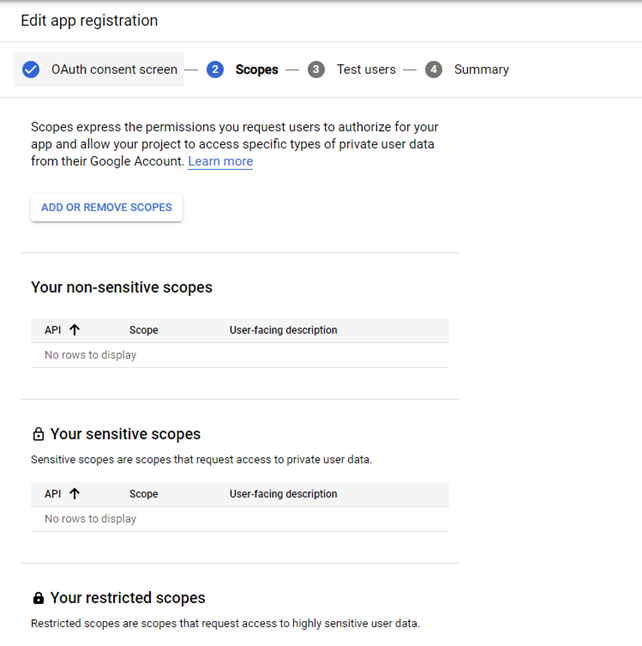
7. On the Scopes tab, select your scopes and click Save and continue.
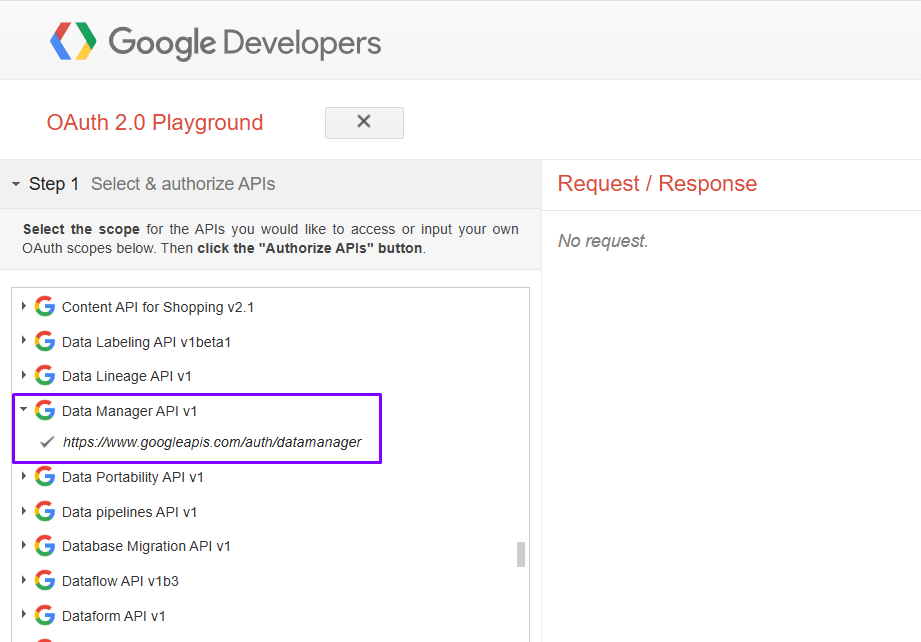
Scopes: https://www.googleapis.com/auth/adwords and https://www.googleapis.com/auth/datamanager.
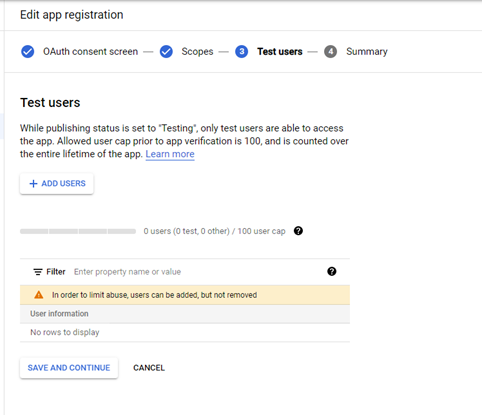
8. On the Test users tab, add the necessary test users and click Save and continue.
9. The Summary tab gives you an overview.
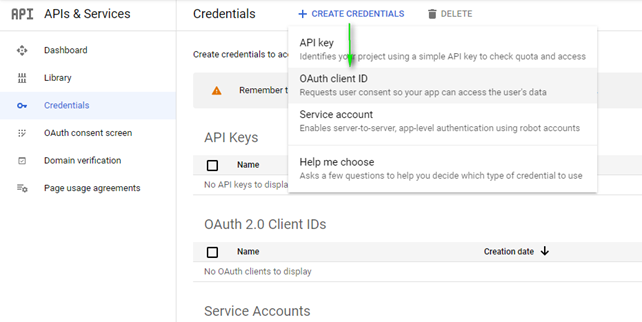
10. Once the Configure consent screen is complete, go back to Credentials, click Create credentials and select OAuth client ID:
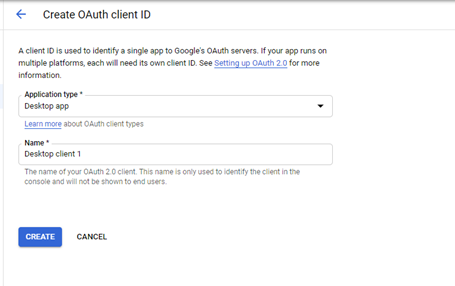
11. Select Desktop app as application type and provide a name. Once completed, click Create.
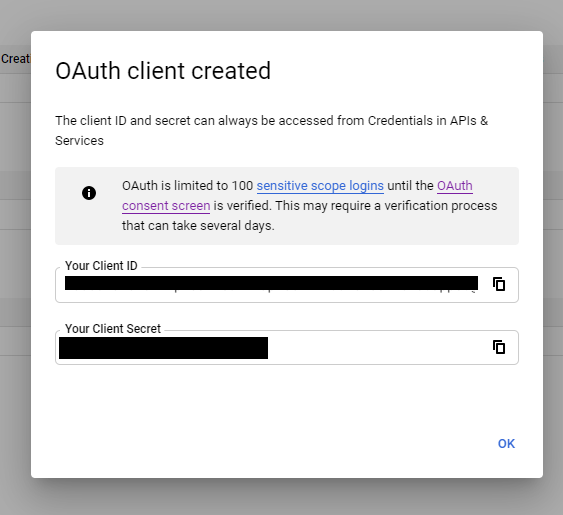
12. A pop-up screen is shown with the Client ID & Client Secret.
Enable APIs
1. Navigate to https://console.cloud.google.com/apis/dashboard, select the correct project, and then click Enable APIs and services.

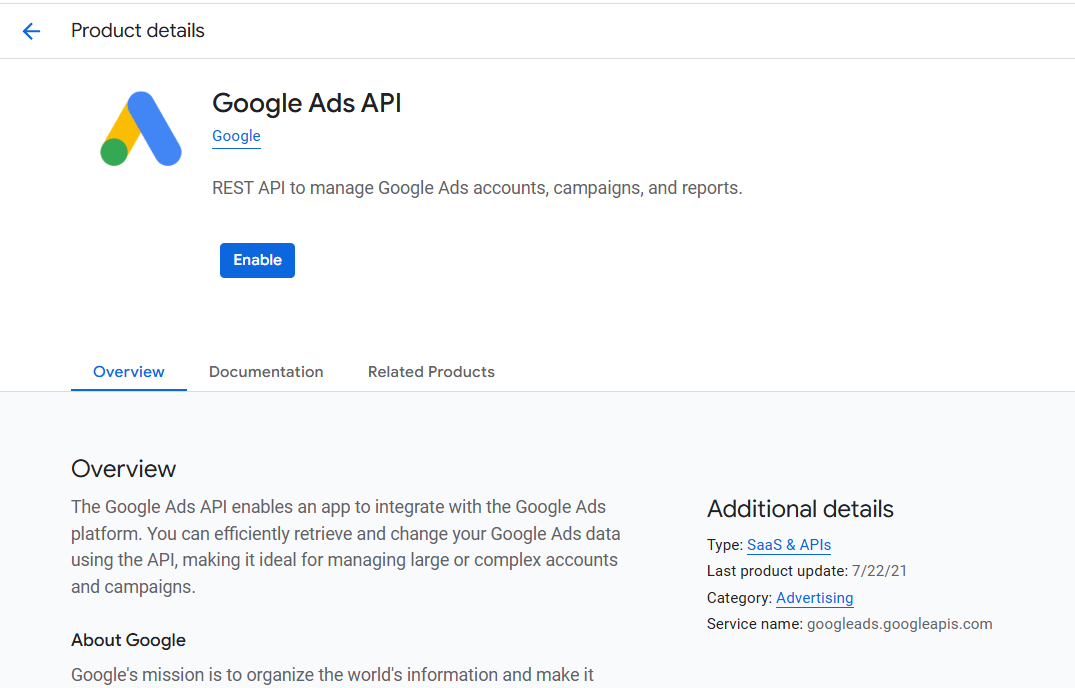
2. Search for Google Ads API and click Enable.
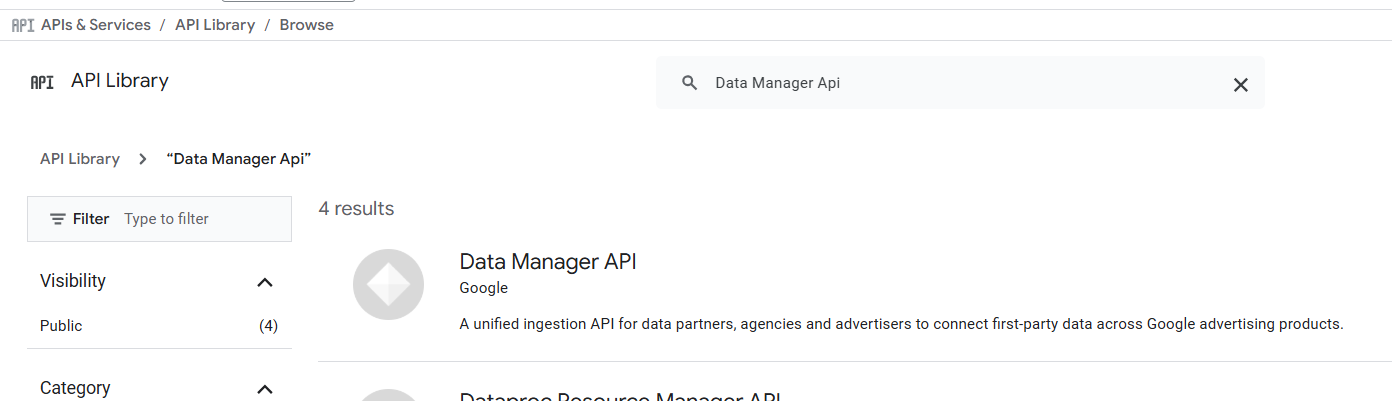
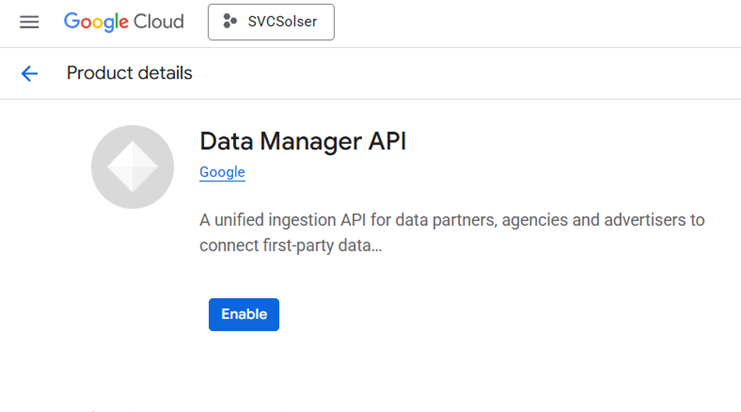
3. Search for Google Datamanager API and click Enable.
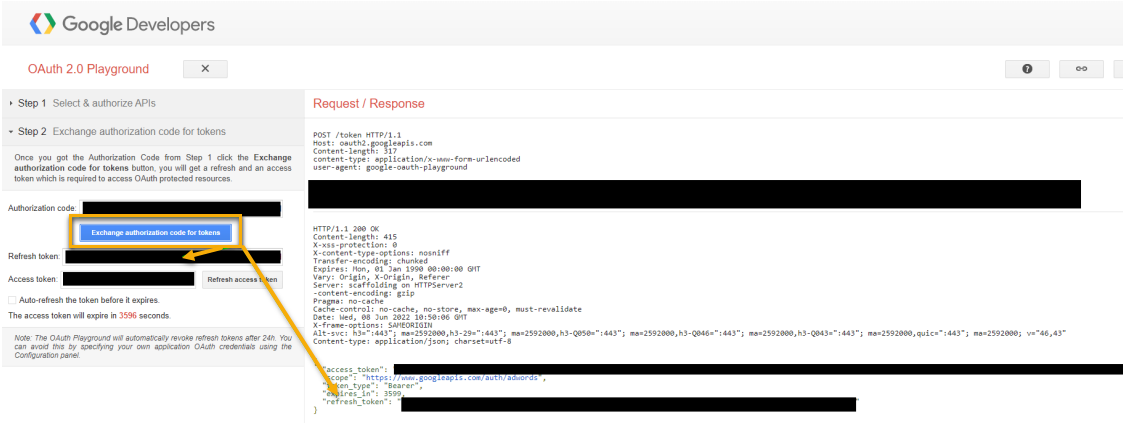
Get the Refresh Token
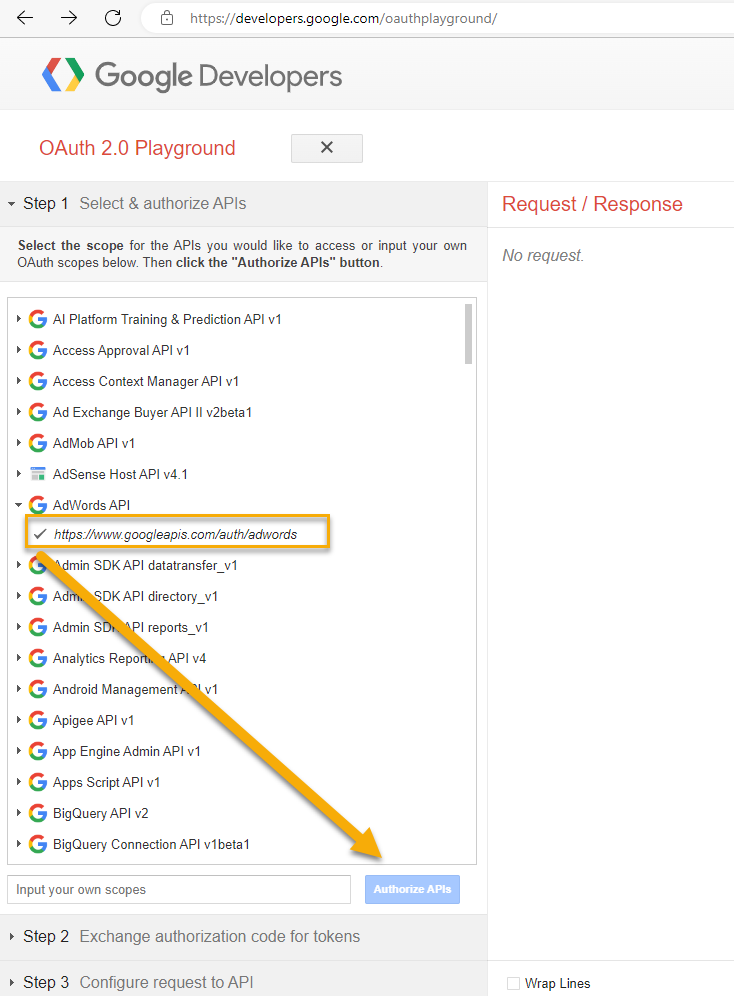
1. Go to https://developers.google.com/oauthplayground and on the Configuration screen fill out the Client ID and Client secret.
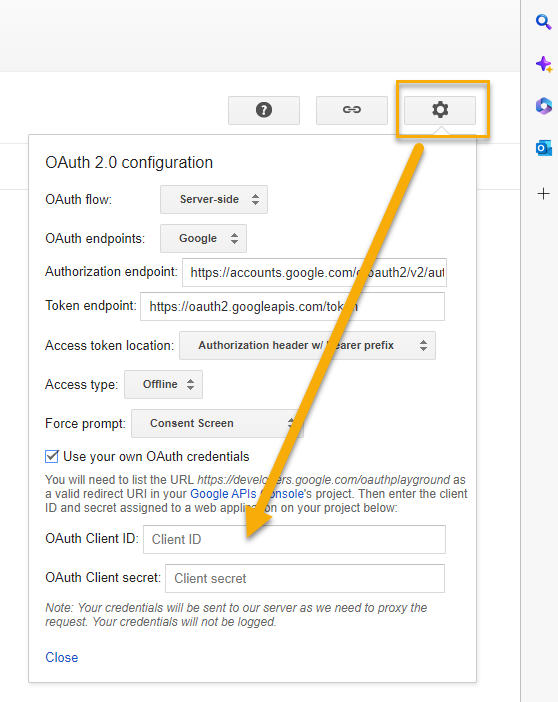
2. Select Adwords API and Data Manager API v1 on the left and click the Authorize APIs button.
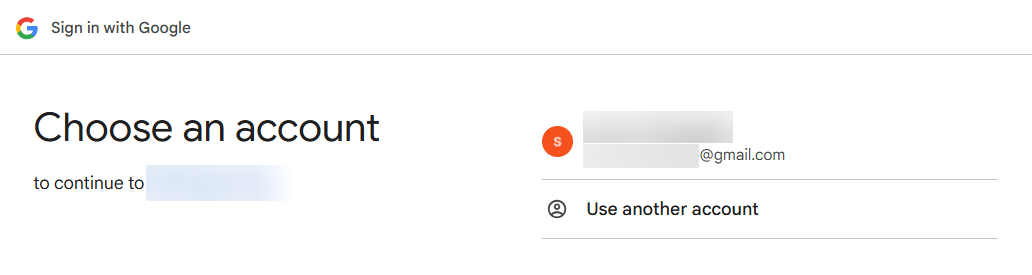
3. A new pop-up opens where you select the user that's generating the refresh token. Make sure you select the same user that created the credentials.
4. If a warning is displayed, ignore it and click the Advanced link below and then click Go to your app.
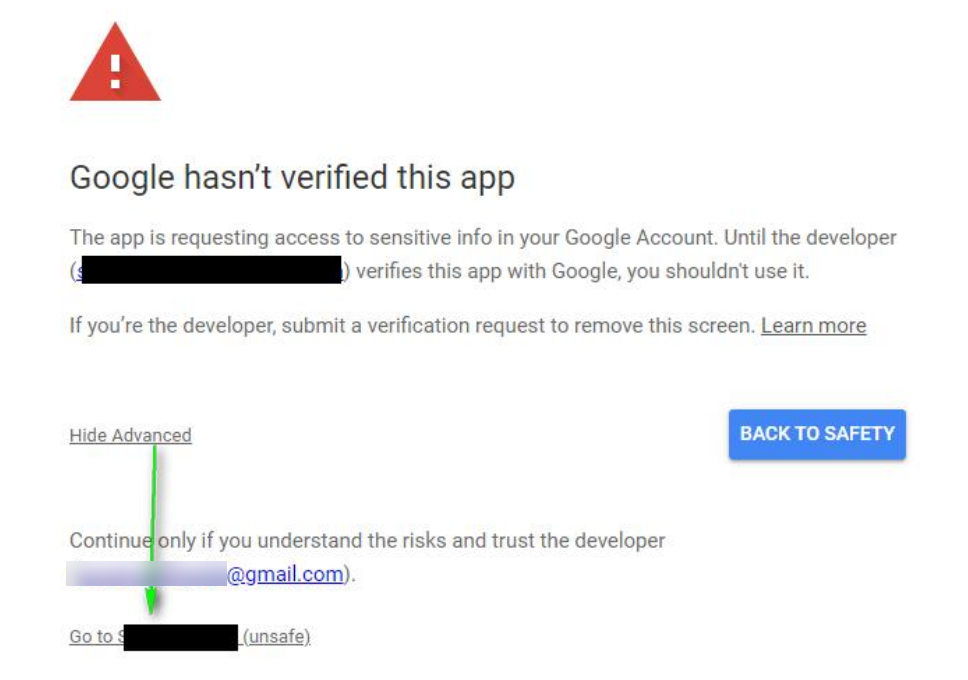
5. Another pop-up is displayed. Click Continue.
6. Next, on the OAuth page, the second step is displayed, containing an Exchange authorization codes for tokens button. Click to refresh and reveal the refresh_token and the access_token.
App Verification
The scope URL https://www.googleapis.com/auth/adwords was classified as sensitive.
It’s required to follow the steps below once your app has been created.
Before you start the verification process, review the OAuth Application Verification FAQ. This will help your verification process go quickly. To start the verification process for apps, do the following steps:
1. Update the OAuth consent screen details in the Google Cloud Platform Console APIs & Services Credentials:
- You must have a privacy policy URL.
- Add URLs for your homepage and Terms of Service if you have them.
2. Verify your website ownership through Search Console by using an account that is a Project Owner or a Project Editor on your OAuth project.
- The same account must be a verified owner of the property in Search Console. For more information about Search Console permissions, see Managing owners, users, and permissions.
- We can't approve your OAuth verification request until your site ownership verification is complete. For more information, see Verify your site ownership.
3. To start the verification process, submit a verification request by using the following process. Note that the Verification required dialog is a beta feature that might not be available for all users at this time.
A. On the GCP Console OAuth consent screen, click Submit or Save.
B. If a Verification required dialog displays:
i. Add information in the text boxes for Google to verify your OAuth consent screen.
ii. When you're finished entering details, click Submit.
Note: If you add any new redirect URLs or JavaScript origins, or if you change your product name after verification, you must go through verification again. (see https://support.google.com/cloud/answer/7454865#verification)
Testing
While Google does provide test (non-production) accounts for Google Ads, the Audience List APIs are NOT supported for these test accounts. To move past this roadblock, a “real” test account has been used for development and testing, which for all practical purposes is a production account. When no money is spent on a client user account, it will be automatically deactivated. When this happens, go to the Google Cloud Console again and reactivate it.
https://console.cloud.google.com/apis/credentials
For Testing the credentials, the following values are required:
Developer Token
The developer token can be received by creating a new Manager Account (if it does not exist).
1. Go to https://ads.google.com/home/tools/manager-accounts/
2. Navigate to Tools & Settings > Setup > API Center.
Manager Customer ID
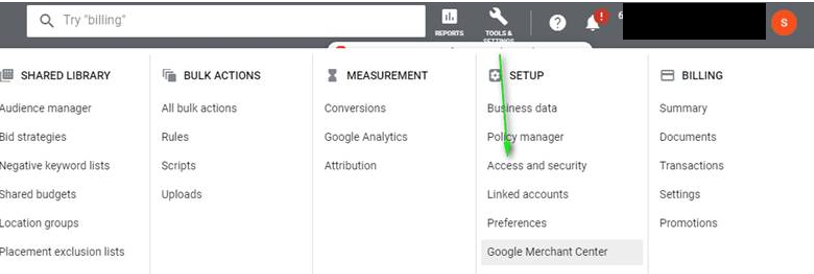
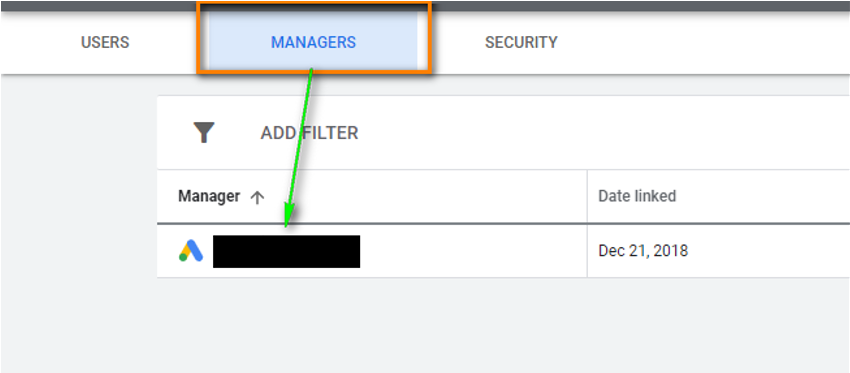
1. Go to Tools & Settings and click Access and security.
2. Click Managers. In there, you’ll see the Manager Customer ID (format: xxx-xxx-xxxx).
Client Customer ID
The Client Customer ID can be found at the top-right.

Note: Make sure to login within your Client Customer Account (not with the Manager Account).
OAuth2 Client ID & Client Secret
Navigate to the following URL: https://console.cloud.google.com/apis/credentials
This includes all your ‘projects’.
Select the project in scope. You’ll notice that the OAuth2 section has one listed. Click on it to receive the clientid & clientsecret.
OAuth2 Refresh Token
The refresh token is based on clientid & clientsecret.
https://developers.google.com/adwords/api/docs/guides/first-api-call#.net_1
Check installation steps for more info.
Interesting Links
- Google Data Manager API — https://developers.google.com/data-manager/api
- Google Data Manager API - Customer Match — https://developers.google.com/data-manager/api/devguides/audiences/google-ads/customer-match
- Google Ads API — https://developers.google.com/google-ads/api/docs/start
- Googlde Ads API - Customer Match — https://developers.google.com/google-ads/api/docs/remarketing/audience-segments/customer-match/get-started
- Google Ads Portal — https://ads.google.com/
- Google Ads Manager Account — https://ads.google.com/aw/accountaccess/managers
- Google Ads Credentials (Cloud console) — https://console.cloud.google.com/apis/credentials
- Google RSS Link (to know when new version arrives) — http://feeds.feedburner.com/blogspot/hecyUu
