Mediums are used when defining an import/export configuration. To avoid redefining mediums for each import/export individually, you can create a definition on the general level, link it to one or more Business units and then use it in the file import/export configuration as pre-defined medium.
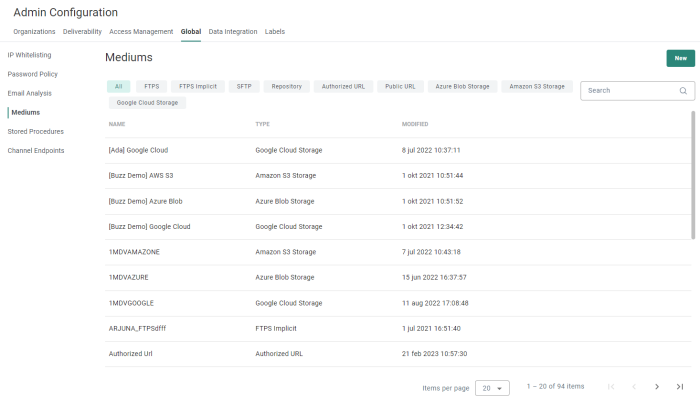
The Mediums overview shows all configured mediums.
Each row contains the medium name, type, last modified date/time and icons to edit the medium, see its usage and delete the medium.
The overview can be sorted by clicking on a column header.
Different tabs are shown to make a distinction between the type of medium, on which can be filtered — All, Repository, Authorized URL, Public URL, Azure Blob Storage, Amazon S3 Storage, Google Cloud Storage, FTPS, FTPS Implicit, SFTP.
The Search field at the top-right
allows searching in the list of mediums based on name.
From this overview you can
- Create a new medium — See below.
- Edit an existing medium — By clicking on a medium name. The properties are then displayed in a right sliding panel.
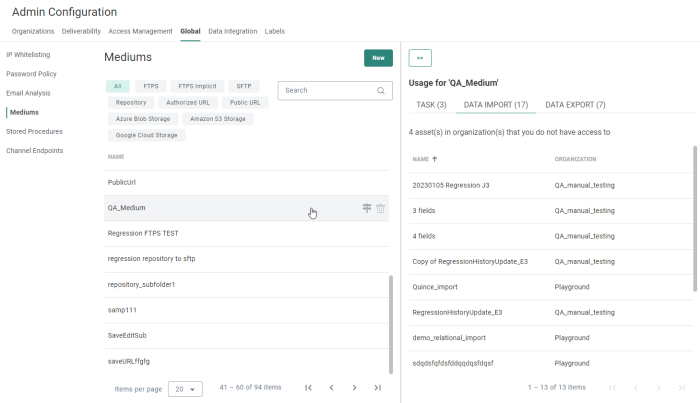
- View the usage of the medium — By clicking on the road sign. The usage is shown in the right sliding panel.
Usage is split per tab :
- Each tab corresponds to a different usage type (for example Tasks).
- The number of usages per type is shown between brackets (for example Tasks (10)).
You can click on a row to jump directly to a specific usage location (for example to a task).
If usage of a medium is in an Business unit in Selligent by Zeta to which the user does not have access, this is mentioned too (for example: 8 asset(s) in Business unit(s) that you do not have access to).
If a medium is not used at all, a corresponding message is shown.Example of a medium that is used in 7 data exports, 17 data imports and 3 tasks. For the data import usage, there are 4 asset(s) in Business unit(s) that you do not have access to :
- Delete an existing medium — By clicking on the bin icon.
Note: A medium which is in use can not be deleted. In that case, the bin icon is disabled and shows a tooltip with explanation when hovering over it.
Create a medium
To create a new medium, click on the New button
at the top-right.
The properties are then shown in a right sliding panel.
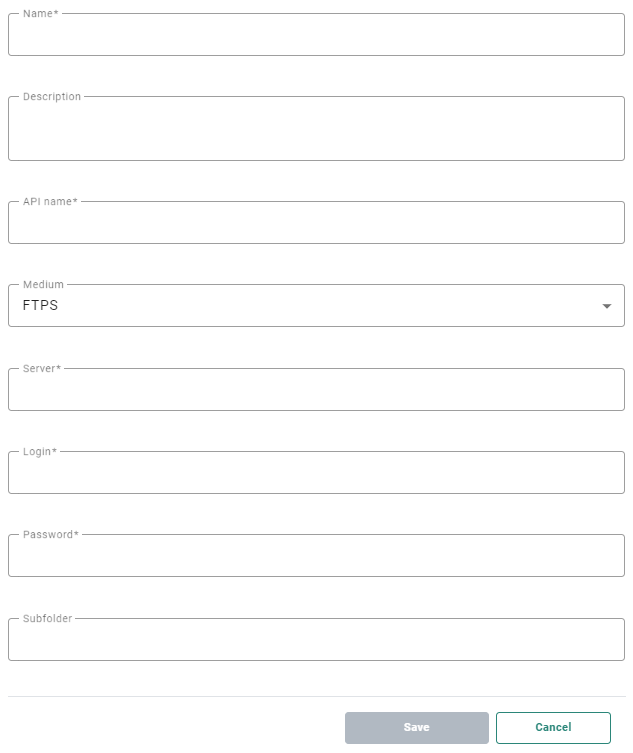
The following properties can be configured (the ones with an asterisk are required fields) :
- Name* — Medium name. Make it explicit to easily recognize it in the Data Exchange section.
- Description — You can enter a description for the medium here.
- API Name* — This name is used by the API when Mediums are managed through the API.
- Medium* — You can choose from Repository, Authorized URL, Public URL, Azure Blob Storage, Amazon S3 Storage, Google Cloud Storage, FTPS, FTPS implicit, SFTP. Depending on the selected type, different connection settings are required :
- Repository — The server on which the process runs contains a local file system with two folders: Data In and Campaign Data. You can select a sub-folder to retrieve the import file from. Example: If you have a folder Orders, with a subfolder OrderDetails, the syntax for the subfolder is the following: /Orders/OrderDetails.
- Authorized URL — Provide the URL, user login and password (only HTTPS URLs are allowed).
- Public URL — Provide the URL (HTTP and HTTPS URLs are allowed).
No authentication parameters are required for the public URL. - Azure Blob Storage — Provide the connection string (you can toggle the visibility of the string on and off by clicking on the eye icon) and container, and an optional subfolder. (*)
- Amazon S3 Storage — Provide the access key id and secret access key (you can toggle the visibility of both strings on and off by clicking on the eye icon), bucket name, region endpoint code, and an optional subfolder. (*)
- Google Cloud Storage — Provide the type, project id, private key id and private key (you can toggle the visibility of both strings on and off by clicking on the eye icon), client email, client id, auth URI, token URI, authprovider X509 certificate URL, client x509 certificate URL, bucket name, and an optional subfolder. (*)
Note: Details on how to setup cloud storage configurations, can be found here.
- FTPS, FTPS implicit, SFTP — Provide the name of the server and the user and password. A default sub-folder is filled out but one can be defined on the server.
Private Key authentication
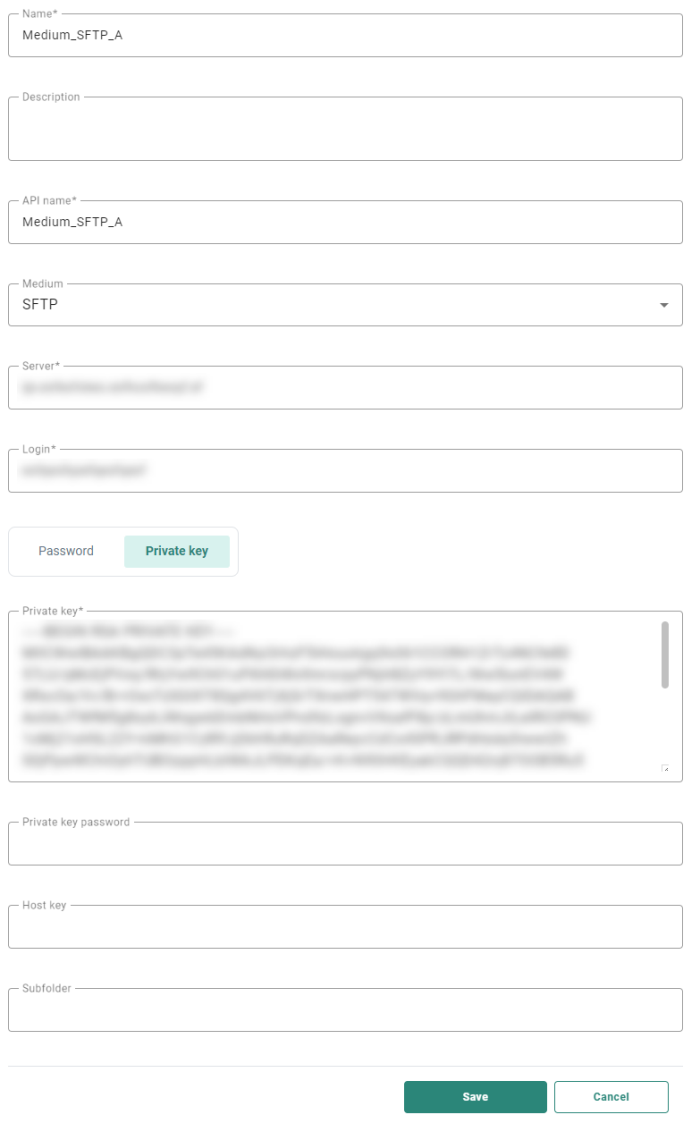
For SFTP, besides using a password to authenticate when connecting to the server, it's possible to use a private key instead:
A toggle is available to select either Password or Private key.
When Private key is selected, you can enter (or paste) the private key data in the field Private Key.
Important: We only support PuTTY format private keys for SFTP exports. So please make sure you use the correct format. The PuTTY user manual can be found here.
If the private key requires a password (some servers do), you can enter the password in the Private key password field. This is an optional field.
Note: The data from both fields (private key and private key password) is stored encrypted in the database, and only used when transferring the files.
The Host key is an optional field that can be used as an extra verification step to make sure you’re connecting to the right server.
Note:
When saving the Medium :
- The content of the private key field is emptied (for security reasons)
- The label for the private key field is updated to Specify a new private key in order to update the existing private key
- The content of the private key password field is emptied (for security reasons)
- The label for the private key password field is updated to Specify a new private key password in order to update the existing private key password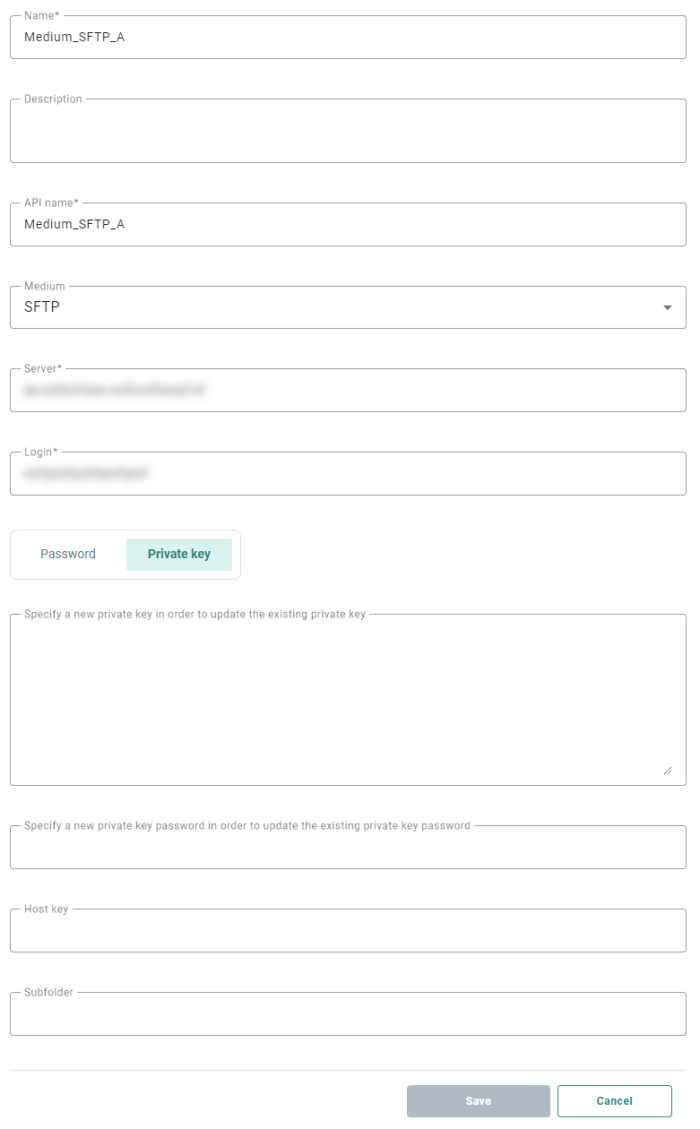
When done, click Save to create the medium.
Note: When saving a medium, your configured connection is checked. Inconsistencies (like wrong credentials, an ftp location that no longer exists, etc) result in errors. Rectify your setup and save again.
Note: Mediums must be assigned to one or more Business units, in order to use them (within the Business unit(s)) !
