
This topic covers the following sections :
- Create a Cadence Plan
- Set the properties
- Defining the rules
- Assigning journeys to a plan
- Setting the priority for the different journeys in the plan
- Excluding messages from a plan
- Calculate a plan
- Reduction reports
- Automatic removal of irrelevant journeys
Create a Cadence Plan
1. To create a new Cadence Plan, use the +New button on the Cadence overview or go to the fly-out menu.
2. Set the following properties for a Cadence Plan:
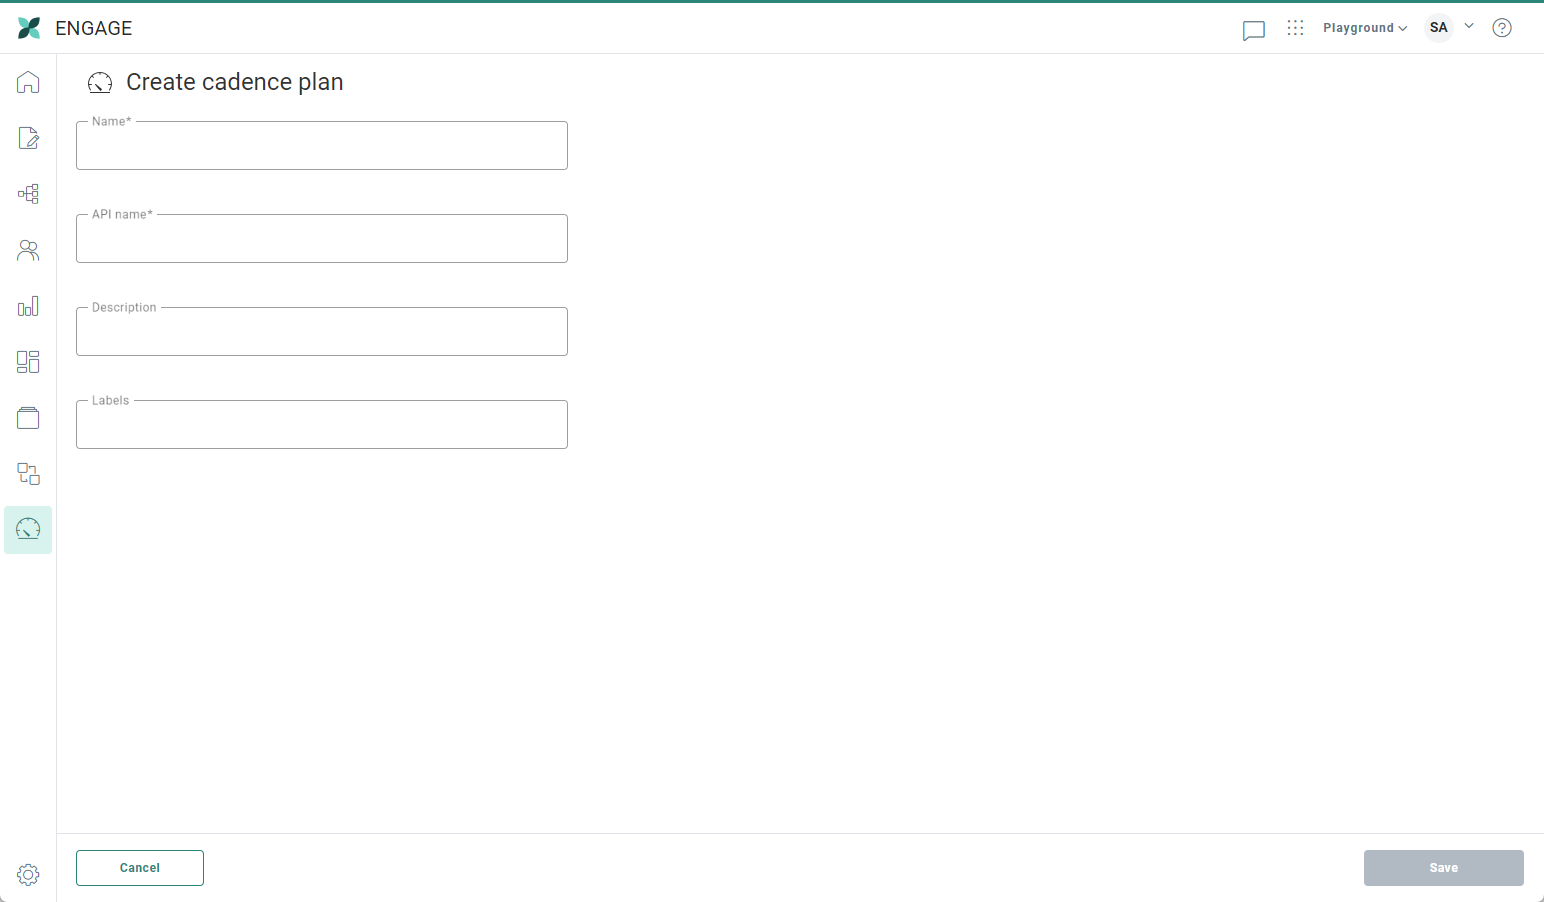
- Name* — The name of the Cadence Plan as it will be displayed on the overview.
- API-name* — The name that will be used when managing the Cadence Plan through the API.
- Description — Provide a clear description of the Cadence Plan explaining what the plan is about.
- Asset label — The label(s) assigned to this plan. Select one or more labels from the drop-down. (These labels are configured in the Admin configuration.) Users with the proper Access permissions can also create new labels hereby typing the new label value in the Label field.
3. When done, use the button Create Plan to save the Cadence Plan. The configuration panel is displayed where rules and priorities are set.

Set the properties
Once the plan has been created, you can still modify the properties. Advanced settings can be defined in the Properties tab.
Auto re-calculate journey audience time — Set the time of the day at which the target audience should be re-calculated automatically. This will make sure that the number of contacts targeted for each journey in the plan is up to date, taking the rules into account and the communications already sent out.
A button 'Auto re-calculate journey audience time?' helps the marketer in deciding what is the best time to re-calculate the target audience, based on average re-calculation times and the launch time of the first journey in the plan. Click the button to display the following dialog:
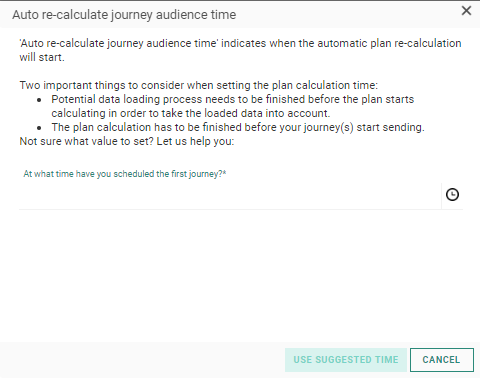
You are asked to enter the time at which the first journey in the plan is executed. This start time and the average calculation time will be used to propose an auto -recalculation time.
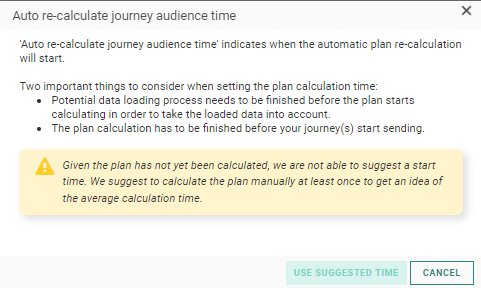
If there are no previous re-calculations, Selligent by Zeta will not be able to propose a time and the user is informed.
Warning: When setting a calculation time, it is important that any data loading of new contacts is executed and finished before the set calculation time in order for these new contacts to be taken into account. This is the responsibility of the user creating the cadence plan.
Example:
If the average journey audience re-calculation takes 26 minutes, and the first journey is launched at 05:00 in the morning, it makes sense to re-calculate the targeted audience 30 minutes before, so at 04:30.
Unique contact definition — Set the field that is to be used to identify a contact as a unique contact. This must be a field with a unique value, such as the email. This option is to be used when the journeys in your Cadence Plan use different audiences. A contact that appears in different audiences can be detected using this unique field. The Cadence Plan will then take into account this information when calculating the messages that have already been sent to the contact.
Defining the rules
When creating a Cadence Plan, a default rule is automatically generated allowing a maximum of 1 message per week over all channels.
The first step is to modify this default rule or keep the rule as is and apply the rule.
The next step, if required, is to set additional rules for the plan. You need to decide how many communications over what channels are allowed and over what time period.
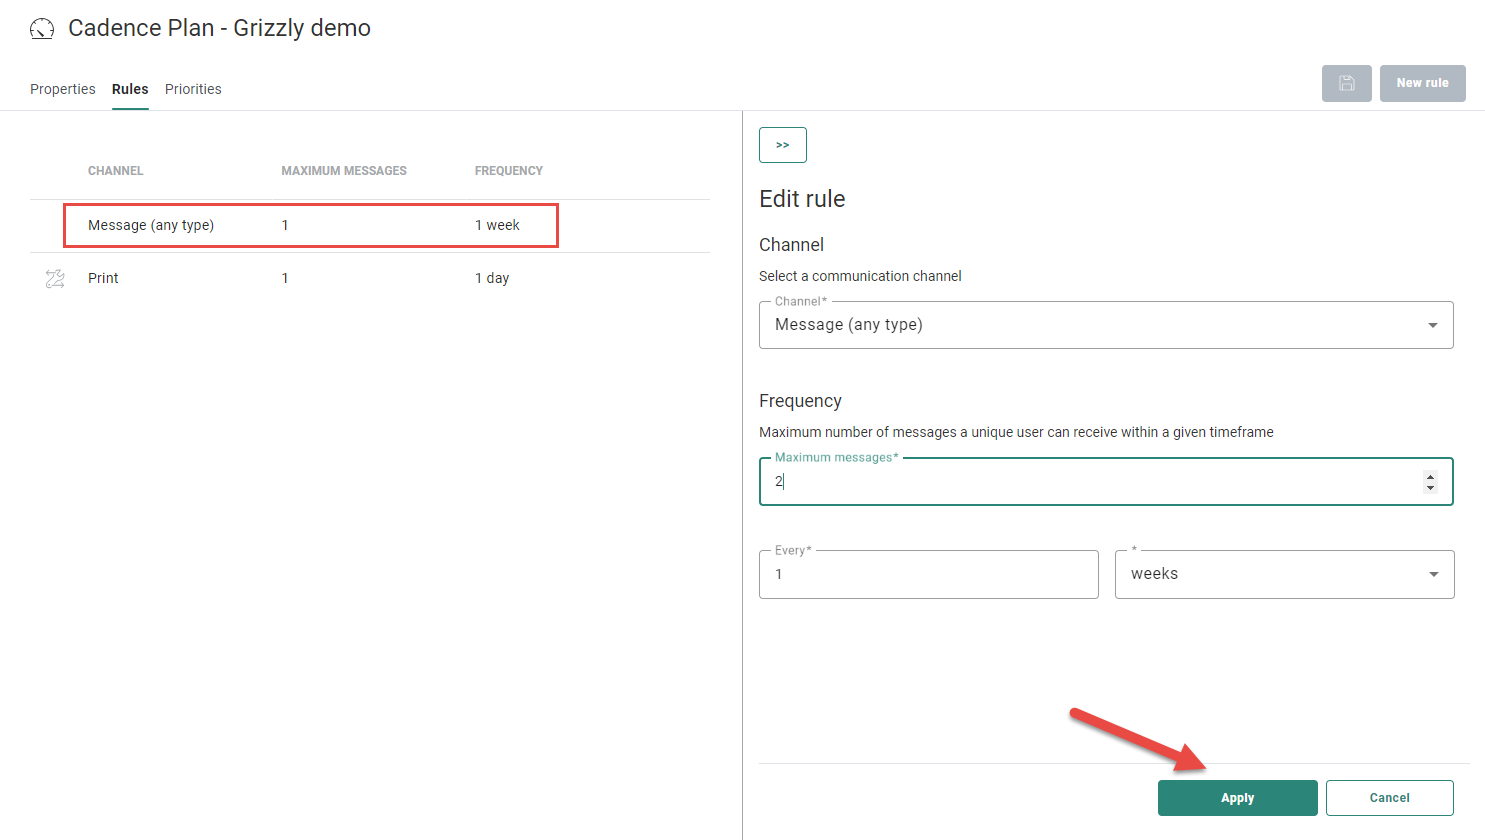
To create a new rule, use the button New rule in the upper right corner. The following configuration panel is displayed:
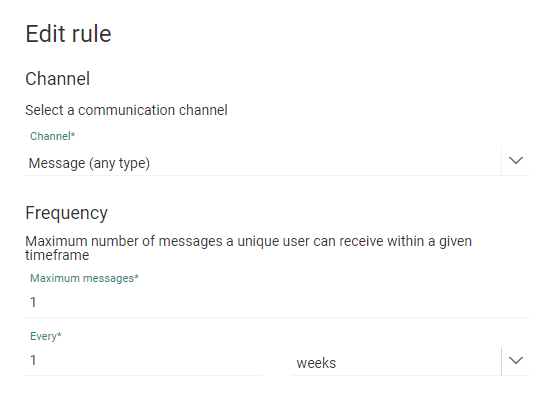
Channel — Select first the communication channel to which the rule applies. This can be
- any type
- choose from SMS, Email, Mobile Message, or any of the following Custom Channels: Export, Print, Callcenter, Onsite Intervention. The list of available Custom Channels depends on the Custom Channel endpoints defined for the environment. If a specific channel is selected, the rule will only apply to that channel.
Maximum messages — Indicate how many messages will be allowed for the selected channel(s).
Example: 1 PDF print, 2 emails
Frequency — Last, set the occurrence allowed for the selected channel(s).
Example: 2 times a week, 1 time per day
When done, click Apply. The rule is added to the overview. Rules can be deleted or edited from this overview.
When multiple rules apply they are all tested.
Example: If the first rule limits the communication to 1 message per day over all channels, and the second rule only allows one email per week, the first day 1 message over any channel can be sent, but the second day if an email was sent the day before, no more emails will be sent, but SMS or mobile messages can still be sent.
Assigning journeys to a plan
In the last step add journeys that need to be included in this plan . For all journeys added, the plan will be applied. The order in which the journeys are listed defines the priority of the journeys when the rules are applied. Single Batch Journeys, Recurring Batch Journeys and Custom Journeys can be added to the plan. Also, Campaign journeys having email interactions can be added to the plan.
Note:
Control Group Components cannot be added to a plan, regardless if they are part of an Selligent or Campaign journey. The reason for this is that a Control Group behaves more or less like a message on its own, and any component following the Control Group behaves as if it followed another message in combination with a history filter. As a result it is not possible for Cadence Management to determine who should get the message.
Example:
Let's start from a simple journey with a Single Batch Component, a Control Group Component and an Email.
If Cadence Management would determine who receives the Control Group, it would be all contacts in the selected Audience List.
If Cadence Management would have to determine who gets the email, it would be all contacts that passed through the Control Group.
However, when Cadence is calculated before the journey execution, no contact has passed yet through the Control Group and the audience calculated for the email will always be empty. For this reason, when trying to use a journey with a Control Group in a Cadence plan the user is informed that this is not a valid combination.
Note:
Cadence Management can be used in combination with scheduled Custom Events but not with instant Custom Events. The reason for this is that these instant custom events are triggered on the fly. As a result they cannot be taken into account when applying a Cadence plan. Cadence plans are all about planning and calculating upfront which emails can be sent out. As cadence is calculated at the beginning of the day, any 'instant' message can not be taken into account.
When Cadence Management is used in combination with scheduled Custom Events, only the messages that are directly triggered by the Custom Event are taken into account in the cadence calculations. Messages in the Custom Event Journey that are the result of an interaction (for example a click or a send of an earlier message) are not taken into account when calculating the number of messages already sent. These are instant messages and Cadence has no way of knowing when these messages will be sent.
Let's explain the use of scheduled Custom Events with Cadence Management with a basic example:
A Cadence plan includes 1 Custom Event Journey that is scheduled every day at 09:00. The target of the journey is person A and B.
At 04:00 a Custom Event record is created for A.
At 06:00 the Cadence plan is calculated and determines that A can receive the email.
At 08:00 a Custom event record is created for B.
At 09:00 the journey is executed and an email is sent to A. B will not receive anything because the Cadence plan did not include this email.
The next day at 06:00 the Cadence plan is calculated again and detects a Custom Event record exists for B and determines this email can be sent.
At 09:00 the journey is executed and an email is sent to B.
Example:
Journey A has 1 email and journey B has also 1 email. Both journeys are executed in the same week. When the plan indicates that only 1 email per week is allowed, the email in journey A will be sent out to all the contacts but the email in journey B is only sent to the contacts who were not targeted yet by the first email. A target reduction is applied to the second journey.
1. To add a journey to the plan, go to the Priorities tab. When no journey has been assigned the following is displayed:
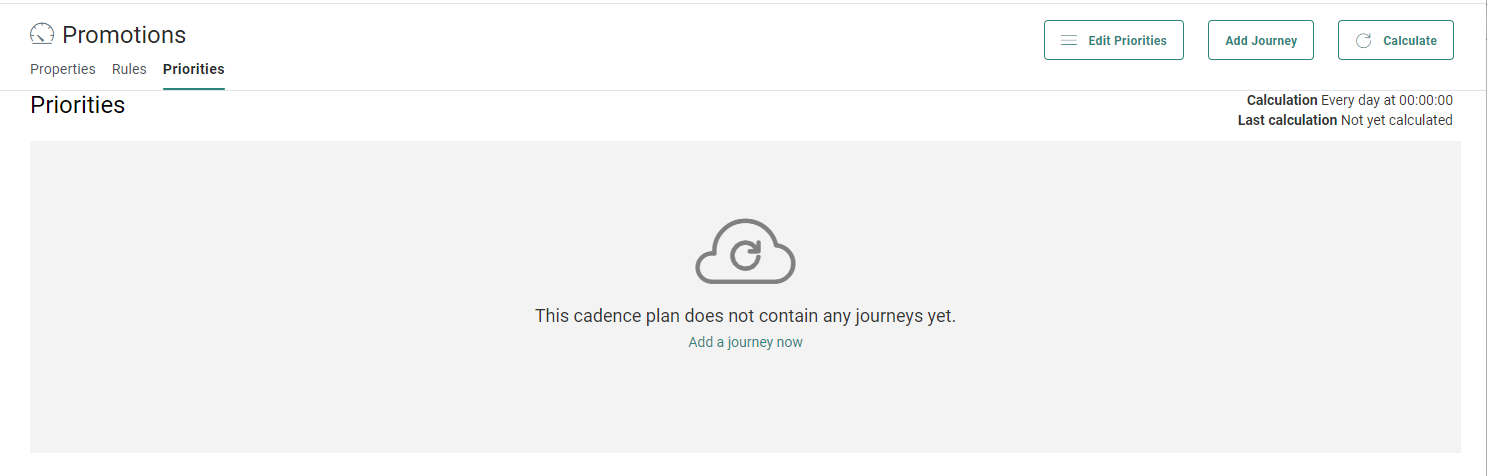
At the top right, the daily calculation time is indicated as well as when the target was last calculated. To launch the calculation manually, use the Calculate button.
2. Click Add journey to select one or more journeys and add these to the plan.
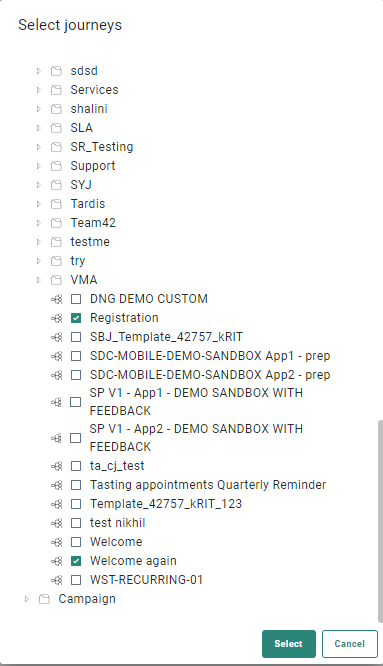
You can choose from all Single Batch Journeys , Recurring Batch Journeys and Custom Journeys. Only published Selligent by Zeta journeys are available.
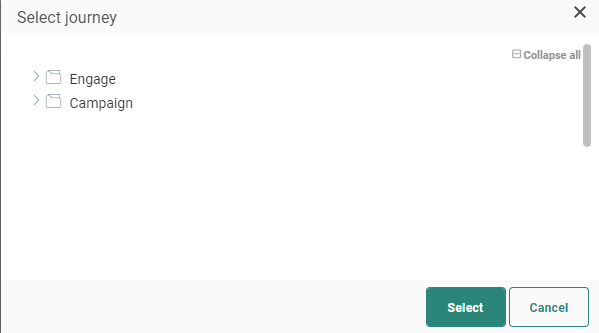
In addition, Campaign journeys having email interactions can be added to the plan.
They are accessible from a dedicated folder in the journey selector.
Note: Currently Campaign journeys using interfaces (mobile push, sms) are not supported by Cadence Management in Selligent.
Moreover, the Campaign Export Component is not supported in Selligent Cadence plans as it does not have its counter part in Selligent and no rules can be set for this particular type of message.
Also, Selligent Custom Channels are not supported by Cadence Management either.
Note: Journeys can only be added to one plan at a time and as a result will not be shown in the tree view when that journey is already part of a Cadence Plan. In addition, Campaign journeys added to a plan can no longer be edited in Campaign.
A journey that has been selected previously for the current plan can't be selected anymore.
3. Click OK, the journey is added to the overview.
4. To add additional journeys to the plan, repeat the above steps. Any additional journey is by default added below the previous journey in the list.
Note: Journeys can be removed from the plan by using the Delete button in the Priorities overview.
Moreover, you can jump straight to the Selligent by Zeta journey by clicking the Journey icon on the right. For Campaign journeys, the icon is disabled and shows a tooltip when you hover over it.
Click the journey name in the overview to expand the details for this journey with all the messages included in the plan.
Expand the journeys to check the messages that are included and the details on the targeted contacts and reduction:
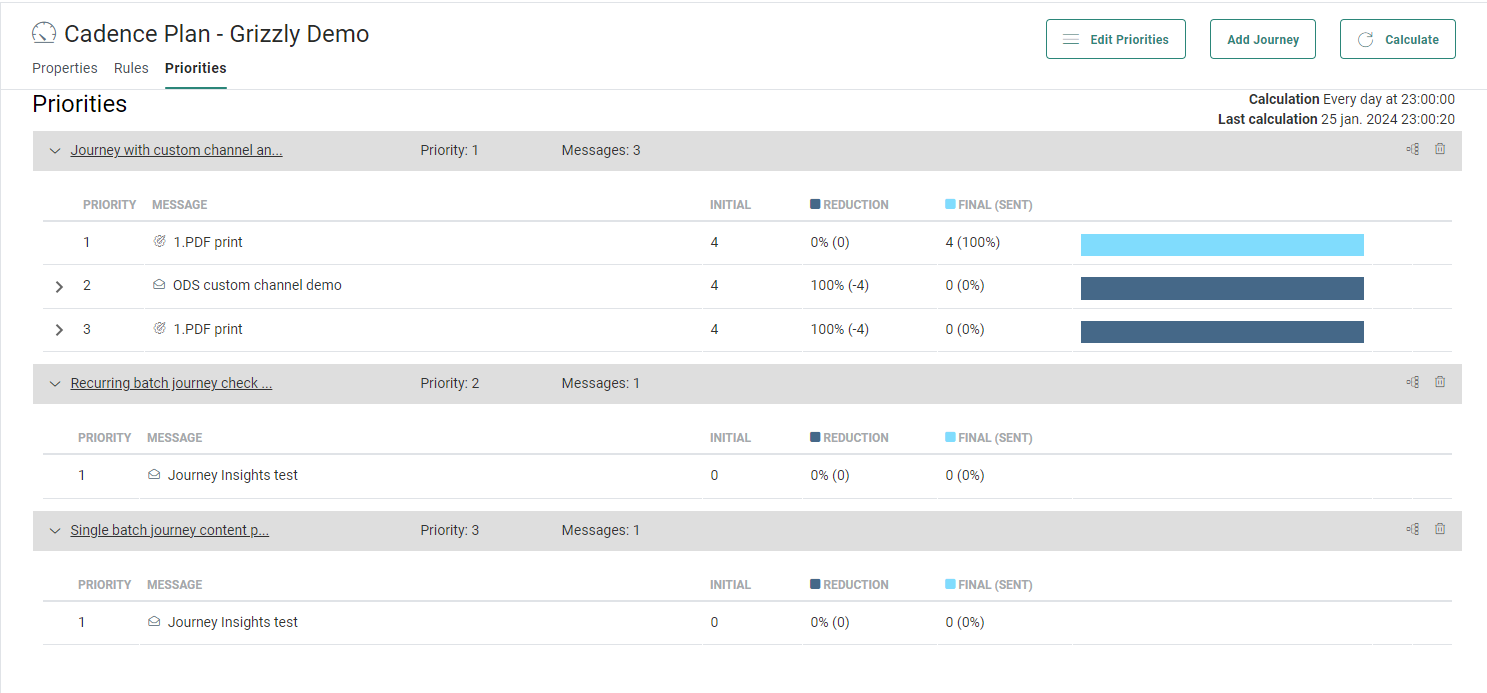
For each one of the messages included in the plan, you get details on the targeted contacts, the reduced % of this target and the number of messages that will actually be sent.
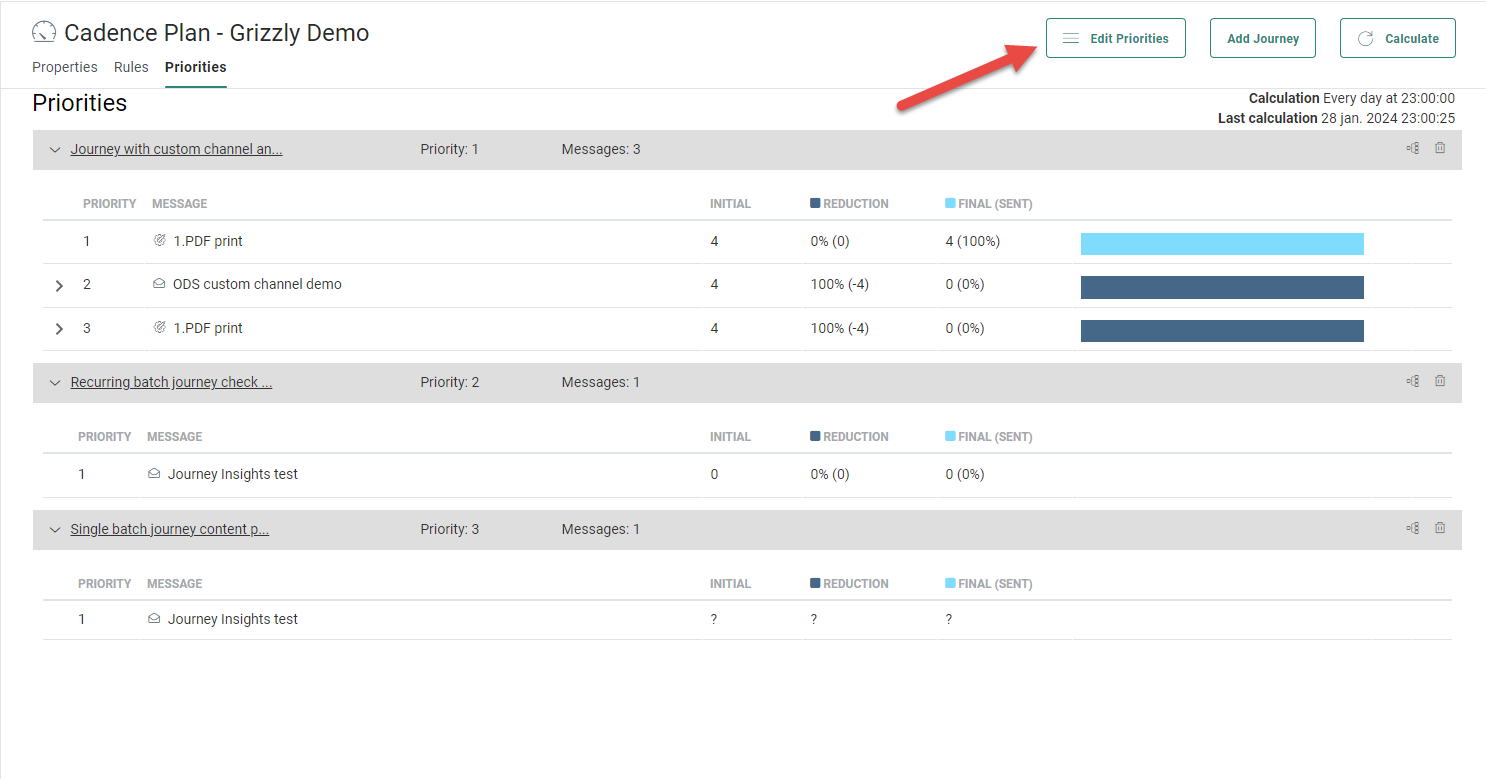
Note: When no numbers are available yet a question mark is displayed for the different columns until the next target calculation is done. A tooltip informs the marketer that no calculation results are available. The reasons, among others, can be:
* journey is not in range of the Cadence Plan, meaning the journey is executed outside the validity time of the plan.
* the cadence rules are not applicable to the message, meaning if the rule is about emails and you are sending an SMS, no calculation is done
* when a new journey has just been added, no calculation is done yet. You can then launch it manually to display the numbers
* calculation might still be in progress
*...
Setting the priority for the different journeys in the plan
Once the journeys have been added, the order in which they are listed determines the priority during the execution of the plan. You can change the priority as following:
1. Use the button Edit priority in the top right corner to make the journey overview editable.

2. Now, you can drag and drop the journeys to the right position depending on their priority, with the highest priority at the top.
3. When done, click Save priorities to apply the new order.
Example: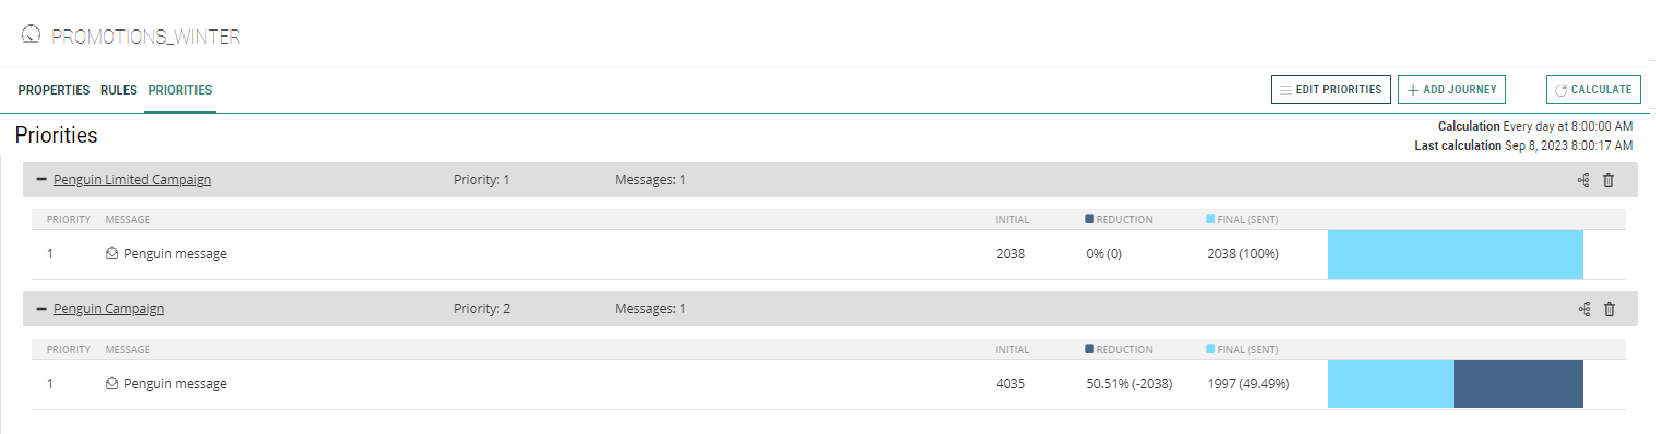
There are 2 journeys included in the plan. The first journey contains 1 email and 2038 targeted contacts. The second journey also contains a single email but here the number of targeted contacts is 4035. Both journeys are executed on the same day and the rule for this plan is only one communication per week.
As a result the first group of contacts targeted will all get the first email. There is no reduction yet as each one of the contacts have not yet received any email this week within this plan. But only 49.49% of them will actually get the second email because they were already targeted by the first journey.
Excluding messages from a plan
Journeys sometimes consist of multiple messages . When such a journey is added to the plan, by default every message in that journey is included in the plan. However, this might not be the behavior you want. Therefore, you can select for each journey individually which messages should be included.
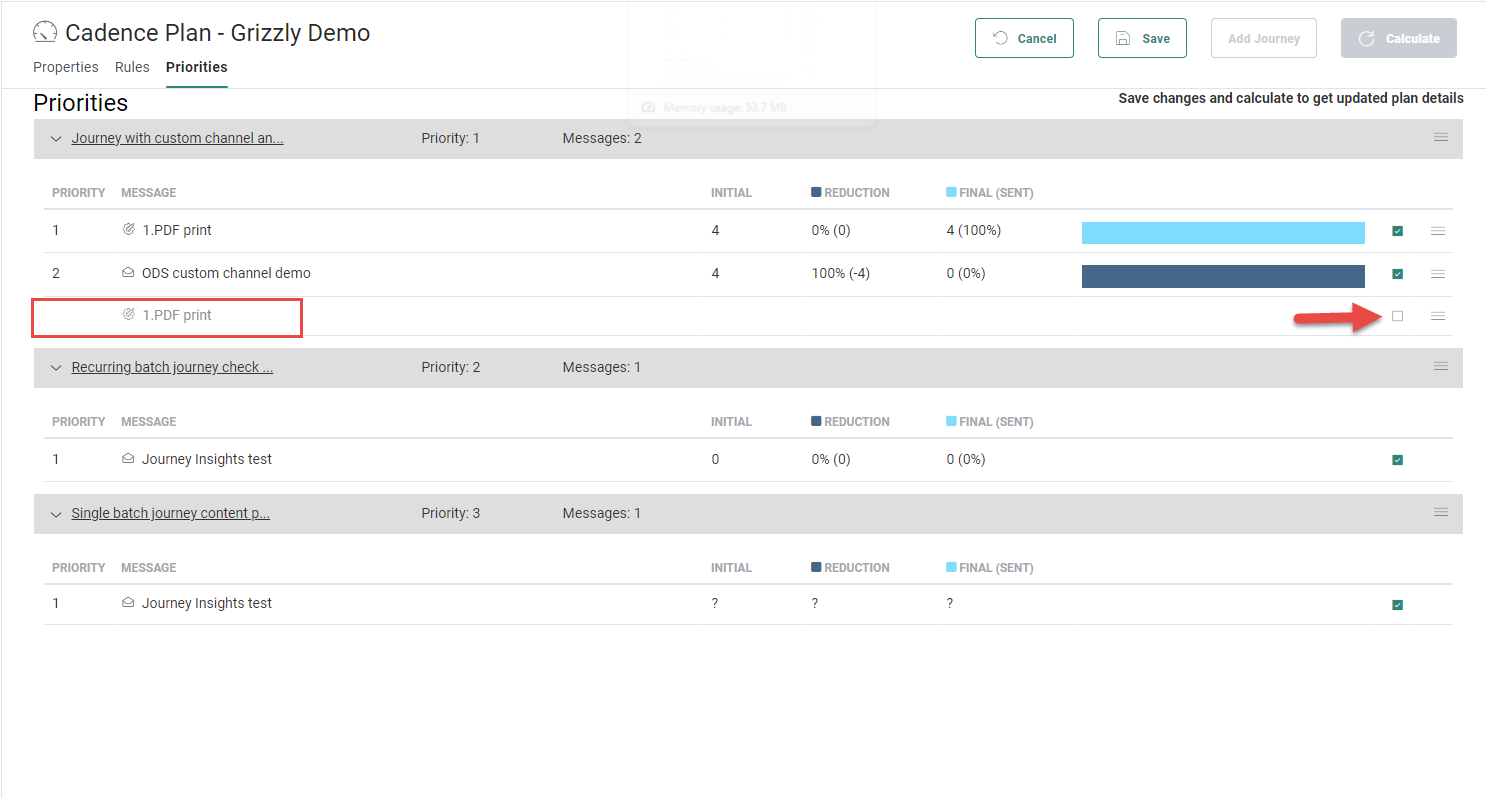
1. To exclude interactions, use the Edit priorities button in the top bar to make the overview editable.
2. For every message a check box is available, which is by default ticked, meaning the message is included in the plan.
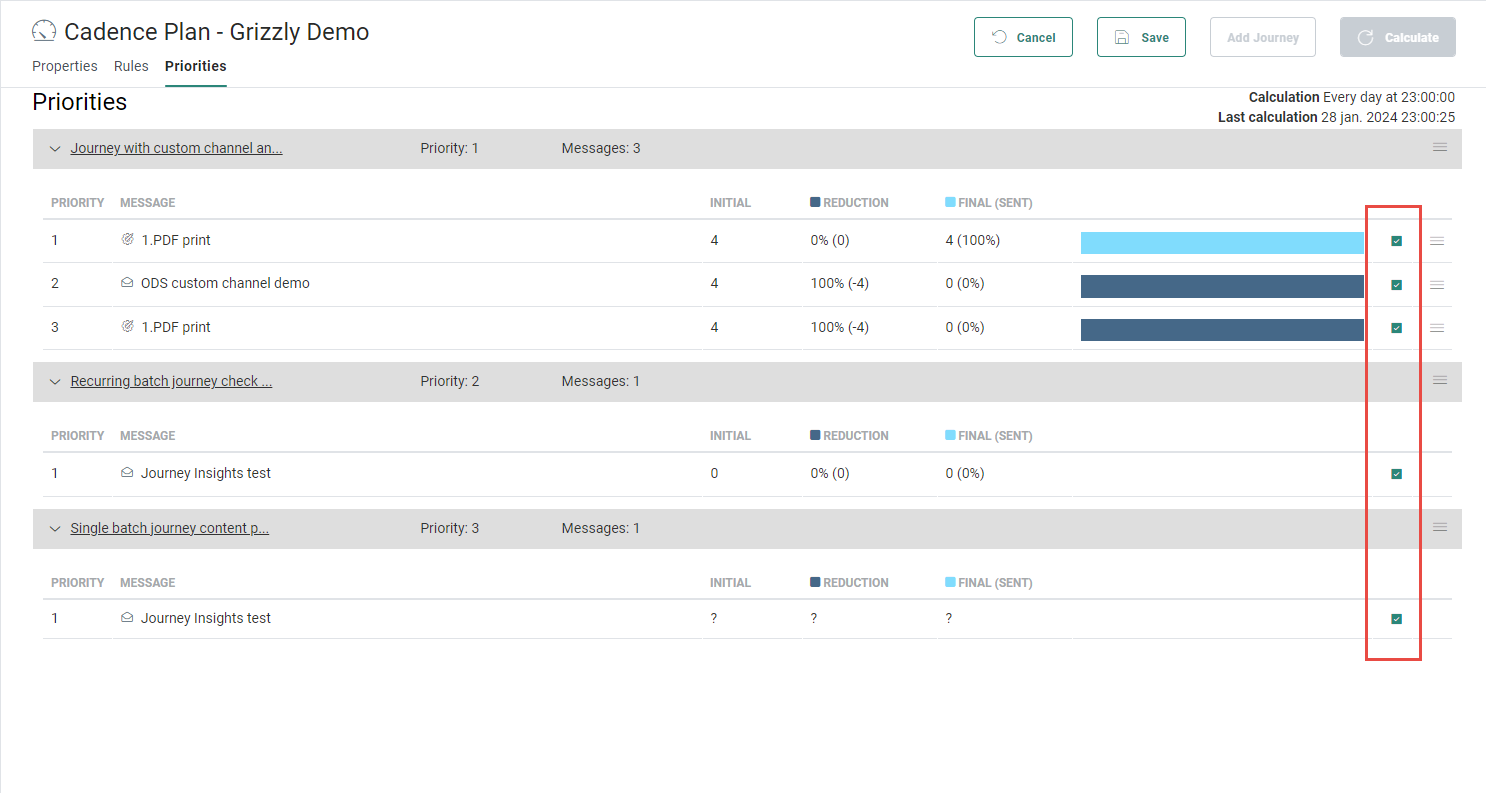
3. To exclude a message, remove the check. The interaction is grayed out and no more details are displayed about the target and reduction.
Calculate a plan
If you are starting out with a whole new Cadence Plan, adding new journeys to an existing plan or changing the priority of the journeys in the plan, it is always a good idea to recalculate the plan and check the numbers.
Plans are calculated automatically at a given time of day. But you can also start a re-calculation manually. This is done through the Calculate button in the upper right corner:
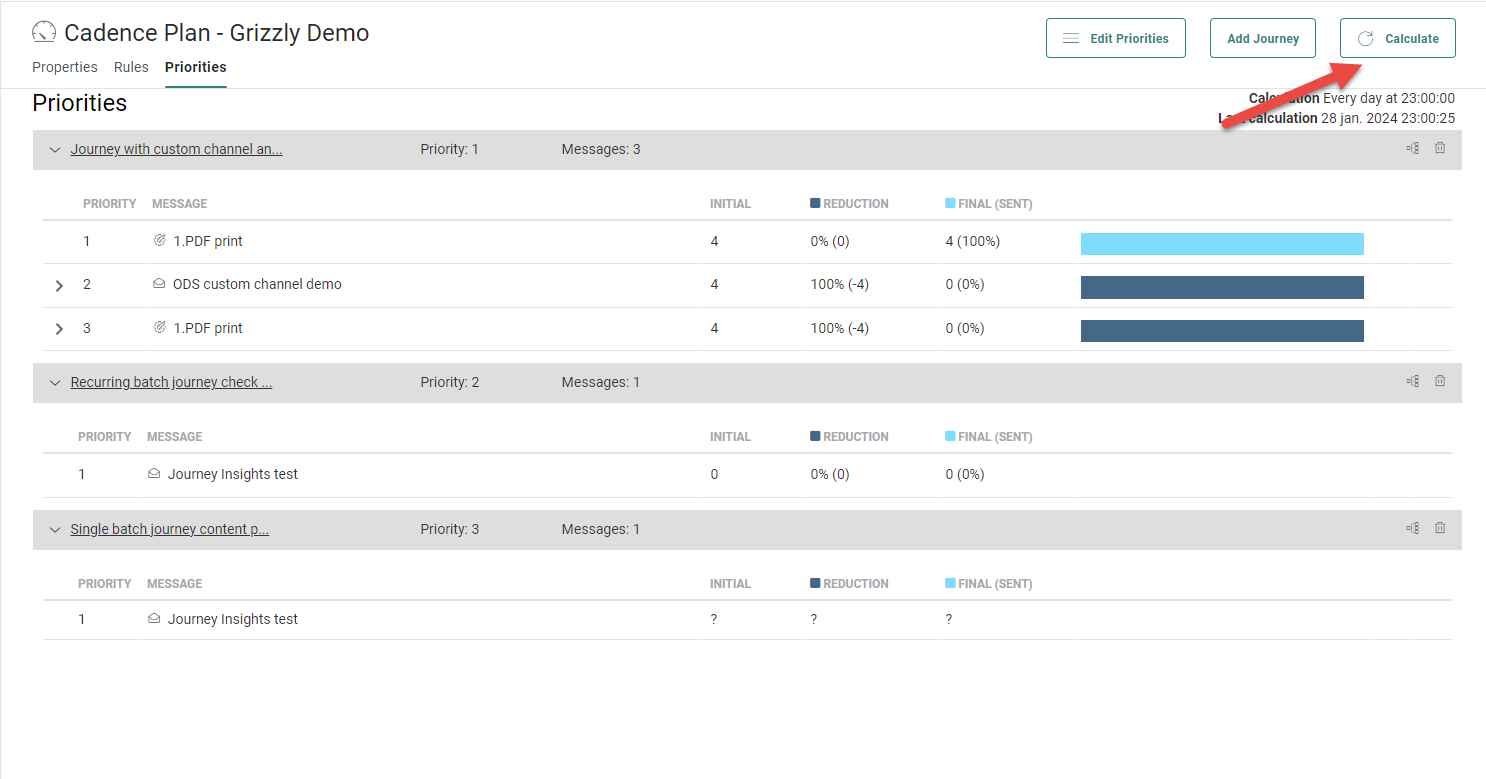
Just below the button you can check the last time the calculation was done and when the next calculation is planned.
Click the Calculate button to re-calculate and refresh the numbers displayed in the details of the different journeys.
While the re-calculation is done, the average calculation time is indicated in hours and minutes and uses previous calculations for this statistic. Moreover, the name of the message that is currently calculated is returned.

Note:
The following actions result in a 'partial' (re-)calculation of a Cadence Plan to be triggered :
- Adding a journey to the plan
- On every save of a journey
The following actions result in a 'full' (re-)calculation of a Cadence Plan to be triggered :
- Updating the calculation settings of a Cadence Plan (channels, rules)
- The automatic daily schedule based on the configuration of your Cadence Plan runs
- Clicking the Calculate button on top of the screen
Note 2: When a journey with a Sample Component is included in a Cadence Plan, this sending limit is not taken into account when calculating the plan. The Sending limit is only taken into account at execution.
Reduction reports
When a plan is calculated, the reduction numbers of the target for each one of the messages in the plan is updated and provides information on how many contacts were initially targeted and how many will actually get the message.
Moreover, for each message individually, a reduction report is provided with details on what journey caused the target reduction and what rule. To view the reduction report, expand the message:
Example: In the screenshot below you can see that the target reduction for the message 'ODS' in the journey was caused by the first message '1. PDF print' by applying the rule '1 message per week for all channels'.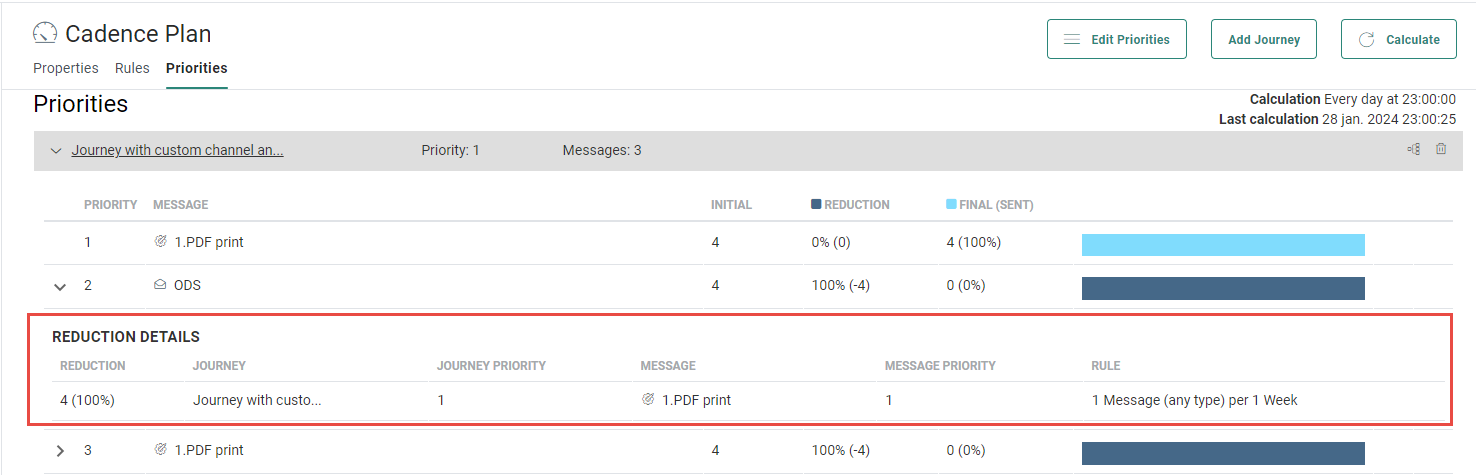
When reduction is caused by messages that have already been sent, a lock icon is displayed in the reduction details. Hover the lock icon to show the tooltip explaining why there are no details available:
Automatic removal of irrelevant journeys
When a journey is linked to a Cadence plan, but it has become irrelevant for the plan, the journey is automatically removed from the Priorities screen. A journey has become irrelevant when it ended sending out messages (e.g. the send end date is in the past) and there is no defined rule in the plan that would still take the journey into account.
Note: The Priorities screen is updated after an automatic or manual re-calculation.
Example: Journey A is part of Cadence plan X.
Cadence plan X has the following rule defined: 1 email / week.
Journey A has sent out its last email 6 days ago and then ended.
- Today and tomorrow, the journey remains visible in the Cadence plan, as the rule says 1 email / week. The Cadence plan considers the journey as still being relevant, as the week has not yet gone by and more emails can still be sent during this time frame.
- After tomorrow, the Cadence plan considers the journey as no longer being relevant, as a week has passed by in which no emails were sent. The journey will be removed from the Cadence plan Priorities screen, as it already ended and does not send out any more emails.
Note: When a journey is removed from the Cadence plan Priorities screen, it will still display the linked Cadence plan in the journey properties.
The journey can become relevant and active again in the Cadence plan, when editing the journey and re-activate it again to send out new messages and/or when changing the Cadence plan rules that would re-affect the journey.
