
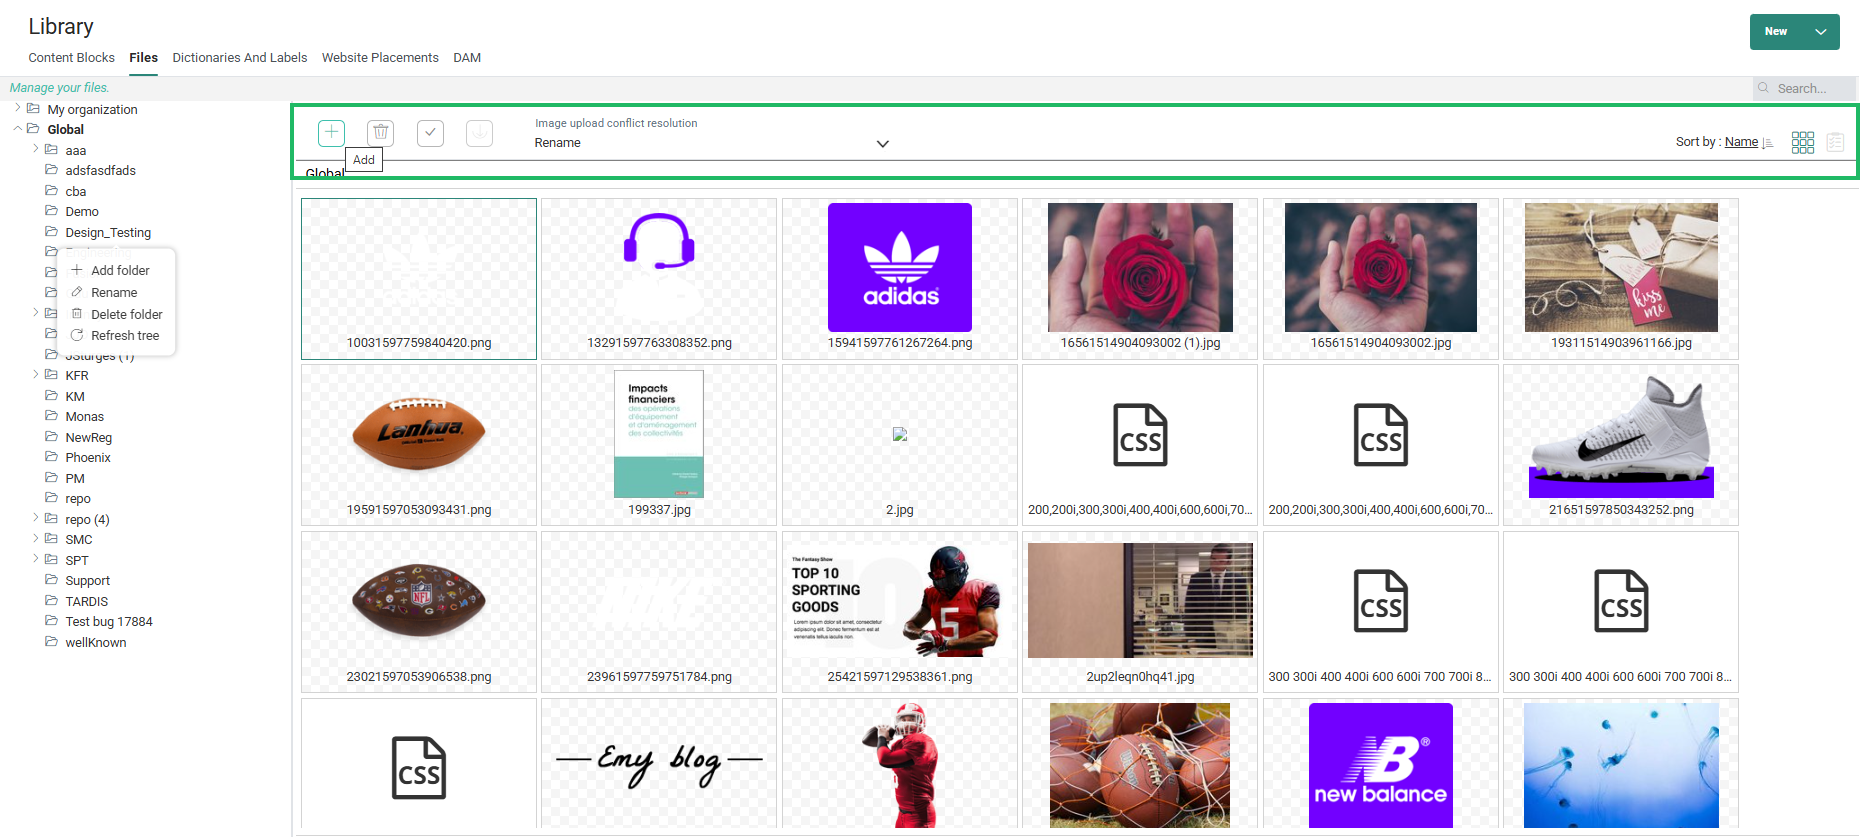
The Library contains a tree view of folders on the left and a tile or detail representation of the files on the right. Toggle between both views with the List/Tile buttons at the upper right:

By default, there are two root folders:
- My Business unit — This folder allows you to store files in the library, and make these files only available to users of the Business unit in which the files where added to this folder.
- Global — All images stored in this folder or any sub-folder will be available for everyone.
Example: Users of the Parana Business unit can add files to this folder. These images will then be linked to the Parana Business unit only. These files will not be visible to users of the ACME Business unit.
Managing files
From the toolbar on the top right, above the files overview, the following operations can be performed on files:
-
 — To add a new file from a local or network folder using the File explorer. An upload status dialog shows the status of the upload process.
You can also add a new file to a folder, by. - Dragging a file from a network folder onto a folder in the tree view.
- Open the folder of your choice and drag a file onto the central part of the window.
-
 — Deletes the selected files.
 -
 — Deselects all of the selected files.
 -
 — Downloads the selected files
Moreover, when uploading new files to the library, you can define what needs to happen in case of conflict:
- Rename — Rename the imported file.
- Overwrite — Overwrite the existing file in the library with the new one.
- Keep existing — Keep the existing file in the library and don't import the new one.
Important Note: The maximum image size allowed to upload is 50 MB by default. This is configurable in the customer environment.
Note: The following file types are supported:
- Image formats: .jpg, .jpeg, .png, .gif, .bmp, .svg
- JavaScript (.js) and Cascading Style Sheets (.css) files
- Document formats: .pdf, .txt
- Font formats: .eot, .ttf, .woff, .woff2
Files can be sorted, ascending or descending, using one of the following fields: Name, Size, Extensions or Modified date.
From the Files overview, you can
- Select multiple files by holding down the CTRL button while clicking on the files.
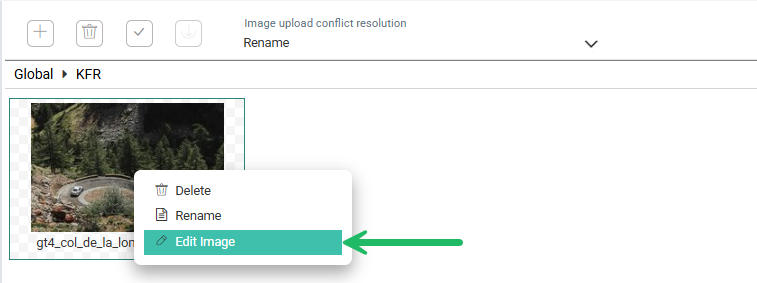
Right clicking a file in the overview allows you to access a pop-up menu and
- Rename a file through the right click pop-up menu
- Delete a file through the right click pop-up menu
- Crop a file
Cropping files
Cropping files refers to the process of removing or trimming unwanted portions from a file, usually an image. The goal is to focus on a specific area, improve composition, or reduce the file's size by eliminating excess content.
To crop an image directly in the Library, right click the image in the files overview and select Edit image from the pop-up menu.
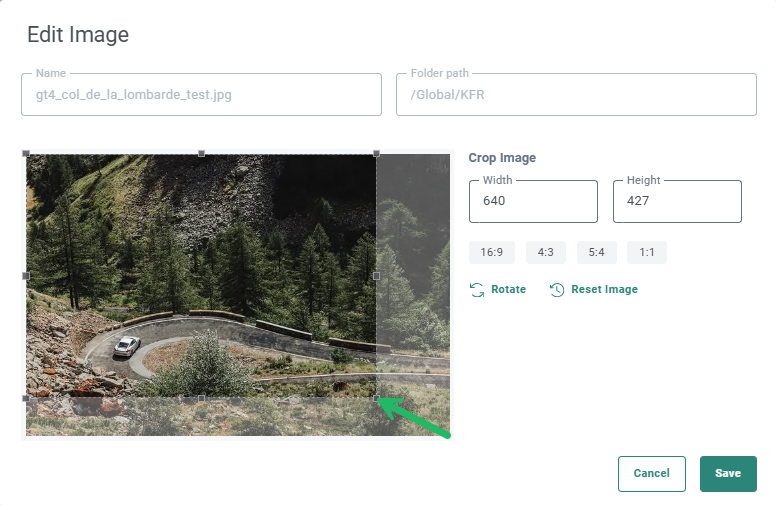
A dialog is displayed where you can define the cropped image dimensions and select the specific area of the image you want to keep. There are multiple ways in which this can be achieved:
-
From within the image preview on the left, you can define the cropped version of the image by dragging the dotted outlines to the desired dimension. Once the dimensions of the cropping have been defined, the cropped area can be moved around to cover different sections of the image.
-
You can also use the height and width fields on the right to set a custom width and height for the cropped image. By default, the image is cropped from the top left corner but you can move this cropped section around to wherever you would like the image to be cropped.
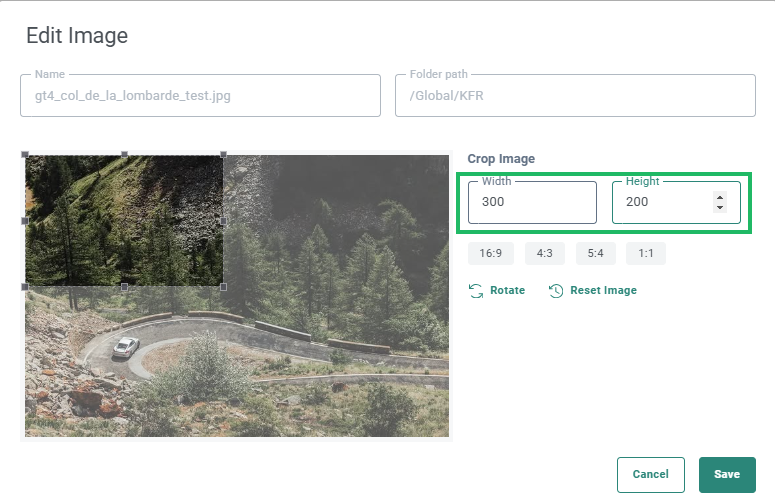
-
In addition, the aspect ratio buttons on the right allow you to define a fixed ratio for the cropping. You can choose from 16:9, 4:3, 5:4 and 1:1 ratio. Once the ratio is defined, you can move the cropped area around exactly to where you need it.
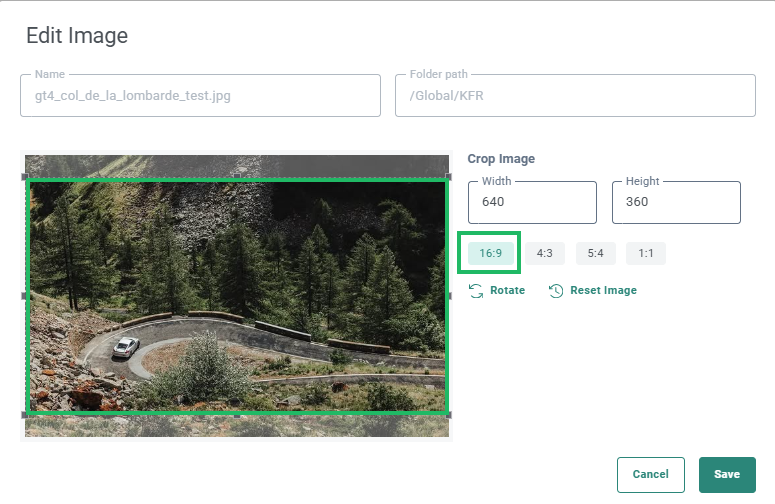
Use the Rotate button to rotate the image and if not satisfied with the result of the cropping or rotation, use Reset image to go back to the original version of the image.
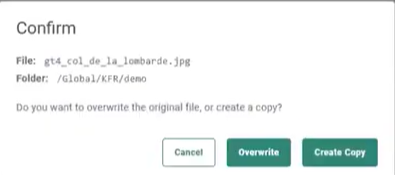
Once you are satisfied with the results, click Save.You are prompted to either save the cropped version as a new file or overwrite the existing.
Managing folders
In the Manage your files panel on the left, you can right-click to see a menu of operations you can perform on the folders:

- Add folder — Creates a new folder. An entry is added to the tree and you can assign it a name.
- Delete folder — Deletes the selected folder. You will be prompted for confirmation before it is deleted.
Note: If a folder is deleted, all images in the folder are deleted as well.
- Rename — Lets you rename the folder.
- Refresh tree — Refreshes the screen to show the most current list of folders.
Technical Note: Because these folder names might be used in a URL, only some special characters are allowed in the folder names: decimal digits, hyphen (-), period (.) and underscore (_)
Note: For performance reasons, when lots of images (e.g., several thousands) are stored in the library, it is advised to create and structure these images in different folders.
Note: Inside the Global folder, a wellKnown folder is available by default.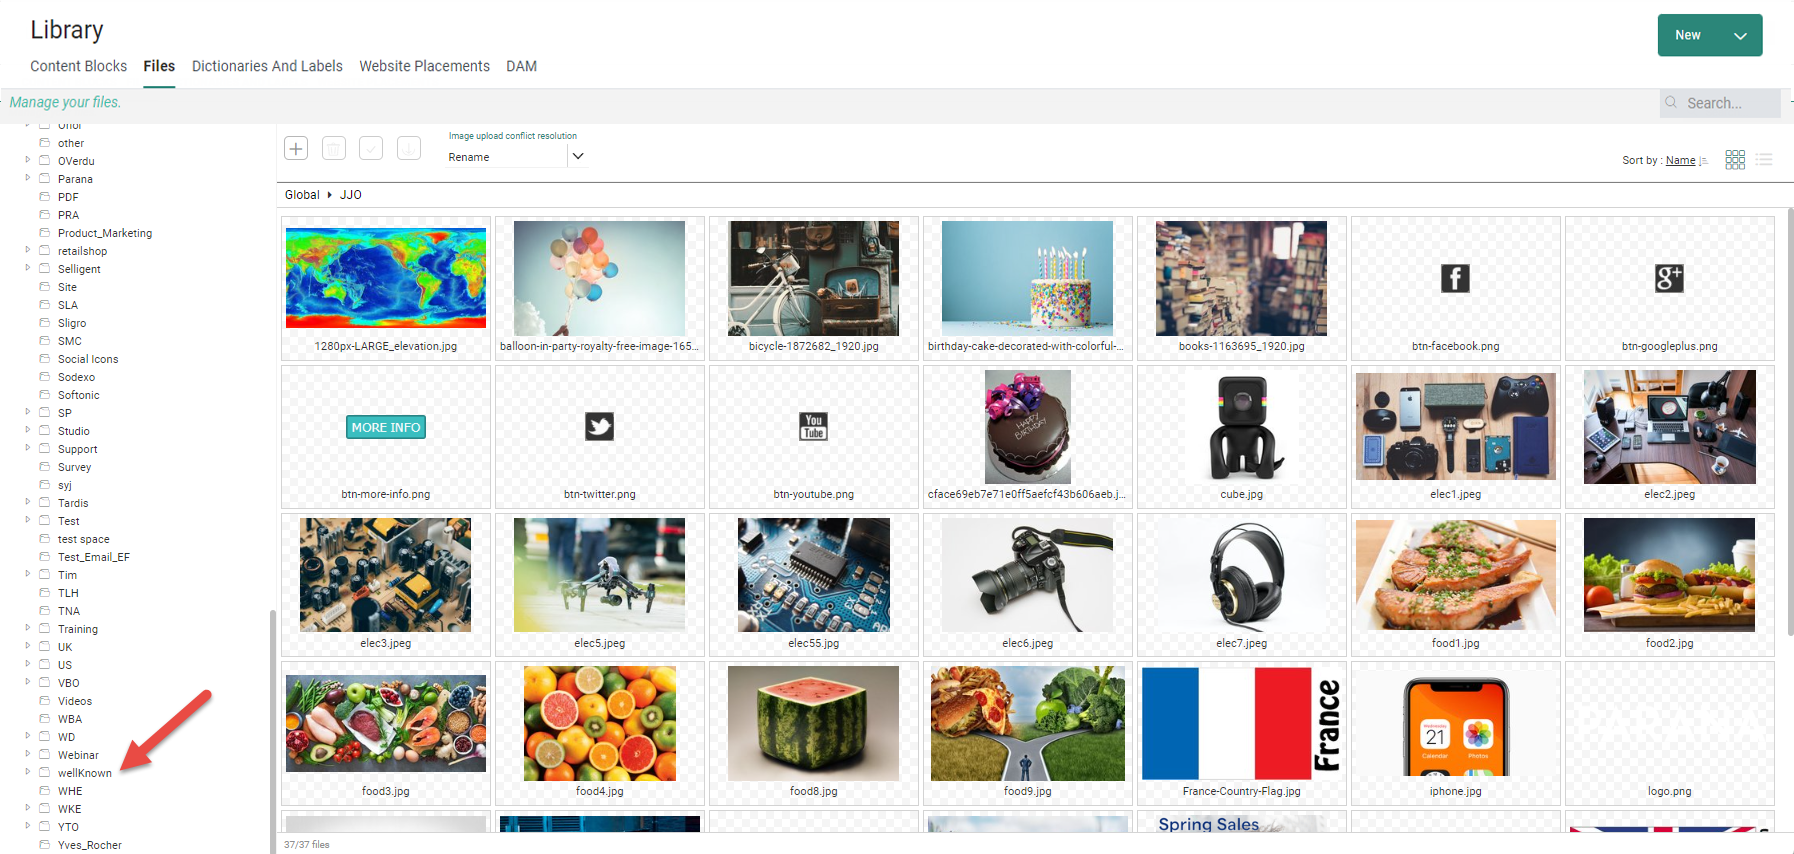
You can upload files in this folder, as with any other folder.
This will make those 'well-known' files available on your domain, so that for example when a click is done in a Selligent by Zeta email that leads to your app, the file is accessible.
More information about the well-known URI can be found here : https://en.wikipedia.org/wiki/Well-known_URI
Note: It is advised not to change the folder structure, the file name or folder name for files that are already used in content. If any changes are made to existing files, you need to update all content that uses that file.
