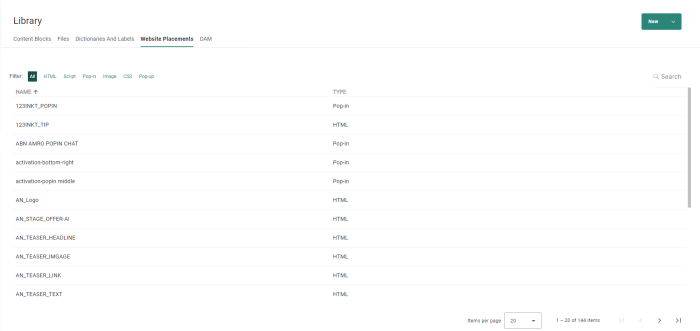
Website Placements are user-defined sections within a webpage that indicate where specific offer content should be placed on the website, such as banners, pop-ins, etc. When accessing the Website Placement section, an overview of all Site Placements and their usage is shown.
Note: This tab is only visible to users having the correct permissions for Website placements in the Library.
When hovering over a Placement, following icons become visible:
-
 Usage Icon — Takes you to the Placement overview with a list of offers the Placement is used in.
 -
 Delete Icon — Is only available when a Placement is not in use.
Note: The filters for the different Placement types are dynamically adapted based on the existing placements.
Note: Placements used in deleted actions will be still available in Reporting. The corresponding check box is ticked when this is the case.
Technical Note: When you try to access the Placements window in the Library Chapter for an Business unit that is not connected to Site, a warning is shown. To use placements, you should make Site available for your Business units and enable the following permissions for your user: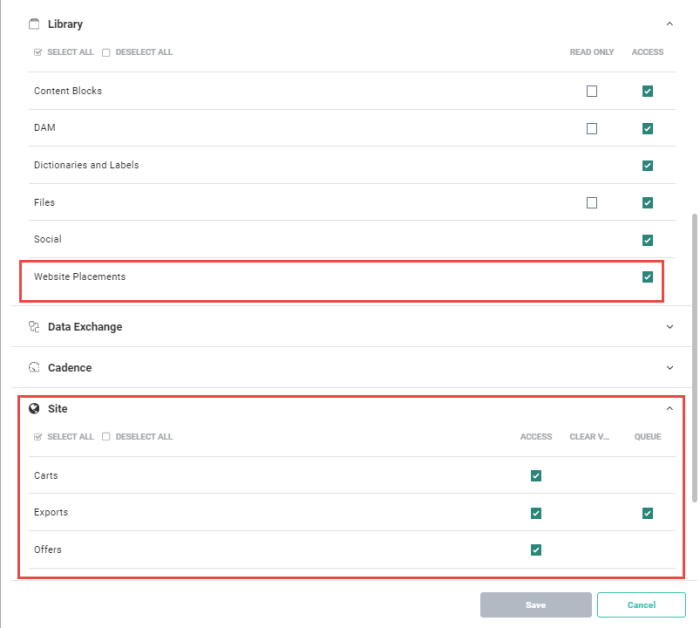
Placement Usage Overview
The following details are shown in a Placement's usage overview:
-
Offer — The name of the offer in which the Placement is used.
-
Action — The name of the action in which the Placement is used.
-
Reporting Only — Placements used in deleted actions are still available in Reporting. The checkbox is ticked when this is the case.
Creating a Placement
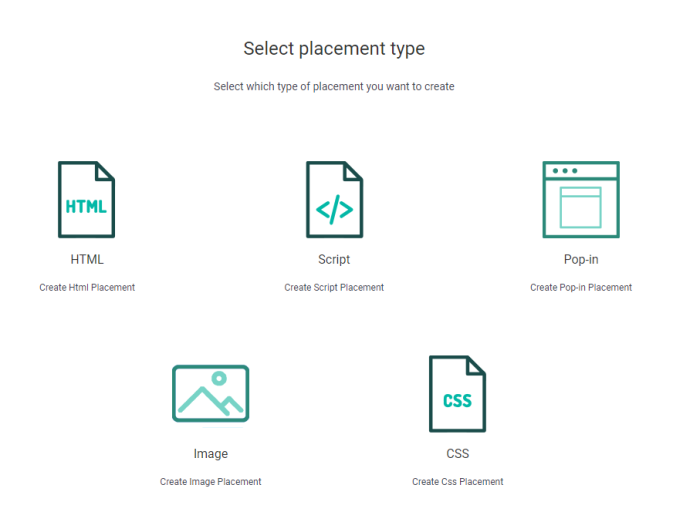
The following types of Placements can be created in the Library Chapter: HTML, script, pop-in, image and CSS.
Pop-up, list item and redirect are Placement types that are no longer supported. However, for backward compatibility, if these types where created previously in Site, they are visible in Selligent in read-only mode.
To create a Placement, click New > Website Placement in the toolbar of the Library start page or click New from the Website Placements tab directly:
A wizard pops up in which you can select the type of Placement:
Next, you are taken to the Properties screen for the selected type.
Properties of Placements
Common properties
Following common properties need to be set for every type of Placement:
- Name — The Name of this Placement.
- Applies to — You can configure the Placement in a way that it applies to: "All websites", "These websites only" or "All but these websites".
- This is an interruptive Placement — This is usually done for Placements like pop-ins, etc., Placements that really interrupt your browsing experience. When this box is checked, an extra option is visible where you can configure frequency capping on this Placement, meaning how often the Placement will be shown to a visitor. For example, 1 time per visit, 1 time per day, etc.
Note: There are two levels of frequency capping in Site. One on Placement level like explained in the paragraph above, but also on universe configuration level. More info can be found here.
Example 1:
Universe A has capping configured on a universe configuration level to have a maximum of 3 interruptive Placements per visit (this is the total for all potential different interruptive Placements).
Placement X is an interruptive Placement, with capping configured to show 1 time per visit.
Conclusion: The visitor visits the website, could potentially see a maximum of 3 interruptive Placements in total, but only see Placement X once because it is capped to show it only 1 time per visit.Example 2:
Universe A has capping configured on a universe configuration level to have a maximum of 3 interruptive Placements per visit (this is the total for all potential different interruptive Placements).
Placement X is an interruptive Placement, with capping configured to show 2 times per visit and is used in Offer1 (Offer1 is higher in priority than Offer2).
Placement Y is also an interruptive Placement, with capping configured to show 3 times per visit and is used in Offer2 (which is lower in priority than Offer1)
Conclusion: The visitor will see "Placement X" 2 times and "Placement Y" only 1 time. This is due to the universe configuration capping of only 3 interruptive Placements per visit.
Placement specific properties
In addition to the common properties, each Placement type has specific properties. The table below contains an overview:
| HTML | Image | Script | CSS | List item | Redirect | Pop-in | Pop-up | |
|---|---|---|---|---|---|---|---|---|
| Selector type* | X | X | X | |||||
| Selector path* | X | X | ||||||
| Selector scope* | X | X | X | X | X | X | ||
| Apply on all path matches* | X | X | ||||||
| Action* | X | X | X | |||||
| iFrame* | X | X | ||||||
| Lay-out* | X | X | X | X | ||||
| Style* | X | X | ||||||
| CSS* | X | X | X |
Note: Popups can be blocked by the web browser and are more intrusive than pop-ins.
- The selector scope — Allows to configure the Placement as global or specific. Global means that the Placement will appear on the whole webpage. To only select a specific area on the website where the Placement will be applied, enter the specific selector path related.
-
Selector type — The selector path can be of 2 different types: "CSS" or "XPath". The selected type defines the syntax to be used.
For example:
XPath : //div[@id="content"/div/div/h1
CSS : div#content > div > div > h1.
-
The selector path — This is the path that defines the location of your placement. This can be done by typing the selector path manually or by selecting the element path on the website directly via the Element Selector.
To do this, click on Select on website. A pop-up appears where you can select one of your registered domains from your Site universe linked to your Business unit.
Note: Once a domain is selected, you can still change the URL to a sub page of that domain.
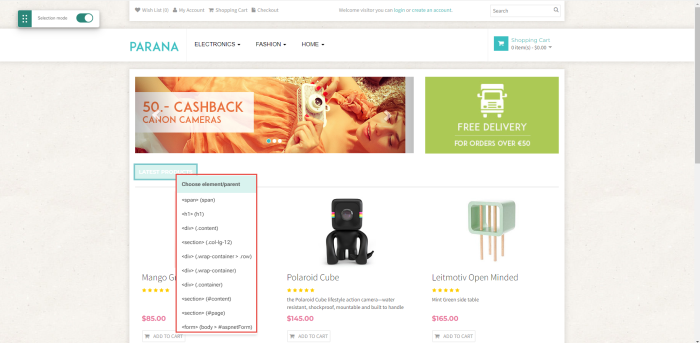
Once you have selected your domain, click Go to website. The configured domain opens in a new browser tab together with the Element Selector. Here you have the ability to select an area on the website which is used as a location for the Placement.
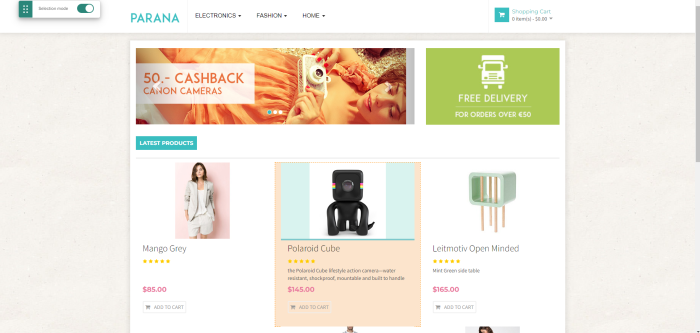
By default the Selection mode will be set to ON. Website areas will then be highlighted when hovering over them, making it easier to pick an area.
When you right click a website area, you can also select parent elements such as <DIV>s. The selected element is displayed and highlighted at the top of the menu. Hovering a parent item in the contextual menu, highlights the corresponding area on the website.
To select an area as the location of your Placement, left-click to confirm. The selector path is automatically updated with your selected area.Note: When using the Element Selector, the selector type will be CSS.
Note: If you are editing an existing Placement, the previously selected element is highlighted.
Example: The domain on our Parana retail webshop has the following URL: https://paranadigital.selligent.com . You can change the URL to the webshop's women fashion overview page because the Placement needs to be shown on that page: https://paranadigital.selligent.com/shop/fashion/women .
-
Apply on all path matches — A website can have multiple similar paths. If you check the Apply on all path matches checkbox, all areas with the same path will be used as the Placement. Otherwise, it will be the first path on any webpage of the website.
-
Action — The action refers to where the Placements need to be inserted into the code. For example: Insert before an element, insert after an element, replace content of an element etc.
-
Can be used without an iFrame — You can also use the Placement without an iFrame. When this box is checked, the Placement can be used on your website without putting it in an iFrame. The advantage of this lies in the fact that the styling of the website will also apply to the Placement and responsive design will be respected. A warning becomes visible when the option is selected, indicating that this might have an impact on the website.
-
Layout — Define the size of the Placement. If no values are entered, the Placement will take the default dimensions of the area selected from the selector path. Dimensions are only used if your content is loaded in an iframe.
-
You can also add a style to a Placement.
-
In the CSS section, you can add CSS classes defined on the customer's website to this Placement (you can enter multiple, space-separated, classes without a dot). Like this the design of the website is integrated into the Placement. CSS properties can also be added for this Placement.
Example 1: HTML Placement
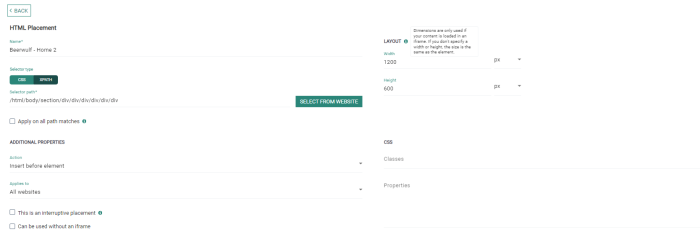
In this example, we are going to create an HTML Placement in order to showcase the Parana Banner offer on the Parana webshop when the users falls into this offer. This will be located at the top of the home page. The following properties are configured:
- Name— Parana Banner
- Selector type — CSS
- Selector path — The element with ID "slideshow" has been selected in the Element Selector.
- Apply on all path matches — Not checked in this example. CSS ID's are only used once, so not applicable.
- Action — The element with ID "slideshow" will be replaced.
- Applies to — Only to the Parana Digital domain.
- Interruptive placement— This is an interruptive Placement as it is front and center on the home page, so the offer will only be shown once per visit.
- Can be used without iFrame — Not checked in this example, as we want to define the styling in the HTML itself (offer action).
- Lay-out — The width and height of the banner has been set.
Example 2: pop-in Placement
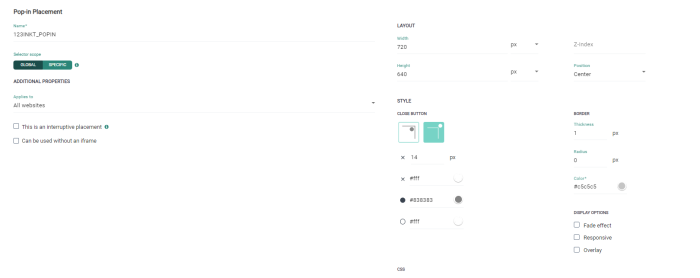
This example creates a Placement for a Subscribe pop-in on the Parana webshop. Asking the user to subscribe to Parana and receive a discount code with its next purchase. The following properties are configured:
- Name — Parana Banner
- Selector scope — Is set to Global, as the pop-in should appear on any page of the webshop.
- Applies to — All websites that are configured for this domain.
- Interruptive placement — A lot of pop-in's can be disturbing for the user, that's why we set a maximum of 1 pop-in per visit to the Parana webshop.
- Can be used without iFrame — Not checked as we will be using the CSS properties to style the Placement.
- Lay-out — We set a width and height, position of the Placement and the Z-index is set to 1 so that the pop-in in will be in front of everything else on the webshop.
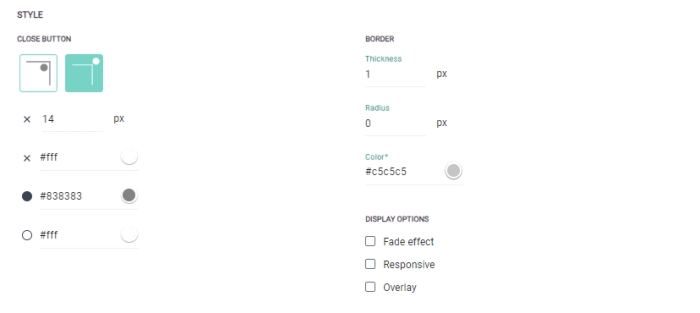
- Style — A style has been set for the close button and borders of the pop-in as well as some display options are checked: the pop-in will be responsive, an overlay is set to make the pop-in stand out even more and a fade effect will also be applied.
- CSS — The pop-in will make use of the "parana-global" class which is configured on the webshop itself and the background-color has been set to white.
