
WordPress-Plugin
The Wordpress Form data Integrator plugin empowers you to effortlessly configure custom forms within your WordPress website and seamlessly integrate the collected data with your Selligent platform. By leveraging shortcode functionality, you can easily embed these forms into your posts, pages, or widgets, enabling streamlined data capture directly from your WordPress site to your Selligent solution.
Example: Subscription forms, Event Registration.
Note: WordPress integration is activated on request.
Set up the Inbound Event in Selligent
To be able to collect the data from a WordPress form, an Inbound Event needs to be created.
1. In the Data Exchange Chapter in Selligent, go to the Inbound Events tab.
2. Click New and select Inbound Event from the drop-down. The following properties need to be set:
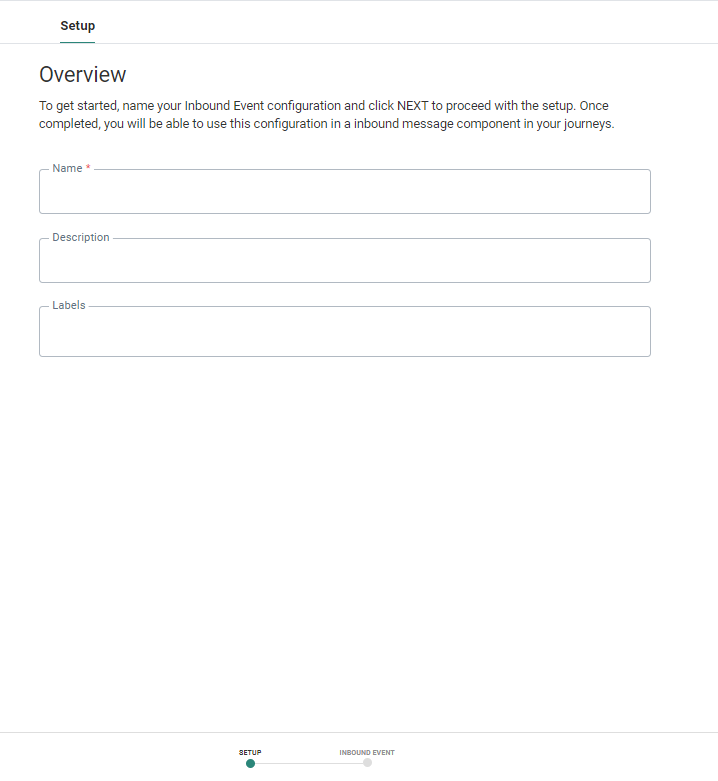
3. Define a name*, description and Label.
4. Click Next.
5. On the following configuration tab, select WordPress as Channel. No other settings are required.
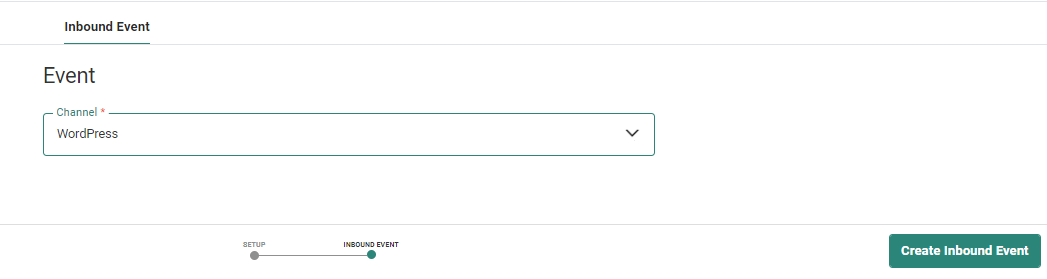
6. Next, click Create Inbound Event.
This Inbound Event can now be used in a Custom Journey.
Use the Inbound Event in an Selligent Journey
The WordPress Inbound Event can be used in Custom Journeys and allows marketers to collect data and store it in the Selligent contact profile. Following is an example of such a journey, where data is collected from WordPress, a lookup in the database is performed and the contact is stored if it doesn't exist yet.
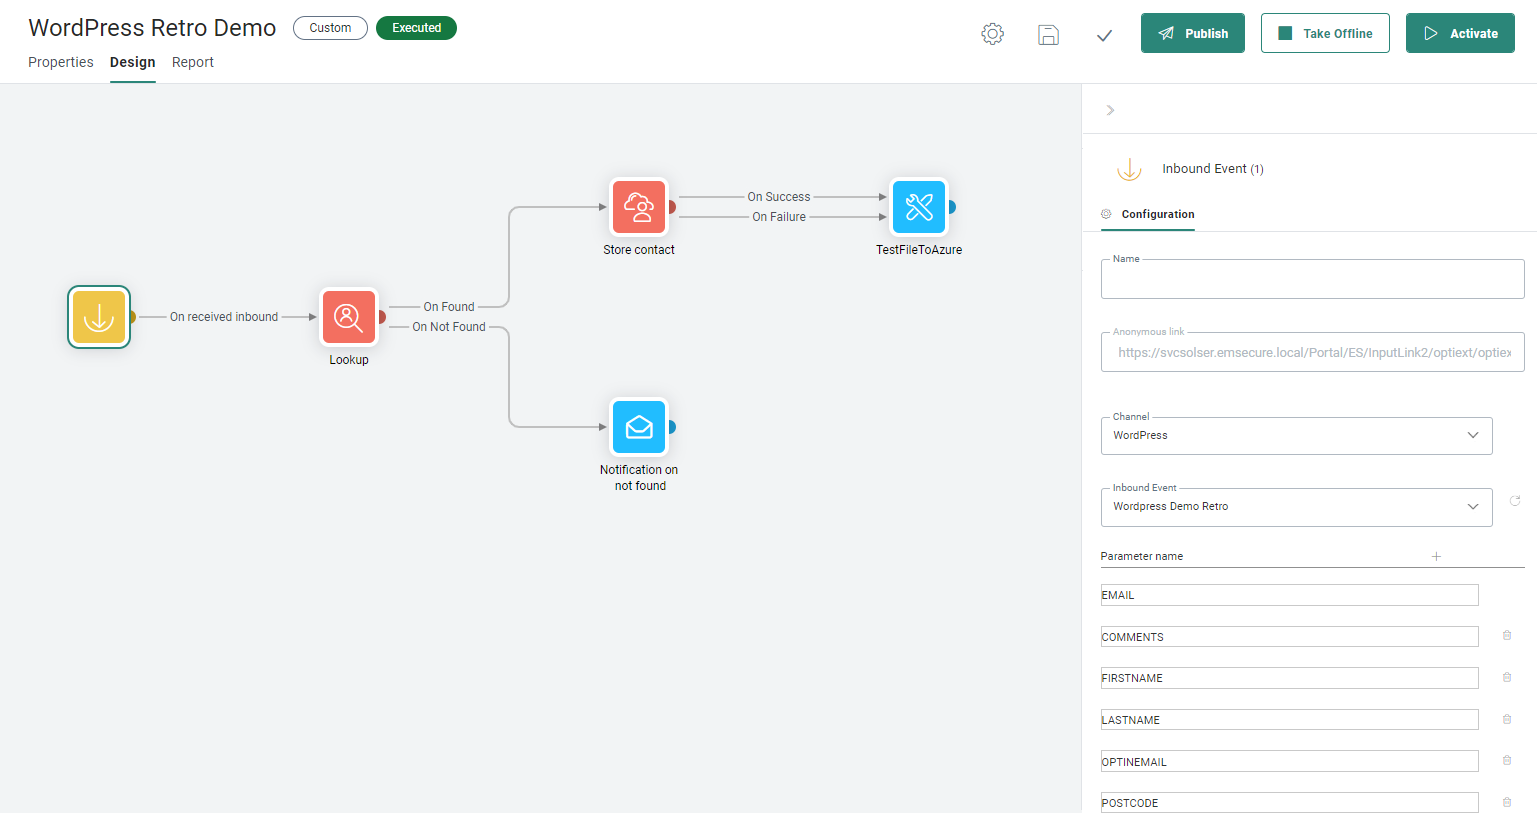
Note: The WordPress Inbound Event can only be used in one journey. This Inbound Event is triggered when the WordPress form is submitted.
1. Create a Custom Journey, starting with an Inbound Event.
2. In the properties of the Inbound Event Component, select WordPress as channel.
3. Next, in the Inbound Event field, select the Inbound Event created in the previous step.
4. Last, define the list of fields that you want to render in the form. All fields defined in here will be available in the WordPress form and can then be used to update the contact's profile in Selligent.
Note: The Email field is a mandatory field.
5. Add all other required components to your Custom Journey. In the above example, this includes among others a Lookup Component to check if the contact exists and a Data Component to store the data in the Audience.
Important Note: The journey needs to be activated for the Inbound Event to be visible in WordPress
Install the Selligent WordPress plugin in your WordPress Environment
Install the plugin
The WordPress plugin is available in zip format and needs to be installed on your WordPress environment:
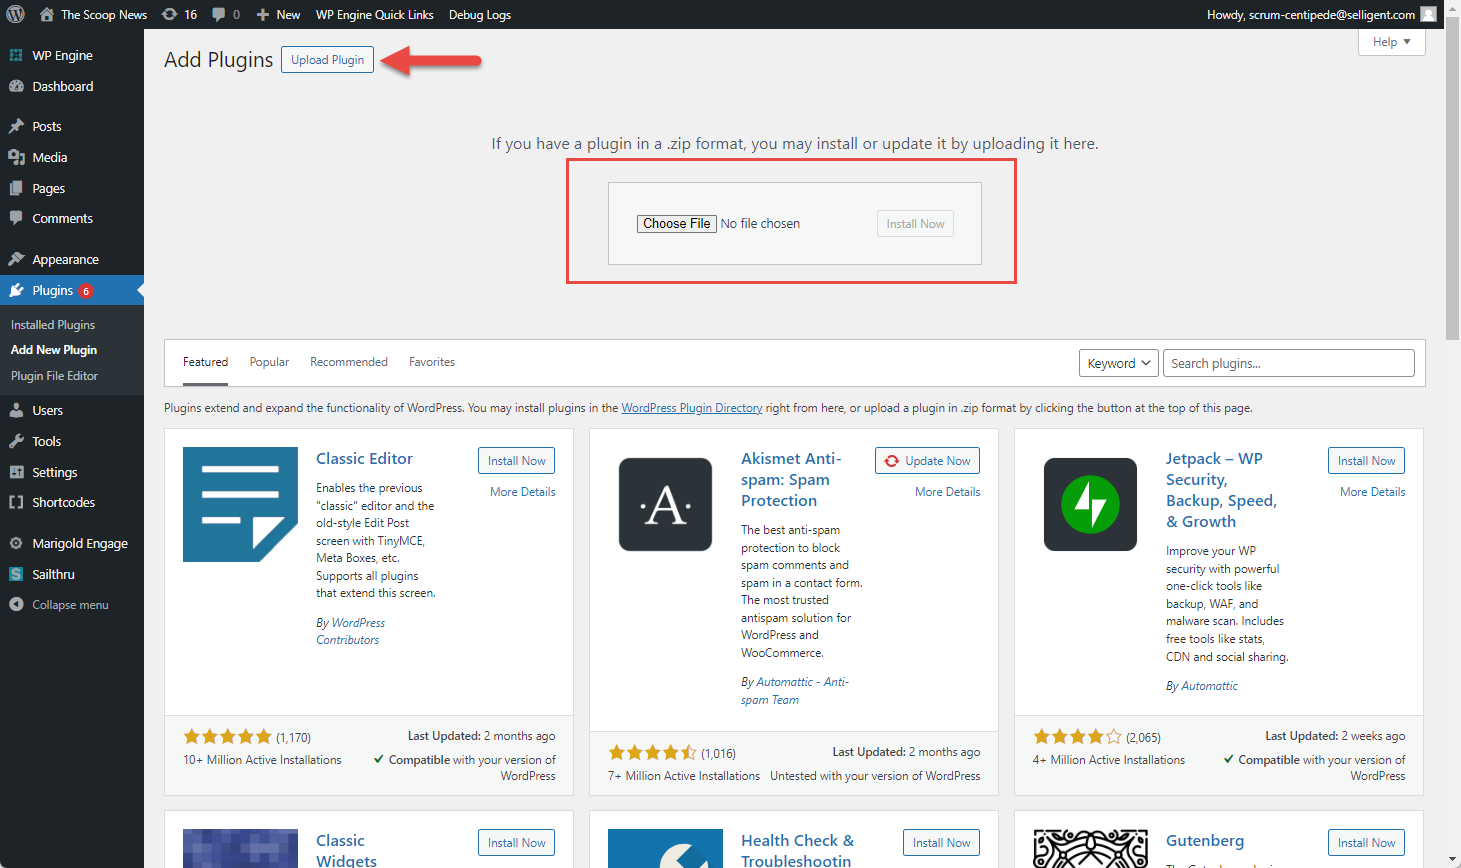
1. In WordPress, go to the Plugins entry and click Add New plugin.
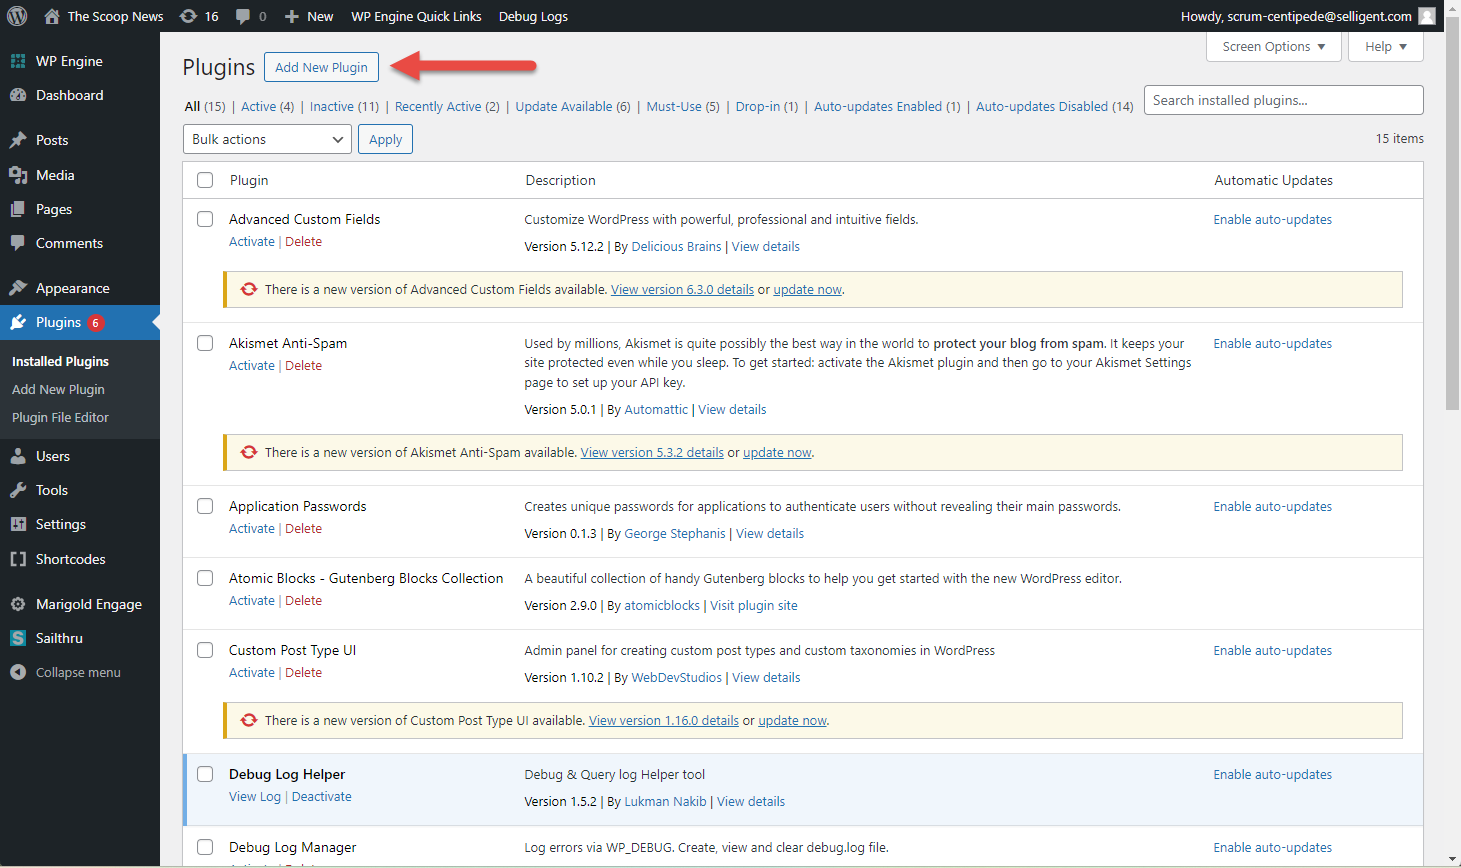
2. Next, click Upload plugin and select the location of the zip file to upload:
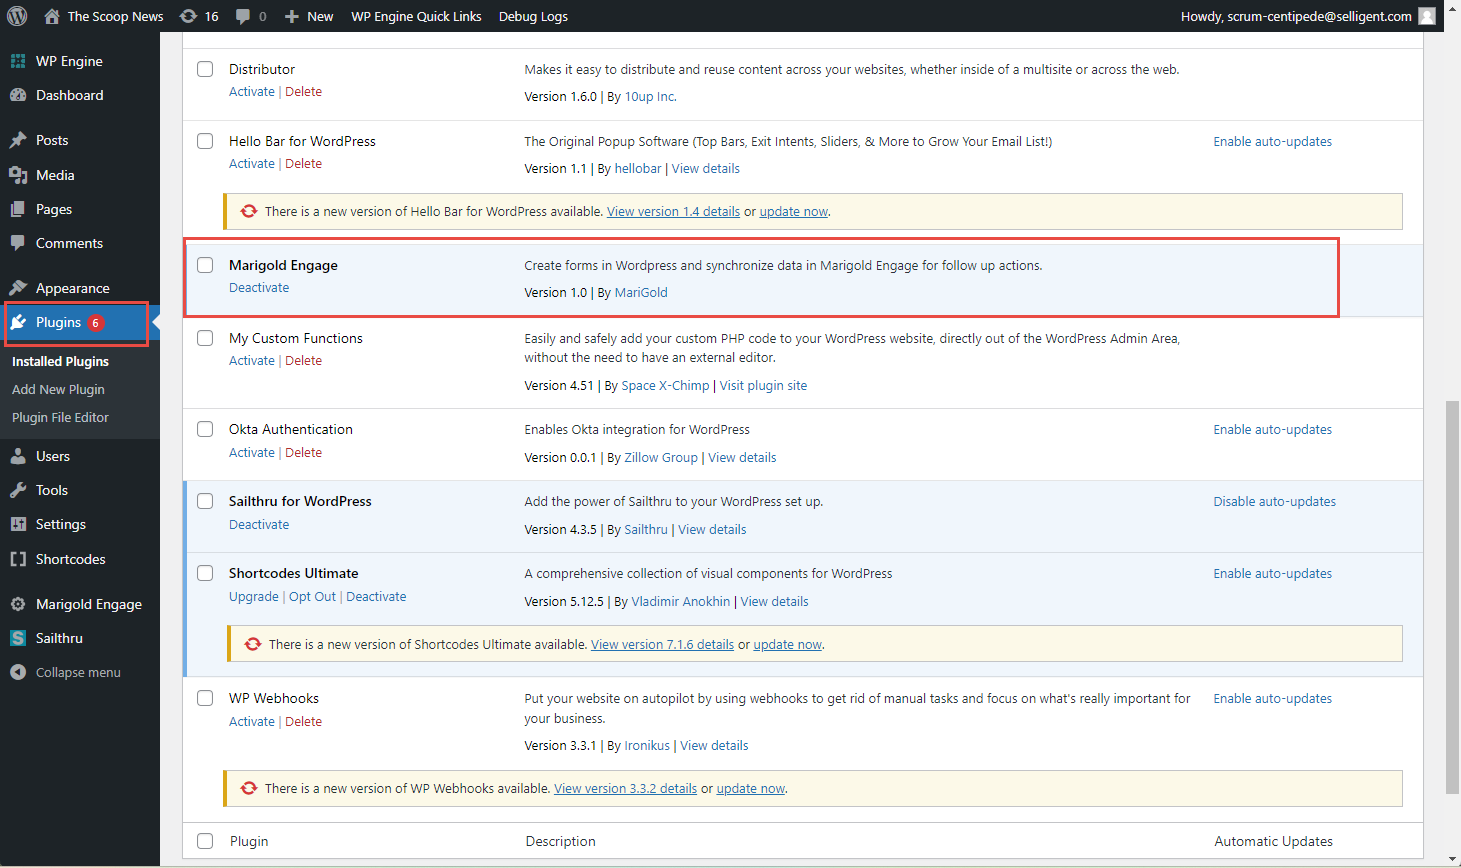
3. Once the plugin is installed, it needs to be enabled. Go to Installed plugins section and look for the Selligent plugin and enable it:
Configure the API Settings
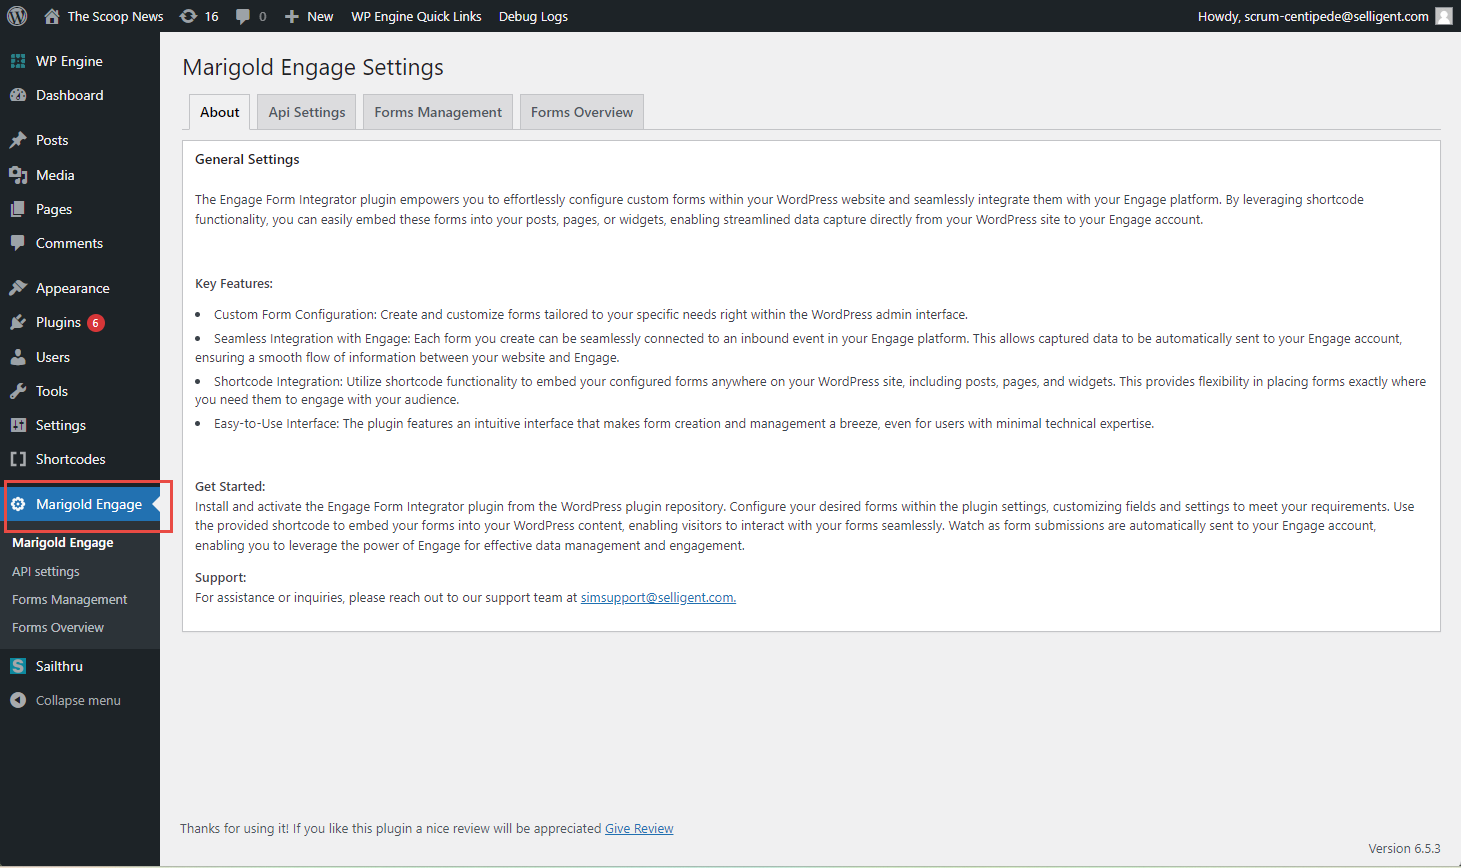
1. The Selligent by Zeta plugin is now listed on the left hand side. Click it:
2. On the API Settings tab, fill out the following connection parameters:
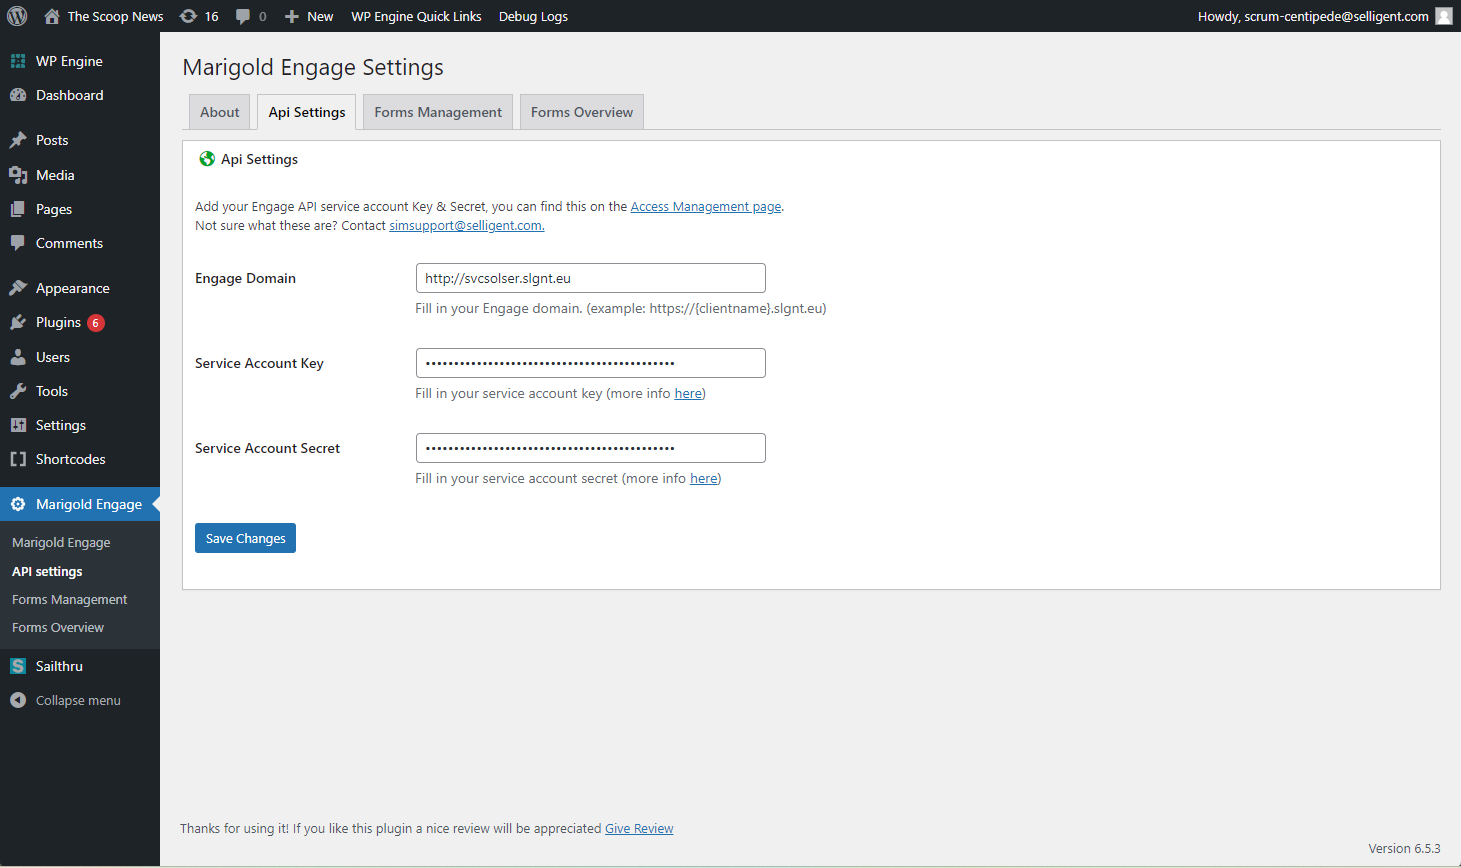
-
Selligent Domain: This it the URL of your Selligent environment.
-
Service Account Key and Secret: You can retrieve these keys from the Service Account entry in the Selligent Admin Configuration. If those keys do not yet exist, create a new service account of type CUSTOM.
Filling out the above settings, allows WordPress to communicate with the Selligent install. Once these settings are configured and validated, 2 additional tabs become available: Forms Management and Forms Overview. You can now start creating your WordPress form.
Create a Form
1. On the Forms Management tab, fill out the following:
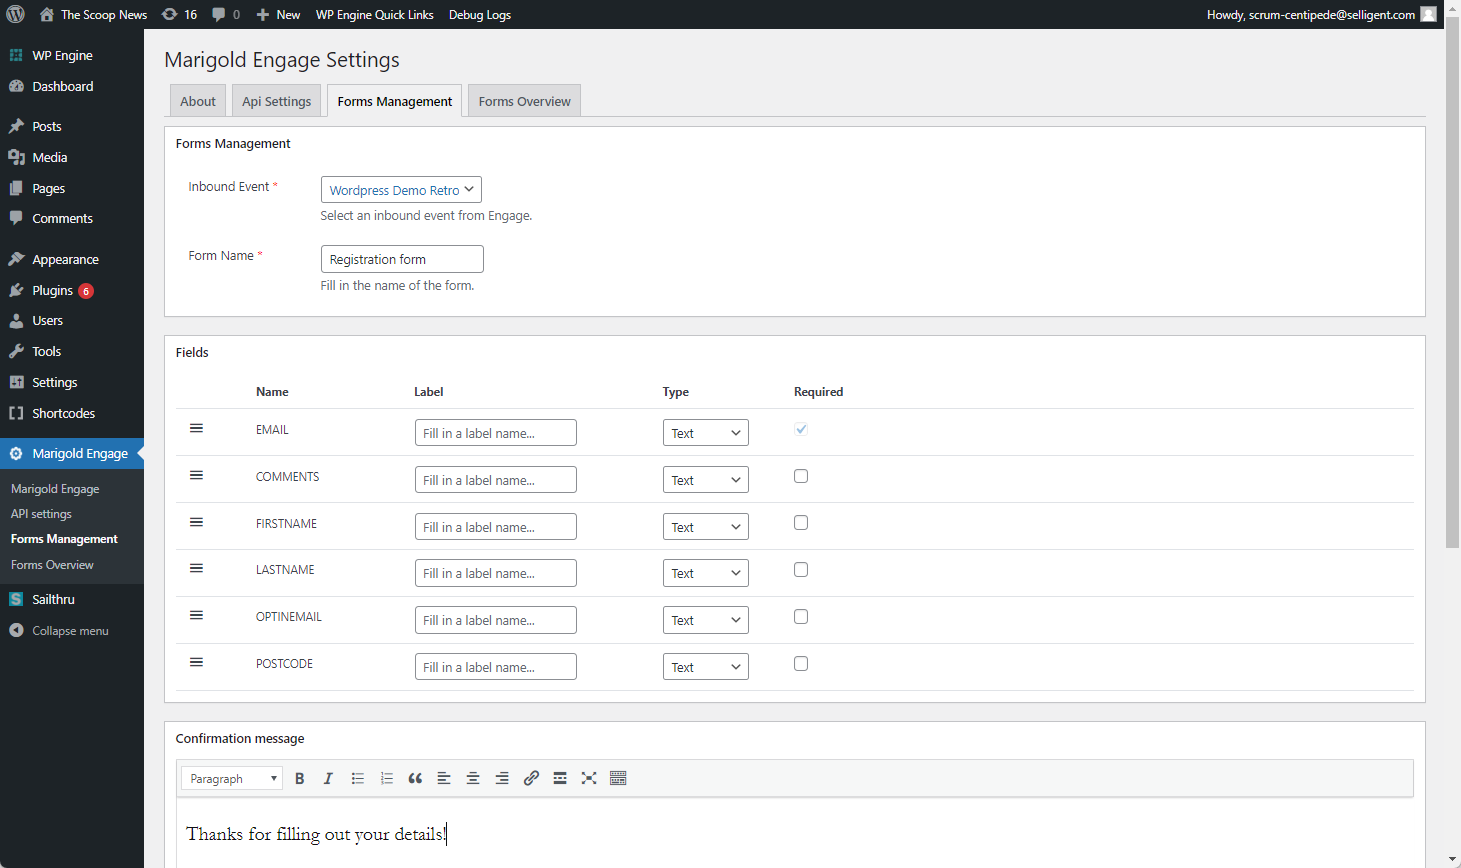
Forms Management:
Inbound Event: Select the Inbound Event created earlier on in Selligent. By selecting this event, all data entered in this form will be sent to that Inbound Event and trigger the journey.
Only Inbound Events in active Custom Journeys are listed. If you do not see the Inbound Event, please check the Custom Journey is activated.
Form Name: Provide a clear name to identify the form
Fields:
All fields that were defined in the Inbound Event Component in Selligent, are listed here. Here, you can change the order of the fields, define a form label and field type (text, text area or check box) as well as make them required fields. The EMAIL field is always a required field.
Confirmation Message:
The confirmation message is displayed once the form is submitted.
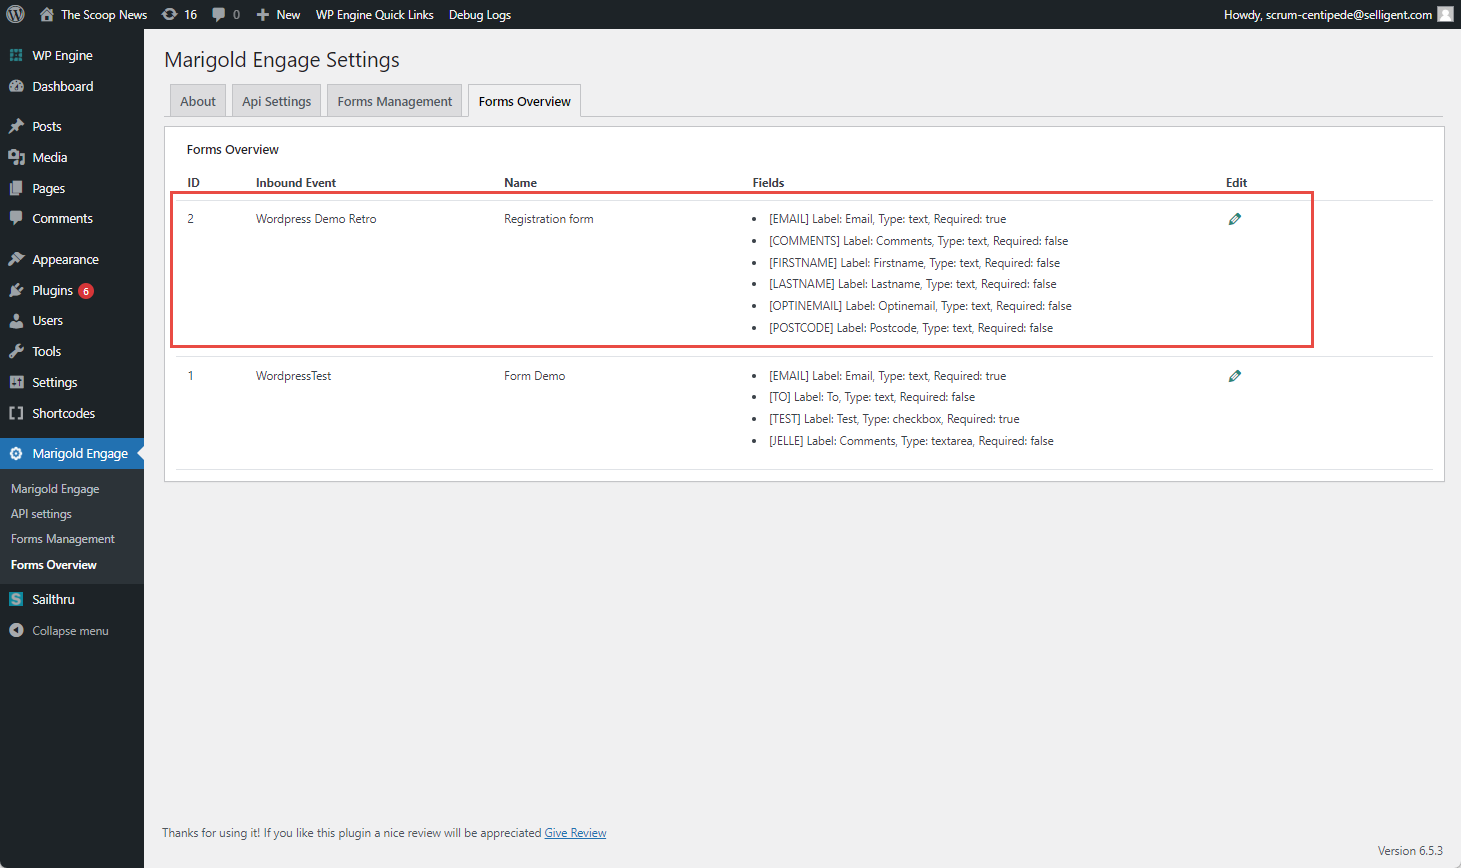
2. Click Add form to save the form. It is now added to the Forms overview.
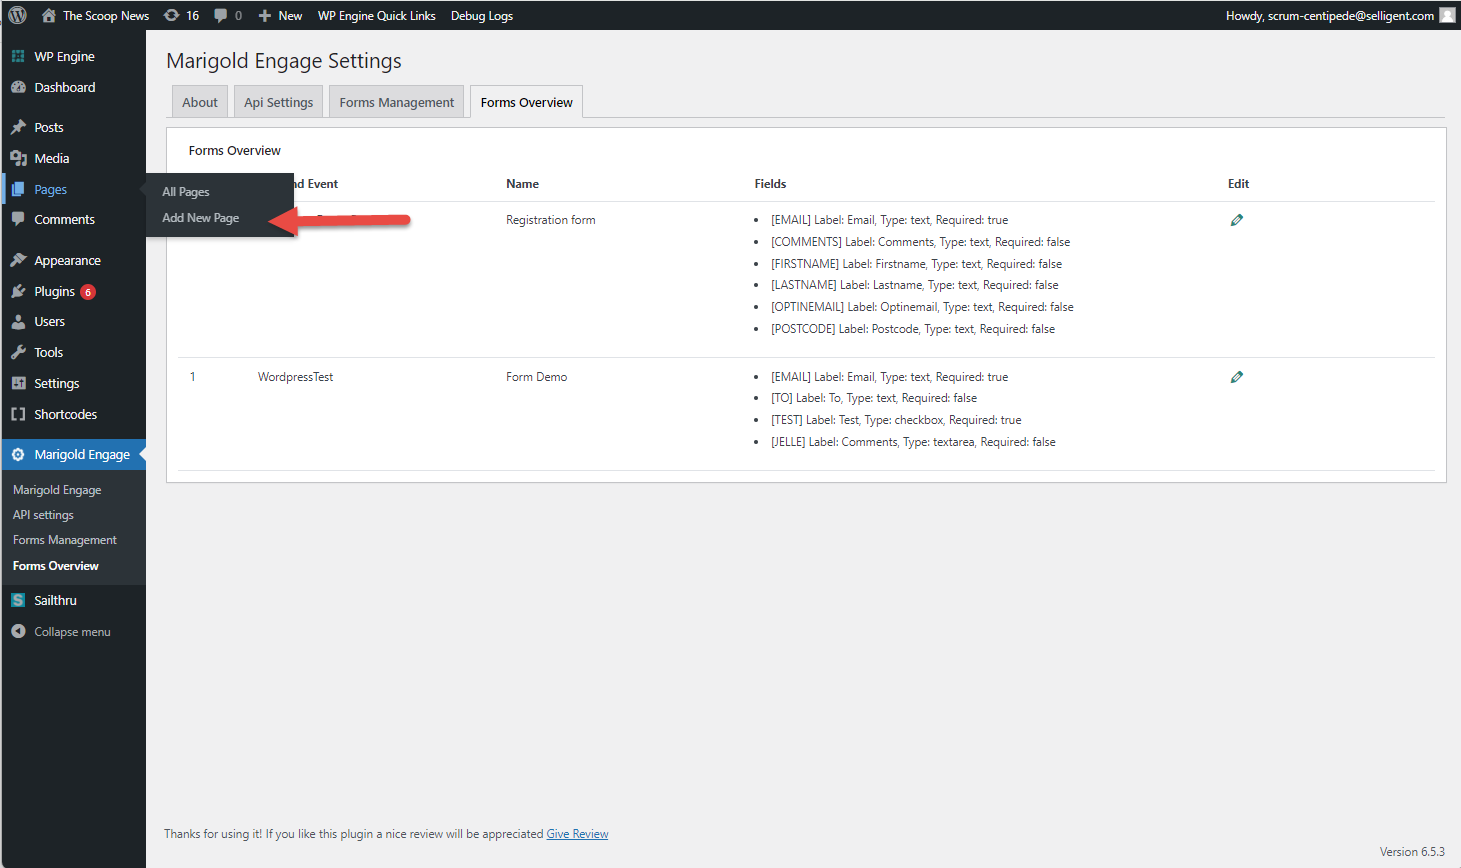
Render the form
The ID of the form is used to render the form in the shortcode and display it on a WordPress page:
1. Go to the Pages entry on the left, and select Add new page:
2. Add a title for the page and then click the + button to add a shortcode component:
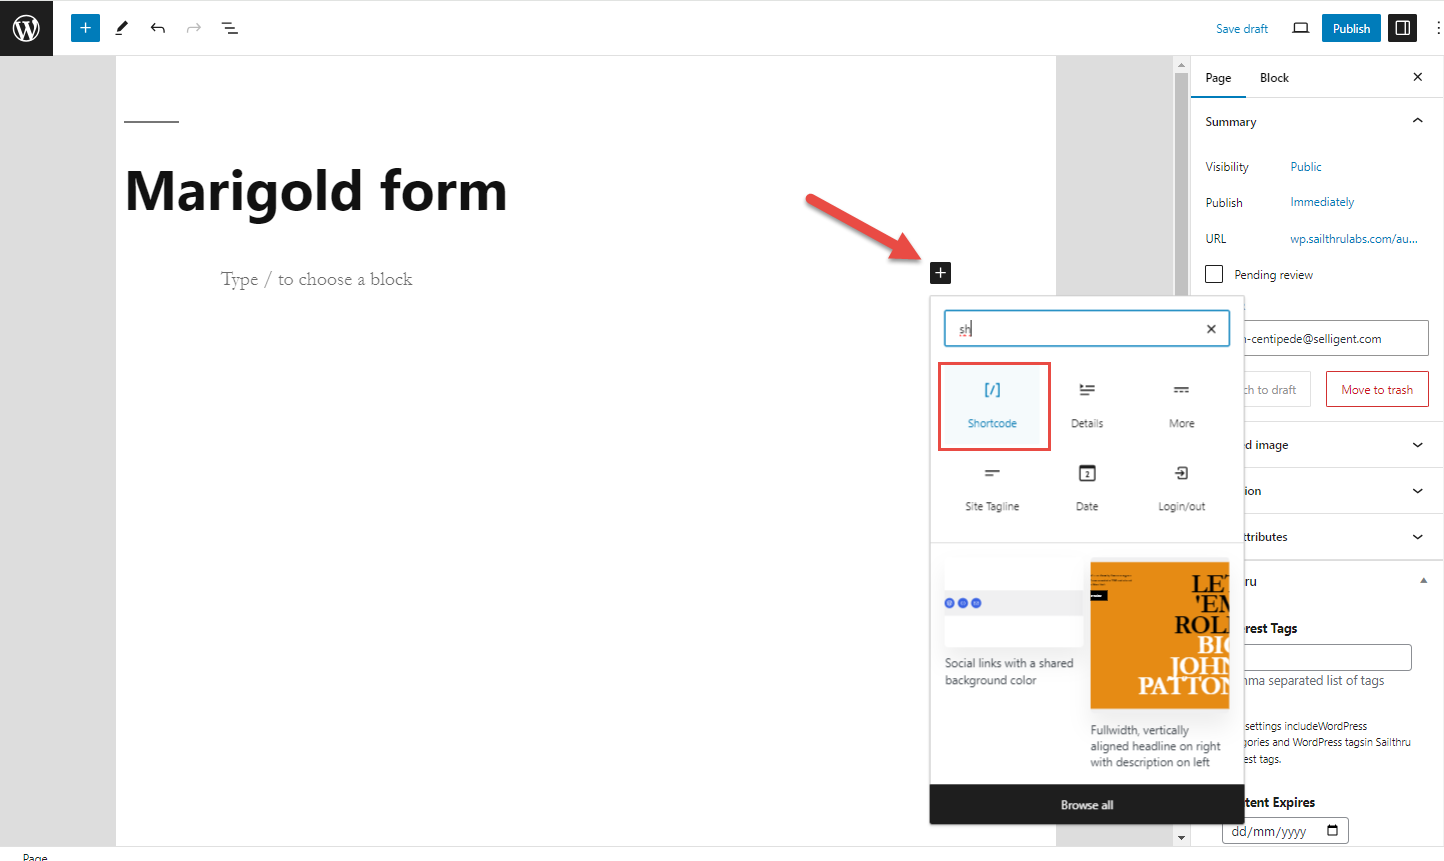
3. In the shortcode component, add the following:
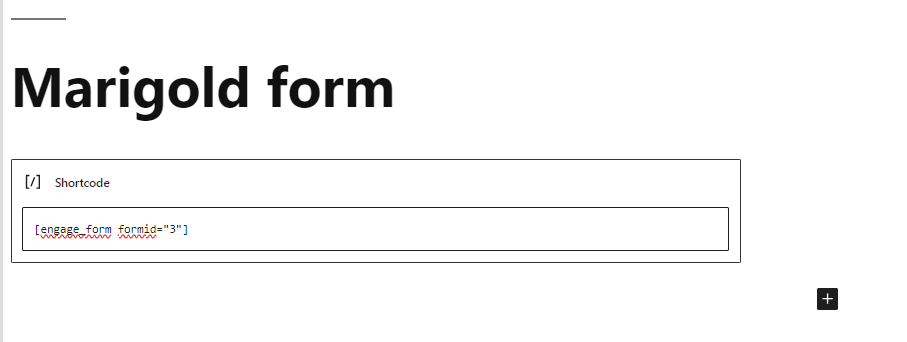
[engage_form formid="3"] where 3 is the ID of the WordPress form.
4. Publish the page. Once the page is published, click View page to display the content of the page and fill out the form.
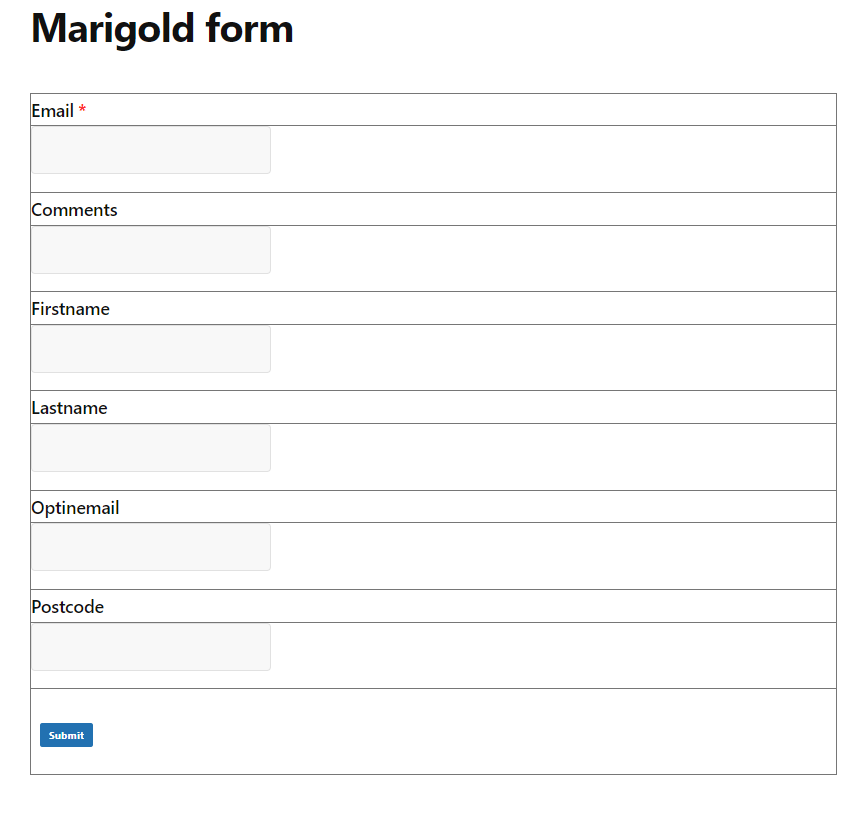
Submitting the form will trigger the journey and display the confirmation message defined in the form.
Note: If you want a different action to take place when the form is submitted, add the following to the shortcode: [engage_form formid="3" formaction="https://www.meetmarigold.com"]
