Build a Campaign from an Edited Feed using Recommendations
Once you have created a data feed, customize its content in Recommendations to prepare and preview emails.
|
Reorder content using an easy drag-and-drop interface. |
Pin content to key positions, while other content is personalized per-user.
|
|
|
Edit, add, or delete content, both text and images. |
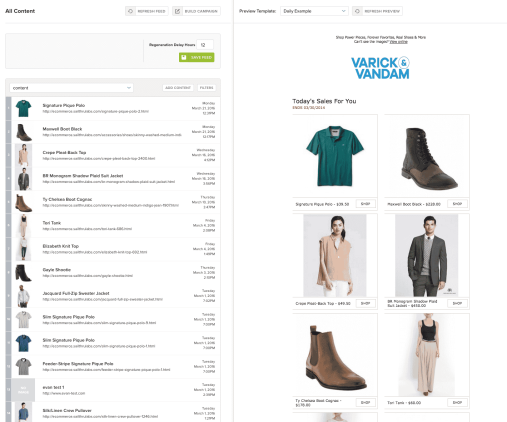
View a realtime preview of the content using any email template. |
Your feed customizations are retained for a period you specify, allowing you to use the customized content in email campaigns or on your website.
Access Recommendations
- Under the Content menu:
- Click Recommendations.
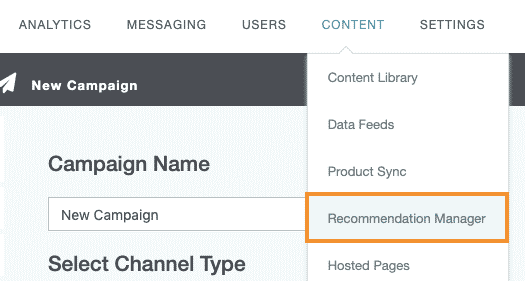
- Search for and select a feed from the Recommendations page.
- Click Recommendations.
- You can also access Recommendations from the Data Feeds page. At the end of a feed's row, click
 to open that feed in Recommendations.
Select a Template for Previewing the Feed
- To select a template for previewing the feed, click the Preview Template drop-down. Each time you open the feed in recommendations, the last template you selected will be displayed by default.
- The preview area in the right pane will update with each of your feed edits, although edits are not saved until you click Save.
- If you are about to make several edits, you can speed the process by first clicking Hide Preview, then clicking Show Preview when you are finished.
Note: Based on your template code, personalized content slots will show default content choices in the preview, yet each recipient may see different content.
Filter the Displayed Content
You can filter the feed to easily view the content you intend to work on. Filtering does not affect the content of the feed, just your current view of it.
- To search or filter feed content, click Filters.

- As you enter text in the Search box, the list of content below will update to display only those items which match your query.
- By default, the feed's Title, Name, Description, and Tags fields are searched. To search one of these fields exclusively, select it from the drop-down (which is set to All, by default). Your query is not case-sensitive.
- To remove the filter, either delete the text in the Search box or click the Filters button to hide the filtering options.
For merged feeds, to filter by key, select the drop-down above the first content item.

- If you are not viewing a merged feed, the drop-down will only contain a single key, and you can skip the rest of this section.
- Selecting a key will not alter the feed. It will simply make it easy for you to view and edit one key's content at a time. All content that you do not delete will remain in the feed.
- If the source feeds have identical keys, a distinct number for each source will be appended to all keys so that you may differentiate among them. (E.g. mykey1, mykey2, mykey3).
Customize Feed Content
When you add, edit, remove, reorder, or pin content, and then click Save Feed, your instance of the feed is affected and changes are reflected in campaigns based on the feed, but source data remains unaffected. For example, if you are using a Horizon Content Feed, other Content feeds that display the same content from the content library will not reflect the edits that you perform on this feed. Similarly, when editing merged feeds, the content in their source feeds is not affected. You can roll back changes at any time by using the Refresh button and also manually removing pins, which are not affected by a Refresh. After removing pins, you must click Save Feed in order for the pin change to be committed. In fact, after making any of the changes below, you must click Save Feed to save your changes. If you click Refresh Feed before saving, a warning is displayed that the refresh will drop any unsaved feed edits.
Reorder Content
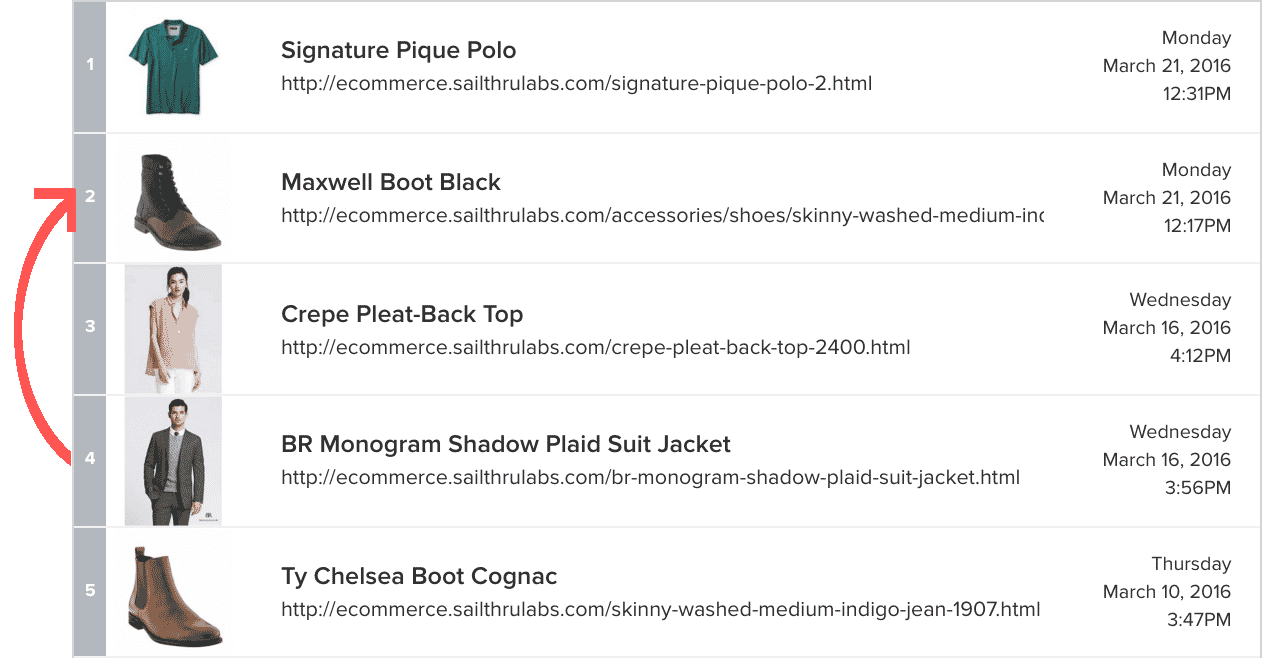
To reorder the feed, click and hold any feed item, drag it to the desired position and then release (drop) the item. The preview pane will update in real time, although your template may not be configured to display items in the same order as they appear in the feed. Note: When the feed is filtered, you cannot drag and drop a content item to change its position. Instead, you can manually edit its position number.
Pin Content
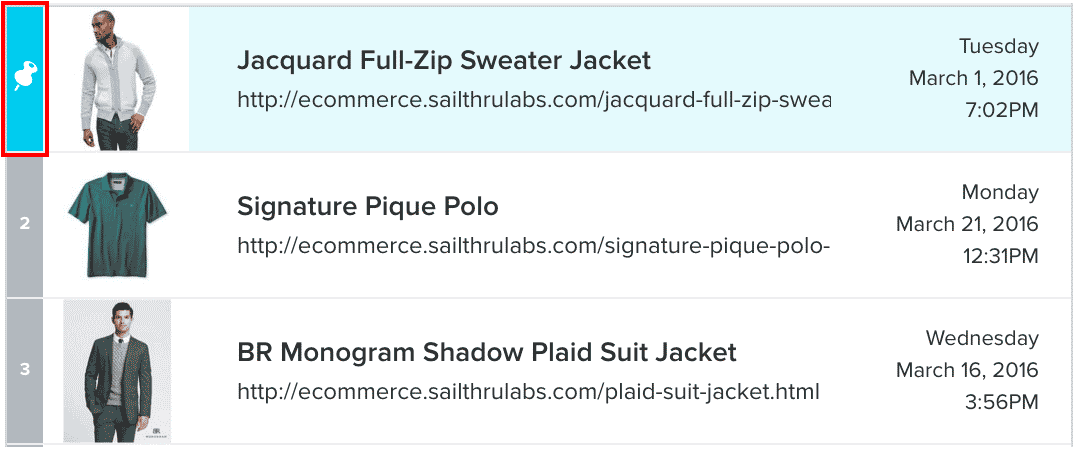
If your template personalizes content per user, you can 'pin' an item to a position so it stays in that position--such as a top hero spot--for all users. Once you have dragged and dropped a content item to the desired position, if you want this position retained for all users, click the item's position number (to the left of its thumbnail) and select the Pin icon.

Note that you are pinning the item to a position within the feed. Your template code then has a role in determining how your edited feed sequence and pins are displayed. Some Zephyr functions in your Zephyr template may affect pinning. For more information, please see template requirements for Recommendations Pinning.
Edit, Add or Remove Content
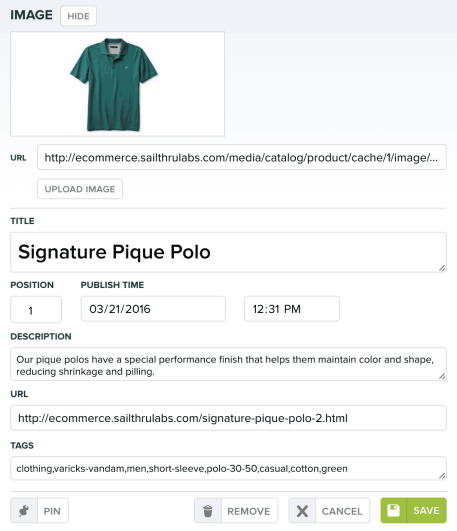
To edit the content of a feed item, click its position number (to the left of its thumbnail image) to open the tool drawer, and then select the edit icon.

The following fields are expected for most content and will be displayed and editable in the primary window of Recommendations if they are present in your feed:
- Name and/or Title (displayed in large text)
- Publish Time (displayed using your account's time zone setting)
- Description
- URL
- Image (URL and preview)
- Tags (if present as a string; a comma-separated list is recommended)
"Position" is an editable field allowing you to change the position of the item within the feed. Changing this number has the same effect as dragging and dropping the item in the main feed view. To replace the current image or add an image, if none is present, click Upload Image. The image file is added to your Image Library and the image URL field is automatically populated with the new media.sailthru.com URL. If any additional fields are present in the feed or you want to add others, they can be accessed below the primary fields by clicking the Show Custom Fields button.
- Custom fields with a simple number or string value are also editable.
- Custom fields that are objects (containing multiple properties) are listed by name, but are not editable.
- To add new custom fields, use the var name and value fields at the bottom of the section. Any number of new fields can be added.
- Numbers will be read in as number type vars. If you are entering a postal code like 01832 or other numbers with a required zero in front, use quotes to save it as text.
At the bottom of the feed item display:
- To cancel feed item changes, click Cancel.
- To delete the feed item, click Remove. This has the same effect as the trash icon on the primary view.
- To save changes to the feed item, click Save. This will close the item and provisionally retain your changes, but they are not applied until you also click Save Feed .
To add a new content item, above the first item, click Add Content. Enter any of the following information. Only "URL" is required.
- Image - Enter an image URL or click Upload Image to add the file to your Image Library. When you upload an image, the image field is automatically populated with the new media.sailthru.com URL.
- Title
- Position - This is the initial position upon saving the new content item, although you can drag and drop it to another position after saving.
- Publish Time - Date and time fields displayed using your account's time zone setting,
- Description
- URL
- Tags - If using multiple tags, enter them as an comma-separated list.
- Custom Fields - Click Show Custom Fields, then enter a var name and value. Click Add New Field to add additional values.
At the bottom of the feed item display:
- To cancel feed item changes, click Cancel.
- To save changes to the feed item, click Save. This will close the feed item and provisionally retain your changes, but they are not applied until you also click Save Feed .
To delete a feed item, click its position number (to the left of its thumbnail image) to open the tool drawer and then select the trash icon.

You can also delete an item during editing using the Remove button at the bottom of the item editing display.
Set a Regeneration Delay
You must specify a period of time after saving the feed upon which it will be automatically regenerated (refreshed) from its source. If you want your changes to non-pinned items to be reflected in a campaign that is based on this feed, ensure that it is sent within this time window. Pinned items will retain their placement and edits after the feed is refreshed, until you manually remove their pin. To set a regeneration delay
- Enter the duration of time (in hours) that your changes should be retained once you save the updated feed. 12 hours is the default. Note: If you change this value, the new value becomes the default for this feed, appearing even after the feed's content is regenerated (until you modify it again).
- Click the Refresh button.
Save the Feed
When you're ready to save the changes you have made to the feed, click Save Feed. To discard all changes made since your last save, click Refresh Feed.
Build a Campaign Using the Feed
To build a campaign using the newly ordered feed, click Build Campaign. Enter the Campaign details, and when you select a template, choose either 'Static' or 'Dynamic'. Dynamic is recommended if you use Zephyr variables in your template. For more information on building a campaign, visit the Campaigns section.
Recommendation manager uses content urls as ids. If multiple pieces of content share the exact same url then items in the feed will not be able to be pinned or edited. For best use ensure all content items have a unique url.
