Send Direct Mail with Lifecycle Optimizer Webhooks
This guides you through setting up an Inkit webhook in Lifecycle Optimizer, adding direct mail to your omnichannel toolkit and allowing you to create rich journeys reaching your customers in the channels they respond to best.
For more information, see the Inkit Integration Overview.Setup
Locate your Inkit Details
To set up the integration, grab your Inkit API Key as well as the ID of the Inkit mailer template you'd like to send. To find your Inkit API Key and Authorization Header, visit your Inkit Integrations/API settings tab in your Inkit dashboard.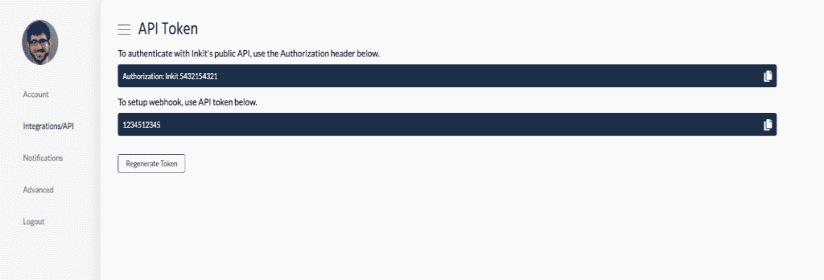
To get your template ID, open the template in your Inkit account. The Template ID can be found within the URL. For example: https://app.inkit.io/#/templates/design/bd9b0b8c-c47b-40ae-8787

Create a Lifecycle Optimizer Webhook
- Create or open an existing Lifecycle Optimizer flow
- Click the
 and add a new Action.
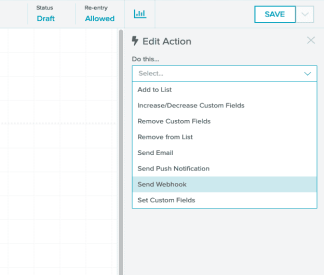
 - In the Edit Action sidebar, select "Send a Webhook"
Configure your Webhook
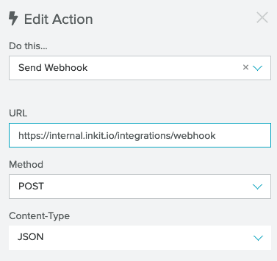
1. Set the Webhook URL to https://internal.inkit.io/integrations/webhook.
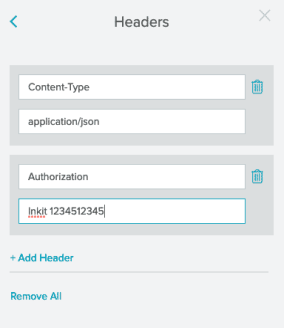
2. Click Headers at the bottom of the Edit Action sidebar. From the Headers tab, create a new header called Authorization and add the value from your Inkit dashboard.
3. Create your webhook JSON payload based on the custom profile fields you've used to store address information using Zephyr.
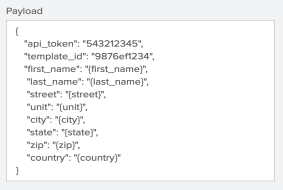 | Boilerplate:
|
| Inkit Webhook Fields | Source |
| api_token | Copied from Inkit Settings |
| template_id | Copied from Inkit Template page. |
| first_name | Custom Fields on Sailthru Profile |
| last_name | |
| company | |
| street | |
| unit (optional) | |
| city | |
| state (2-character code) | |
| zip | |
| country (2-character code) |
You can add other custom fields from user profiles via additional JSON key-value entries.
<strong>{ "fav_color": "{fav_color}",</strong><strong>"promo_code": "{promo_code}" }</strong>promo_code and color are extra fields added into the request body. These fields can be used on your templates to dynamically deliver customized direct mail to your customers.


