
The Templates Page
Manage your templates and reduce complexity with folders. Go beyond labels to segment your templates by marketing or strategic initiatives or organize your assets by team.
Note: The legacy Templates page will be available for a time after the Folders release. Select the button to go back to the previous version.
How it works
Folders are a customizable feature that allow you create an organizational structure for your assets that works for your account needs.
Notes:
- You can have up to 1000 folders per page where the feature is activated.
- Folders are nestable up to five layers.
- The main folders that show on the Templates page must each have a unique name. Subfolders can share names.
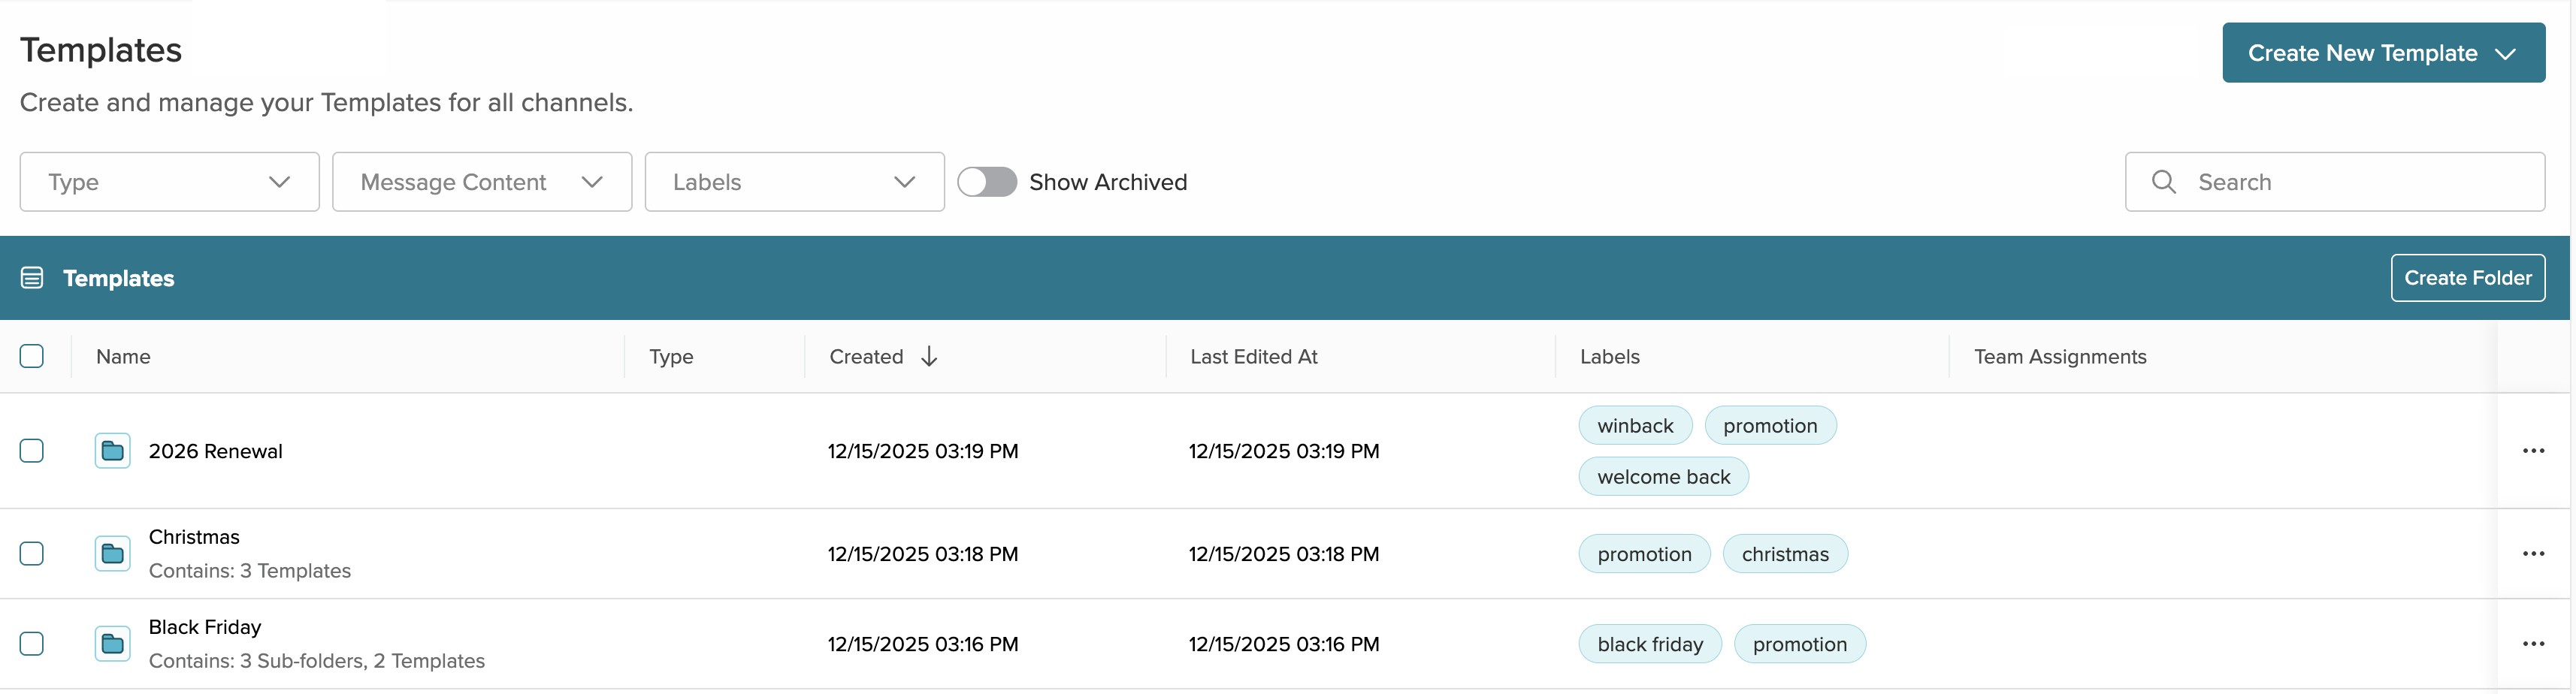
The blue bar at the top of the templates shows where you are in your folder structure as you navigate through folder layers.

Folders
Create and manage you folders.
Create a new folder
- Select the Create Folder button.
- When the modal opens, give your folder a name and select any labels you wish to apply to the folder.
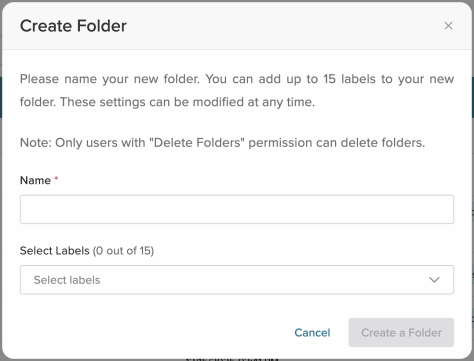
Note: Any labels applied to the folder will only be applied to the main, or root, folder, not the contents of the folder. - Select Create a Folder to create the folder. It will appear in your list, marked with a green folder icon.
Nest folders
- Select a folder to open it.
- Select the Create Folder button.
- When the modal opens, give your folder a name and select any labels you wish to apply to that folder.
- Select Create a Folder to create the folder. It will appear in your existing folder, marked with a green folder icon.
Note: Folders can be nested up to and including five levels of nesting, such as Brand > 2025 > Spring > April > Paid
Delete an existing folder
Any folder can be deleted if you have delete permissions and the items in the folder can be deleted. Templates used in recurring messages cannot be deleted.
- Select the hamburger menu at the end of the list row.
- Select Delete from the menu.
- The Delete Folder modal opens. Select the Delete button to confirm deletion.
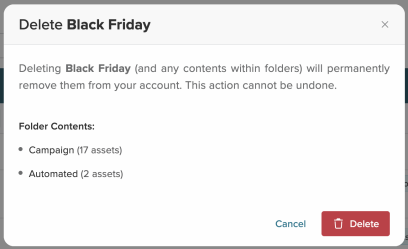
- A success or error message will appear at the bottom of the screen.
Move assets
Assets include both folders and templates. Keep in mind the nesting structure you have for folders. If a folder already contains 5 layers then you will not be able to move a folder into it. Templates do not have the same limitations.
Move assets to a folder
Both folders that contain templates and individual templates can be moved.
- Locate the folder or list you wish to move and select the meatball menu at the end of the entry.
- Select Move from the menu. The Move Asset modal opens.

- Search for the folder you wish to use by name.
Note: If you're moving a folder, you may see some folders grayed out. These are folders that already contain the maximum number of nested folders. - Select Confirm Changes.
- A popup message at the bottom of the Templates page confirms that your asset has moved.
Bulk move assets to a folder
- Locate the folders and/or templates you wish to move. Select the checkbox at the beginning of each row.
- Select the Move to folder icon at the top of the list. The Move Asset modal opens.
- Search for or select the folder you wish to use.
Note: If you're moving a folder along with templates, you may see some folders grayed out. These are folders that already contain the maximum number of nested folders. - Select Confirm Changes.
- A popup message at the bottom of the Templates page confirms that your assets have moved.
Search and filter
Search for and filter your templates.
Search
Search all content or within a folder. If you're within a folder, you can search just the top-level folder or the folder and subfolders.

Filter
Filter templates in a variety of ways.
| Filter Name | Description |
| Message Content | Select the type of campaign content you'd like to see - limit by Transactional or Marketing content. |
| Type | Filter by template type: HTML Email, Visual Email, Push/In-App, or SMS. Select one or more options. |
| Team Permissions | Filter by one or more Teams. You'll see only the Teams you belong to. Set Team privileges in Email Composer or the HTML Editor. |
| Labels |
Filter templates by Label. Select one or more of the labels. This shows the top 20 most-used labels. |

