Push Notifications for iOS
-
Enable Push Notification on your App ID and export .p8 Push Certificate
-
Upload .p8 Push Certificate to Sailthru
-
Test .p8 Push Certificate
-
Remove .p12 Push certificates
Enable Push Notification on your App ID and export .p8 Push Certificate
- Login to your Apple Developer account
- Register a New Key by going to Certificates > Identifiers & Profiles > Keys, and then click on the blue plus symbol
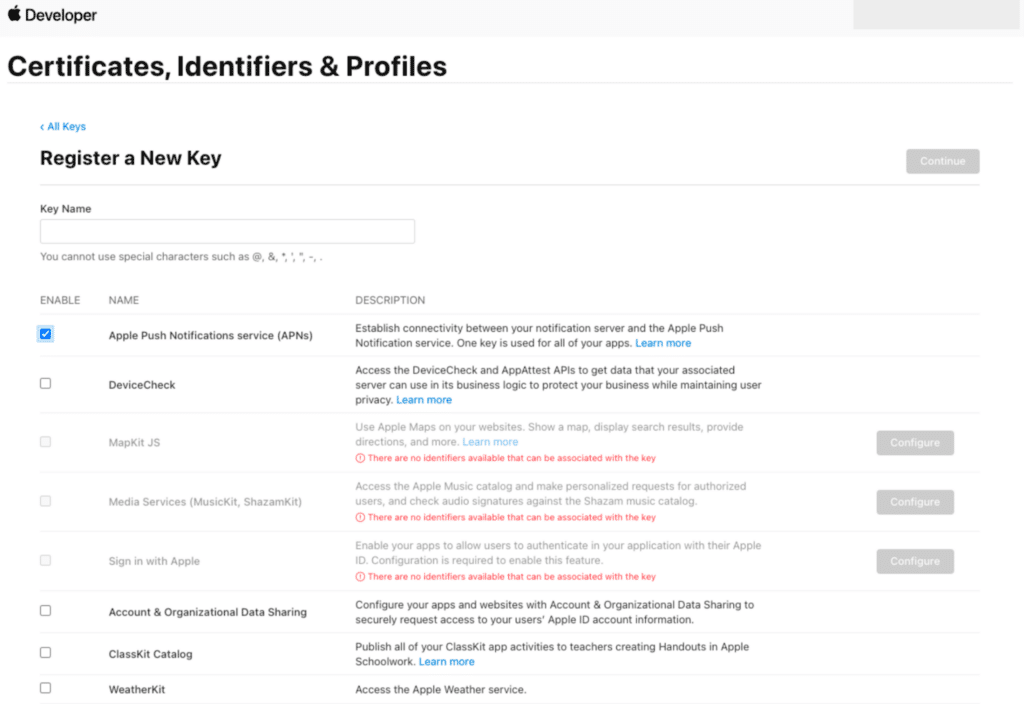
- Enter a Key Name, check the box to enable "Apple Push Notification service (APNs)", and then click Continue
- Follow the prompts to download your .p8 Push Certificate
Note: You can only download your key once so be sure to save it in a secure location. You can only have two .p8 Push Certificates in your Apple Developer account.
Generating p8 keys
Upload .p8 Push Certificate to Sailthru
- Login to your app on https://mobile.sailthru.com/
- Go to Settings > Developer > Apple iOS
- Fill in the information in the order prescribed below:
- Apple Bundle Identifier - App's unique identifier*
*You can find these IDs in the Keys and App Information sections of your Apple Developer Account - Apple Push Certificate (.p8) - Upload Apple .p8 Push Certificate by drag and drop or click to select
- Apple Bundle Identifier - App's unique identifier*
- Team ID - Unique 10 Character string assigned to your team*
- Key ID - Unique 10 Character identifier for your authentication key*
Note: You must input the Apple Bundle Identifier, Team ID and Key ID before uploading your .p8 Push Certificate.
.png)
Remove .p12 Push certificates
- Once you've observed a successful send with your .p8 Push certificates we recommend removing the legacy .p12 Push certificates from your app
- Click on the cross in the top right hand corner of the Apple Push Certificate (Development) and/or Apple Push Certificate (Production)

_658x193.png)


