
Configure a Keitai Campaign: Audience
The Audience sub-section is used identify to whom you're sending your Campaign message. The platform offers several different options to both select and restrict your Campaign Audience.
The features and options available from the Audience sub-section are described below.
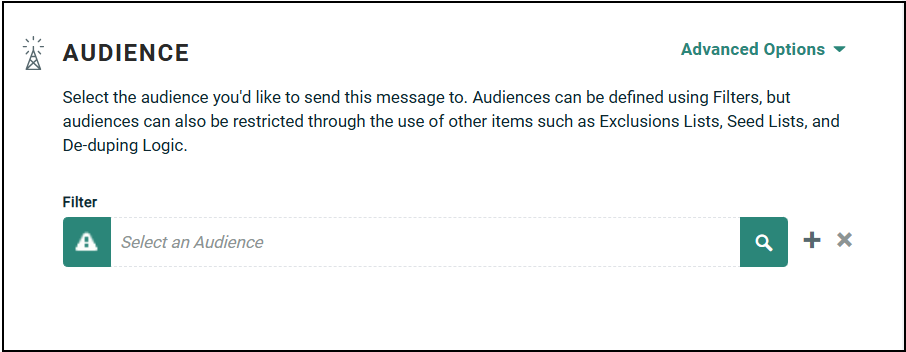
Select the audience
The options for defining the Campaign Audience are described below:
Select the Campaign audience
Audiences are defined using a filter, which can often (depending on the channel) be restricted through the use of other items, such as Exclusions Lists, De-duping Logic, etc.
For more information on setting up filters, see the Filters section.
For Regular One-off and Date-triggered Campaigns, the system requires you to select a Filter.
Note: If you assign an empty filter (that is, a filter that doesn't have any logic criteria within it) to a Campaign, the Campaign will deploy to all recipients in the Campaign's source table. In most cases, this isn't desired. The system will display a warning messages if the Filter is empty, but you should also always check that you've assigned the correct filter to the Campaign and check the Filter logic to make sure it's selecting the desired recipients.
For an Event-triggered Campaign, you don't have to select a filter, as the event itself defines who the recipients are; the default audience for an Event-triggered Campaign is all triggered records. Optionally, however, you can select a filter if you need to apply additional restrictions to identify and select only a sub-set of the triggered records.
For an Event-triggered Campaign, in the Advanced Options drop-down list, select Add Audience Filter. The system replaces the default All triggered records filter with a user-defined field. From this point, you can proceed with the steps described below.
For all Campaign types:
-
Select a filter:
-
To select an existing filter, begin typing in the name of the desired filter and select the required filter from the displayed list. Or, click the browse button (magnifying glass icon). A Browse Filter dialog box is displayed, showing all the filters with the same source table as the current Campaign. Click on the required filter.
Note: If you search for and select a filter that has a different source table than the current Campaign, the system will display an error message at the top of the Campaign screen.
-
To create a new filter, click the new button (+). A Create new Filter dialog box is displayed. Enter a name and select a data source for the filter. Click Create. To define the Filter logic, click the Go to filters details button (green up-arrow icon). The system displays the Filter detail screen where you can define the filter logic. When finished click Edit > Save. To return to your Campaign, click the Campaigns tab in the Top Navigation Pane.

-
-
Optionally, to view the details of this filter, click the Go to filters details button (green up-arrow icon) to the left of the Filter field. The system opens the Filter details screen within a new tab.
-
You may be prompted to select the field you want to use to contact the Campaign's recipients. This option is displayed if your source table contains more than one address-type field (such as multiple Email type fields in an Email Campaign, or multiple Phone type fields in an SMS Text Campaign). From the drop-down menu, select the source table field that you want to use.
Configure preferences
When setting up your Campaign, you may be required to select one or more Preference flags, depending on the configuration of your Sender Profile. A Preference is a special type of field in your database that's used to control whether or not a consumer has opted-in or opted-out of receiving messages. Your database can optionally contain multiple Preference flags that allow your customers to manage their subscriptions at an even more granular level.
For example, let's say you deploy three main categories of messages -- transactional messages (like Order Confirmations), promotional messages, and newsletters. You could set up Preference flags for each of these, allowing a consumer to opt-in or opt-out of any of those subscriptions. When you build a new Campaign, you would need to check the appropriate Preference flag. For example, if you were sending out a new promotion, you would want to check the Promotional Preference flag, so that only consumers who have opted-in to those types of messages would receive the promotion.
Preference flags are defined in your database using a Data Type of Preference. The determination of whether you must check a Preference flag is set by a system administrator at a Sender Profile level. Each Sender Profile can optionally be configured to require a Preference flag check. If you're using a Sender Profile that has this requirement in place, then the system will display a Preferences field within the Sender Profile section. The system will require you to select at least one Preference flag when you build the Campaign.
Note: For more details on using Preferences to manage your recipient contact eligibility, please see Permission Management - Preferences.
The system provides two methods for choosing a Preference flag.
The first method is to manually select a Preference flag:
-
The Preference flag drop-down menu is populated with every Preference type field on the Campaign source table. From this menu, select the desired Preference flag.
-
Click the add button (+). The selected Preference flag is added to the list.
-
Repeat the above steps as needed to add more Preference flags to this Campaign. If you add multiple flags, the recipient must be subscribed to ALL the selected flags in order to receive the Campaign message.
-
If you need to remove a flag, click the remove button (gray X icon) next to the flag.
The second method is to have the system parse your selected Audience Filter for any Preference flags:
-
Define a Filter that uses one or more Preference flags as Filter criteria (see Filters for more details on how to build a Filter).
-
Assign this Filter as the Audience for your Campaign.
-
Beneath the Preferences list, click Add from filter. The system scans the Filter, looking for any criteria that use a Preference flag. If the system identifies any Preference flags in your Filter, that flag (or flags) is automatically added to the list. If you add multiple flags, the recipient must be subscribed to ALL the selected flags in order to receive the Campaign message.
-
If you need to remove a flag, click the remove button (gray X icon) next to the flag.
Add a seed list
A Seed List is a group of one or more individuals who are designated to receive a duplicate copy of a Campaign message. When the Campaign is deployed, the system will automatically send the Campaign message to each recipient in the Seed List, regardless of whether those individuals are part of the Campaign audience.
The use of Seed Lists in a Campaign is optional.
Note: Seed Lists are used only for Date-triggered and Regular One-off Campaigns. Currently, the user interface allows you to assign a Seed List to an Event-triggered Campaign, but the system will not actually send email messages to the Seed List recipients when the Event-triggered Campaign is deployed.
For most channels, Seed Lists can be built in one of two ways: either by manually entering one or more individuals, or by using a Filter to define logic that determines who should be included in the Seed List.
To use a seed list:
-
From the Advanced Options drop-down list, select Add Seed List.
A Browse Seed List dialog box is displayed, showing all Seed Lists that have the same source table as the currently selected Campaign.
-
Click on the required Seed List . The selected Seed List is added to the Campaign.
-
To view or edit the Seed List, click on the Seed List's name. To remove this Seed List from the Campaign, click Xnext to the Seed list.
-
If this Campaign is Date-triggered, you can provide additional parameters that control when the system generates and deploys messages to the Seed List recipients. The options for a Date-triggered Campaign are:
-
Off (default selection): The system will send messages to the Seed List recipients ONLY for the first time the Campaign deploys.
-
On: The system will send copies of the Campaign message to the Seed List upon each date-triggered deployment of the Campaign.
-
Daily: Enter a daily limit on how many times the Seed List can be sent copies of the Campaign message within a 24-hour period. You can enter a value between one and 99.
-
For more information on setting up Seed Lists, see the Seed Lists topic.
Use a filter as a seed list
To define a Seed List by means of a Filter:
-
From the Advanced Options drop-down list, select Use a Filter as a Seed List.
-
A Browse Filters dialog box is displayed, showing all filters that have the same source table as the currently selected Campaign.
-
-
Click on a Filter name. The system adds the Seed List as the selected filter in the Campaign.
-
To view or edit the filter, click on the Filter name. To remove this filter from the Campaign, click X next to the filter name.
-
If this Campaign is Date-triggered, you can provide additional parameters that control when the system generates and deploys messages to the Seed List recipients. The options for a Date-triggered Campaign are:
-
Off (default selection): The system will send messages to the Seed List recipients ONLY for the first time the Campaign deploys.
-
On: The system will send copies of the Campaign message to the Seed List upon each date-triggered deployment of the Campaign.
-
Daily: Enter a daily limit on how many times the Seed List can be sent copies of the Campaign message within a 24-hour period. You can enter a value between one and 99.
-
For more information on setting up Filters, see the Filters topic.
Add an alert group
The primary purpose of an Alert Group is to notify a select group of individuals when some triggering event has occurred. That event could be any activity recorded by the platform, such as an email click or a Web Form submission. When the event takes place, the system sends a message via Email, SMS Text, or Push Notification to the recipients included in the Alert Group.
Alert Groups should be assigned to their own dedicated Event-triggered Campaign whose sole purpose is to send the alert message, and not to any live marketing Campaign. If you want to send out messages to an Alert Group, you should create a separate Event-triggered Campaign within Cheetah Digital, define the triggering event, define the content of the alert message, and then assign the Alert Group.
Note: When you assign an Alert Group to a Campaign, the recipients in that Alert Group become the de facto Audience for that Campaign, overwriting any other Audience Filter selections you may have made. For this reason, you should keep your alert Campaign separate from your marketing Campaigns.
To add an Alert Group to an Event-triggered Campaign:
-
From the Advanced Options drop-down list, select Add an Alert Group. A Browse Alert Group dialog box is displayed, showing all existing Alert Groups with the same channel as this Campaign.
-
Click on an Alert Group. Within the Audience section of the Campaign screen, the system adds a new Alert Group field.
-
To view or edit the Alert Group, click on the Group's name. To remove this Alert Group from the Campaign, click X next to the group name.
For more information on setting up Alert Groups, see the Alert Groups topic.
Restrict the audience
Select an item above for more details on that section.
Add an exclusion list
An Exclusion List consists of individuals who should not be targeted in your marketing Campaign, such as individuals who work for competitors, for example. The Exclusion List automatically overrides all other criteria, including Filters, Seed Lists, and Proofing Groups. For example, if a specific individual is added to an Exclusion List, and that same person meets the Filter criteria used to defined the Campaign audience, that person would not receive the Campaign message.
Note: For Load and Send Campaigns, you're required to assign a Virtual Exclusion List to the Campaign, if you select a promotional Sender Profile (that is, a Sender Profile intended to be used for promotional marketing messages, rather than for operational messages like shipping notifications). When you launch the Load and Send Campaign, the system will verify that you've assigned at least one Virtual Exclusion List; if not, an error message is displayed.
To add an Exclusion List to your Campaign:
-
From the Advanced Options drop-down list, select Add Exclusion List. A Browse Exclusion Lists dialog box is displayed.
-
Click on the desired Exclusion List. Within the Audience section of the Campaign screen, the system adds a new Exclusion List field, and populates it with the selected Exclusion List.
-
Repeat the above steps as needed to add more Exclusion Lists to this Campaign.
-
To view or edit the Exclusion List, click on the List's name. To remove this Exclusion List from the Campaign, click X next to the List name.
For more information on setting up Exclusion Lists, see the Exclusion Lists topic.
