
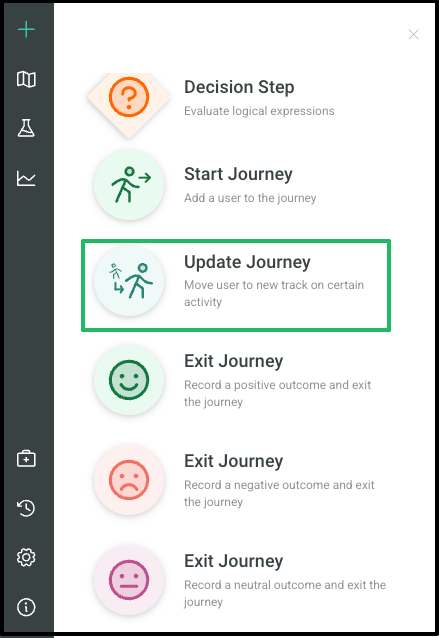
Update Journey Step
An Update Journey step listens to customer behavior and moves the customer to a parallel path, such as making a purchase. Update steps are only applicable for customers who are already in the Journey.
Key marketing advantages of these steps include creating personalized user paths that adapt in real-time to behavior, allowing for targeted experiences instead of a one-size-fits-all approach. With contextual trigger activities like cart abandonment, product reviews, ad clicks, purchases, and category exploration, you can implement sophisticated routing based on critical user actions. This enhances conversion potential by shifting users to tailored communication tracks, increasing the likelihood of engaging them with the most relevant content and offers at the right moment.
Add an Update Step to your Journey
From your Journey canvas:
-
Click + in the top left corner; this will display the steps available to add to your canvas.
-
Select Update Journey from the available options.
-
Drag and drop to your desired spot in the Journey canvas.
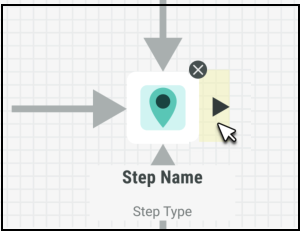
Connections
The simple connector mechanism allows you to create complex workflows with clearly defined relationships between each step. When connecting elements, every step can have both inbound and outbound connections.
To create connections:
-
Hover over a step's edge to display an arrowhead.
-
Click and drag to the next step, and release to create a connector.
-
To label a connector, click it and add a name in the Edit Pane.
-
Use the Label Position slider to adjust label placement as needed.
Configure the Update Step
To configure this step, click on the icon in the canvas. This will open a panel on the left hand side of your screen with the associated settings where you can begin filling out each field accordingly.
Once complete, either click Save in the top right hand corner of your screen to save your changes and exit the Journey, or click Apply to save and continue updating the Journey.
Name
The system will automatically provide a default name to the Step, however we recommend updating this so that each Step’s name is clear and descriptive, and therefore easier to identify.
To change the name of your step, you can either:
-
Click on the default name directly on the canvas and type your preferred name
-
Enter a new name under Name from within the editing panel
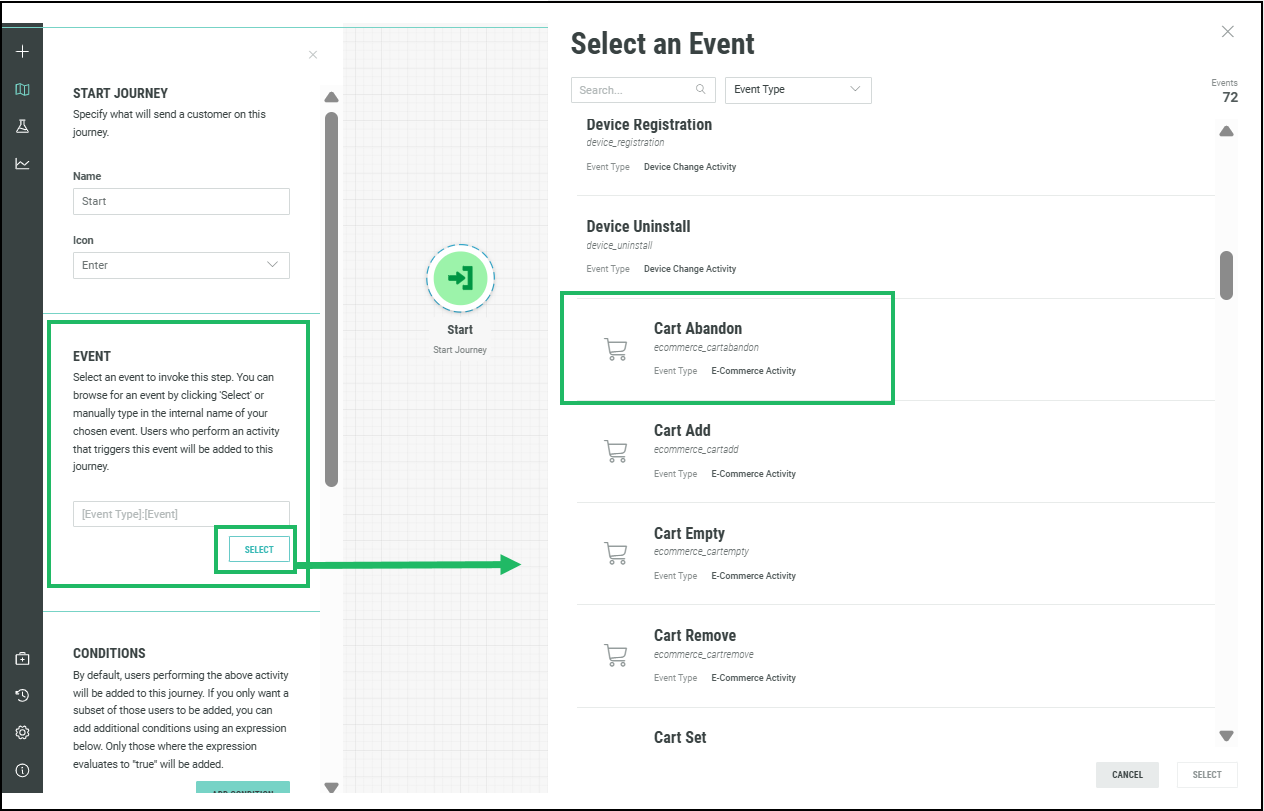
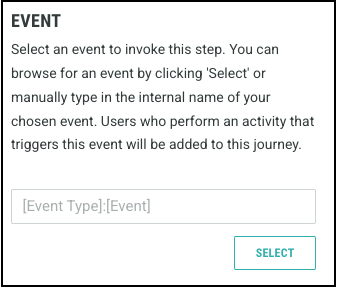
Event
In this field, you can define which customer event will trigger this Step. Customers will move through this Step in the Journey as they perform the event related action in real-time, such as making a purchase or signing up.
Whenever a customer performs certain actions in Zeta applications and your other integrated marketing platforms such as websites, they are identified as Events. Journeys waits to be told about these events by the other Zeta apps, like Cheetah Digital and Interactive Moments. These apps are known as Producer apps.
The Producer apps need to be configured to send the event data to Journeys based on the occurrence. These producer apps need to be configured to send data to Journeys based on a trigger. Journeys will receive Event data whenever a customer performs an action that triggers an event, and accordingly the customer is placed at the start or taken to alternate paths in the Journey.
Events can be used to place a customer into a Journey, guide them to an alternate path within a Journey, or even have them start another Journey based on their actions. Journeys provides a predefined list of common events for you to choose from. Similar events (e.g., a purchase) are grouped into event types.
You can configure your Journey steps to be based on these predefined Events and take the customer through an intended path to exploit opportunities based on the customer behavior.
Note: Ensure that an Event Map with this event type is available in Cheetah Digital, and Moment is available in Interactive Interactive Moments, based on the application selected for the Journey. Without the corresponding Event Maps and/or Interactive Moments (based on your app selection), your Journey will not start or function as intended.
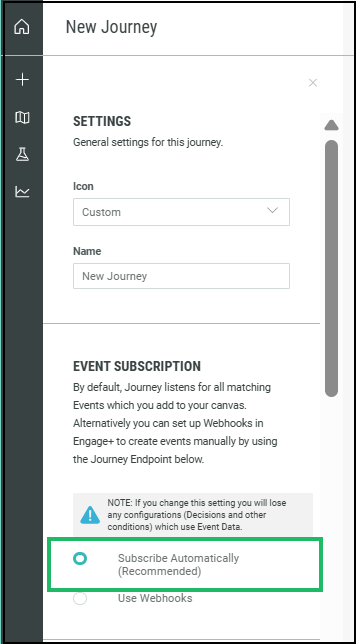
Note: When configuring your Journey Settings, you can have your Event Subscriptions set to either Subscribe Automatically or Use Webhooks. Based on this selection, the method for selecting your events in the Step will differ. Refer to Journey Settings for more details.
Events from ZetaEvent Stream (Subscribe Automatically)
You can use events from multiple event sources, specifically, the applications selected in the App Selection field within the Journey's settings. To do this, you'll first need to configure the necessary settings in your source applications.
Cheetah Digital:
To use event data from Cheetah Digital, you must first configure your Event Maps. These maps make event data available to Journeys based on the configured triggers.
When you set your Journey's Event Subscription setting to Subscribe Automatically, it will subscribe to all the event data sent from Cheetah Digital.
Based on the event data required for your Journey steps, you must select the appropriate event in the Event field within your Step settings.
For this data to be available in your Journey, an Event Map with the same Event Type must exist.
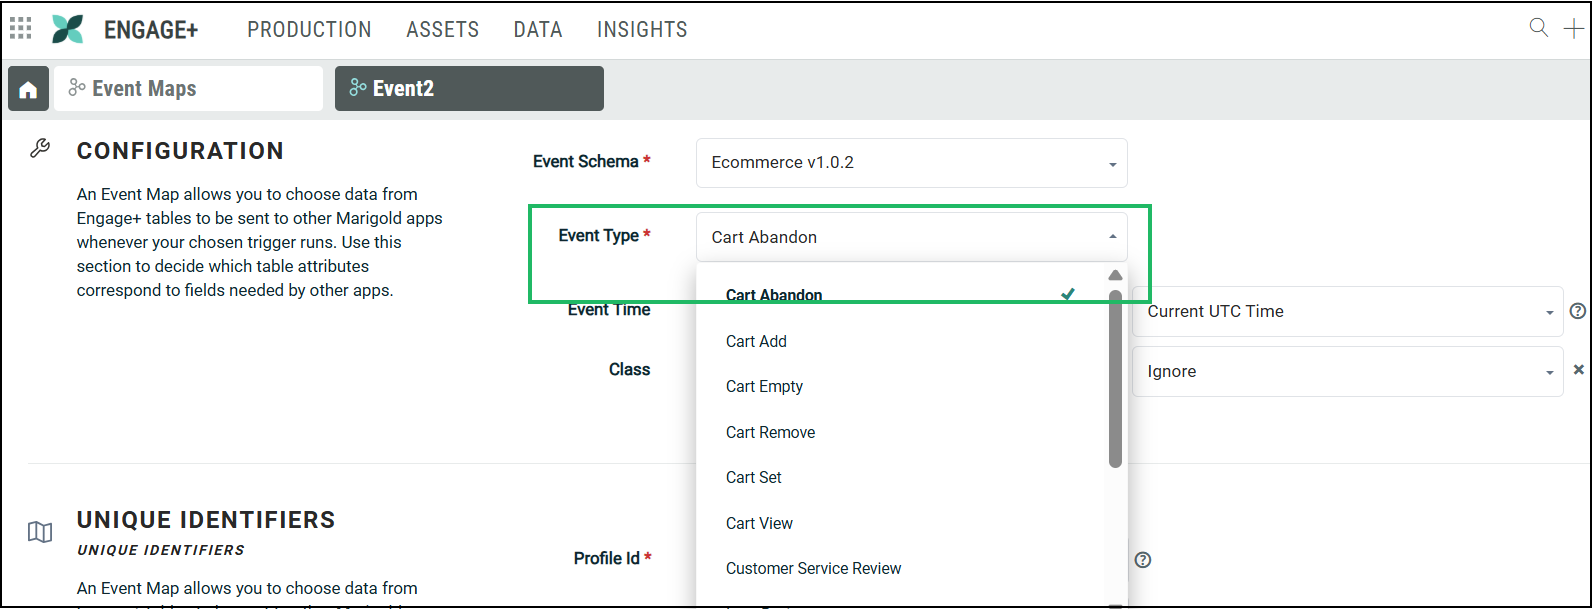
For example, to use the Cart Abandon event in the Start step of an Abandoned Cart Journey, you must have an Event Map created with the Event Type: Cart Abandon.
Note: You do not need to create a separate Event map for every Journey. You only need to ensure that an Event map with the required Event Type exists to send the appropriate event data from Cheetah Digital. Once this data is available, it can be used across multiple Journeys.
Similarly, you can have multiple Event maps linked to the same Event Type but configured with different conditions, such as different triggers or schedules. For example, different online stores can each have their own trigger mapped to the same Purchase Event Type.
Contact your Zeta representative to provision Event maps in your account, and set up the necessary Event Schema and Event Types.
To create your Event maps, refer here for instructions.
Interactive Interactive Moments: To use events from Interactive Interactive Moments application, you must first configure your Interactive Moments. These Interactive Moments listens for specific signals and triggers a pre-defined response based on the information contained within those signals. A Moment defines “when” and “how” actions are executed, like sending a notification or an email 2 hours after the cart was abandoned.
Refer Interactive Moments for more details.
To select your Events when your Journey is set to Subscribe Automatically, for Event Subscription:
-
In the Event field, click Select to open the list of events to choose from.
-
In the displayed popup window, select the event you want the step to be associated with. You can also use the search option to find an event from the list.
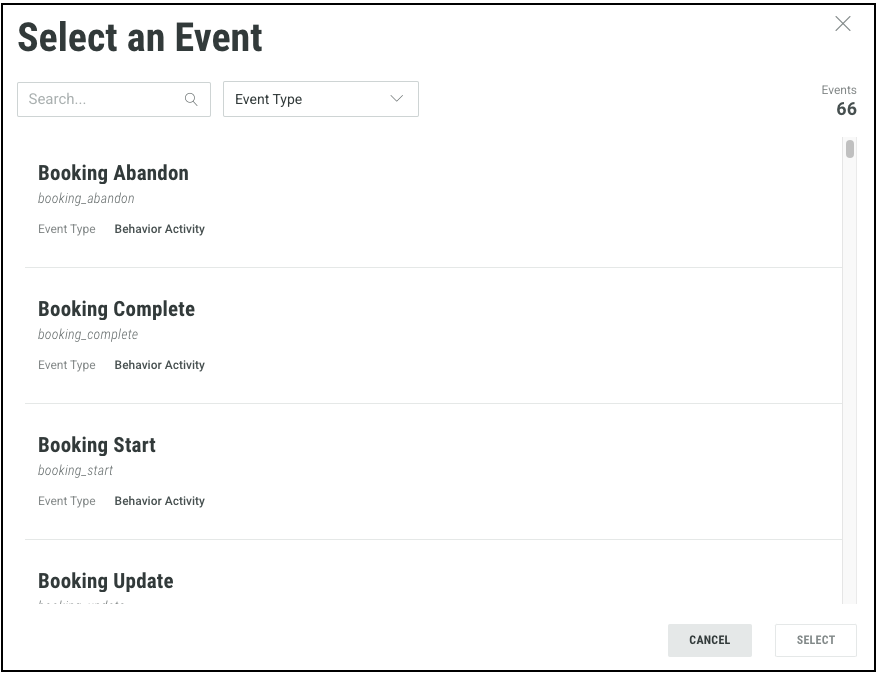
Alternatively, you can use the Event Type to filter the events. An Event Typerepresents a group of similar events. Most of the events that can be used in your Journey Steps are available in these Event Types: E-Commerce Activity, Campaign Activity and Profile Sync Activity.
-
Click on your preferred event and then click Select.
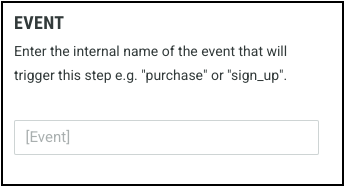
Events from Webhooks
If your Event Subscription is configured to use Webhooks, ensure that the corresponding Webhooks are created within Cheetah Digital to transmit event data to Journeys. You will need to manually enter the event name exactly as it appears in the JSON payload defined within the Cheetah Digital Webhook.
Note: The Journey uses events from your selected applications (Cheetah Digital, Interactive Interactive Moments). By default this is set to all of the applications available on your account.
Note: You can select the application to align with your specific needs and objectives, as this choice will determine the events you can access and track throughout your Journey. For more details refer to Journey Settings.
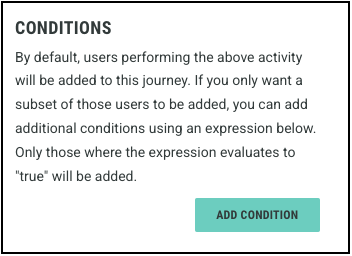
Conditions
The Conditions option allows you to set up certain conditions or criteria that users must meet in order to enter the Step. For instance, you may wish only those from a certain location be allowed to enter (a Customer Attribute Condition), or that they clicked on a specific link (an Event Attribute Condition), or you could enter a literal condition as well.
The condition expression allows for real-time personalization by enabling you to create complex conditions to segment your users.
To define the conditions for a Step:
-
Click Add Condition to open the expression builder.
-
Name your condition for future reference.
-
Start typing or use the drop-downs to build your own expression.

You can choose from two types of data to build your expression: Customer Data and Event Data.
-
Customer Data: Selecting Customer Data allows to personalize a customer’s experience by creating conditions based on Customer Data, such as how much they spent or their preferences. You will then be presented with the Member attributes list from the Data Source table defined in Journey setting. Select the required attribute.
-
Event Data: Selecting Event Data allows to build conditions based on customer behaviors, such as interactions with your campaigns or specific actions they take. You will then be presented with the Event attributes list. Select the required attribute.
You can now complete your condition by selecting:
-
Comparison Expressions: Select from the list of supported comparison expressions provided to help you evaluate the specified condition.
-
Value: Specify the string value to compare in your condition, or select Null if you want the expression to be evaluated against a null value.
You can enhance your condition by using the AND (exclusive) or OR (inclusive) operators to construct more complex logical expressions.
For more details and examples, refer here.
-
-
Click Save to save your Condition.
Note: The data available for selection here is from the Data Source table selected in the Journey settings. Verify that you've selected the appropriate table from Cheetah Digital in the Data Source section in the Journey Settings. Refer to Journey Settings for more help.
If you are using Zeta Interactive Interactive Moments from multiple sources, such as your website, POS, or other systems, by default, Journeys will listen to all of these. However, this can be restricted by specifying the audience IDs you want to use. However, you can also use the Condition to segment your users.
More details about this can be found in Journey Settings.
Adding Notes
Use the notes section to clarify the rationale behind your choices or to highlight any notes for other marketers using the Journey.
