Marigold ID Single Sign On Setup Guide
Marigold ID SSO Integration
Marigold ID supports SAML Single Sign-On; it streamlines user access by requiring a single authentication with your company’s IDP, granting access to Marigold ID and Marigold products without the need to manage additional credentials.

As a Marigold customer, you can configure SSO for Marigold ID app by following the guide below.
IDP Mapping
Okta
If your company is using Okta Workforce Identity Cloud as your IdP, please follow the steps below to obtain the SAML certificate and metadata and pass them to your Marigold Representative.
1. Create “Marigold ID” app with SAML 2.0 and configure the values as below:
1. Single sign-on URL: <any URL>
2. Audience URI (SP Entity ID) : <any URL>
3. Name ID format: EmailAddress
4. Attribute Statements (optional):
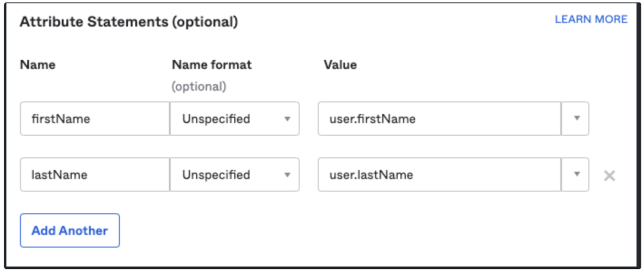
2. Download SAML Certification and metadata and pass to your Marigold representative.

3. Once Marigold’s IdP is configured, Marigold will provide their Okta IdP Metadata and the information below for configuring your Identity Provider to communicate with the Marigold ID Application.
| Client IDP | Marigold Values |
| Single sign-on URL | Assertion Consumer URL |
| Audience URI (SP Entity ID) | Audience URL |
| Default Relay State | Default Relay State URL |
Onboarding users from Azure IDP
1. To create new users, select Persons from the left navigation bar , then click on Add Person
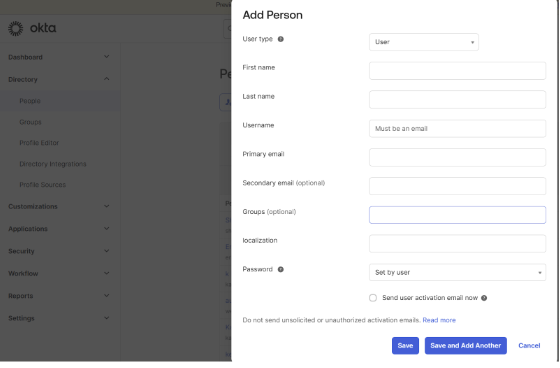
2. Enter the required user information and click Save
3. Next , select the Application from the left navigation panel
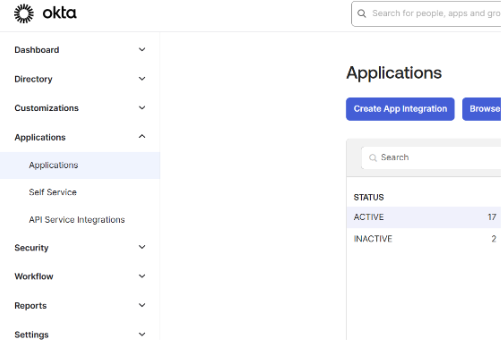
4. Locate the Marigold ID application configured previously for the SAML SSO integration , and click on it
5. It should bring us to the Application page , and from there , click on the Assignments tab
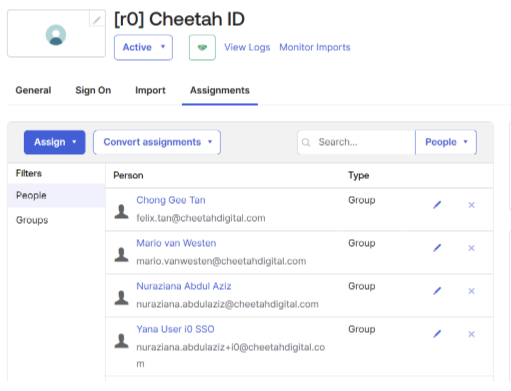
6. From here we can select whether to assign users or groups into this application by clicking on the Assign button
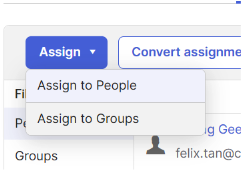
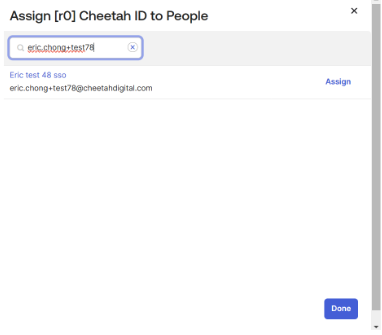
7. Search for the user or group to be assigned and click done
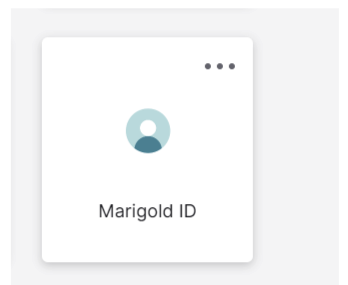
8. Once the user is assigned with the group , the user can login from Okta and they will see the Marigold ID application tile
9. User can also use vanity URL to login , this can be requested from Marigold ID team.
AZURE - SAML Signing Certificate
If your company is using Azure IdP, please follow the steps below to obtain the SAML certificate and metadata.
1. Create "Marigold Id" Application in your Azure interface

2. Setup Single Sign-On by clicking app → Single Sign-on
3. Configure the values as below:
1. Identifier (Entity ID): <any URL>
2. Reply URL (Assertion Consumer Service URL): <any URL>
3. Attributes and claims are configured as below key
1. email: user.userprincipalname (The user.userprincipalname may vary depending on the client's settings. When configuring this attribute, ensure to use the correct email attribute as configured by the client to ensure the submission of the correct email address. Azure employs various types of email variables, which may differ significantly from other platforms.)
2. firstName: user.givenname
3. lastName: user.surname
4. From the same Single Sign screen, note and pass the following details to Marigold :
1. Certificate
2. Federation Metadata XML
3. Login URL
4. Microsoft Entra ID Identifier
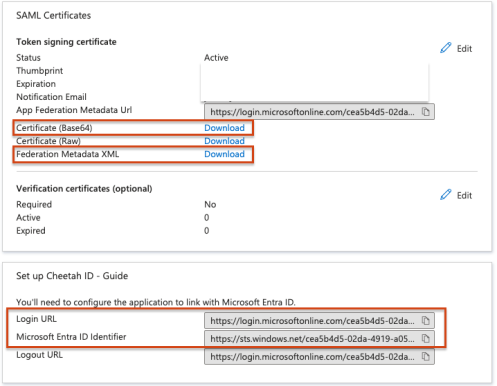
Once Marigold’s IdP is configured, Marigold will provide their Okta IdP Metadata and the information below for configuring your Identity Provider to communicate with the Marigold ID Application.
| Client IDP | Marigold Values |
| Single sign-on URL | Assertion Consumer URL |
| Audience URI (SP Entity ID) | Audience URL |
| Default Relay State | Default Relay State URL |
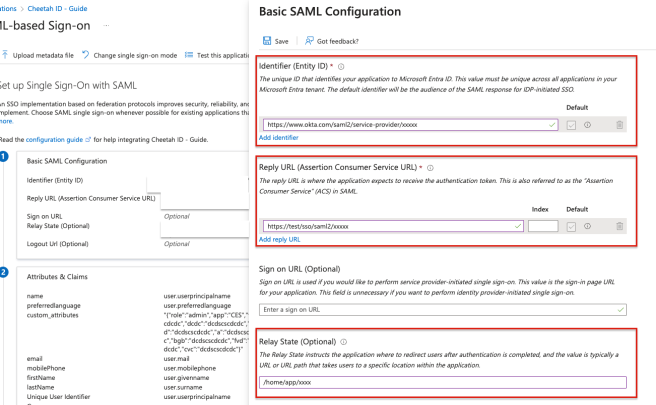
Please note that the default RelayState is needed for your company’s IDP to directly forward to the Marigold ID application when your user logs into MarigoldId Okta.
When the above is completed, please get in touch with the Marigold team so that a meeting can be arranged to test the integration.
Microsoft Azure SSO User Onboarding
The following are the steps to onboard users from Azure IDP after the integration with SSO login with Azure as the IDP.
1. To create new users, select Users > All Users from the left navigation bar. The User Management page is displayed.
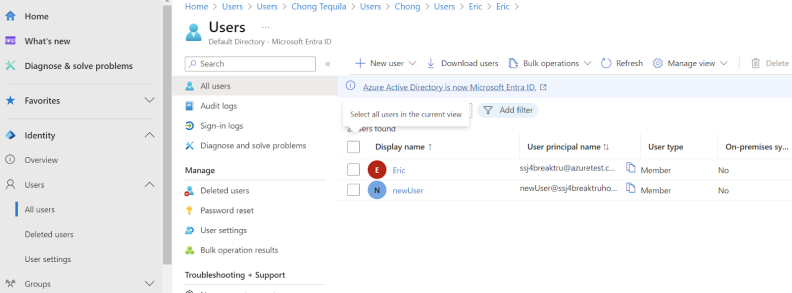
2. Click New User.
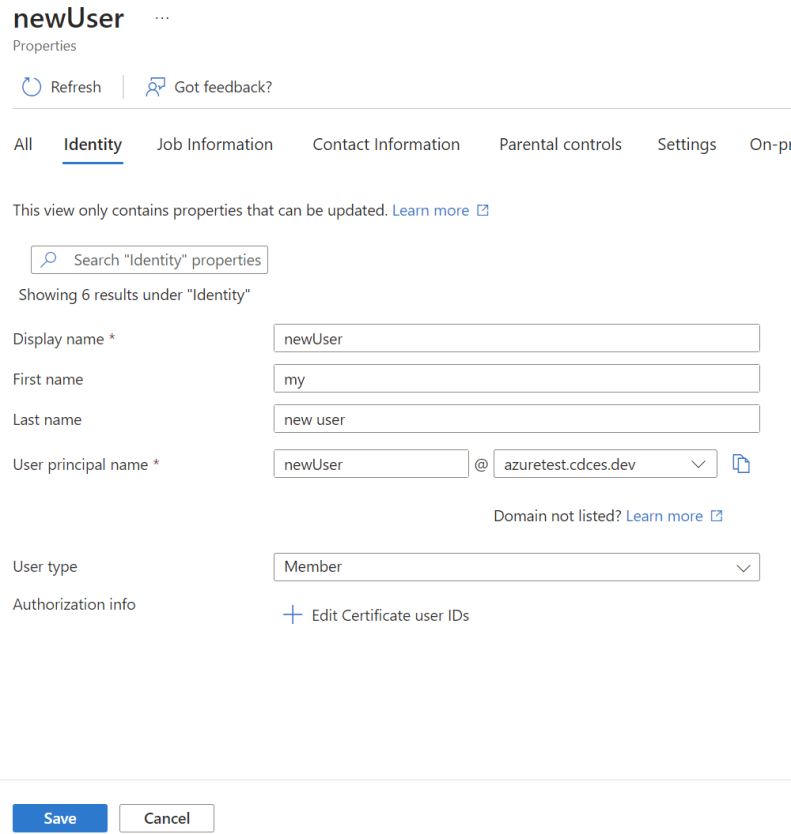
3. Enter the required user information and click Save. Make sure the correct domain is selected for the User Principal Name field.
4. The next step is to assign the user to the Enterprise Application created to integrate with Marigold ID. Select Application > Enterprise Application from the left navigation bar.
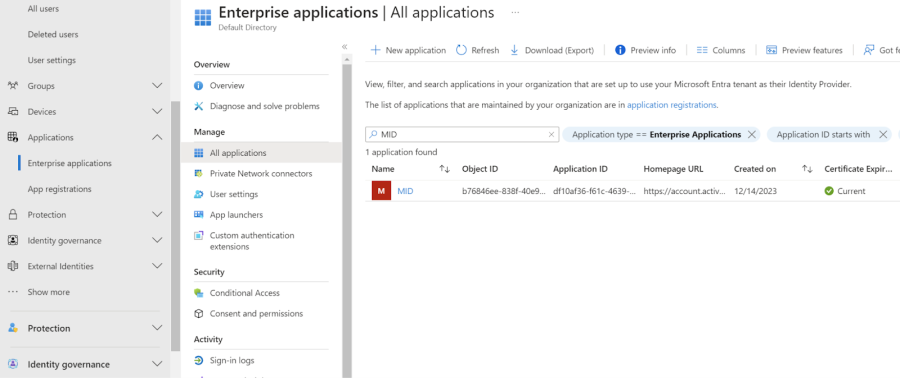
5. Find and select MID from the application list.
6. In the displayed application window, select Manage >Users and Groups.
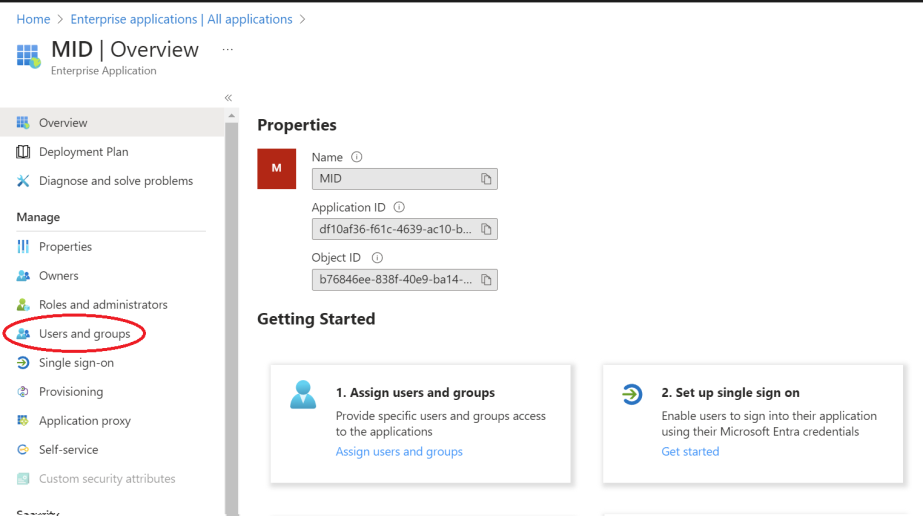
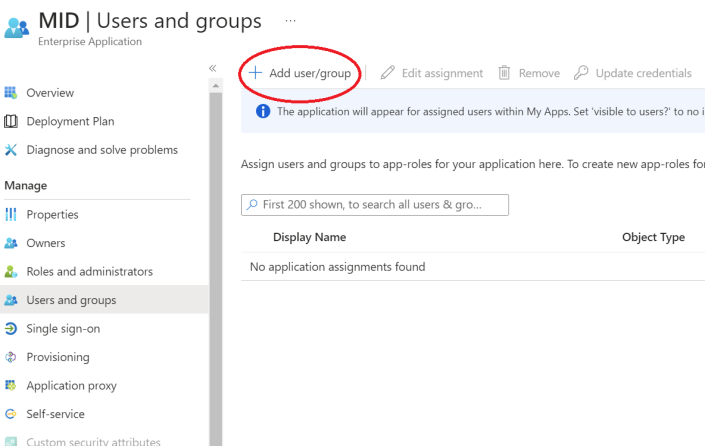
7. Click Assign users and groups. In the displayed Users and Groups window, click Add user/ group.
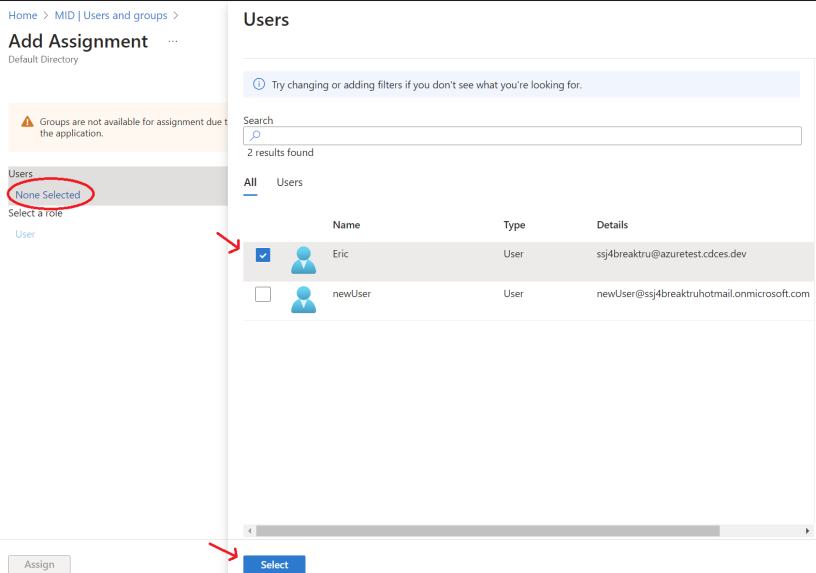
8. Click None Selected, then select the user to be added from the Users popup window. and click Select.
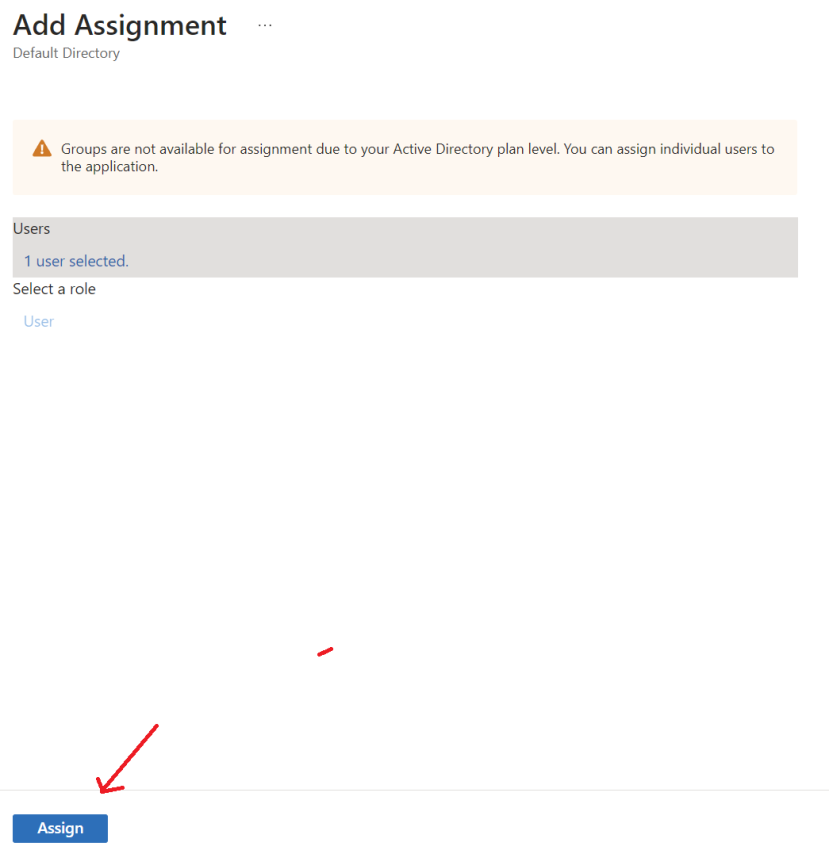
9. Finally click Assign to save the selection.
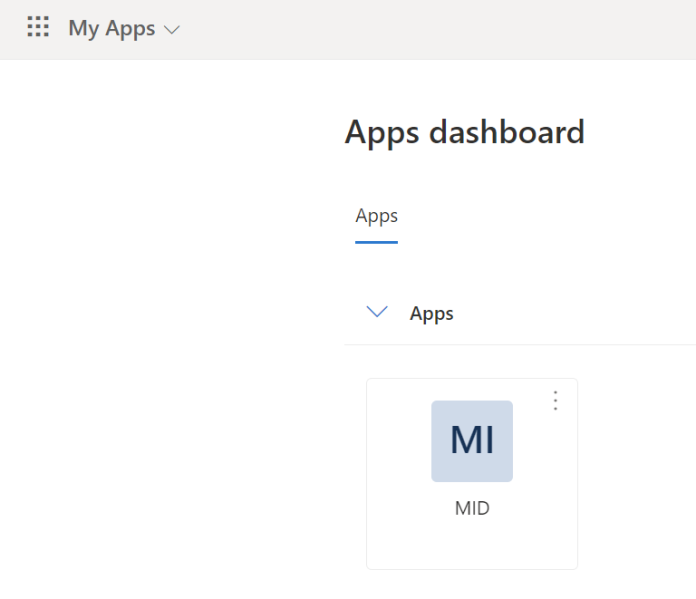
10. The user assigned to the application can now log in from the Azure domain and will see the Marigold ID application. Clicking the application will redirect the user to Marigold ID, where their account will be automatically created if it does not already exist.
Additional Information
SSO Group Mapping allows you to map groups in your internal user directory to User Groups in Marigold Products. This feature will be available in Q2, 2024.
If you wish to enable SSO to access Marigold ID and Marigold products before Q2 2024, please note the limitations and additional steps below:
The steps for SSO implementation in Marigold ID are different between existing and new customers as explained as follows:
| Existing Customer | New Customer |
|---|---|
|
If you are an existing Marigold customer using Engage+, Loyalty and/or Platform (EDP), Marigold team will do a pre-migration for your existing users so that their existing access (e.g. roles in Engage+, Loyalty, or EDP ) are retained. Subsequently, new users will be granted access to Marigold ID via your company’s IDP. Please note that when the new users access Marigold ID from your company’s IDP, their accounts will be created via Just-In-Time (JIT) in Marigold ID, but will not have access to Marigold products yet. Please follow the steps below to grant Marigold product access to the new users. |
If you are a new customer, or your company does not have user accounts created in Marigold Engage+, Loyalty or Platform (EDP) yet, users will be granted access to Marigold ID via your company’s IDP. When they access Marigold ID from your company’s IDP, their accounts will be created via Just-In-Time (JIT) in Marigold ID, but will not have access to Marigold products yet. Please follow the steps below to grant Marigold product access to the new users. |
For new users whose accounts were created via Just-In-Time (JIT) in Marigold ID, please contact Marigold Support Team or your company’s organization admin to grant them access to Marigold products through Marigold ID.
