Launch an Email Campaign
Launching
Once your Campaign has successfully been proofed and audited, it's ready to be launched.
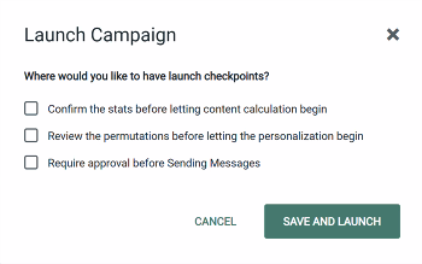
Campaigns that use a Engage+ table as the data source can optionally be launched with the following approval "checkpoints:"
-
Queuing Statistics: Confirm the stats before letting content calculation begin.
-
Content Permutations: Review content variations before letting personalization begin.
-
Sending: Require approval of the overall Campaign before sending messages.
For each checkpoint that's enabled, an approval will be required before the Campaign can proceed to the next step.
Note: Campaigns that use the Engagement Data Platform (EDP) as the data source do not support the use of launch approval checkpoints.
1. Launch a Campaign
1. Navigate to the Campaign.
2. Click the Review tab.
3. At the bottom of the screen, click Launch Campaign.
4. The Launch Campaign pop-up window is displayed:
-
For Campaigns that use a Engage+ table as the data source, place check marks next to the processing steps where the platform should stop and require a manual approval.

• For Campaigns that use the EDP as the data source, review the Campaign information (Audience, subject line, etc.)

5. Click Save and Launch.
Note: Clicking Save and Launch does not deploy the Campaign at that moment, but instead begins the Campaign launch process. If a Campaign is scheduled to deploy at a future time, it must be launched and approved first so that it will automatically deploy at the desired time.
2. Approve a Launched Campaign
To approve a launch step that's awaiting approval:
-
Navigate to the Campaign.
-
Click the Status tab.
-
In the Review and Approve section, click Approve next to the step that's awaiting approval.
-
The system displays a warning dialog box. Click OK.
-
Pickup Changes
