Testing Journeys: Using Simulations
Journeys is an orchestration tool that offers non-technical marketers end-to-end capabilities to manage and deliver personalized interactions at scale. Journeys allows marketers to easily create a multi-step campaign helping them browse, build, publish, and manage advanced journeys based on existing Engage+ assets.
In order to ensure that your journey works, Journeys comes with some tools which allow you to test end-to-end without sending any content to customers and highlights areas that need to be addressed. Whilst this does not completely replace live testing, it allows you to address items that do not work before you get to this stage.
Applying and Saving Changes
Creating multi-step campaigns, applying, or saving changes on the canvas highlights any configuration issues within your canvas (checklist of what you have not finished). This pops up as a large orange banner. On the canvas, any steps not properly configured are highlighted with an “!” badge.
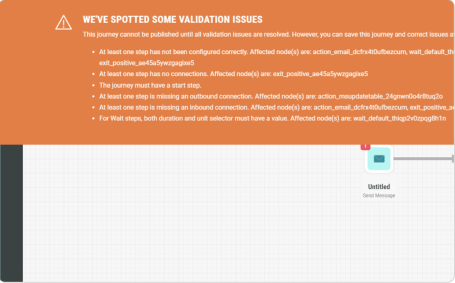
Journeys allows marketers to save their journey at any point of a build. This gives marketers a space to create a journey, to save at any point of a build, and highlight a checklist of what they haven’t finished. However, in order to simulate a journey, you need to ensure that all of your steps are configured and connected correctly so that you have no warning badges on the canvas.
Here is a demo shown by deliberating causing an error:
- Click on the Start Journey step.
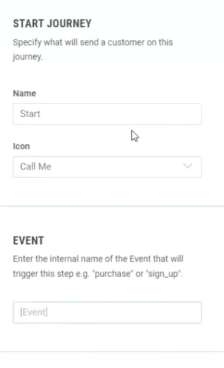
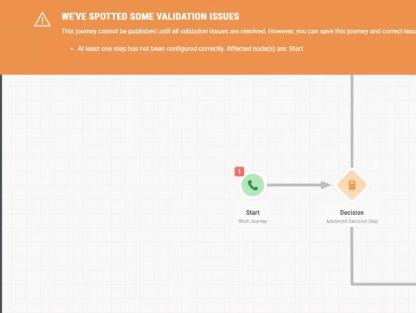
- Remove the Event and click Save to apply the changes.
- A validation error box pops up. This reminds you of your validation issues through the highlighted exclamation point.
Types of Warning in Journeys
Warnings in Journeys are color-coded, and have an associated icon which helps you to understand whether things need to be fixed now or fixed at a later date (i.e. if you have a 3 month journey, you may want to set up your creatives within campaigns closer to the time).
- Red Warnings(X Icon): means that your journey will not run at all unless you have resolved this issue.
- Amber Warnings (! Icon): means that something (normally in another system) still needs to be configured for your journey to work
- Green (Tick Icon): means that everything is fine
Health Checks
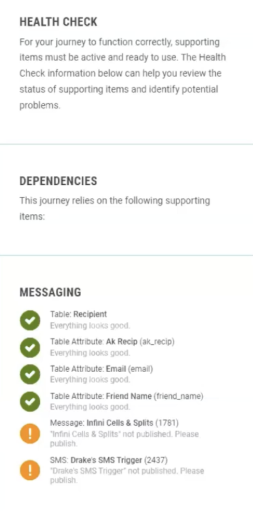
Because Journeys requires other apps to send content to your customers, Journeys comes with a Health Check.
This tool checks to ensure everything outside of Journeys is configured correctly.
Journey Healthcheck checks:
- Whether you have a table set up
- Whether any customer attributes needed for conditions (e.g. customer’s communication preference for a decision)
- The Status of your campaigns
To select a Journey Health Check, click on the first aid box icon for Journey Health Check in the left side menu. The side menu pops up a health check to inform you where steps are or aren’t working.
Remember, you can always come back to the journey to fix these errors.
Simulating Recipients
In order to check to make sure that your journey is working as anticipated, Journeys has a Journey Simulation tool.
This tool allows you to choose a recipient from your recipient table and run the journey as if it were real, without the wait and without sending. It checks the following:
- That your journey is able to invoke (tell Engage+ to send) a message without a problem
- That your conditions for your Start/Update and Decision Steps are working
- That everything is properly connected and that the recipient you choose travels down the correct path
To select the recipients in Journey Simulation and view a simulation:
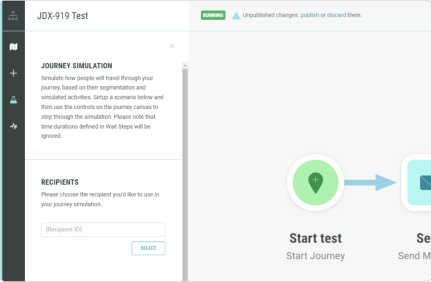
- Click in the half-full flask
 icon for Journey Simulation on the left side menu.
 - Enter the Recipient ID in the field if you know it. Otherwise, click Select.
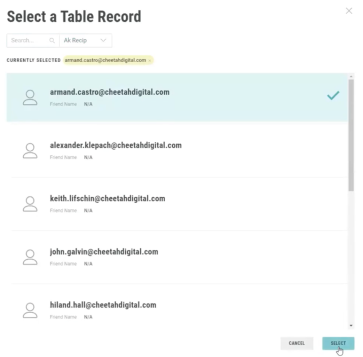
- In the Select Table Record pop up, search and click on the recipient you are requesting.
- Click Select.
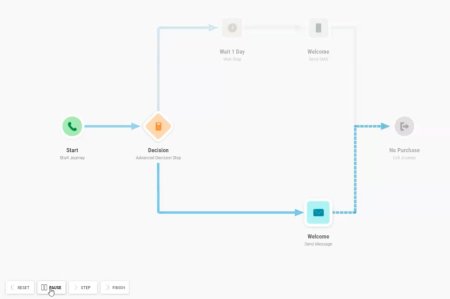
- Click Play, Step, or Finish to move the Journey along. This example uses the Play button.

- After pressing play, based on their member attribute, this journey pushes the member where they need to go to reach the Exit step.
Configuring the display of your recipient list
Does the list of recipients you see have information that you don’t understand? Are your filtering/search options limited?
This is because when you set up the table for your journey, you are prompted to choose 3 attributes. These attributes determine what you can see for each record.
You can change this at any point without affecting your journey by going to JOURNEY SETTINGS > DATA SOURCE and using the Table Selector. Don’t change the table. Instead, change the attributes you want to see when you view the list of records.
Top Tip for Effective Simulations
When you test your journey, choose a range of customers who have the attributes which appear in your conditions or decisions.
- Go to Journey Healthcheck: this will get you a list of all attributes you use in your journey.
- Find recipients with those attributes: to make this easier, configure the display of your recipient list by choosing those attributes so that you can search for matching customers.
