Configure Application Role
When adding access to a application for a user, the platform assigns a default Role to the user (for example, the default role Loyalty for is “CSR”). Please note that this Role is different from the Zeta Login Role, and governs the user’s access privileges within that application.
In addition, some Zeta Global applications provide an option called App Attributes, which allows Organization Administrators to select the desired application-specific Role, and also to customize the privileges granted to the user by that Role.
Note: The App Attributes feature must be enabled for your Organization. In addition, App Attributes must be enabled for a Business Unit. Please speak with your Zeta team for more information. Currently, this feature is available only for Grow by Zeta and Loyalty by Zeta.
Note: This feature is available for Organization Administrators.
To manually assign an application-specific Role to a user:
-
Log into the Zeta Login User Workspace.
-
Click your profile icon in the top-right corner of the screen. The Profile Info pop-up window is displayed.
-
Within the Profile Info pop-up window, click Zeta Login Administration. This will take you to the Zeta Login Administration environment, with the Users tab selected by default.
-
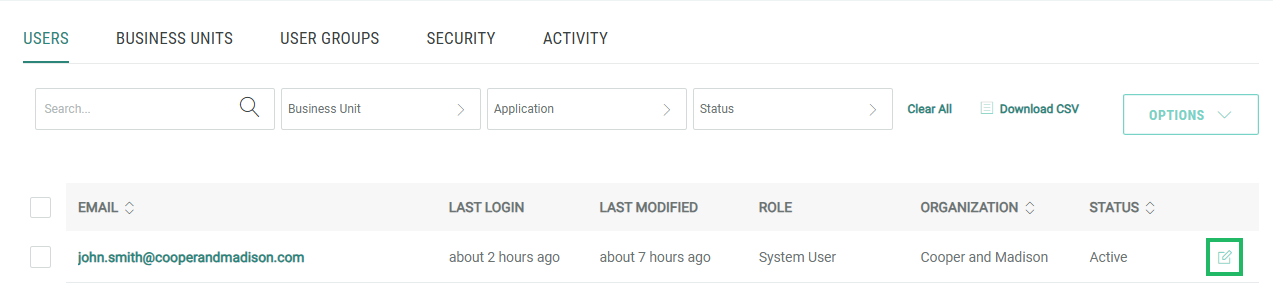
Search for the desired user (see View All Users for more information on the search options).
-
Next to the desired user, click the Edit icon. The User Workspace for the selected user is displayed, with the Profile tab selected by default.
-
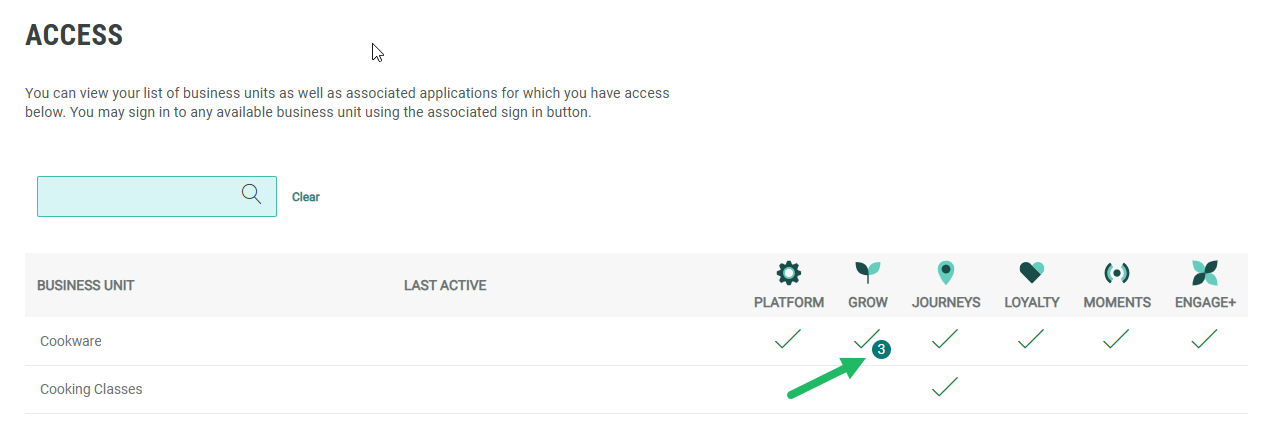
Select the App Access tab. This tab displays all the Business Units and applications to which this user has been assigned.
Note: If this user has previously been assigned an application Role, the platform displays a small badge that indicates the number of custom privileges granted to this user for that application and Business Unit.
-
Click App Role Config. The App Role Config pop-up window is displayed.
-
From the Business Unit drop-down menu, select the desired Business Unit.
-
From the Application drop-down menu, select the desired application.
Note: Currently, the ability to customize an application Role is available only for Grow.
-
From the User Group drop-down menu, select the desired User Group.
-
From the Roles drop-down menu, select one or more standard Roles.
-
Based on the selected Role, you may be able to customize the user’s access privileges by adding one or more additional permissions. Beneath Additional Roles, check one or more available permissions.
-
Optionally click Review to see a summary of the user’s selected Role assignment.
-
Click Save. A success message is displayed; click OK.
-
On the App Access tab, you will see a small badge that indicates the number of custom privileges granted to this user for that application and Business Unit. Hover your mouse over this badge to see a tooltip with additional details.