
Invite a New User
The Zeta Login Administration environment provides administrators with the ability to onboard new users and to invite them to set up their Zeta Login. This feature triggers the deployment of the “Welcome Email” message (see New Zeta Login Setup for more information). As part of this onboarding process, you can select the User Groups (Organization Administrators only), the Business Unit(s), and the Zeta application(s) to which the new users are assigned.
Note: This feature is available for Business Unit Administrators and Organization Administrators.
To invite one or more new users to set up their Zeta Login:
-
Log into the Zeta Login User Workspace.
-
Click your profile icon in the top-right corner of the screen. The Profile Info pop-up window is displayed.
-
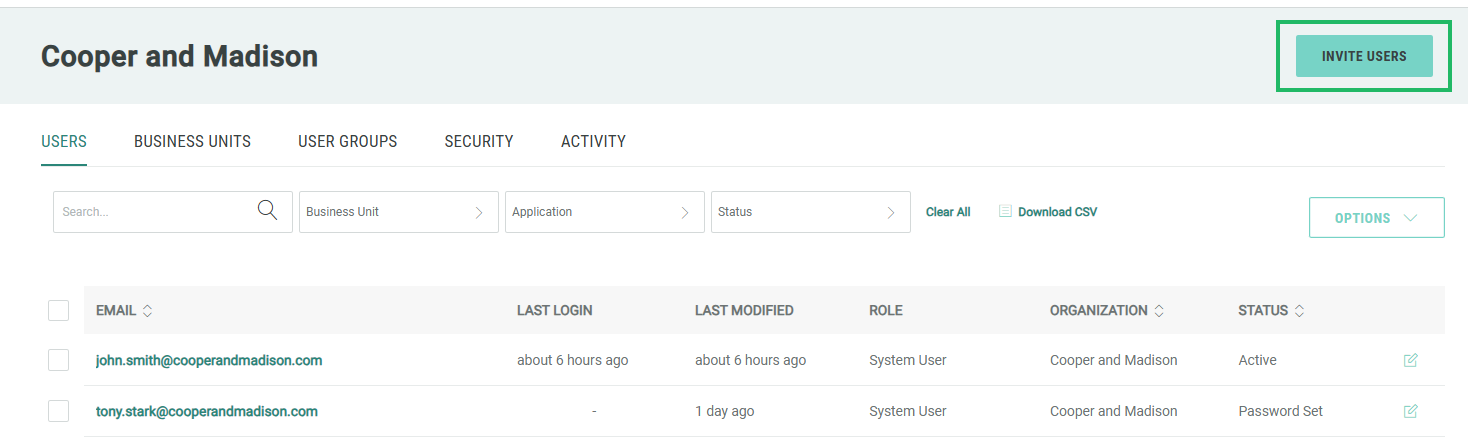
Within the Profile Info pop-up window, click Zeta Login Administration. This will take you to the Zeta Login Administration environment, with the Users tab selected by default.
-
Within the header bar, click Invite Users. The Add Users pop-up window is displayed.
-
In the text field, enter one or more comma-separated email addresses.
-
Click Invite and Assign Applications.
-
For Organization Administrators only --- if you have User Groups enabled in your Organization, the Select User Groups pop-up window is displayed. Check one or more User Groups, then click Next. Or, to not assign this user to any User Groups, click Skip Assigning Group.
Note: If you added the user to at least one User Group in the previous step, the platform will automatically assign this user to the applications / Business Units defined in the User Group, allowing you to skip the following steps. User Groups streamline the new user onboarding process, so you don’t have to make these assignments manually for each new user (see Getting Started with User Groups for more information). If you added the user to at least one User Group, the platform displays a summary of the new user’s access privileges granted by their User Group(s). You can click a User Group name within this summary to view the User Group Details screen.
-
If you didn’t add the user to at least one User Group in the previous step, the Add Business Unit to Users pop-up window is displayed. Organization Administrators will see all Business Units; Business Unit Administrators will see only the Business Units they administer. Optionally search for a Business Unit by entering all or part of its name in the Search field.
-
Check one or more Business Units to which the new user(s) should be assigned. Optionally check Select All to automatically select all displayed Business Units.
-
Click Next. The Add Application to Users pop-up window is displayed.
-
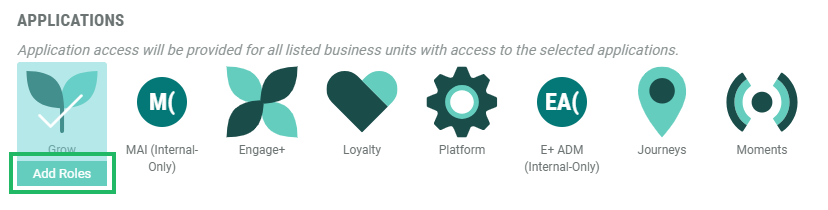
Select one or more applications to which the new user(s) should be assigned.
Note: Some applications have an additional option to manually assign an application-specific Roles to the new user(s). See Role Assignment below for more details on this process.
-
Click Done. The platform adds the new user(s), and sends the “Welcome Email” message.
Role Assignment
When onboarding a new user, the platform assigns a default Role to the user (for example, the default role for Loyalty is “CSR”). Please note that this Role is different from the Zeta Login Role, and governs the user’s access privileges within that application.
In addition, some Zeta applications provide an option called App Attributes, which allows administrators to select the desired application-specific Role, and also to customize the privileges granted to the user by that Role.
Note: The App Attributes feature must be enabled for your Organization. In addition, App Attributes must be enabled for a Business Unit. Please speak with your Zeta team for more information. Currently, this feature is available only for Grow by Zeta and Loyalty by Zeta.
If an application has a manual Role assignment option, an Add Roles button is displayed beneath the application icon when you select it.
To manually assign an application-specific role to a new user:
-
After selecting an application within the Add Applications to Users pop-up window, click Add Roles beneath the selected application. The Add Roles pop-up window is displayed.
-
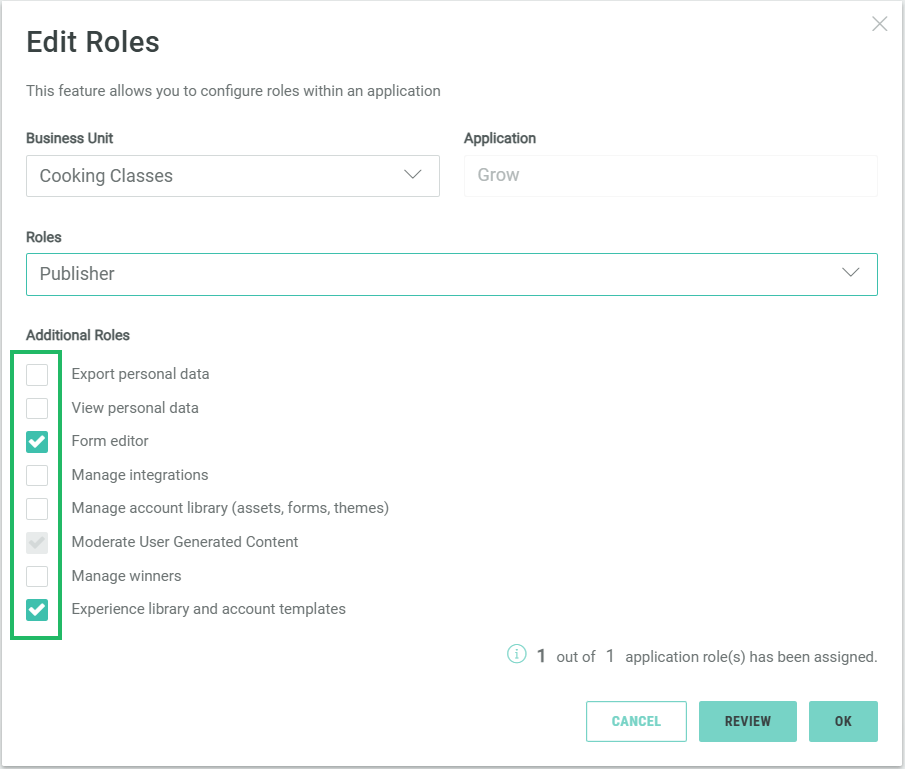
From the Roles drop-down menu, select one or more standard Roles.
-
Based on the selected Role, you may be able to customize the user’s access privileges by adding one or more additional permissions. Beneath Additional Roles, check one or more available permissions.
-
Optionally click Review to see a summary of the user’s selected Role assignment.
-
When finished, click OK to return to the Add Application to Users pop-up window.
-
Click Done. The platform adds the new user(s), and sends them the “Welcome Email” message.
