A good analytics strategy is a key component of any successful marketing campaign. Marigold Grow surfaces events that can be sent to the analytics provider of your choice so that you can analyze views, engagement, drop-off rates, conversions, and click-throughs and then make real-time adjustments to your experience in order to maximize your ROI.
The release
With this release, Marigold Grow is introducing some new event types to enable richer insights as well as providing out-of-the-box integrations with several of the most popular analytics providers so that marketers can setup analytics in their campaigns without having to engage technical teams. Don't see your analytics provider listed below? Let us know so that we can add it to our roadmap, and in the mean time, you can setup your own custom integration with a little JavaScript.
Download the attached document for detailed instructions on how to setup custom analytics.
How it works
Once you have setup your integration, we will include any necessary third-party scripts and start sending analytics events to that system for all of your Marigold Grow Experiences. (Note: We do not dispatch analytics events for "web embeds" and "ad units"; you can learn more about the reasons for this in the attached document).
New events
We've added several new events to support use-cases requested by our customers. Here are a couple of the most asked for:
- form:module:interaction
Surfaced the first time a user interacts with a form field enabling you to measure drop-off rates - action:cta
Surfaced when a user clicks a CTA enabling you to measure click-through rates
Download the attached document for a full list of events.
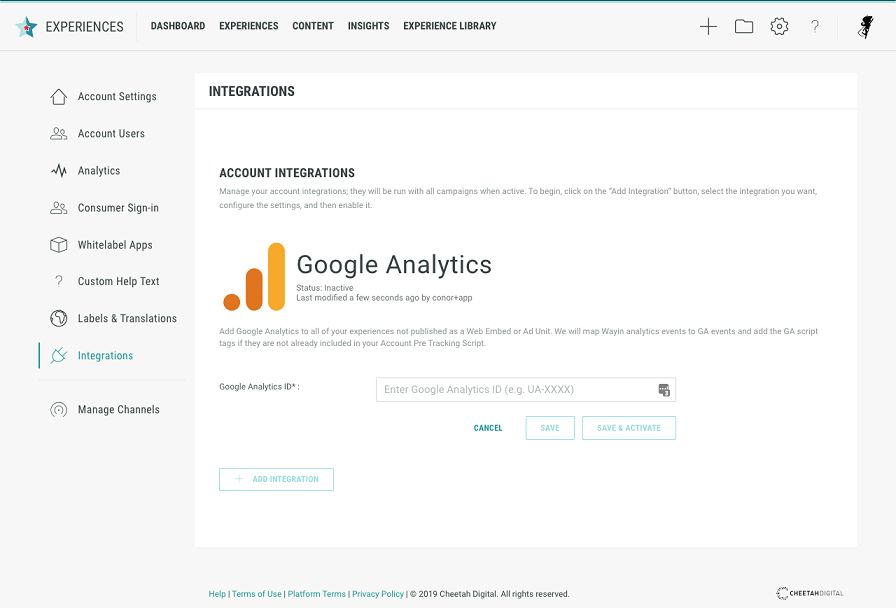
Google Analytics
Note: Web embed and Ad unit destinations are not supported, please see the attached documentation for further information regarding this.
- Navigate to your account integration management area /admin/account/integrations
- Click the Add Integration button
- Select Google Analytics from the available options
- Configure your Google Analytics integration
- Provide the Google Analytics ID
- Click Save & Activate
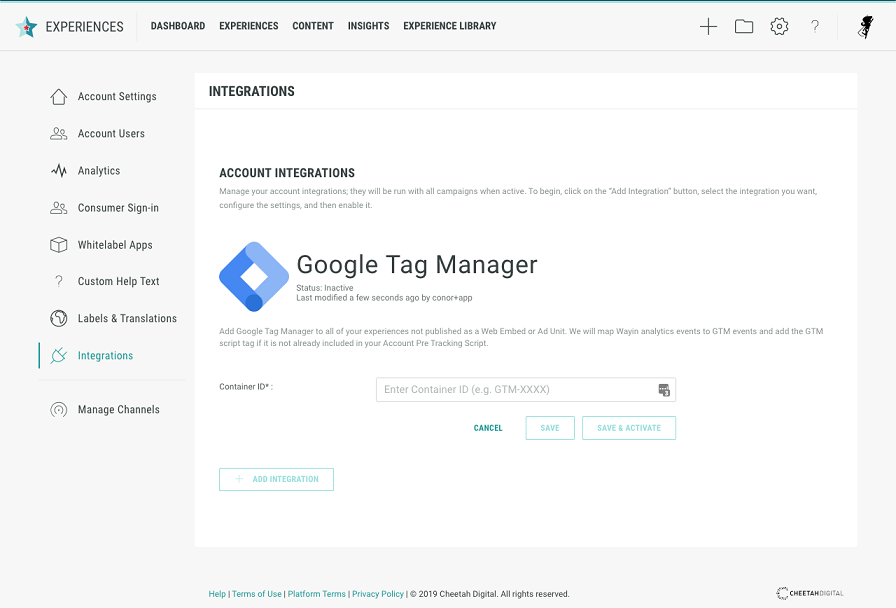
Google Tag Manager
- Navigate to your account integration management area /admin/account/integrations.
- Click the Add Integration button
- Select Google Tag Manager from the available options
- Configure your Google Tag Manager integration
- Provide the Container ID
- Click Save & Activate
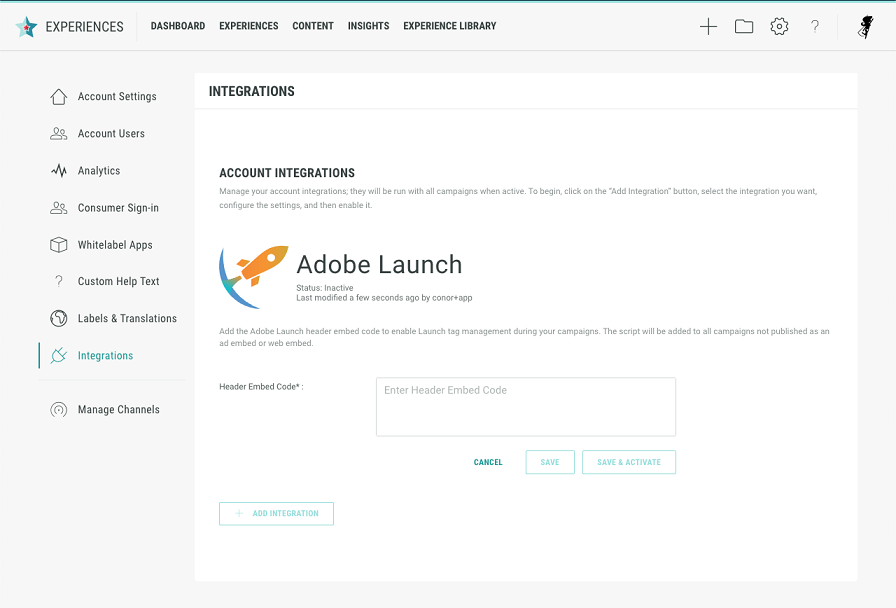
Adobe Launch
- Navigate to your account integration management area /admin/account/integrations
- Click the Add Integration button
- Select Adobe Launch from the available options
- Configure your Launch integration
- Provide the Header Embed Code generated by Launch
- Click Save & Activate