The LiveSocial element allows you to embed the feed from your social networks in your email campaigns. In this article, we'll first go over how to add your social networks to your account, and then cover some of the individual instructions for each of them below.
Supported Social Networks
Add Social Networks to Your Account
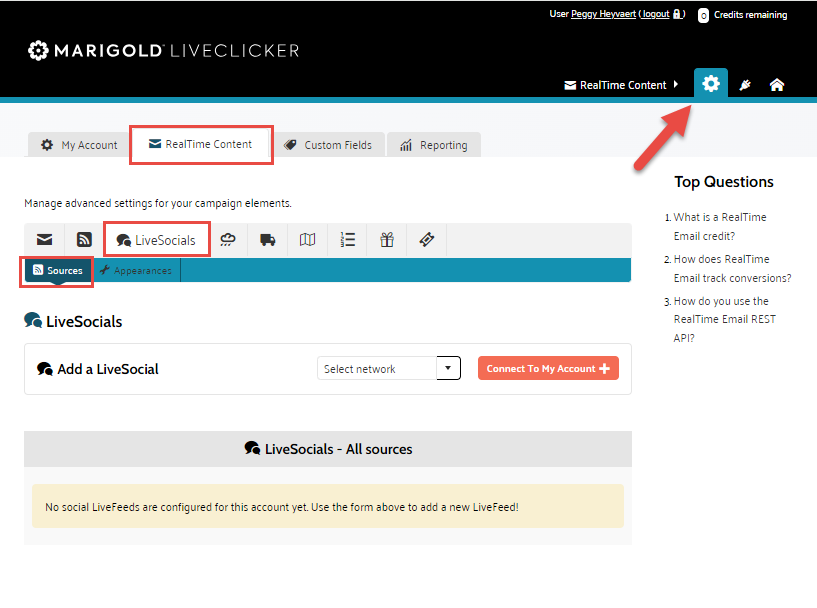
1. Go to Account Settings by clicking on the Gear icon in the top menu.
2. Click on the tab RealTime Content, and then go to LiveSocials > Sources:
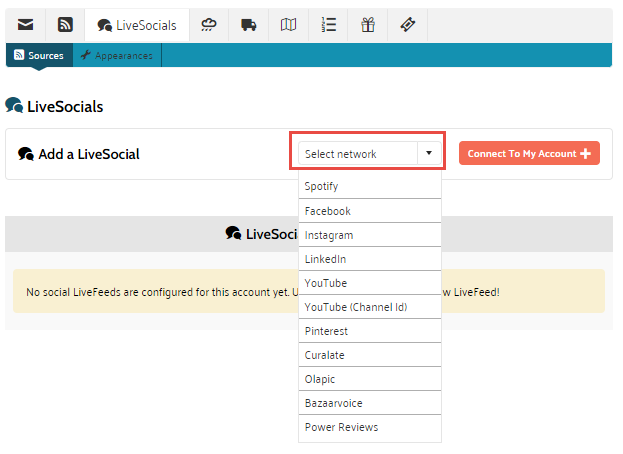
3. In the select network field, click the drop-down to select the social network you would like to add:
4. Click on the Connect To My Account + button, and verify your login details for the selected network. For more details on each of the login options, check out the next section on how to connect to the different social networks.
How to Connect to Different Social Networks
Bazaarvoice
When selecting Bazaarvoice, you will be asked to input your Bazaarvoice API Key. Please have in mind that this must be the Conversations API Key.
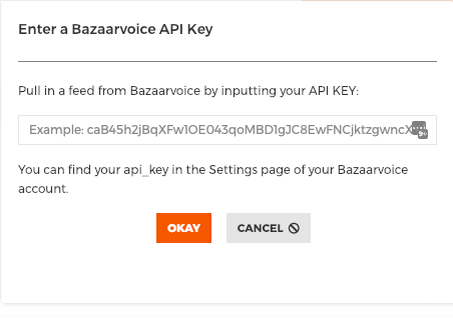
To get an API key you must submit a request through Bazaarvoice following the process outlined in this documentation. If you have any questions on that process, please reach out to your Bazaarvoice account manager for more information.
Once the API key has been entered, click Okay. Your Bazaarvoice social network can now be selected as a source for the LiveSocial element.
Curalate
When selecting Curalate, you will be asked to input your Curalate Datasource ID and Name for your Curalate FanReel or Like2Buy feed:
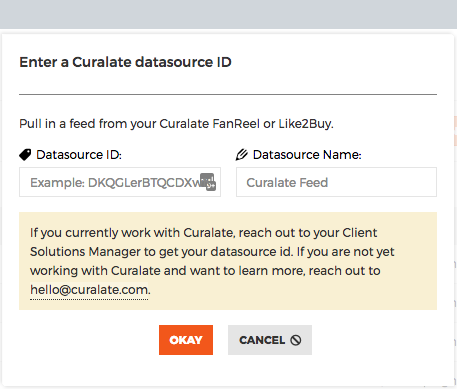
You can obtain the Curalate Datasource ID from your Curalate Client Solutions Manager. Your Curalate account must have API access in order to use this integration. For more information on Curalate, you can reach out to hello@curalate.com.
Once the necessary information has been entered, click Okay. Your Curalate social network can now be selected as a source for the LiveSocial element
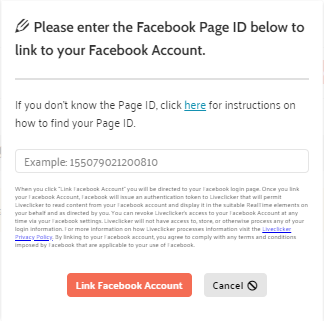
When selecting Facebook, you will be asked to input a Facebook Page ID. This is not the ID that's present in the page URL. Please follow these instructions to get your Page ID.
When connecting Facebook to your Liveclicker account and use it in a campaign, you must take into consideration that a unique Facebook user can have more than one page linked to it. If this is the case, take into account the following:
-
The first time you connect your Facebook account to your Liveclicker account, and after you are requested to enter your Facebook page ID and your log in to Facebook, you will be asked to select what page you want to use with the Liveclicker app. The page you select must be the one related to the corresponding Facebook page ID. After you have selected the corresponding page, click Next to proceed with the rest of the process.
-
If you want to connect Facebook to your Liveclicker account using a different Facebook page than the one previously used, you must enter the corresponding Facebook page ID, log in to Facebook and select the preferred Facebook page. To be able to select the Facebook page, you must click on "Edit Settings" in order to be redirected to the step where you will select the corresponding Facebook page.
Once the connection has been successful, your Facebook social network can be selected as a source for the LiveSocial element:
When selecting to connect to Instagram, you will be requested to enter your Facebook Page ID that's linked to an Instagram account. The Instagram account that is being linked must be a business Instagram account.
Learn more on how to set up a business Instagram account.
Learn how to link your Facebook page to your Instagram account.
Please refer to this page in order to get your Facebook Page ID.
Once the connection has been successful, your Facebook social network can be selected as a source for the LiveSocial element:
When adding a LinkedIn feed source to your LiveSocial element, you will first be asked to enter your company's LinkedIn ID.

To find your LinkedIn Company ID, you need to:
1. Log into your LinkedIn account. Make sure you are an admin for the company page you wish to add as a LiveSocial source because only admins can give authorization for a company page to be used as a source.
2. Navigate to the 'Me' drop-down found in the top menu on the page. In the drop-down, under 'Manage' select the company you want to add.
3. You will be taken to the company page where you can copy the company ID from the URL. It will be the number immediately after 'www.linkedin.com/company/'.
After you copy the ID, you can paste it in the LiveSocial Setup Wizard.
Once the connection has been successful, your LinkedIn social network can be selected as a source for the LiveSocial element:
Olapic
When selecting Olapic, you will be asked to input your Olapic API Key. This key can be found in the admin settings of your Olapic account.
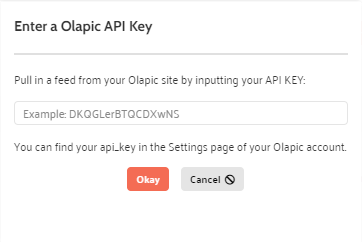
Once the connection has been successful, your Olapic social network can be selected as a source for the LiveSocial element:
PowerReviews
When selecting PowerReviews, you will be asked to input your PowerReviews API key and Merchant ID.
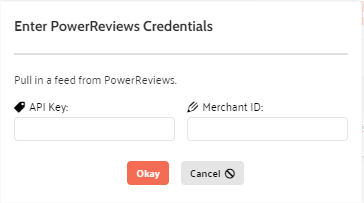
To get your API key and Merchant ID you must submit a request through PowerReviews following the process outlined in this documentation. Please reach out to support@powerreviews.com for more information.
Spotify
When selecting Spotify, you will be redirected to the Spotify user-login page, where you will need to log in if you are already signed up, or you will need to sign up for the first time.
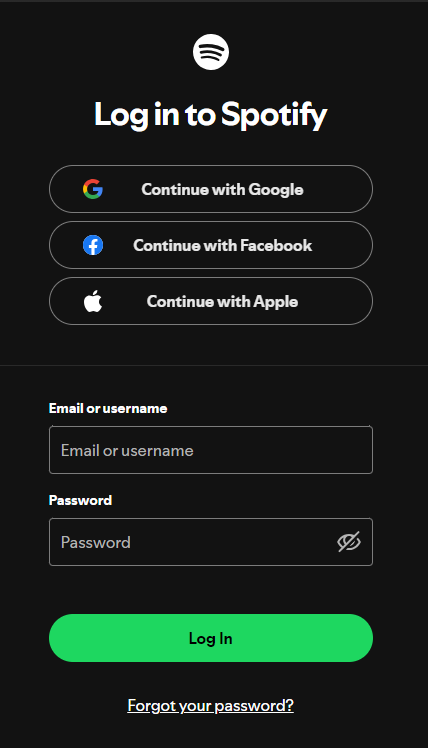
Once you have set up your Spotify integration, you will be able to select Spotify as a source for your social feed in theLiveSocial element
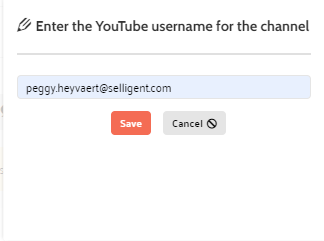
YouTube
When selecting YouTube, you will be asked to input your YouTube username for the channel. The username can be found on your YouTube page. (Take into account that LiveSocial impressions won't affect YouTube views.)
Please note that Liveclicker's integration with Youtube's API will display content by date uploaded. Due to how YouTube truncates the time/date stamp, if multiple videos were uploaded in a short time-frame, YouTube may not send them to us in the order they were uploaded. Please reach out to our support team with any questions or concerns.
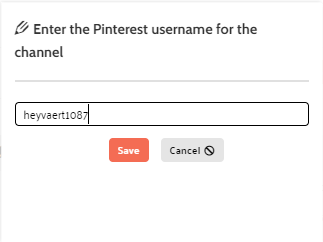
When selecting Pinterest, you are asked for the user name for the channel. To find your user name, log in to Pinterest, and click your profile. Next, click edit profile. Your user name is displayed.