Overview
The Loyalty Profile Stream is a feature designed to enhance data exchange and personalization capabilities within the Marigold ecosystem. It enables seamless, near real-time data synchronization from Loyalty to other Marigold Products, allowing for efficient management and sharing of member attributes, preferences, and metrics.
Key benefits of the Profile Stream feature include:
- Streamlined data exchange between Loyalty and other Marigold Portfolio Products
- Elimination of manual queries, exports, imports, triggered actions, or scheduled jobs
- Near real-time updates of member data across Marigold platforms
- Intuitive setup process requiring no scripting or programming
This feature empowers marketers to create more targeted and effective campaigns by providing up-to-date member information. As a result, marketers can deliver personalized experiences that drive engagement, retention, and loyalty with higher accuracy and consistency. The Profile Stream significantly reduces data latency, ensuring that the most current member information is always available to create impactful marketing initiatives.
For more information on integrating the Profile Stream feature with Engage+, please see the Loyalty Profile Stream with Engage+ Setup Guide.
Prerequisites
To access the Profile Streaming feature, the feature flag must be enabled. Please contact your Customer Success Manager (CSM) or Support to have this feature activated for your Loyalty instance.
Enable Profile Streaming in Loyalty
Once the Profile Stream feature flag has been enabled in the environment, you can follow these steps to configure and enable the Profile Stream feature:
Roles and Permissions
1. The Profile Stream Page is accessible by default to Admin users as a resource permission for the role:
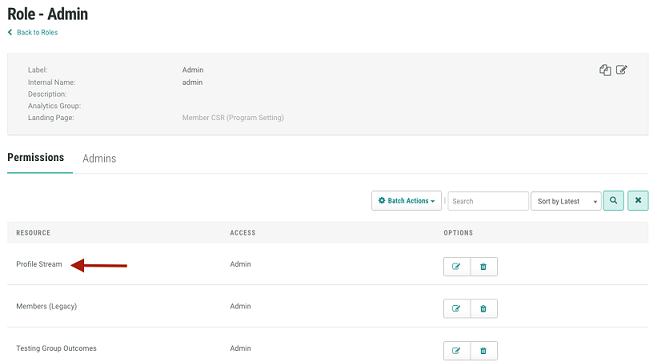
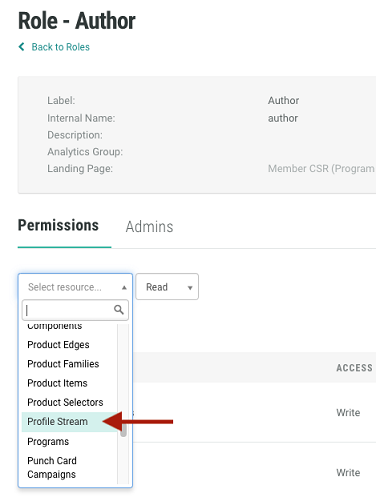
2. Access to the page can be granted to other roles as needed by configuring the role’s resource permissions for access to the Profile Stream page.
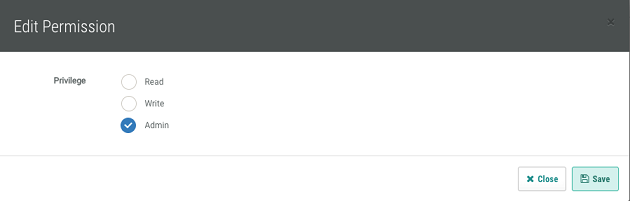
3. Standard privilege access applies to this resource. Users may be granted Read, Write, or Admin permissions.
Access Profile Stream in Loyalty
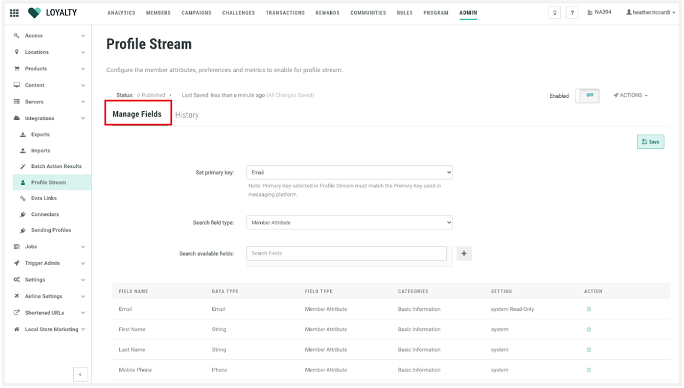
1. Access Loyalty Admin Console and navigate to Admin > Integrations > Profile Stream.
2. The Profile Stream is initially set to "Draft" status, with the LastSaved Date and Time recorded. The stream is disabled by default.
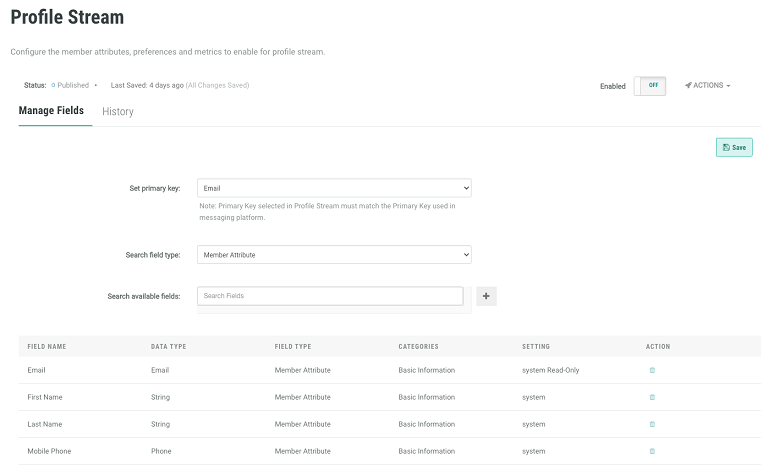
3. Upon accessing the page, you will be directed to the Manage Fields tab.
4. Within Managed Fields, you can perform the following actions:
- Search and select the fields to make available for the service
- Add fields to a configuration or modify fields in an existing configuration
- View selected fields
- Save selected field configuration
- Enable or disable the streaming service
- Deploy metadata for the service
Configure Profile Streaming in Loyalty
Primary Key
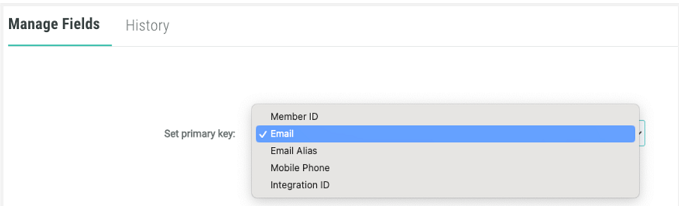
The Primary Key must be selected in the configuration. The key chosen in Loyalty must match the Primary Key selected in the Messaging Platform. For example, if the Primary Key in Messaging is email, then email should be selected as the Primary Key in Loyalty. Only one primary key may be selected.
The following options are available for Primary Key selection:
- Member ID
- Email Alias
- Mobile Phone
- Integration ID
Search and Select Fields
1. Search Field Type drop-down options:
- Member Attribute - enables the search and return of Published Attributes Only.
- Member Preferences - enables search and return of Preferences Only.
- Member Metrics - enables the ability to search all Member Metrics.
- Select which metric information to stream.
- When a metric is selected, the following data will be streamed for each metric: total_earned, total_redeemed, total_expired, and balance.

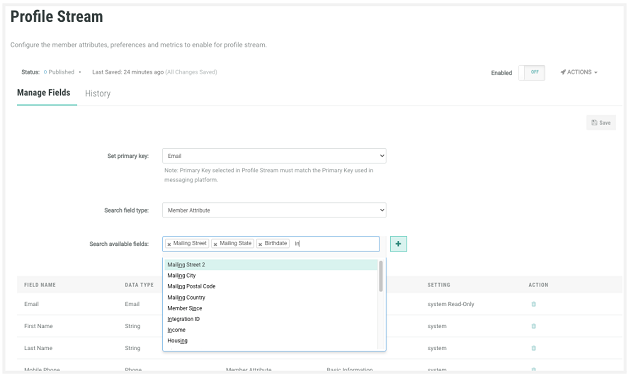
2. First, select a Field Type first from the Search Field type drop-down. Then, search by field name or use a partial search in the Search available fields.
3. After selecting fields in the search, click the “+” to add them to the selected area; repeat this process for all desired fields in each Field Type. Finally, click Save.
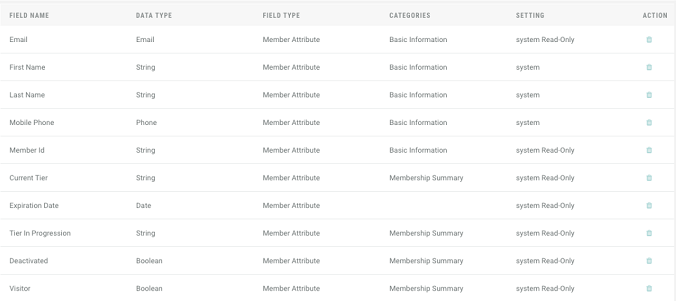
Standard/Default Fields
1. The Profile Stream page has several pre-selected fields that are designed to be enabled by default. These include: member_id, email, mobile_phone, first_name, last_name, current_tier, tier_in_progression, expiration_date, deactivated, and visitor.
2. While user-added fields can be removed, the standard set of default fields cannot be removed. For these fields, the delete icon will be disabled.
Select Fields
1. When searching for a field in the Search Available Fields drop-down, you may perform a full or partial search. Any Fields within the Field Type selected matching your search criteria will display automatically in the search drop-down.
2. The Search Available Fields feature is a multi-select control, allowing users to search for all needed fields within the selected Field Type.
3. To add fields, select the desired field(s) and click the “+” button. The selected fields will appear in the designated area. Repeat this process until you've chosen all desired fields.
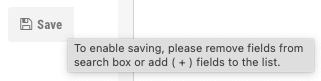
4. Once you've made your selections, click the Save button on the page to confirm your choices.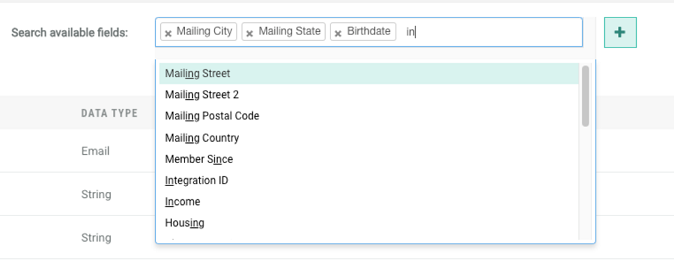
5. Note that if there are uncommitted fields in the Search Available fields box, the Save Button will be disabled and a hover message will be displayed:
Enable Streaming and Deploy Metadata
Note: Before enabling the streaming service in Loyalty, make any necessary updates within the recipient Marigold Engage+ product. For guidance on setting up this feature, refer to the Loyalty Profile Stream with Engage+ Setup Guide.
Enabling the Streaming Service
This section guides you through the process of enabling the Streaming Service for the first time.
Note: You may pause or disable the service at any time by turning the Enable toggle off. However, anytime the stream is disabled and then re-enabled, a full data sync must be performed. Please refer to the Scheduled Jobs section for additional information on this process.
- Enable the service by switching on the Enable toggle.
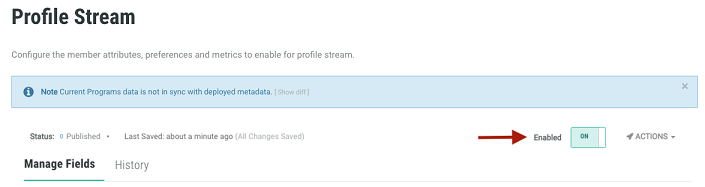
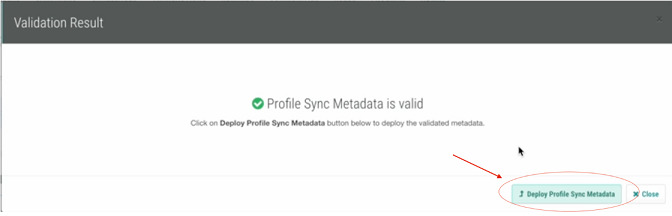
2. The system automatically validates the Profile Sync Metadata.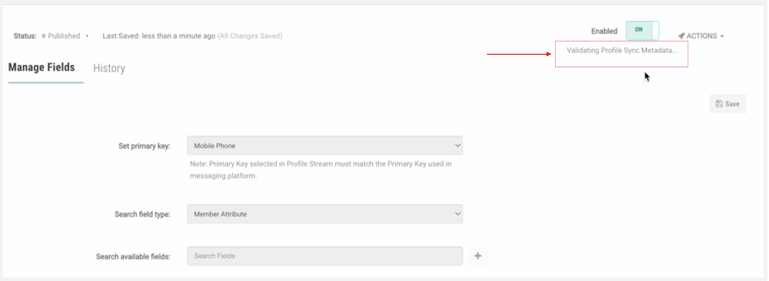
3. Deploy the validated metadata by clicking Deploy Profile Data Metadata in the pop-up.
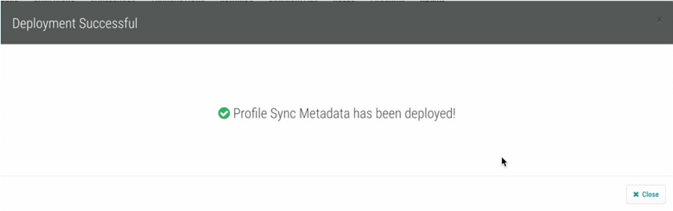
4. Confirm successful deployment in the Deployment Successful window.
5. To verify the deployed metadata, access the metadata from the Profile Stream page (see Manually View, Validate, and Deploy Metadata section).
6. After completing these steps, the Profile Stream feature should be fully configured and operational in the Loyalty Admin Console. If you encounter any issues during this process, please contact support.
Toggling the Enable Feature On and Off
The enable toggle can be switched On or Off as needed. Each change triggers the following actions:
1. Automatic validation and deployment of Metadata when turning On or Off
2. Recording of updates in the history tab
3. Suspension of event publishing to the Marigold Engage+ product while the Profile Stream is disabled (events don't queue for later processing)
4. Requirement to initiate a full data sync using the Profile Sync Scheduled Job after toggling the Stream On or Off. See section on Scheduled Job for Profile Sync Action Type for steps to create, configure, and run the scheduled job).
Manually View, Validate, and Deploy Metadata
As previously mentioned, the system automatically initiates Metadata Validation and Deployment whenever the Profile Stream feature is enabled or disabled. However, users can also manually view, validate, and deploy metadata if needed.
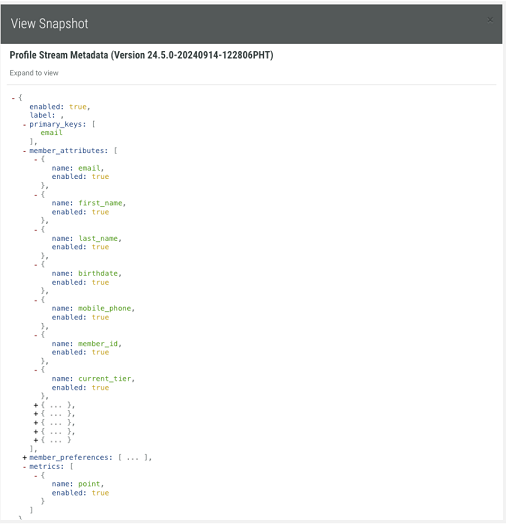
1. On the Profile Stream screen, access the Actions option on the right side of the page near the Enabled toggle:
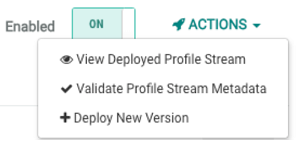
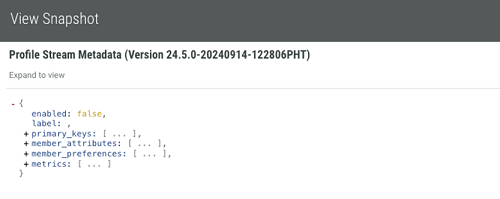
2. To view, select "View Deployed Profile Stream metadata" and expand the data arrays to see additional data elements.
3. Alternatively, access the metadata from the Program Deployments page.
a. Navigate to Program > Deployments and expand the latest Program Version.
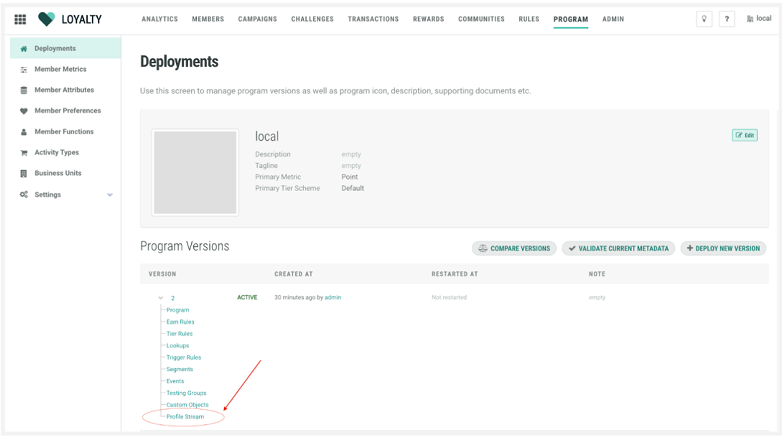
b. Click on the Profile Stream item to view the Profile Sync metadata.
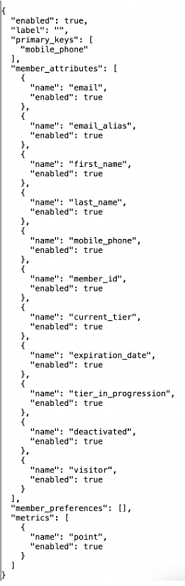
Example of enabled Profile Streaming configuration
Scheduled Job for Profile Sync Action Type
Profile Stream Data Sync
Enabling the Profile Stream in Loyalty initiates events from the Loyalty platform. Member inserts, updates, and deletes will begin sending from that point forward only and does not trigger a full data sync or backfill to Messaging. To initiate a full data sync, you must use the Profile Sync Scheduled Job.
Consider whether a backfill is necessary during the initial implementation enablement.
Note: Whenever the Profile Stream is paused or disabled, and then re-enabled, a full data sync must be performed.
Configure Full Data Sync
To initiate a full data sync when first enabling the Profile Stream or after re-enabling it, follow these steps:
1. Navigate to Admin > Jobs > Scheduled Jobs to access the scheduled job.
2. Create a new Scheduled Job (see Initiate the Profile Sync Job for steps to access an existing job).
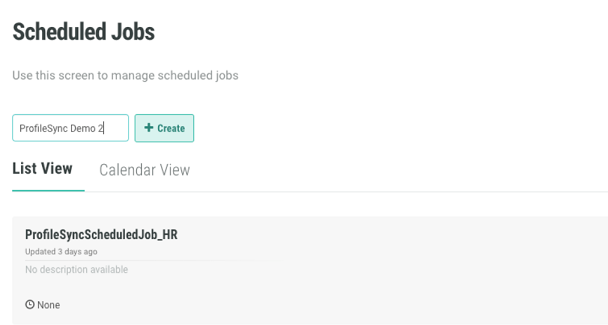
3. To create a new job:
- Enter a Display Name for your job
- Click Create
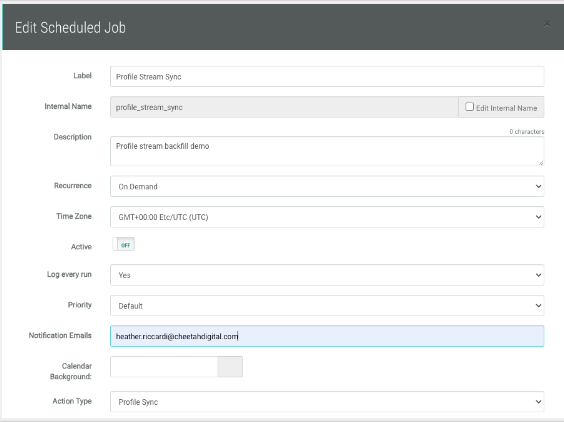
- Enter a Description
- Recurrence: current default is On Demand and cannot be modified
- Notification Emails: Enter any emails that should receive notifications
- Select Profile Sync as the Action Type
- In the Profile Sync Action Parameters section:
Leave the following fields empty:
Created At Start
Created At End
Batch Size
Save the Scheduled Job
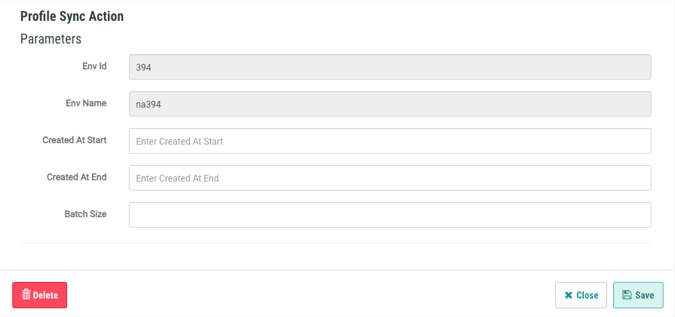
Note: Entering values in the Created At Start and Created At End fields will cause ONLY Inserts (new members) to sync, excluding Member Updates or Deletes.
Defaults for Profile Sync Action Parameters
1. Created At Start - Optional config for ONLY syncing members created at a certain date. Defaults to null.
2. Created At End - Optional config for ONLY syncing members created at a certain date. Defaults to null.
3. Batch Size - Optional config. Defaults to 5000.
Initiate the Profile Sync Job
To run the On-Demand Profile Sync Job, follow these steps after configuring the scheduled job in Admin > Jobs > Scheduled Job:
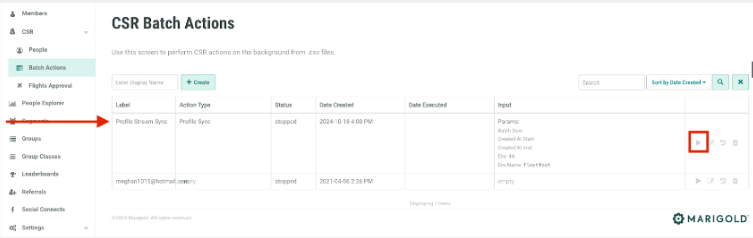
1. Navigate to Members > CSR > Batch Action
2. Find the scheduled Profile Sync job
3. Click the run icon in the left panel
Note: The sync performs a full backfill, so completion time depends on factors such as the number of members and profile updates in your program.
1. Available actions:
a. Run: Executes the profile sync job
b. Edit: Modifies job parameters (leave blank unless instructed otherwise)
c. History: Views job execution history
d. Delete: Removes the scheduled job
Update or Modify an Existing Configuration
The existing Enabled Streaming configuration may be re-entered to modify the set of attributes, preferences, and/or metrics selected by adding or removing fields. While any fields previously added can be removed, the pre-selected default/ standard fields cannot. These fields will have the Delete icon grayed out as a result.
It is critical to follow the below steps when modify your configuration:
1. Disable or Pause the Streaming Service by toggling the Enabled toggle to ‘Off’.
2. This will trigger Validation of Metadata and Metadata will need to be deployed.
3. Perform field searches, add new fields, remove existing fields, and save as needed.
4. Make any necessary updates within the recipient Marigold product prior to re-enabling the streaming service in Loyalty.
5. Switch the Enable toggle to On.
6. After the system validates the metadata, deploy metadata in order to make the modification active.
7. Run the Scheduled Job for Profile Sync Action Type.
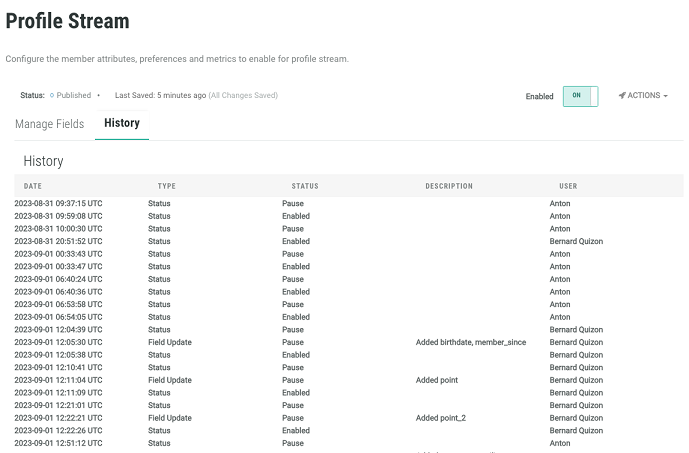
Profile Stream History
The Profile Stream History tab allows for access to recent history of synchronized streaming changes, status changes, and any Loyalty error messages which may have occurred.
1. Access Loyalty Admin Console and navigate to Admin > Integrations > Profile Stream.
2. Navigate to the History tab within the Profile Stream page.