
Change Member Tier
In most loyalty programs that use Tiers, Members will move up to higher Tiers upon achieving a Metric threshold specified in your Tier Scheme. The Member Profile screen can be used to manually adjust a Member’s Tier assignment – either upwards or downwards – thereby temporarily overriding the requirements defined in your Tier Scheme.
When you manually adjust a Member’s Tier, you can optionally enter a date range that controls how long the manual adjustment should take effect. Once the end date is reached, the platform will evaluate the Member’s Metric balance and assign them to the correct Tier based on your Tier Scheme. Any new activities or purchases that occur within the override period will NOT impact this Member’s Tier assignment, even if they earn Metrics that would otherwise have caused them to change Tiers. The manual override will always take precedence.
Note: By default, CSRs can only upgrade a Member's Tier, or force them to retain their current Tier. The option to downgrade a Member’s Tier assignment is controlled by a Program Setting. Please see Program Settings Category - Tier for more information.
To manually change a Member’s Tier assignment:
-
Select Members from the top navigation bar, then select CSR > People from the side navigation menu. The People screen is displayed.
-
On the People screen, search for and select the desired Member (see
-
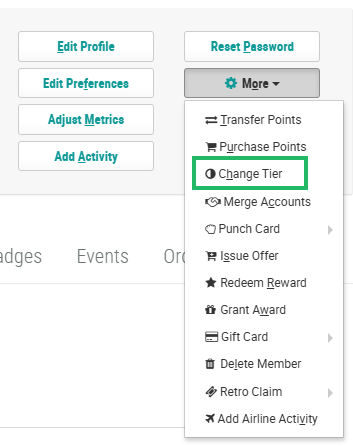
Within the header section of the screen, click More > Change Tier. The Manual Change Member Tier Level pop-up window is displayed.
-
From the Tier Scheme drop-down menu, select a Tier Scheme.
-
From the Transaction Type drop-down menu, select the Tier adjustment direction: Upgrade or Downgrade. You can also force the Member to keep their current Tier by selecting Retain.
-
If you selected Upgrade or Downgrade, select the Member’s new Tier from the New Level drop-down menu.
-
In the Start Date field, enter the date when the manual adjustment should take effect.
-
Optionally, in the End Date field, define the date range for how long this manual adjustment will take effect.
-
In the Reason field, optionally enter an explanation for the manual Tier adjustment.
-
In the Internal Notes field, optionally enter any additional information.
-
Click Submit.
