
Import Offer Responses
Offer Responses can be created automatically by the Loyalty platform based on information provided from a Point of Sale system when a Member uses an Offer in a purchase. In addition, you can import a file of Offer Responses.
Note: Loyalty supports importing Offer Responses through both the Standard Import and Advanced Import features (see Importing Data into Loyalty for more information on these import features). This article describes how to import Offer Responses using the Standard Import feature. For details on how to import Offer Responses using the Advanced Import feature, please see Configure an Offer Response Import Definition.
When importing Offer Responses, the import file should be either comma-delimited or semicolon-delimited, and can include the following columns:
-
member_id (required): The identifier for the Member who used the Offer.
-
offer_id (required): The identifier for the Offer to which this Offer Response is assigned.
-
integration_id
-
id
-
pin
To import a file of Offer Responses:
-
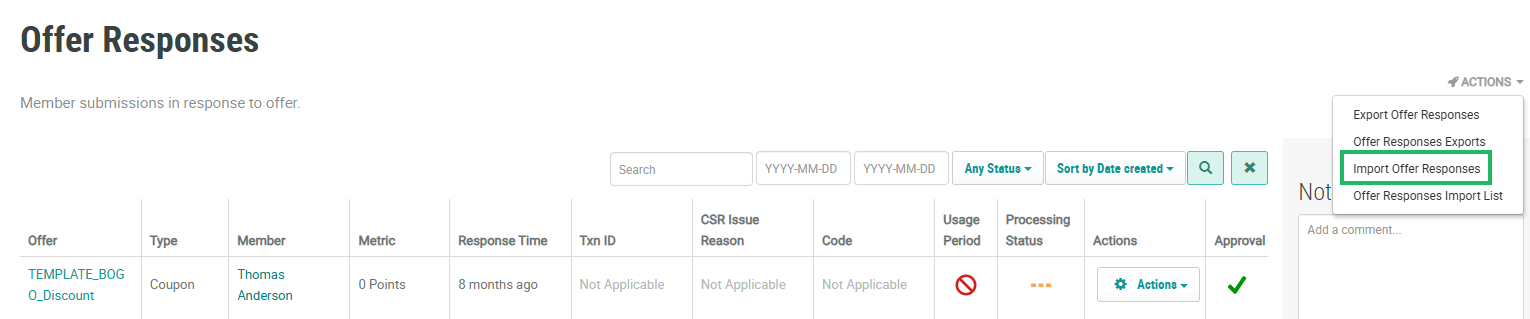
Select Campaigns from the top navigation bar, then select Offers > Offer Responses from the side navigation menu. The Offer Responses screen is displayed.
-
From the Actions drop-down menu, select Import Offer Responses. The Create New Import pop-up window is displayed.
-
Enter or select the desired configuration options. The different sections available within this window are described below in detail.
-
When finished, click Submit to execute the import process.
File Options
This section defines the basic properties of the import file.
-
From the Import Method drop-down menu, define how you want the platform to handle the import records:
-
Insert Data or Update if Duplicate: The platform will create new records and update existing records.
-
Insert Data or Skip if Duplicate: The platform will create new records only; updates to existing records are ignored.
-
Update Data or Skip Insert: The platform will update existing records only; new records are ignored.
-
-
The Find Options field is automatically populated with the required columns for this import type. Optionally, depending on the type of object being imported, you may be able to select additional columns on your import file. Add these additional columns in the order in which they appear in your file.
-
By default, the platform will create an Activity record associated with this import. To omit this process, select Yes next to Skip Publish Activity.
-
Optionally, to import blank values, select Yes next to Include Include Blank Values.
-
The platform supports email and phone number syntax validation on the appropriate import fields. Optionally, to run this validation, select Yes next to Validate Records.
-
If you have Business Units enabled in your account, select a Business Unit from the Business Unit drop-down menu.
-
To send email notifications following a successful import process, enter one or more email addresses in the Success Import Email Recipients field.
-
To send email notifications following a failed import process, enter one or more email addresses in the Failed Import Email Recipients field.
-
To select the import file, click Choose File. Browse to and select the desired file, then click Open.
-
Select the column separator used in the import file: Comma or Semicolon.
Import Options
This section provides additional options regarding the use of Lookup tables in the import process:
-
Click Add Options.
-
To use a Lookup table, select the desired table from the Lookup Table drop-down menu.
-
From the Lookup Column drop-down menu, select the desired column on the Lookup table.
-
Enter a value in the Rename as field.
-
In the Find by Columns field, select one or more columns used to identify existing records in the database.
-
If the Lookup table is required, select Yes next to Required.
-
If you want to stop the import process if a duplicate record is found, select Yes next to Abort on Duplicate Record.
-
Optionally enter any additional conditions as Groovy expressions in the Condition field.
-
Optionally, click Delete to remove the additional import options.
