
Create an Export Definition for Orders
To export Orders:
-
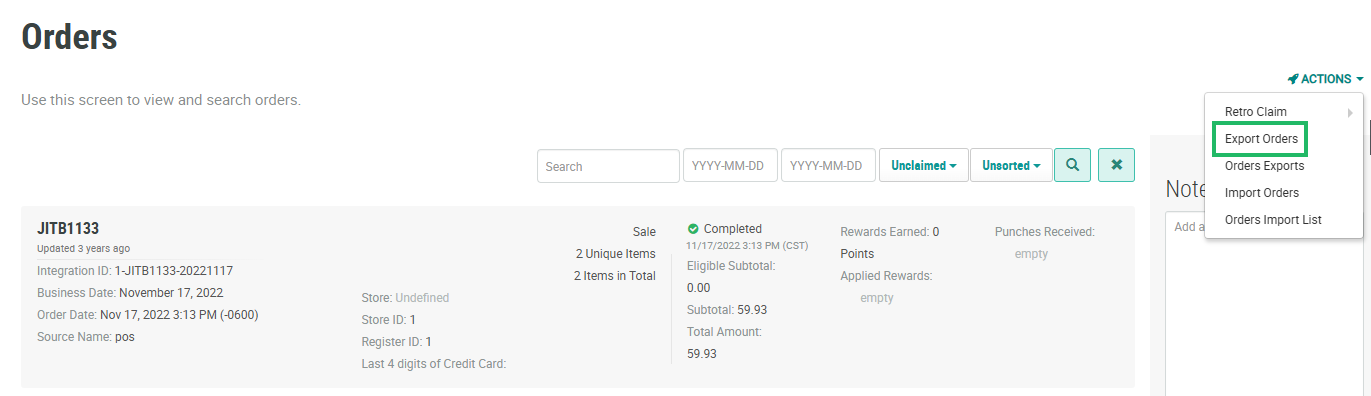
Select Transactions from the top navigation bar, then select Orders > Orders from the side navigation menu. The Orders screen is displayed.
-
From the Actions drop-down menu, select Export Orders. The Create New Export pop-up window is displayed.
-
Enter or select the desired configuration options. The different sections available within this window are described below in detail.
-
When finished, click Save.
Info Section
This section contains high-level information about the export.
-
In the Label field, enter a name for this export.
-
The Internal Name field is populated based on the Label value you entered above. Optionally to edit the Internal Name, check Edit Internal Name. A confirmation dialog box is displayed; click OK. The internal name must be unique and can not include any special characters or spaces; only numbers, letters, and underscores are allowed.
-
Optionally in the Description field, enter a description of this export.
-
Select the Column Separator used to separate columns in the export file: Comma or Semi-colon.
Timing Section
This section is used to define a schedule for when the export file is generated.
-
Select one or more of the following to define the export timing:
-
Asynchronous: An asynchronous export means that the table being exported is still accessible during the export process. For example, if exporting Offer Responses and you enable this feature, the platform can still create new Offer Responses to that table while the export is running. The best practice recommendation is to enable this feature. This option also allows you to configure email notifications; see below for details.
-
Execute now: Execute the export immediately upon saving the export.
-
Create Schedule: Define an export schedule (either a one-off execution at some point in the future, or a recurring schedule).
-
-
If you checked Create Schedule above, from the Recurrence drop-down menu, select an option:
-
Repeat: Execute the export based on a recurring schedule; see below for details.
-
Once: Execute the export once. Click into the Execute Once On field, then select the date and time from the calendar pop-up. Select the time zone from the Time Zone drop-down menu.
-
On Demand: Execute the export when specified by a user. Select the time zone from the Time Zone drop-down menu.
-
Recurring Schedule
If you selected Repeat above, the following options are displayed, allowing you to define the recurring schedule either through the user interface, or using a CRON expression.
-
Optionally, from the Schedule Composer drop-down menu, select and configure an interval:
-
Hour: Select the minute past the hour at which to run. For example, "every hour at :30 past the hour."
-
Day (recommended): Select the time at which to run using a 24-hour clock. For example, "every day at 14:00."
-
Week: Select the day of the week, and the time at which to run. For example, "every Monday at 14:00."
-
Month: Select the day of the month, and the time at which to run. For example, "on the 15th of every month, at 14:00."
-
Year: Select the day of the month, the month, and the time at which to run. For example, "every year on March 15, at 14:00."
-
-
Optionally, check Advanced to enable the CRON Expression text field, and enter a custom CRON expression.
-
In the From and To fields, enter the start date and time, and the end date and time, for the recurring schedule.
-
From the Time Zone drop-down menu, select the time zone to use.
Notification and Transport
If you checked Asynchronous above, this section is displayed. This section allows you to set up email notifications related to the export process.
-
To send email notifications if the import process is successful, enter one or more email addresses in the Success Email Recipients text field.
-
To send email notifications if the import encounters an error, enter one or more email addresses in the Error Email Recipients text field.
Fields Section
This section allows you to optionally include (or exclude) specific Attributes in the export file.
-
From the Inclusion drop-down menu, select an option:
-
All: Every export definition type has a standard set of Attributes related to the object being exported. Select this option to include all standard Attributes in the export file.
-
Only Selected: The Fields drop-down menu contains all the standard Attributes related to the object being exported. From this menu, select one or more standard Attributes to include in the export file.
-
Except Selected: The Fields drop-down menu contains all the standard Attributes related to the object being exported. From this menu, select one or more standard Attributes to exclude from the export file.
-
-
Optionally, to include attachments in the export, select one or more attachment types from the Attachments drop-down menu. When you download the export, the platform will include all attachments of the selected type(s) within a ZIP file. Optionally, instead of including the attachment files in the download, check Include Attachment URL to instead include a link to the location where each attachment is stored. This link is added as a column on the end of the export file.
Rules Section
This section allows you to define logical conditions that control which records are included in the export file.
-
Click the Add icon, then select Add Rule. The platform adds a new blank row.
-
From the first drop-down menu, select the desired Attribute. This menu is populated with all the standard Attributes for the object type being exported.
-
Select a mathematical operator. The available operators will vary based on the data type of the selected Attribute.
-
Enter or select a value.
-
Some Attributes allow you to define additional criteria, such as a date range, or a channel type, for example. Select or enter the additional criteria.
-
Repeat the above steps as needed to define more Rules. Optionally, to remove a Rule, click the Remove icon next to it.
Note: To delete all Rules, click Reset.
-
Once you define more than one Rule, select the logical operator from the Include customers that meet drop-down menu:
-
All of the following: Use an 'AND' operator such that all Rules must be true for a record to be selected.
-
Some of the following: Use an 'OR' operator such that at least one of the Rules must be true for a record to be selected.
-
-
Optionally, you can also organize Rules into Rule Groups. A Rule Group allows you to build more complex selection criteria. To create a Rule Group, click the Add icon, then select Add Rule Group. The platform creates a Group, which is represented visually as a nested box with its own operator and Add icon. Within this Group box, click the Add icon to define the Rule (or Rules) using the same process as described above. Use the toggle within the Group box to define the logical operator for the Rules within the Group.
Note: By clicking the Group button inside the Group box, you can create "nested" groups.
Associations Section
This section allows you to also export columns from joined tables. For example, if exporting Certificate Codes, you can also export columns from the Offer table.
-
Click Add. A new row is displayed.
-
Check Enabled.
-
From the Association drop-down menu, select the type of associated record. This menu lists all of the tables joined to the table from which you are exporting.
-
From the Inclusion drop-down menu, select an option:
-
All: Every object type has a standard set of Attributes. Select this option to include all standard Attributes in the export file.
-
Only Selected: The Fields drop-down menu contains all the standard Attributes related to the object being exported. From this menu, select one or more standard Attributes to include in the export file.
-
Except Selected: The Fields drop-down menu contains all the standard Attributes related to the object being exported. From this menu, select one or more standard Attributes to exclude from the export file.
-
-
Repeat the above steps needed to include columns from other joined tables. To remove the columns from a joined table, click the Delete icon next to it.
Children Section
This section allows you to also export columns from "child" tables joined to the main table from when you are exporting records. For example, if exporting Offers, you can also export columns from the Offer Response table.
-
Click Add. A new row is displayed.
-
Check Enabled.
-
From the Child drop-down menu, select the type of child record. This menu lists all of the child tables joined to the table from which you are exporting.
-
From the Inclusion drop-down menu, select an option:
-
All: Every object type has a standard set of Attributes. Select this option to include all standard Attributes in the export file.
-
Only Selected: The Fields drop-down menu contains all the standard Attributes related to the object being exported. From this menu, select one or more standard Attributes to include in the export file.
-
Except Selected: The Fields drop-down menu contains all the standard Attributes related to the object being exported. From this menu, select one or more standard Attributes to exclude from the export file.
-
-
Repeat the above steps as needed to include columns from other child tables. To remove the columns from a child table, click the Delete icon next to it.

