Create a Zone
The Zones tab of the Place Details screen allows you to divide a Place into one or more Zones for more fine-grained targeting. For example, you could define Zones for the different departments in a store location. You can also assign one or more Beacons to a Zone to enable location-based targeting.
Before you can define a Zone, you must have the following additional assets:
-
An image file with a map of the Place.
-
The Beacons(s) you intend to assign to the Zone must be defined within Loyalty. See Getting Started with Beacons for more information.
To create a Zone:
-
Select Admin from the top navigation bar, then select Locations > Places from the side navigation menu. The Places screen is displayed, with List View selected by default.
-
Search for and select the desired Place ( see
-
Select the Zones tab.
-
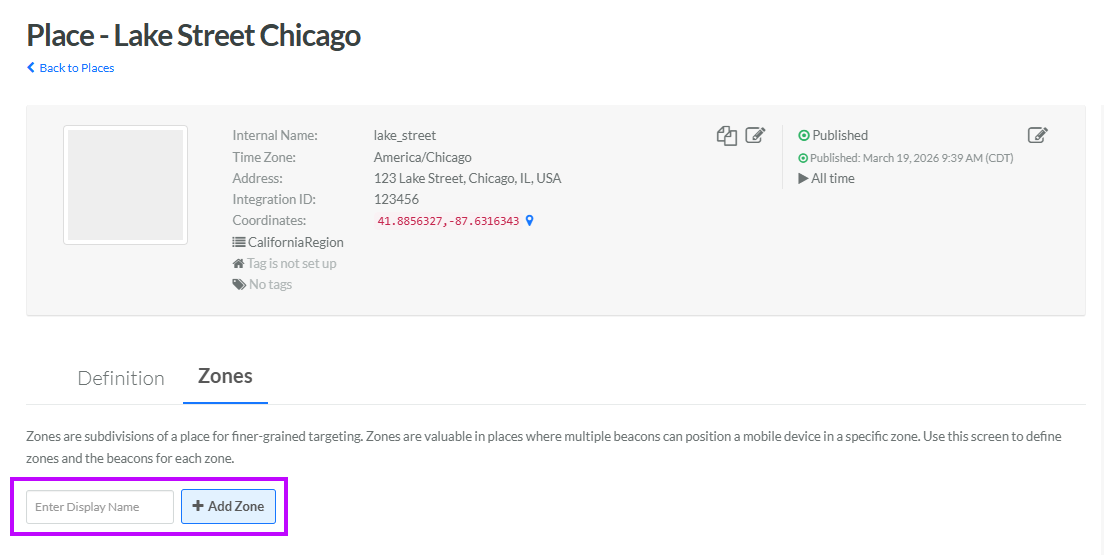
In the Display Name field, enter a name for the new Zone.
-
Click Add Zone. The Edit Zone pop-up window is displayed.
-
The Display Name field is populated with the value you entered above; optionally edit this value.
-
The Internal Name is automatically populated based on the Display Name value. This field is not editable by default. To edit the Internal Name, check Edit Internal Name. A confirmation dialog box is displayed; click Ok. Edit the Internal Name value.
-
Click Save. The platform adds the new Zone to the Zones tab.
-
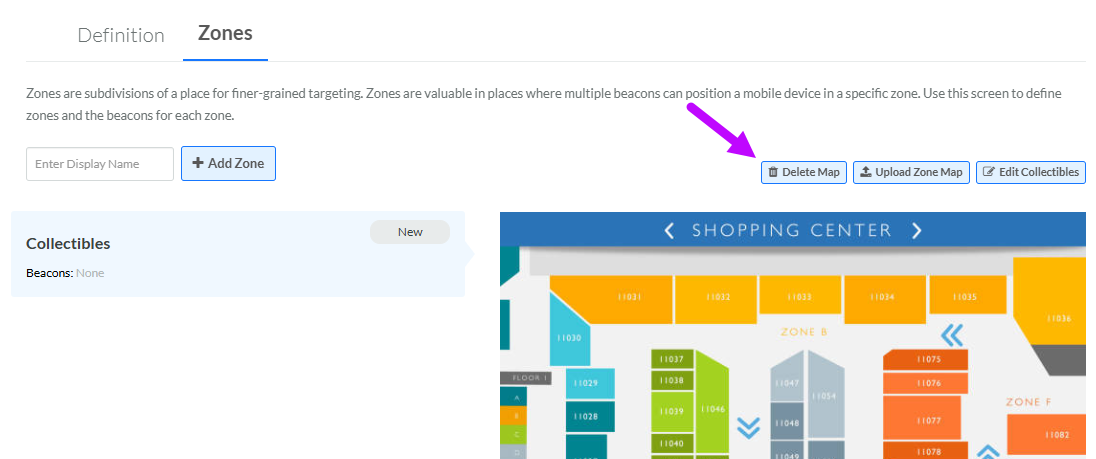
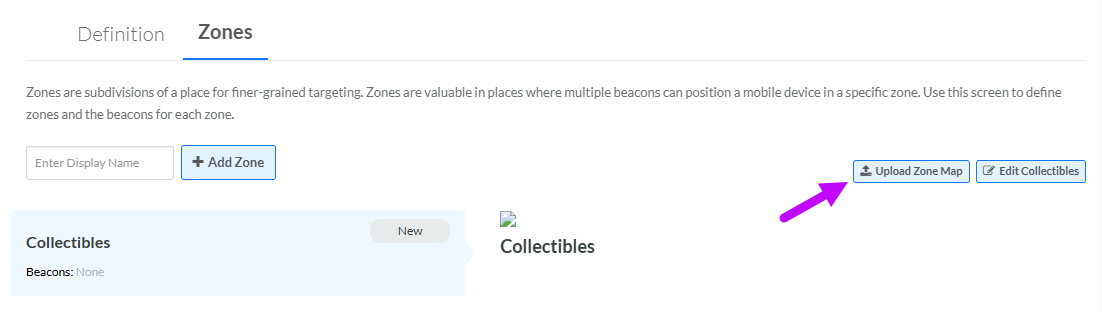
Click the new Zone to select it, then click Upload Zone Map.
-
Browse to the desired image file, then click Open. The system displays the map image within the Zones tab.
-
Click on the map image where you want to place the Beacon. The system displays a small box onto the map image. You can move the box by clicking-and-dragging within the box.
-
To assign a Beacon to this Zone, click the Save icon within the top-left corner of the box. A Select Beacon pop-up window is displayed.
![]()
-
From the drop-down menu, select the desired Beacon.
![]()
-
Click Place Beacon. The platform replaces the square outline with a pin in the selected location.
-
Repeat the above steps as needed to assign additional Beacons to this Zone (the same Beacon can be used only once within a Place).
-
Optionally, to remove a Beacon from a Zone, click the pin within the map image. The pin changes back to the square outline. Within this square, click the Remove icon. A confirmation dialog box is displayed; click Ok.
![]()
-
Optionally, to move a Beacon within a Zone, click the pin within the map image. The pin changes back to the square outline. Click-and-drag this square to the desired new position within the map. Click the Save icon within the square.
-
Optionally, to delete the map image for a Zone, first click the Zone to select it, then click Delete Map. A confirmation dialog box is displayed; click Ok. Note that when you delete a map image, the platform also deletes all Beacons previously assigned to that map.