
Create a Triggered Action
Loyalty allows you to create a new Triggered Action either by creating it from scratch, or by copying an existing Triggered Action to use as the basis of the new Triggered Action.
Create a Triggered Action
To create a Triggered Action from scratch:
-
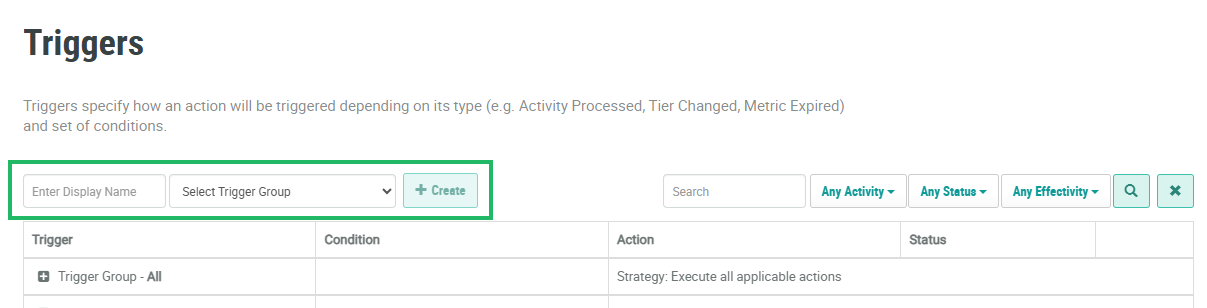
Select Rules from the top navigation bar, then select Triggered Actions from the side navigation menu. The Triggered Actions screen is displayed.
-
In the Display Name field, enter the name of the new Triggered Action.
-
From the Triggered Group drop-down menu, select the desired Trigger Group (or select All).
-
Click Create. The Edit Trigger pop-up window is displayed.
-
The Display Name field is populated with the value you entered above; optionally edit this value.
-
The Internal Name is automatically populated based on the Display Name value. This field is not editable by default. To edit the Internal Name, check Edit Internal Name. A confirmation dialog box is displayed; click Ok. Edit the Internal Name value.
-
Optionally, in the Description field, enter a description of this item.
-
The Trigger Group you selected above is automatically populated in the Trigger Grouping drop-down menu; optionally select a different Trigger Group.
-
From the Triggered Type drop-down menu, select the desired trigger type and enter the configuration properties (see below for details).
The Activity Processed Trigger Type will execute when the selected Activity Type is recorded by the platform for a Member.
-
From the Trigger Type drop-down menu, select Activity Processed.
-
In the Activity Types field, select one or more Activity Types. If you select multiple Activity Types, the Triggered Action will execute if any of the selected Activity Types is recorded.
-
Optionally, from the Metric Changed field, select one or more Metric Types. If selected, the platform will execute this Triggered Action only if the Activity processing causes a change in value of one of the specified Metrics.
The Tier Changed Trigger Type will execute when a Member moves into a new Tier.
-
From the Trigger Type drop-down menu, select Tier Changed.
-
From the Tier Scheme drop-down menu, select a Tier Scheme.
-
Optionally, from the New Tier drop-down menu, select the Member’s "new" Tier. If specified, the platform will execute the Triggered Action upon a Member's change in Tier, only if this is the Member's new Tier.
-
Optionally, from the Old Tier drop-down menu, select the Member’s "old" Tier level. If specified, the platform will execute the Triggered Action upon a Member's change in Tier, only if this is the Member's previous Tier.
Note: If you specify both the New Tier and the Old Tier, then both options must be satisfied to execute the Triggered Action. If neither option is specified, the platform will execute the Triggered Action upon any Tier change.
The Metric Changed Trigger Type will execute when a Member’s Metric balance changes.
-
From the Trigger Type drop-down menu, select Metric Changed.
-
From the Metric drop-down menu, select the desired Metric .
-
Click Save.
The new Triggered Action is added to the specified Trigger Group section. By default, the new Triggered Action is added to the top of its Trigger Group (see Rearrange Triggered Actions for details on how to move a Triggered Action within its Group).
Copy a Triggered Action
To copy an existing Triggered Action:
-
Select Rules from the top navigation bar, then select Triggered Actions from the side navigation menu. The Triggered Actions screen is displayed.
-
Optionally, search for the desired Triggered Action (see
-
Optionally, expand a Trigger Group by clicking the Expand icon next to its name.
-
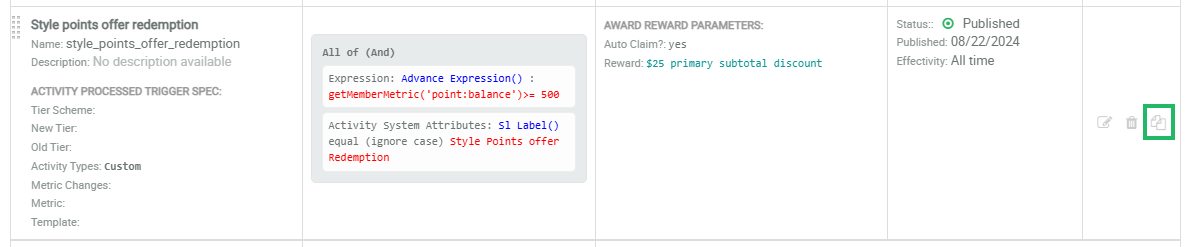
Next to desired Triggered Action, click the Copy icon.
-
The platform creates a copy of the Triggered Action. The default name of the new Triggered Action is the name of the base Triggered Action followed by a counter, such as "(1)."
The newly copied Triggered Action is added to the same Trigger Group as the base Triggered Action. By default, the new Triggered Action is added to the top of its Trigger Group (see Rearrange Triggered Actions for details on how to move a Triggered Action within its Group).
Additional Information
For additional information on how to configure the new Triggered Action, please see the following Help Center articles:
