
Configure Coupon / Offer Advanced Options
This article describes how to configure additional Wallet Pass properties available on the Advanced Options tab.
To configure the advanced options for a
-
Select Campaigns from the top navigation bar, then select Wallet Passes from the side navigation menu. The Wallet Passes screen is displayed.
-
Optionally enter a text string in the Search field, then click the Search icon. The platform filters the screen to only Wallet Passes that have that text string anywhere within the Display Name or Internal Name.
-
Click the desired Wallet Pass. The Wallet Pass Details screen is displayed, with the Apple tab selected by default.
-
Select the Advanced Options tab.
The Advanced Options tab is split into two sections: Linked Offer and Apple Wallet Pass Configuration. See below for details on the options available in these two sections.
Linked Offer
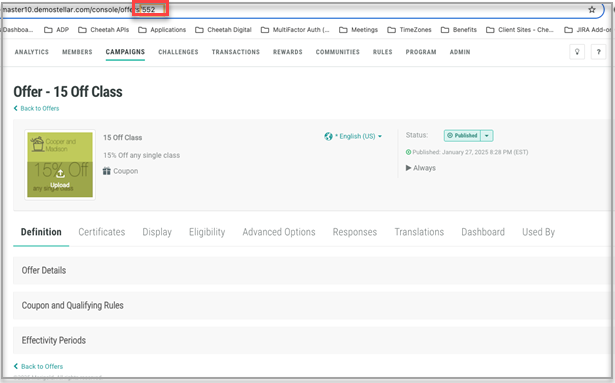
The Linked Offer section allows you to link the Wallet Pass to a specific Offer. This process is managed through the Offer ID, which can be obtained by navigating to the Offer Details screen for the desired Offer, and locating the Offer ID within the page's URL.
To link an Offer to this Wallet Pass:
-
Within the Linked Offer section of the Advanced Options tab, check Use Offer.
-
From the Selection drop-down menu, select By ID.
-
In the Source field, enter the Offer ID of the desired Offer.
-
Click Save.
Apple Wallet Pass Configuration
The Apple Wallet Pass Configuration section provides additional options unique to Apple devices.
-
In the Location Lookup field, enter a Lookup table that contains Locations you want to use in the Store Card.
-
In the App Launch URL field, enter the URL to launch your branded app.
-
In the App Store IDs field, enter one or more Store IDs for your app in the App Store.
-
Click Save.
