In the editor you add forms to pages. The data entered in a form by the contact is validated and stored in the journey, usually with a data component.. If the contact is known (not anonymous), fields in a form can be pre-filled with information already stored in the database.
When designing a form the following steps must be executed:
Adding the Form component
Drag and drop a form component to a message at the position of your choice . Define the form processing.
Place the form fields within the form
These form fields can be added by dragging and dropping the form components from the Components panel on the right into the form.
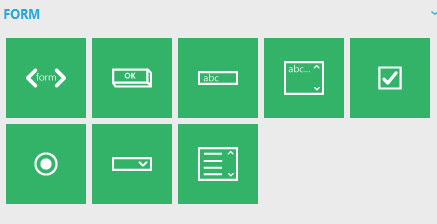
Select the type of form component you want to add: textbox, textarea, checkbox, radio button, drop down or list box.
When adding the elements from the Components panel, they are not linked to a specific list field and are not pre-filled.
To link the element (text, check box, etc) to a specific contact field, select the form element and then right click the contact field from the audience list in the tree view and choose 'Link to selection'.
A second way to insert the form elements is to do this directly from the Audiences tree view on the left, by right clicking a contact attribute and selecting 'insert as..'.
When using this way of inserting form elements, they will automatically be linked to a user attribute and pre-filled when data is available for known contacts (not anonymous).
Check out the section on Personalization fields.
Make sure that data in the form can be retrieved and stored, and that you understand the @ syntax. The @ indicates that a value will be retrieved from the database if available, or, the value entered by the contact in the form after the form is posted. I.e. a posted value.
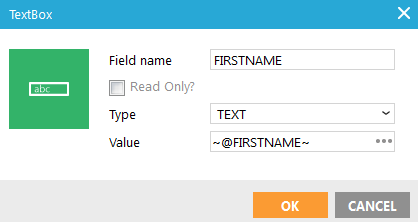
For instance a text box (text input field) with name attribute FIRSTNAME:

Source code: <input name="FIRSTNAME" type="TEXT" value="~@FIRSTNAME~" />
If you enter the posted value of the text box, e.g. ~@FIRSTNAME~ where FIRSTNAME is the text box name, the text box will be pre-filled with the submitted value. This way, after the form has been submitted, when validation fails and the form is displayed again with error messages, the contact does not need to fill in the text box again. If you keep the value the same as an audience list field name, the text box will be pre-filled with the contact's value for that field, if the form is displayed for the contact (not anonymous).
A 'posted value' only lives during one request. Meaning from the submitted form page until the next page (default html behavior). In a journey you can retrieve the posted value in between those two pages, using @FIRSTNAME, to validate and store in a Data component, in a constraint in a Decision component, in a lookup in a Lookup component, etc.
The posted value can be retrieved with ~@FIRSTNAME~ on the page after submitting the form, not after this page. You can assign the posted value to a new form element (input field) on this next page. After that form submits you would have the posted value again. It is called 'posting a value along'.
Make sure you do not reveal contact information to the front-end which could cause a security risk. E.g. if you use the contacts ID in a hidden field in a form, and after the submit would find the contact and change something for the contact based on the submitted ID. The hidden field is perhaps not visible in browser, but still available and changeable in the source code. Someone could easily change the value before submitting. This means you would change something for the wrong contact based on the wrong value.
The same goes for parameters in hyperlinks. E.g. if you use a link http://yourdomain.com/?USERID=~ID~ where ID is the contact's ID (1,2,3). Someone can easily change this value and you would find the wrong contact and store wrong values for him. The same goes for email addresses in a hyperlink. The value for EMAIL in http://yourdomain.com/?EMAIL=~MAIL~ is easily changed, thus completely insecure.
Provide a 'Submit' button and define its behavior
NOTE: to store information entered in a form, the page should be used in combination with a Data component in a journey.

