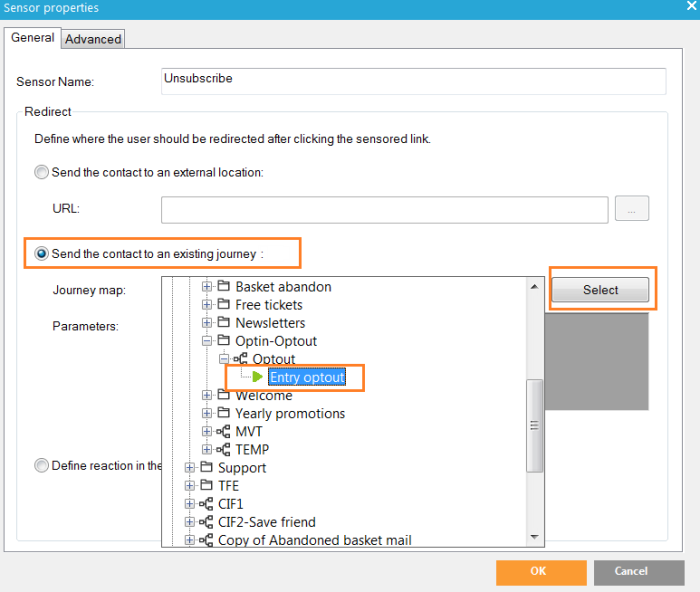
In the "Spring sales" yearly promotional email, a basic email from another exercise, we added an unsubscribe sensor at the bottom. In the sensors over view panel on the right, find the unsubscribe sensor, double-click it to open the properties.
Select the second radio button 'Send the contact to an existing journey'. Click the “Select” button and choose the "Entry optout" Input component of the "Optout" journey, this was defined in the previous step in this exercise. Double-click the Input component to select it from the drop-down.
Click 'Ok' when done and save your email.
Clicking the sensor in the email will now redirect to the Optout journey. It is important that the email journey and the optout journey use the same audience list. The contact who clicks in the first journey, must still be 'identified' in the second journey. If the second journey uses a different audience list, the Data component needs to store values for someone that does not exist in that audience list. This is not possible.
You can test the sensor from the email journey, you should be redirected to the optout journey.


