Dynamic segments are created from an Audience list, based on a filter being defined on the list. The records in this type of segment evolve over time, depending on new records complying with the criteria or existing records no longer answering the filter criteria.
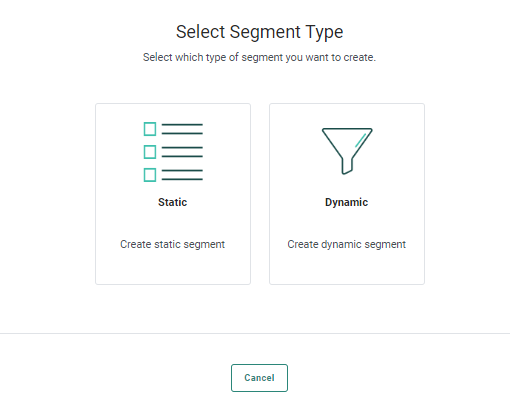
1. From the Segments tab in a list, click New Segment. You are presented with the following choice:
2. Choose Dynamic.
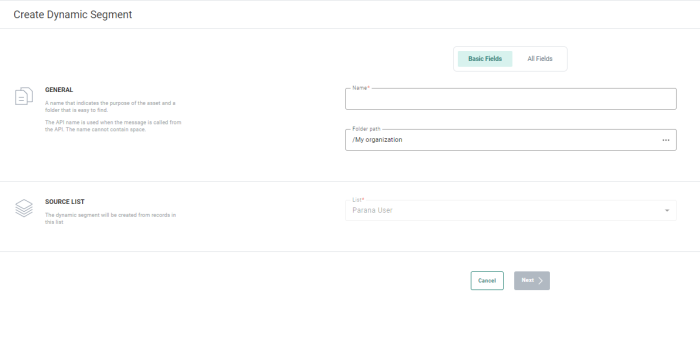
When creating a new dynamic segment for a list, the following properties panel is displayed:
Basic Fields tab:
General
- Name — Provide an explicit name for the segment to explain the use.
- Folder path — The folder path where the current segment is stored. You can select a folder from the folder dialog accessible from the three dots.
Source List
- List — When the segment is created from a specific list, the list field is already filled out with that list name, but a different one can be selected. When a segment is created without starting from the list, a default list name is selected, but a different one can be chosen from the drop-down list.
All Fields Tab
General
- Label — The label(s) assigned to this segment. Select one or more labels from the drop-down. (These labels are configured in the Admin configuration.) Users with the proper Access permissions can also create new labels hereby typing the new label value in the Label field.
- Description — A clear description of what this segments stands for.
- API name — The name of the segment as it will be used by the API methods (Only alphanumeric characters and underscores are allowed). By default, the API name is filled out with the name given to the segment.
3. Click Next to define the filter on the list.
Note: It is not possible to create a dynamic segment without defining a filter.
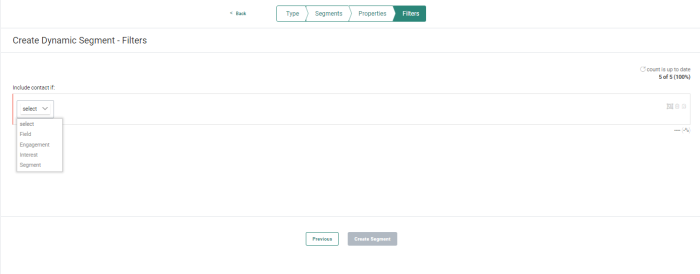
4. The Filter tab lets you define the filter. You can use
- All the fields in the selected list for the segment,
- All fields in 1:1 and 1:n linked lists. (For the 1:n linked lists, a lookup is done to see if there is at least one record in that list that answers the filter criteria.)
- Email metrics
- Historical channel interaction data. This means that any interaction registered (views, sent, clicked, delivered or not, clicks or not any link, click or not on the Unsubscribe link) in a journey can be used. Use one or more fields to define the criteria for this filter. (For more information on the constraint editor, please check this topic).
- Segments of the selected audience by including or excluding records in the selected segment
Note: When creating a dynamic segment and the filter includes the contains operator in one of the conditions, the user is informed that this might cause slower calculations and performance issues. It is recommended to not use the contains operator.
5. When done defining the criteria, click Create segment to Save your segment .
Note: When an audience is selected and a filter applied, the number of contacts in the segment is returned. Contacts who have unsubscribed are not included in the count.
Note that the status count is up to date implies that the count reflects the current filter. If the filter changes, a refresh of the count is required. However, note also that when there are changes in the audience in the last hour (the count is cached and by default refreshed automatically every hour), these will not be reflected in the count.
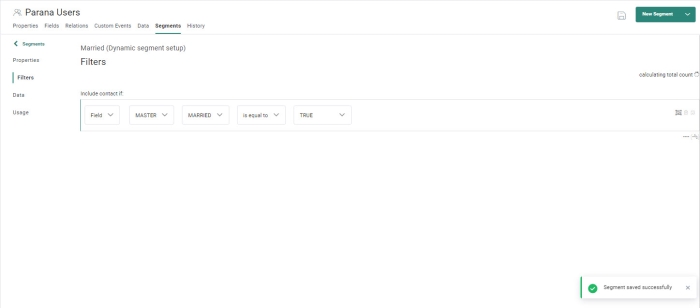
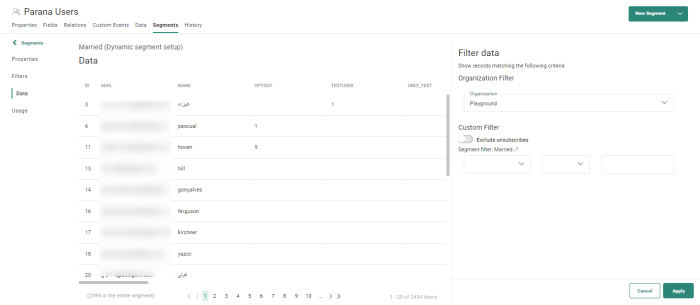
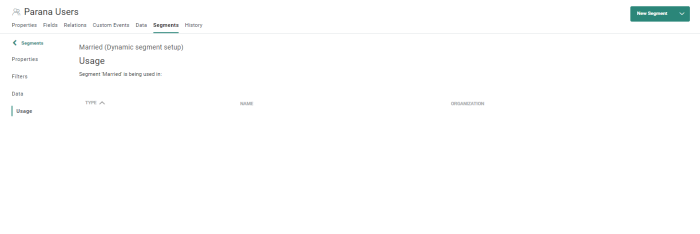
6. You are taken to the Segment configuration pane where you can view the data and the usage of the dynamic segment as well as the filter applied:
The Data step allows you to view the records currently in this segment.
Important note: If you do not see the Data tab when accessing a segment, you probably have the 'Hide Personal data' claim activated. Check with your administrator if this doesn't seem correct to you.
The panel on the right lets you search for specific records in your segment:
Once the Segment is created, the Segments tab contains a Usage overview. This will provide details about the journeys on which the dynamic segment is used.
