Sending a Message
After testing, validating, and publishing a message, it is now ready to be sent.
1. From the toolbar, select Single Batch Journey.
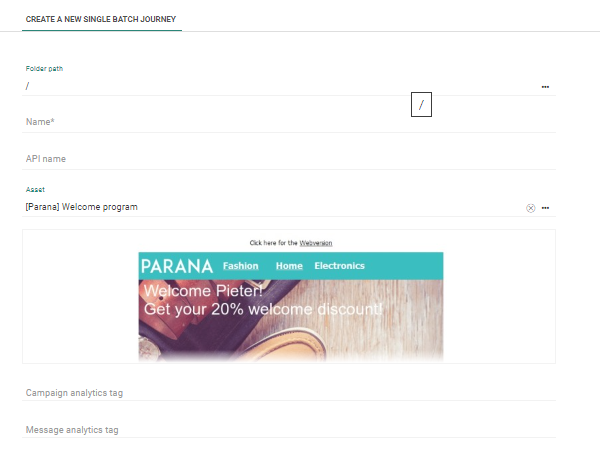
A panel to create a single batch journey is displayed. This journey defines when the message will be sent and to whom.
2. Provide a Name for the journey.
3. The message is preselected, but a different message can be selected from the drop-down list.
NOTE: The same message can be used to create different journeys.
4. Set the Campaign and Message analytics tags when required.
5. Press Journey. The journey will now be available from the Journey Start page where it can be further configured and scheduled.
(For more details on creating journeys, check this topic.)


