1. To create an in-app notification, go to the Content entry.
2. Select New from the toolbar
and then select

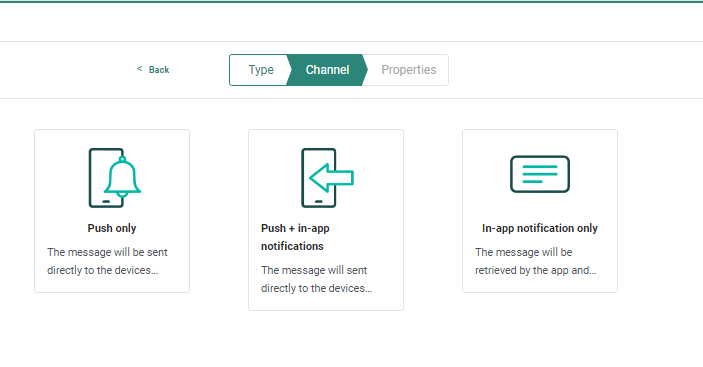
3. Click In-app notification only in the wizard.
4. The following properties page is displayed:
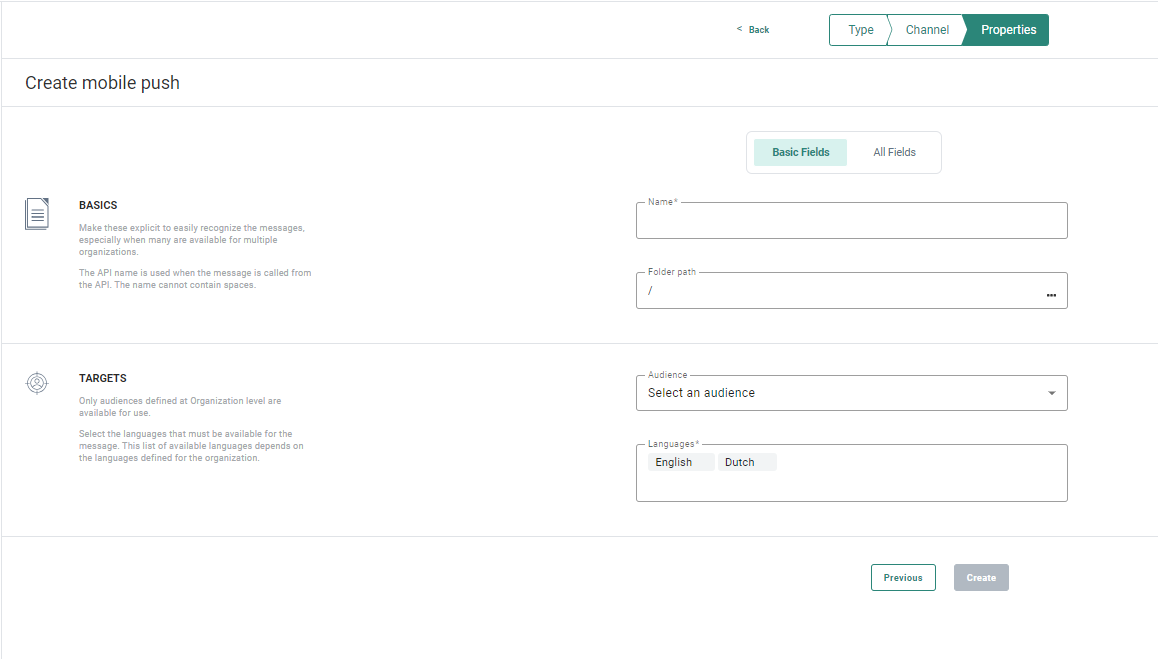
The properties are grouped by type of information. By default only the Basic fields are displayed. Switch to the All fields tab to display all other fields. On the left hand side of the properties, on-screen help is provided. This helps the user filling out the form with accurate and comprehensive information.
Basic fields tab:
Basics
- Folder path — Set the Folder Path. This is the folder in which the asset is created. By default it takes the folder that is currently selected on the Start page when the asset is created. You can modify the path if required
- Name — Set a Name for this notification.
Targets
- Audience — Select an Audience. Fields in the selected list will be available to personalize the notification. This audience list must be linked to a Device List (only one). This also implies that app users that did not register the device, and who, therefore, do not exist in the audience list, will not get this notification.
- Languages —Select the Languages in which the notification should be available. Only languages defined for the Business unit are available. The Language field is pre-filled with the default languages defined at Business unit level. The language of the notification is matched to the language of the user and defines in what language the notification is sent. If the notification does not exist in the language of the device, nothing is sent.
All fields tab:
Basics
- API name — Set the API-Name. By default the API name is filled out automatically based on the name of the message. Change it if needed. The API name is used to call the page via the API Explorer.
- Labels — Asset labels are optional. Select one or more labels from the drop-down. (These labels are configured in the Admin configuration.) Users with the proper Access permissions can also create new labels here by typing the new label value in the field.
- Description — Set a clear description of what this content is used for.
Data selection
Select the type of data to use in this message. From this drop-down list you can choose from following options:
- No event data — In this case the message behaves as a normal message.
- Transactional data — Select this option to make the message available to create Transactional Journeys from. By selecting the option, the message is marked as a transactional message, transactional data can be defined and used and the message will only be available for use in a Transactional Journey.
- Custom event — When Custom Events have been defined for the selected audience, the marketer can use the data in the Custom Event to personalize the message that will be used afterward in a Custom Journey triggered by the Custom Events. Messages using Custom Event data can only be used in event-driven journeys. Note that Custom Events data used to personalize the message are not visible in the preview of the message.
App selection
Select the Mobile app to use in the message. All mobile apps linked to the selected Audience list are listed. Select the mobile app for which the message is being created. Data from this mobile app can be used for personalization.
5. Click Create.
The in-app notification design panel is displayed.
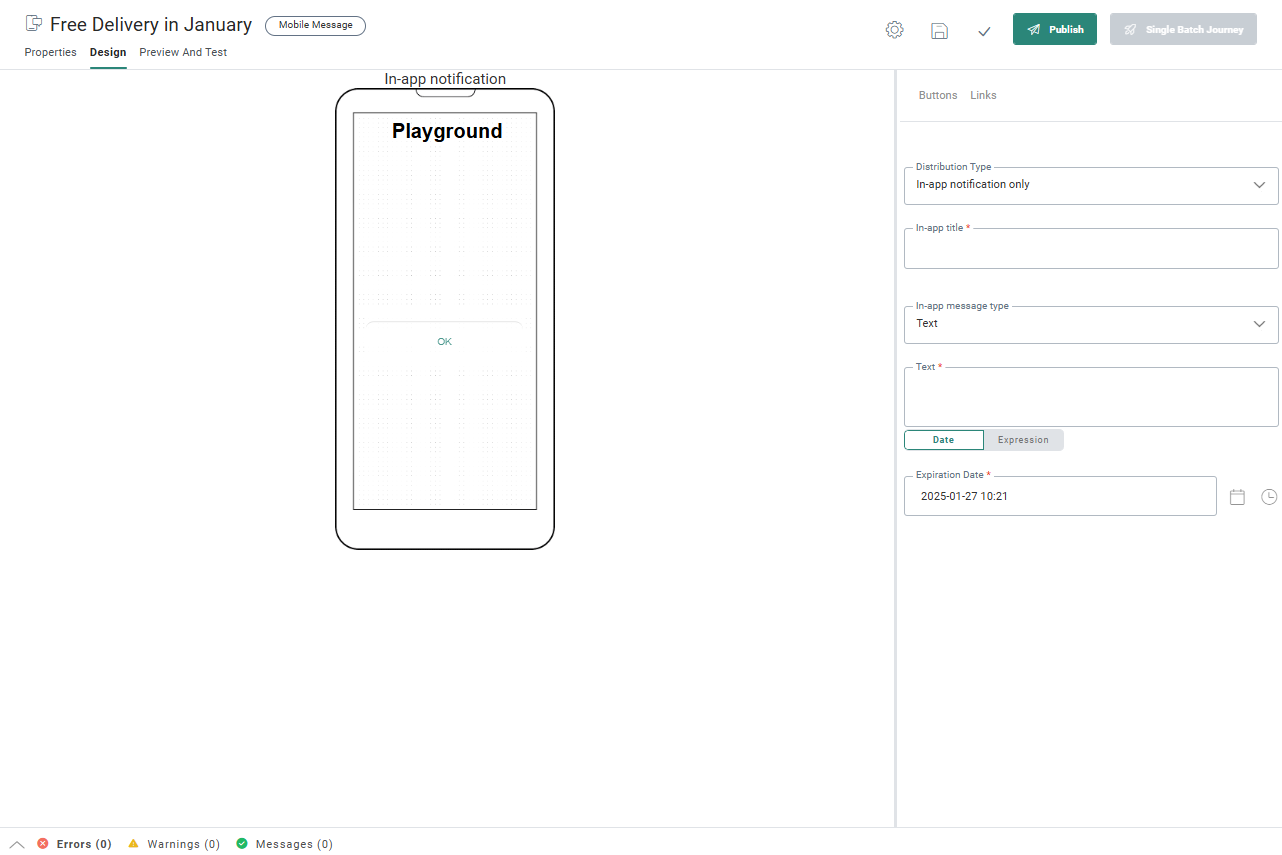
The next step is to define the actual content for the in-app notification.
Define the content
The distribution type field is by default set to the type selected when creating the notification. It can still be modified here. Following options are available:
- Push — Only a push notification is sent.
- Push + in-app notification — A Push notification as well as an in-app notification is sent. The content can be exactly the same or a custom in-app notification can be created.
- In-app notification only — Only in-app notifications are sent to the device. An in-app notification is sent to the inbox.
- in-app notification when no push is available — A push notification is sent to all devices. If a contact has disabled push notifications, an in-app message will be sent instead. If a contact has enabled push notifications, a push notification is sent and no in-app notification.
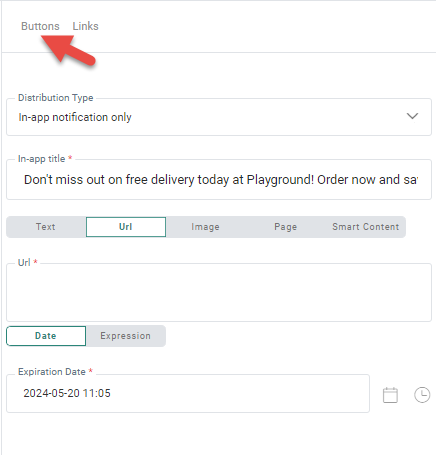
For in-app notifications, the following properties are set:
- In-app title — This is the title that will be displayed for the notification in the app message center. It can be personalized with profile fields and emoticons. The Selligent AI Assistant is available to help out with defining the title.
- In-app message type — The content of the notification. You can choose between the following types:
- URL — This type of notification embeds the content of the specified URL in the notification window and the contact can browse the website.
- Text — Plain text can be enriched with personalization fields and emojis.
- Image — This type of message requires the URL of the image. An image can be uploaded from the Library, which gives access to the images in Selligent by Zeta. Or you can enter the URL of the image. Or, you can use Live Content images. When an image notification is sent, the URL of the image is sent and the image is rendered when the notification is displayed.
- Smart Content — When selecting this option you can choose from a drop-down list of predefined Smart Content. Smart Content is used to add dynamic and intelligent recommended items to a message. The content of the Smart Content is based on algorithms that analyze the behavior of other visitors on the website. For example, you can present your contacts with trending items that are frequently viewed. Or when buying a product and sending a confirmation email, present your contact with products that are often bought together. For more details on Smart Content, refer to this section.
- Journey — This type of content lets the user set a destination by selecting a journey and Input Component to which the contact is redirected. If the input component has parameters defined, you can enter the values here.
The option 'Redirect anonymously' allows you to send the contact to the page as an anonymous user. - Page — This type of content lets the user set a page as the content for the in-app message. An Asset selector is displayed from which a page can be selected
Note: The in-app title and content of type text can be filled with AI generated content. Click the icon Generate message using Selligent AI in the toolbar of the field to open the AI panel on the right hand side. You can enter your question or keyword and use the generated content in your message: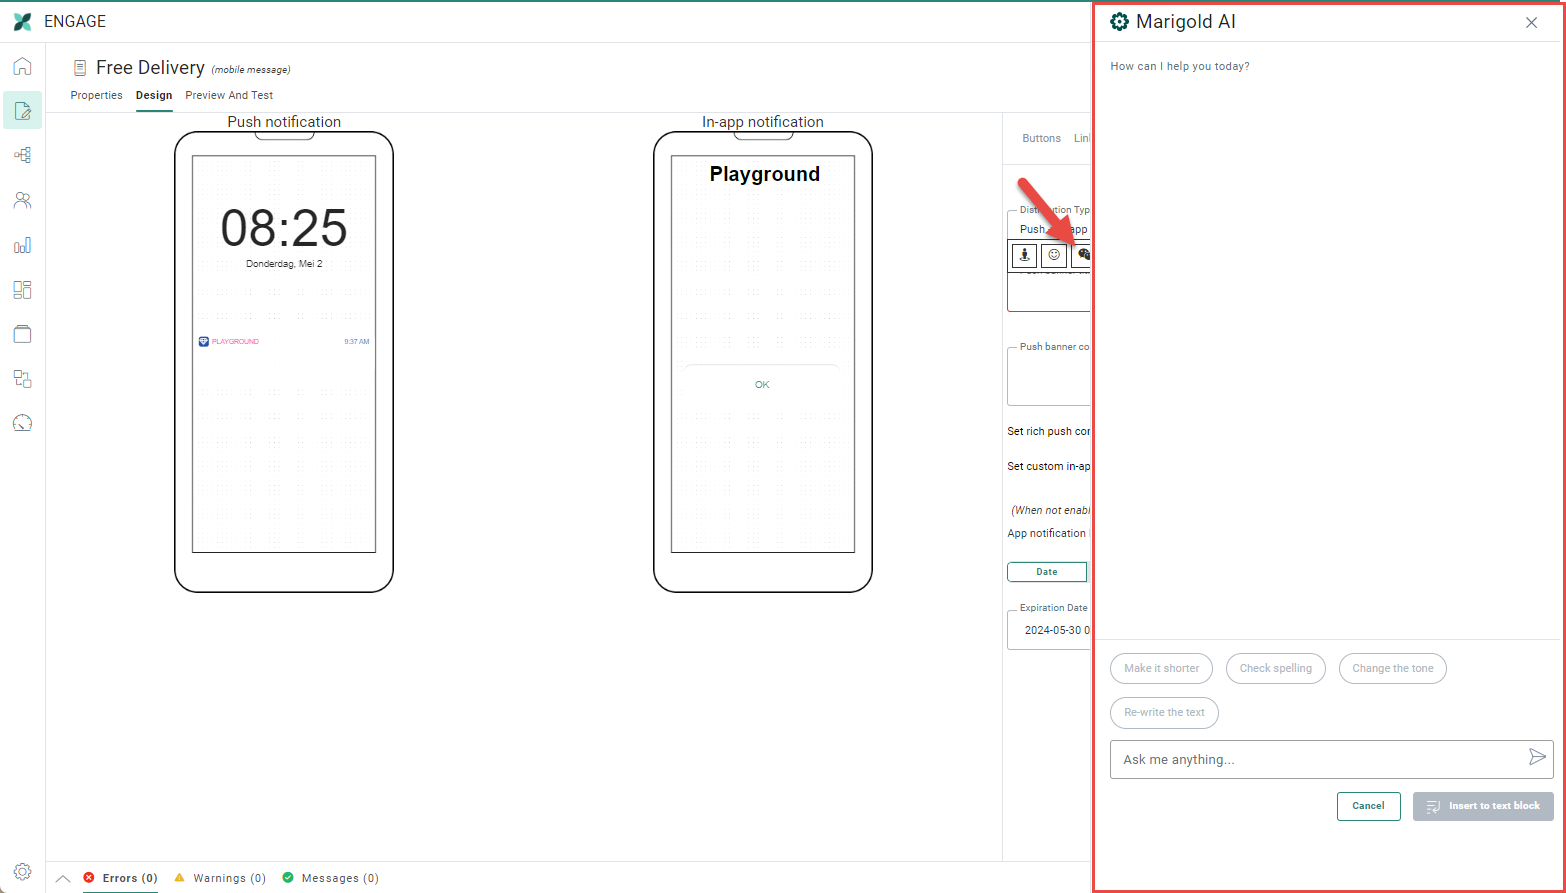
Note: If you select the existing text in your message first and then click the AI icon, the selected text is used as the question in your dialog and the AI generated text will overwrite the selected text in your message if you agree to use it.
Additional options are available to make the selected text shorter, check the spelling, change the tone or completely rewrite the text.
- Expiration date — Specify the date when the in-app notification will expire and become unavailable. If the user doesn't retrieve the notification before the expiration date, the notification is removed from the inbox.
Note: Depending on the operating system used, the following behavior occurs. In iOS, the expiration date is not limited, while in Android, the maximum allowed expiration time is 4 weeks. The expiration date is unique for a message, which means that any expiration date set above 4 weeks will automatically be limited for android to 4 weeks.
The expiration date is by default set to 'today+1 months'.
Example: If you are sending a promotional push notification, it must be available only for a specific duration. When devices are offline and cannot receive notifications at the time they are sent, the notification will remain on the server until the expiration date. After that date, when devices become available again, it will no longer be sent.
All fields can contain personalization fields. These personalization fields depend on the selected audience list.
Example 1 :
The in-app title contains: A special offer for you, [%proper([MASTER.NAME])%]!
Example 2 :
The following expiration date is set: [%addweeks(sysdate(), 4)%]
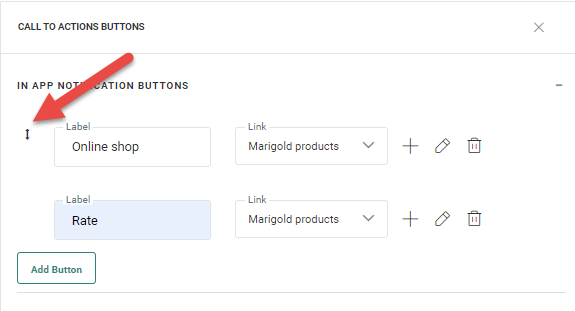
Define the action buttons
If the in-app notification requires user action or interaction, it can include up to three buttons for the user to choose from or take specific actions. If the notification exists in multiple languages, language-dependent button labels can be created. The buttons themselves are only created once for all languages but the content has to be adapted according to the selected language.
Note: If no button is added to the notification, an OK button is added automatically so that the notification can be closed. However, if the user adds a button to the notification, they must add a second link to close the message dialog.
1. To create a button, click the Buttons link in the toolbar.
2. The following panel is displayed that allows button creation:
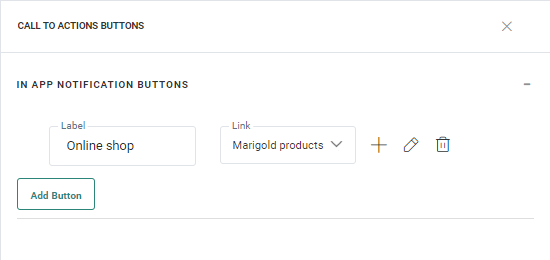
3. Click Add Button.
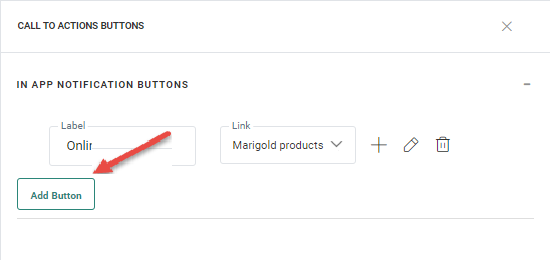
A new line is added where you can enter the button label and the actual link.
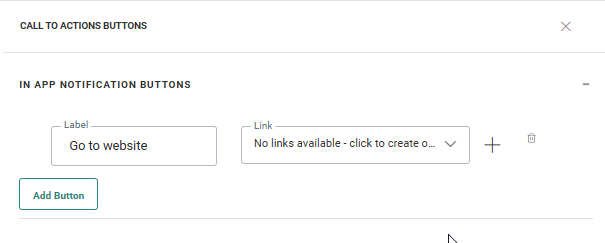
You can choose an existing link from the drop-down list, or you can create a new link.
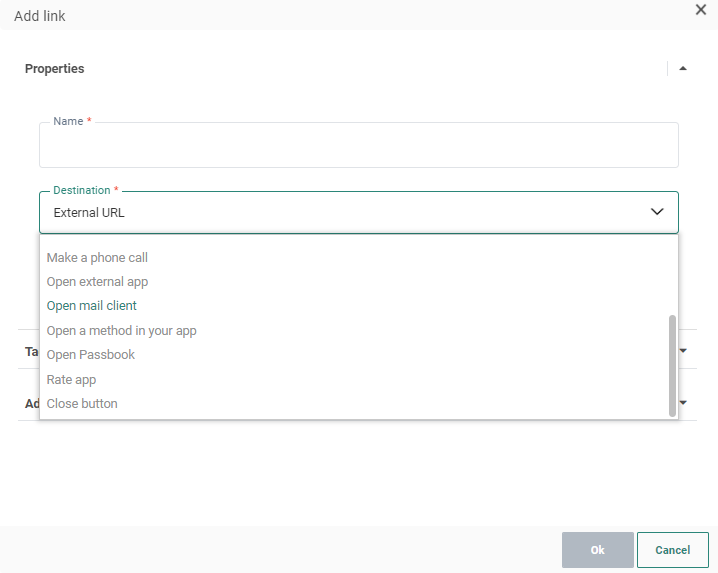
4. For each link, a Name, Destination type, and actual destination can be defined. The following link types are available:
- Define reaction in the journey — What happens when this button is clicked is defined in the journey itself: such as redirect to another journey, send an email, etc. Clicking the link in the notification will close the notification.
Note: When using this type, the mobile push component is followed by a Page component.
- Existing journey — Redirects the contact to a page in an existing journey.
- Make a phone call — Makes a phone call to the specified phone number. Enter the phone number with no hyphens or spaces. Example: 3212345678.
- Send an SMS/MMS/RCS — Opens the default SMS/MMS/RCS application to send an SMS/MMS/RCS text to the indicated number. Enter the phone number with no hyphens or spaces. Example: 32123456789.
- Open Email client — Opens the default email application to send an email to the indicated email address. Example: you@company.com
- External URL — Opens the default browser on a defined URL. Example: http://www.selligent.com)
- Open App — Opens a defined application such as Facebook, 'X' (formerly Twitter), etc. (e.g., fb:// on iOS ; com.twitter.android on Android).
Note: The syntax of the target differs depending on the platform. At the moment no automatic conversion is made to the correct syntax for iOS or Android. It is recommended to create 2 separate push components dedicated to a platform.
- Close button — Closes the notification.Depending on the configuration of the app, it opens the application for the contact. The click on the Close button is sent back to Selligent and can be used to trigger actions at Journey level. For example, a mobile message where the Close button is used as a ‘Remind me later’. The click on the Close button will trigger an action in the journey where a reminder notification is sent later in the day.
- Opena method in your app — Opens a method, or chapter, in the app. The same method name should be used in Android and iOS apps.
- Deeplink — This links to a specific location in an app, instead of just opening the app.
- Experience from Grow — Opens a Grow experience for the contact to fill out.
- Rate app — Allows the recipient to rate the app.
- Open Passbook— Opens the passbook file at the given URL (e.g., airline boarding pass, movie tickets, etc.). The passbook file must already exist. Selligent only provides the ability to open it. When the button is clicked, the notification is closed and the passbook is opened.
Note: Depending on
the selected Passbook provider personalization fields can be added. The
field values are sent via a dynamic URL.
Note 2: Passbook formats are different depending on the OS. Make sure to
target the right devices when sending a passbook.
Note: Buttons added to the notification behave like sensors that send the contact to an external location. They can be used as events in a journey to push the contact further.
When multiple buttons are configured, they can be repositioned by drag and drop. Changing the order here, will change the order in which they are displayed in the notification and this for all the languages: