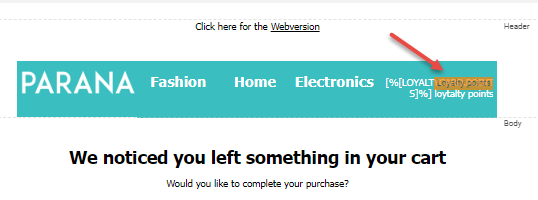
Visibility constraints can be used to hide or show content when specific criteria is matched. For each constraint, a default option must be provided that will be displayed if none of the criteria is matched.
Visibility constraints can only be used in pages, email messages, templates and quickstarts - not on SMS text or mobile push notifications. The method of applying the constraint depends upon the type of content it is applied to. The following sections describe how to apply the constraint for the different types of content.
- Email header — The header can be hidden by clicking the link Make this conditional. When you make the header conditional, it applies to all of the fields, including the Subject line and Preheader, which includes any Aliases and From or Reply aliases, or pre-header text.
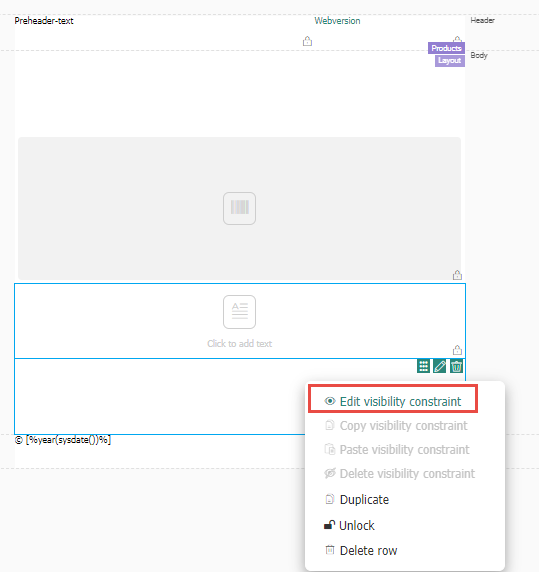
- Rows — Hover over the row and right-click
the
 icon and select Edit
visibility constraint to access the Constraint Builder.
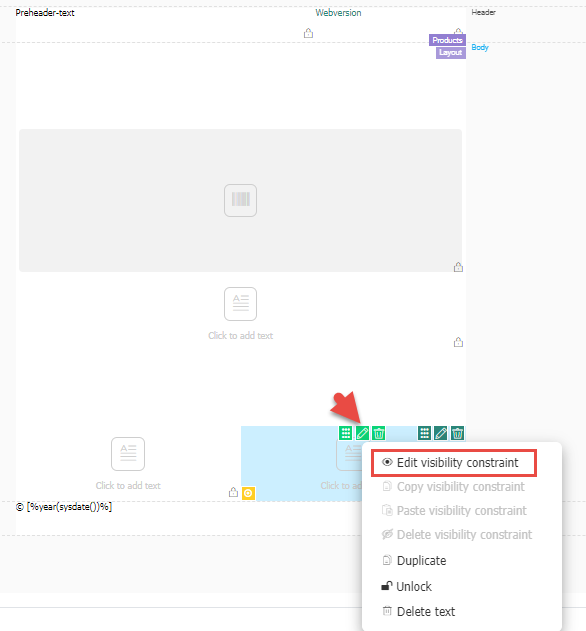
- Content components — Hover over the component (image,
text, divider, button) and click on the
 icon and select Edit visibility constraint
to access the Constraint Builder.
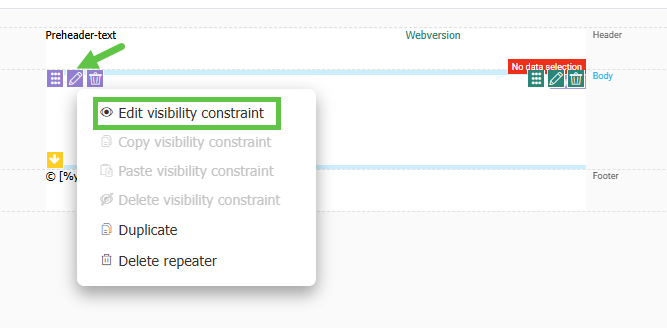
- Repeaters — Hover over the repeater and right click
the
 icon and select Edit
visibility constraint to access the Constraint Builder.
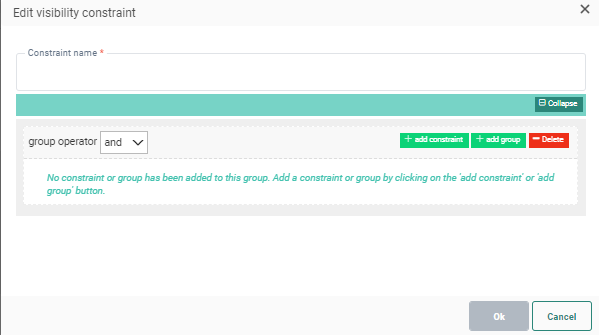
Using the Constraint Builder
The Constraint Builder dialog lets you select the criteria of the constraint. You can use audience fields, profile extension fields, data selection fields, date-time comparisons, and variables as filter criteria.
Group constraints
Constraints can be grouped in single or multiple groups with the “And, Or, AndNot, OrNot“ group operators. The operator used for a group is displayed in the 'Group operator' field.
Be sure to set the group operator before
creating a new group or constraint within a group.
Double-click the group to edit the operator or add a comment. Each group
can have its own operator. Move constraints and groups up and down to
change the order.
If multiple groups are required, create a group first and add constraints to the group.
Note: Use different groups if different operators are required for the constraints within the groups.
Example: I want to create a constraint
to select contacts in France or Belgium for who 'Phones' is one of their favorite products.
Here we created a group that compares the MASTER.FAV_PRODUCTS
field to see if is set to "Phones",
AND it checks the MASTER.COUNTRY
field to see if it is "France (FR)",
OR it checks to see if MASTER.COUNTRY
is "Belgium (BE)".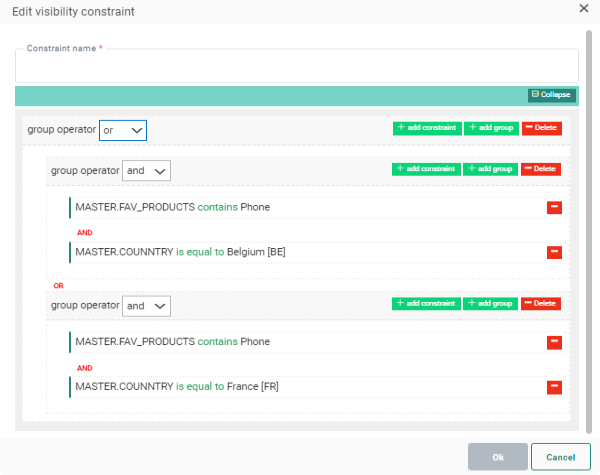
Create a constraint with the constraint editor
Constraints can be created by the following methods:
- Using data from the audience and linked lists
- Using data from data selections when defined for the template/message
- Checking date and time
- Using variables when available
- Using system values
- Using transactional fields when defined in a transactional message
- Using Custom Events data
- Using 1:N linked data
Audience and linked lists
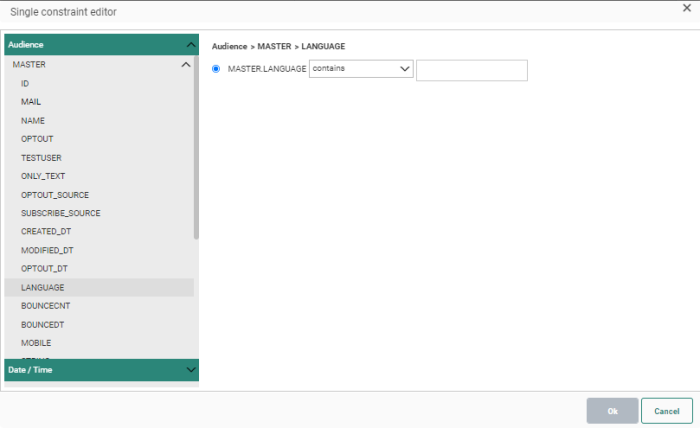
Numeric, text, and date fields from the main Audience list, as well as from 1:1 linked lists, can be selected to build the constraint. This includes data from Email Engagement and Email Interest profile extensions, when the features are active on the environment.
- Text fields — Checks to see if a specific value appears at some point in the string.
- Date and time fields — Compares the selected date with the current date and time .
- Numeric fields — Can be compared to a given number (bigger than, smaller than,) or see if it is between two given numbers.
- JSON fields in Custom Events - Compares the value of a specific field in the JSON structure to a given value. Depending on the type of field in the JSON structure different operators are available.
Date and time
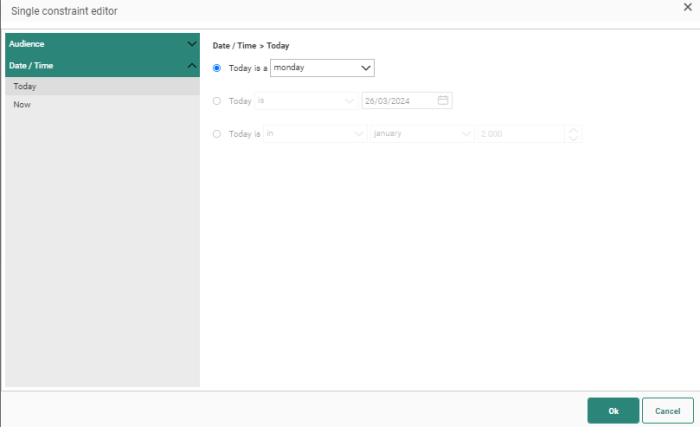
Today — Compare the date of today with a given weekday, a given date selected from a calendar or a given month in a year. (e.g., Today is in January 2017- Today is Monday)
Now — Compare the current date and time with a given date and/or time. (e.g., Now is before 16:00h)
Variables
Variables defined in template/message allow the message creator to select a specific value for that variable and apply that to the content. When a variable is used in a visibility constraint, the choice of value made will determine if the content is displayed.
(For more details on creating these variable, review this topic. )
Example: The
template contains some standard promotional information that only needs
to be displayed if the message is a promotional message. A variable is
created that allows the content creator to indicate if it is a promo or
not (boolean variable) and this variable is then used in the constraint.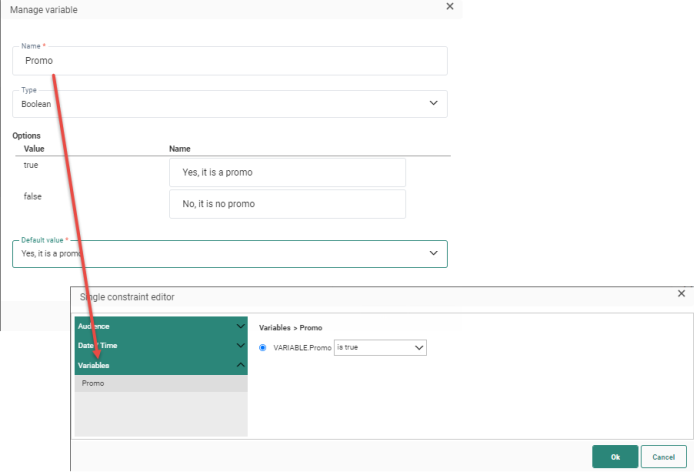
System values
System values are predefined values.
All available system values are listed:
Message related values
MESSAGE.SUBJECT — the subject of the message
MESSAGE.PREHEADER — preheader content, potentially conditional
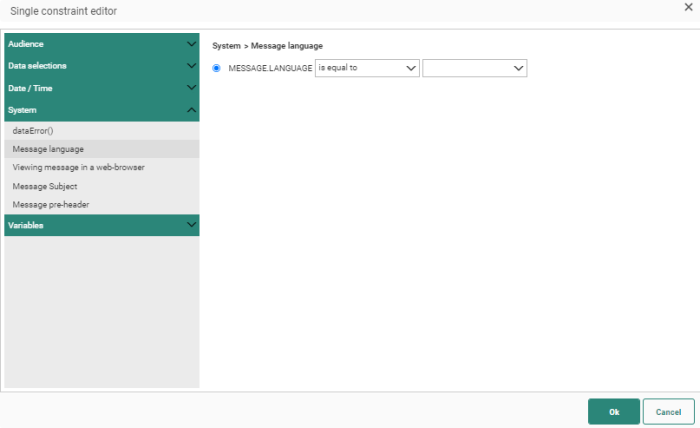
MESSAGE.LANGUAGE — language of the current message
Viewing message in web-browser — is true or false. To show (part of) the message in the email client only, or also in the web-browser.
HTML source code examples for manual usage :
- for a single block of text content : <sg:content id="content-4" expression="all(ne(tobool(InWebContext()),tobool('true')))" />
- for the entire message : <sg:conditional expression="all(ne(tobool(InWebContext()),tobool('false')))" />
System related values
sysdate — the current day returned by the server
dataError() — for example (part of) the error returned by a Validation Component in a Custom Journey
Example:
In a Custom Journey, a Validation Component is being used to validate a condition. When the condition is not met, the error message is triggered. You can then use a visibility constraint in a message or page (that is triggered afterward in the journey), to show/hide certain content by using the dataError() system value, as shown below.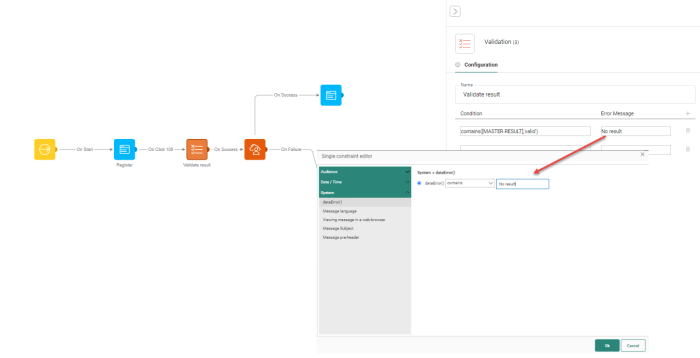
Data selections
Fields from all data selections configured in the template/message can be used to impact visibility. For every data selection, the number of items to choose from depends on how the data selection is configured. If cropping is set to '5', then five items will be returned and each one of those items can be used. The fields that can be used to build the constraint on depend also on the fields selected in the data selection definition.
Example: We
have configured a data selection named 'Products'
that returns five items. The fields that have been defined in the data
selection are listed and can be used as any other text, date or numeric
field: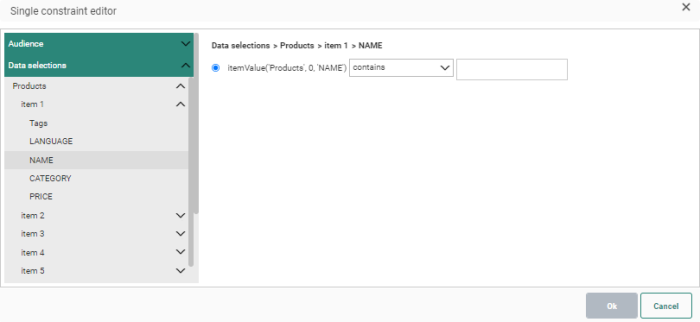
Important note: When using a data selection that is configured as a lookup data selection using the scope of the Abandoned Cart Journey and the PRODUCT parameter, then a function is available here that retrieves the cart value of the selected field instead of the value from the linked Product list: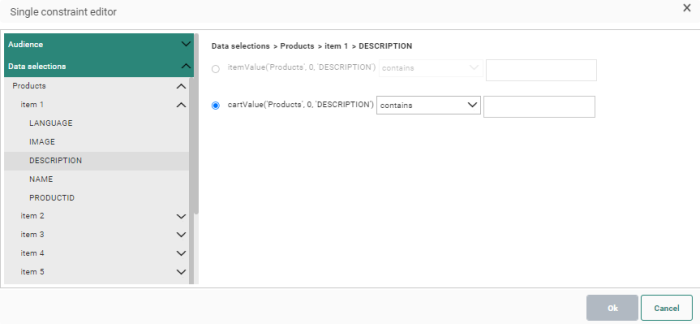
Transactional fields
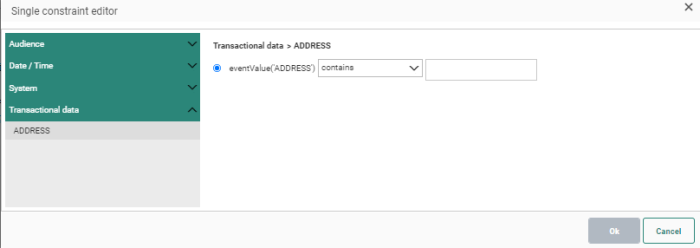
Transactional messages can be personalized with transactional fields for which the values are passed on to the message when it is called by the API. These transactional fields can also be used to set constraints on specific parts of the message.
You can use every transactional field defined in the message.
Custom Events Data
When an Audience List has a Custom Events List linked to it and you want to use data in this Custom Events List to create constraints in your message, you need to explicitly indicate this in the properties of your message.
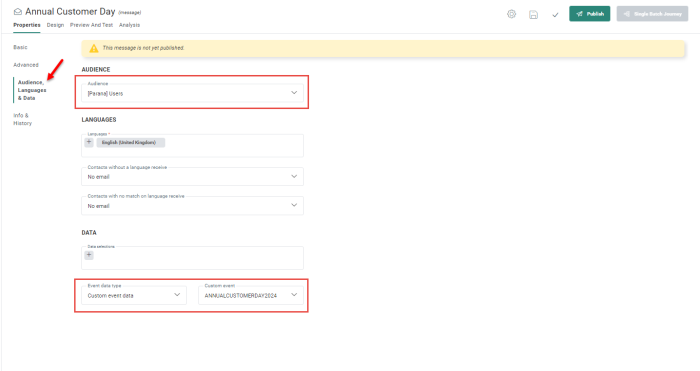
In your message, go to Properties > Audiences, Languages and Data > Data section > Event data type field and select Custom event data from the drop-down.
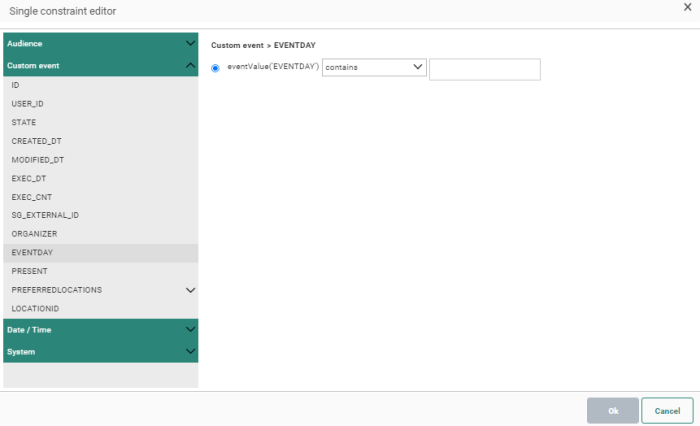
Once this is done, the Custom Events List will be available in the Constraint Editor:
1:N linked Data
Data in 1:N linked lists can be used in a visibility constraint in a message but several steps need to be taken to accomplish this. Currently, this is only available for Custom Journeys.
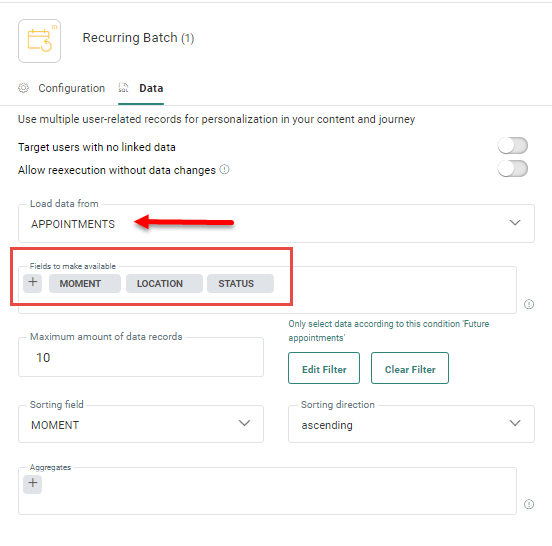
1. In a Single Batch or Recurring Batch Component, go to the Advanced properties of the component. In the Data section, select the 1:N linked list.
2. Next, select the fields in this list. Only selected fields will be available in the Constraint Editor.
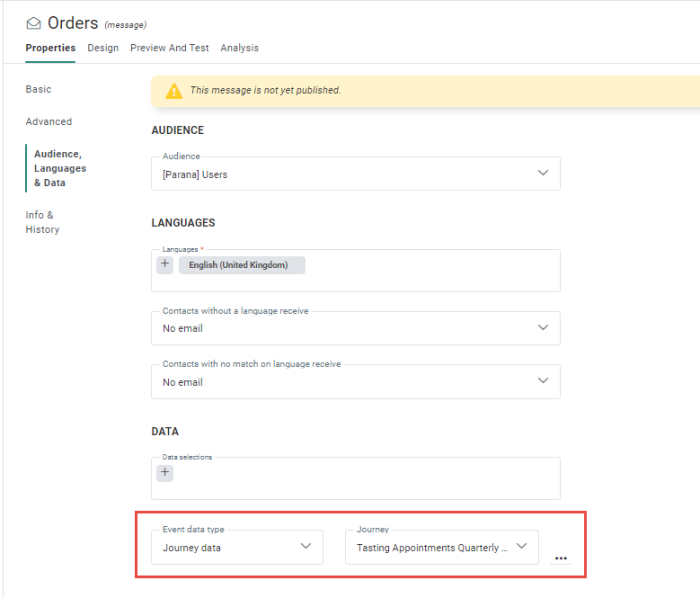
3. Next, create a message, either directly from the Journey chapter or from the Content chapter. Select if journey data needs to be used and which journey. Only journeys that have been set up to make 1:N data available are listed.
Note: When creating the message directly from the Journey chapter, this information is already prefilled.
4. The Constraint Editor now lists the selected fields.
Constraints in the content
When the constraint is created for a row or component, it is visible from the content.
Example of a constraint for the row. The condition is displayed to the right of the row.
When a condition is applied to a content component, the condition name is displayed within the component itself:
Re-use constraints with copy/paste function
Constraints can be re-used within the same content. Just create the constraint once on a component, hover the component and access the 'copy constraint' option in the right-click menu.

Paste the constraint on other components in the content.
Constraints in the source code
Visibility constraints can be added to a content (text, button, image, etc) component by using an expression in an attribute.
Example:
<sg:content expression="all(eq(tobool([VARIABLE.Loyal]),tobool('true')))"
>=> text only visible to contacts when the boolean variable Loyal
is set to true.
<sg:button expression="all(ne([MASTER.TESTUSER], toint('1')))"
>=> button only visible if the contact is not a test user
When an entire row or column requires a visibility constraint, a conditional tag is created around the row or column, with an expression in it.
Example:
<sg:conditional expression="eq(0,1)"> </sg:conditional>

