
Create an Ad Plan
Ad Targeter is an ad management platform designed to work with Sailthru's email products.
You'll need to set up at least one ad plan and a schedule for each campaign (for example, a recurring newsletter), or you can reuse an ad plan across multiple campaigns. This only takes a few minutes, and once complete, the only management necessary is the upload of new ad images.
Create Ad Plans
- From
- Select the Plans link from the left menu.
- Then click the Create New Ad Plan button.
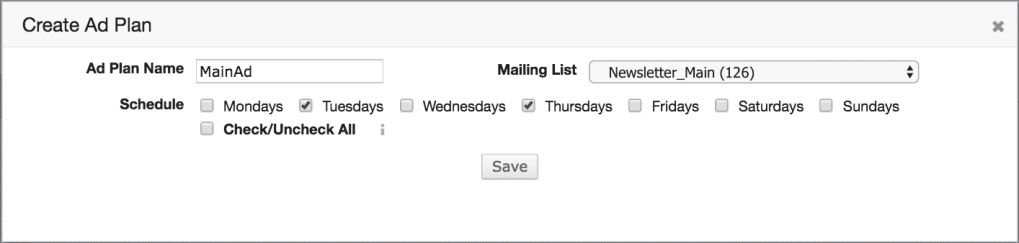
- Name your Ad Plan, select the days of the week.
-
- The drop-down menu for selecting Mailing List is a deprecated feature and will have no impact on your ad-serving.
- If you have a newsletter that goes out an irregular intervals you may leave the days of the week unselected to create an irregular-schedule plan.
- Once you've saved your ad plan, create the zones that your ads will be placed into by selecting the green plus icon.

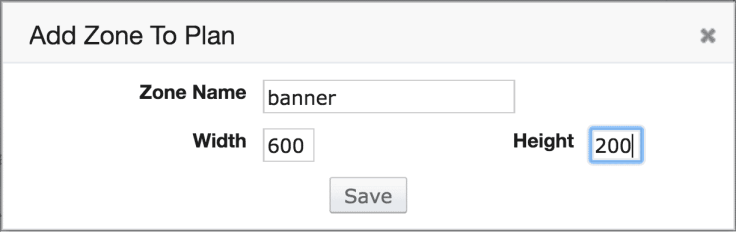
- When creating a zone, you'll specify the Zone Name as well as a Width and Height (in pixels). This is the default size the ad will be displayed in all templates. To enable responsive sizing (e.g. for mobile) or additional styles, see the Place Invocation Codes section below. Regardless, ensure that your template code will accommodate the specified ad size(s).
You can include more zones than a template might use, so your plan is reusable across multiple templates with varying numbers and sizes of ads.
- When creating a zone, you'll specify the Zone Name as well as a Width and Height (in pixels). This is the default size the ad will be displayed in all templates. To enable responsive sizing (e.g. for mobile) or additional styles, see the Place Invocation Codes section below. Regardless, ensure that your template code will accommodate the specified ad size(s).
- In the example below two ad zones have been created: banner and sidebar. The height and width of each correspond to the ad space coded into the chosen template. When coding a template, you'll want to be specific about the image size for each zone.

If you have any ongoing ads for which you won't need reporting, you can create a remnant ad that will always use the same creative.
- If an ad image is not added into the scheduler you will NOT receive reporting on the banner performance page. Remnant ads are not reported in Banner Performance. Additionally, ads in triggered emails are not included in Ad Targeter reporting.
-
An ad zone can only be deleted if it has no zones scheduled, or if all the zones are scheduled in the past. Deleting an ad zone will remove the reporting from the Ad Targeter Tab in campaign summary.
- If you are having trouble saving the banner, please disable ad blocking software or extensions within your browser. Also, ad blockers can prevent ads in emails from displaying in the Clickmap.
Place Invocation Codes
- Click the Paper icon in the right column to view the View HTML.
Copy the invocation code.

This will open the dialog box with the invocation.
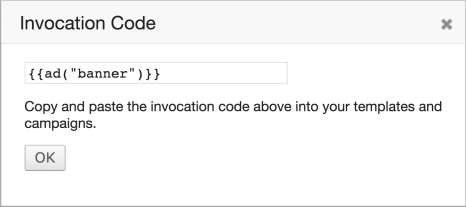
- Within the campaign/template editor's Code tab, paste the invocation code for each ad zone.
- To call the ad:
<span class="c10">{ad("Ad Zone Name")}</span>- For CSS that has a @media rule to enables mobile responsiveness, e.g.:
@media only screen and (max-width: 500px) { your_mobile_css_class { width {60px} }- Add the following Zephyr code in place of the normal
{ad("Ad Zone Name")}
{ad_orig = "class="} {ad_stylized = 'class="your_mobile_css_class'} {replace(ad("Ad Zone Name"), ad_orig, ad_stylized)} - From the Messaging menu in the top navigation, select Templates.
- Select the template you wish to use from the Template List to open the Template Editor.
- Click the Advanced tab and select the Ad Plan from the drop-down menu.
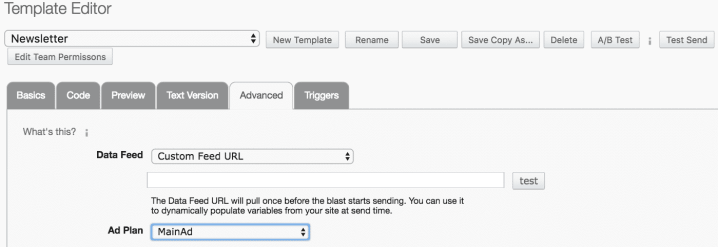
- Look at the Preview tab to see your ad. It will be visible if the criteria are met. For example, if you scheduled your ad for tomorrow, you will not be able to preview it today.
- Save your changes in the template editor.
Once you have an Ad Plan configured, you can:

