Creating Mobile App Audiences
The Audience page in Mobile displays the list of audiences--or segments--which you have previously created. Once you create an audience you can reuse it for targeting and analytics.
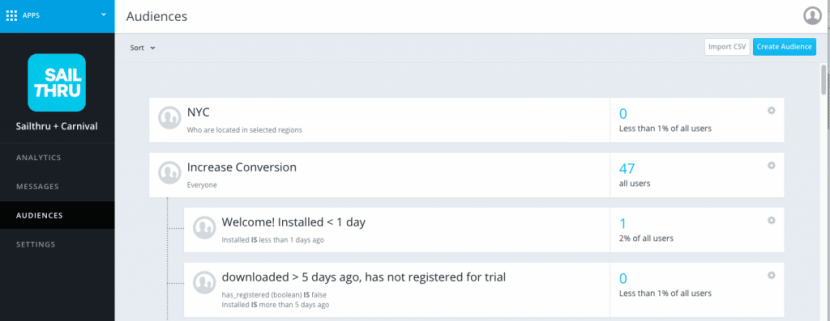
- There are two methods by which to create a new Audience:
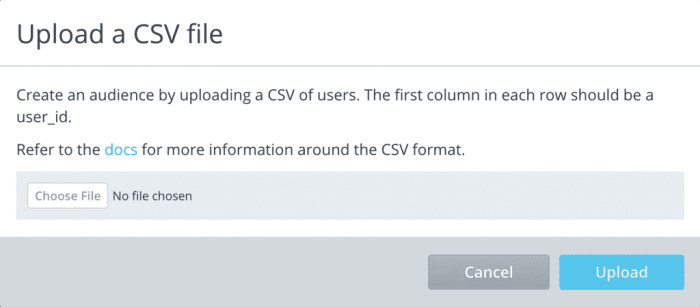
- Click Import CSV and choose the file you will use to create a new audience. Note: the first column for each row should be a user_id. See the By CSV section below for more details.
- Click the Create Audiences button in the top navigation bar on the Audiences page to launch the Create Audiences window.
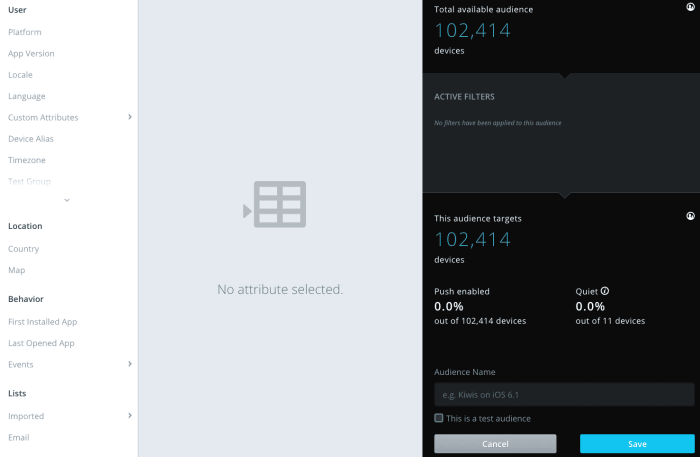
From this window, you can create a highly customized audience based on:
- User device attributes
- User behaviors
- Location
- When you select filters for your audience, these will be listed under Active Filters on the right side of the screen.
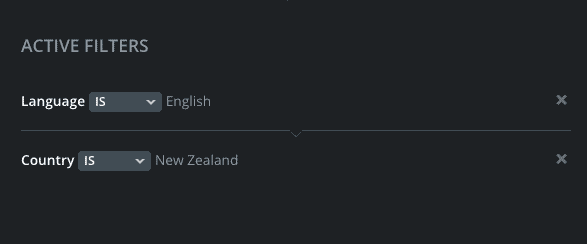
Also listed here will be the total number of users in the audience based on the filters you've chosen. The total number of users shows how many users are Push Enabled, and of the enabled users, how many are set to Quiet.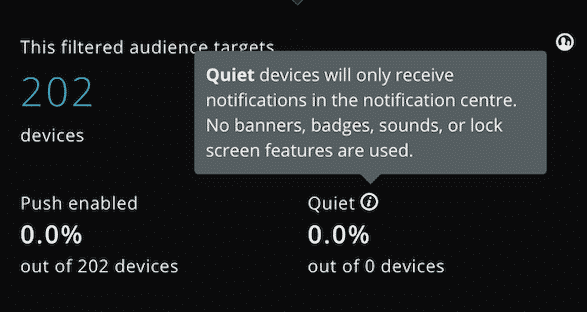
Note: Creating an audience without any filters will pull in all users to the new audience. - Once you complete selecting the filters for your audience, enter the Audience Name in the lower right and click Saveto create your audience.
If you wish to create a Test Audience, select This is a Test audience:
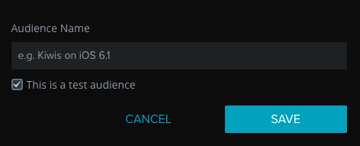
Test Audiences can be used in the Mobile UI as well as the Sailthru UI. In the Mobile UI, when you select the Audience feature from the left-hand side, one can filter for your Test Audiences. Then, one can edit, update or delete.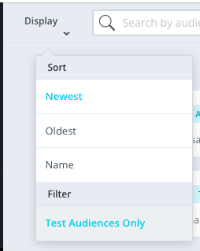
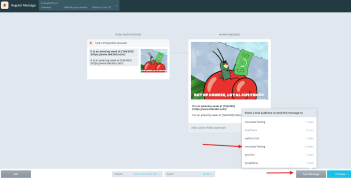
Test Audiences are used within the creation of Push/In App Messages within the Mobile UI.
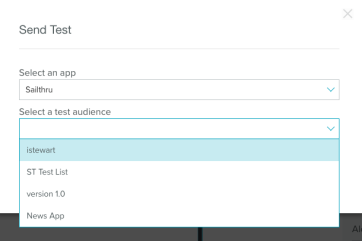
In the Sailthru UI, Test Audiences are available in the Messaging section when one is editing a Push/In App Template.
User Device Attributes
The Device Attributes options allow you to create an audience based on a range of factors.
|
Attribute |
Definition |
|---|---|
|
Platform |
The operating system (OS) of the device (i.e. iOS or Android). |
|
App Version |
The version of your app that the user has installed. |
|
Locale |
The geographic locale of the device. |
|
Language |
The language setting for the device. |
|
Custom Attributes |
Custom meta data, such as birthday, passed to Mobile. Note: This is akin to custom profile fields (variables or vars) in the main platform. |
|
Device Alias |
The alias set on a device in the Device Logs. |
|
Timezone |
The global time zone in which the device is located in. |
|
Test Group |
Select from up to 10 randomly assigned deciles of your app's user base, labeled Group 1-10, for testing and other segmentation purposes. Each user's Test Group assignment will remain consistent over time. Test Groups can be used in conjunction with mobile message AB testing. |
|
Device ID |
The unique Mobile alpha-numeric identifier assigned to each device. |
|
Device Model |
The model of the device a user is user. |
|
Push Status |
Whether or not a device is push enabled. |
|
Development Mode |
Filter for devices set to "Development" from within the Device Logs. |
|
OS Name |
The name of the OS currently running on the device. |
|
OS Version |
The version of the OS currently running on the device. |
|
SDK Version |
The SDK version running the app on the device. |
|
User ID |
The custom user_id being set on the device. |
By Location
The Location interface allows you to filter your Audience based on where your users are. You can target by Country or set specific areas on the Map tab.
The Map features allows you to create polygons on specific geographic areas of the map, for maximum accuracy around the city, state or area you are targeting. Alternatively, you can target a specific country based on the Mobile-tracked geo-data.
Note: By default, location is tracked by IP address. Other options include via GPS and iBeacons. For more information, see Using Location Tracking.The location API also supports point and radius targeting.
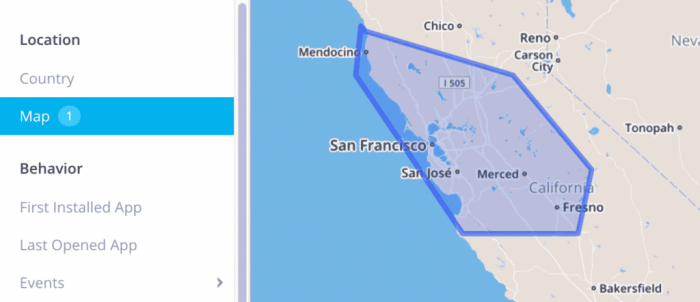
All targeting attributes can be combined together. All attributes are required, and if you want to exclude one, you may select "IS NOT" from the drop down. Combining uses of "IS" and "IS NOT" will let you target with even more power.
By Behaviors
Creating audiences based on user behaviors is a helpful to make messages specifically relevant to past actions of the user. For example, you can create an audience based on Last Opened App to regularly message with incentives, such as a sales or breaking news, to prompt these users to open the app.
|
Attribute |
Definition |
|
First Installed |
The date on which the app was first installed. |
|
Last Opened |
The date on which the app was last opened. |
|
Events |
Events may be chosen from predefined common events or customized based on your app and marketing needs. See the section below on Custom Attributes. Data from other analytics platforms, including Adobe Analytics and Google Analytics, can be passed to Mobile to set up audiences. Examples:
|
By Custom Attributes
Custom Attributes offer great flexibility when you need to segment your audience. This lets you define values you can expect from your users and then target based on those values.
For example:
-
-
- Max Budget : 50,000
- Birthday : 3rd of December 1992
- Average Score : 4.32
- Current Level : 51
- Twitter Handle : @CarnivalMobile
-
You can segment with values that are words (strings), but more flexibility is available with ranges. For example:
-
-
- Send all users over level 50 a custom message (Current Level is greater than 50)
- Send a message to all millennials about something (Birthday is between 1980 and 2004)
-
Ranges can be less than, greater than and in between. Setting these attributes is easy for a developer. For more information, please see our developer documentation.
By CSV
In addition to creating audiences through the Audience Builder, you can also create audiences by uploading a list of User Identifiers that you created outside of Mobile. You can now analyze and group your users in another platform, such as your CRM, Excel, or external analytics provider, and upload this list to Mobile's Audience Builder via a CSV file.
Note: To take advantage of the option to create an audience by uploading a CSV, the CSV must include a User ID. As a best practice, always set up apps to pass a User ID. If the user_id does not exist in your app, it will not appear in the audience.
Once your CSV-created audience is uploaded, it will act as a segmentation filter like a Custom Attribute inside the Audience Builder. This means you can you can target your CSV-created audience even further - such as by geo-location or language.
When should you create an audience through CSV? When you know something about a group of users that doesn't come from your mobile app or can't be synced through our APIs, CSV upload is a great option. For example, use CSV upload if you'd like to retarget users who clicked a link in an email, but you don't have a tech solution to push this info automatically to Mobile.
CSV file specs:
- File must be saved with the .CSV extension
- First column must include a list of unique User Identifiers on each row
- Information in columns outside of the first column will not be uploaded
- Header row is not necessary
The first column of your CSV would look like this example:
example_user_1@example.com example_user2@example.com example_user3@example.com example_user4@example.com
Please note that the number of users that appear in the CSV-created Mobile audience may differ from the number of unique User Identifiers in your CSV list. Why? Your CSV list may include users who have not downloaded the app (making your Audience count smaller), or a User Identifier may be associated with more than one user device, like an iPhone and iPad, which Mobile registers as 2 Audience members (increasing the size of your Audience).
Note: To support this feature, you need to ensure that you are sending a User ID to Mobile from your app. If the userID exists in Mobile, the device will be added to the audience. if the userID does not exist, the device will not be added to the audience.
CSV Files Based on Coordinates
Upload a single CSV file to create multiple geofenced audiences at once and group multiple locations into a single audience. The file must be in the following format withaudience_name as the first column: audience_name,shape_type,latitude,longitude,radius,unit- audience_name: The name of the audience. Specifying the same audience_name for different entries will group them into the same audience
- shape_type: Currently only "circle" is supported
- latitude: The latitude of the center point of the circle.
- longitude: The longitude of the center point of the circle.
- radius: The radius of the circle.
- unit: The unit of the radius (yards, feet, miles, meters, kilometers)
Multiple Audiences in One File
Creating multiple audiences in one file requires multiple audience_name parameters. Your file should resemble the following example that creates one audience per airport:
audience_name, shape_type, latitude, longitude, radius, unit
Taupo Airport, circle,-38.73970031738281,176.08399963378906,1,km
Chatham Islands-Tuuta Airport, circle,-43.810001373291016,-176.45700073242188,1,km
Dunedin Airport, circle,-45.9281005859375,170.197998046875,1,km
Gisborne Airport, circle,-38.663299560546875,177.97799682617188,1,km
Hokitika Airfield, circle,-42.713600158691406,170.98500061035156,1,km
Hamilton International Airport, circle,-37.8666992188,175.332000732,1,km
Kerikeri Airport, circle,-35.26279830932617,173.91200256347656,1,km
Kaitaia Airport, circle,-35.06999969482422,173.28500366210938,1,km
New Plymouth Airport, circle,-39.00859832763672,174.1790008544922,1,km
Hawke's Bay Airport, circle,-39.465801,176.869995,1,km
Nelson Airport, circle,-41.298301696777344,173.2209930419922,1,km
Invercargill Airport, circle,-46.41239929199219,168.31300354003906,1,km
Oamaru Airport, circle,-44.970001220703125,171.08200073242188,1,km
Palmerston North Airport, circle,-40.32059860229492,175.61700439453125,1,km
Queenstown International Airport, circle,-45.0210990906,168.738998413,1,km
Rotorua Regional Airport, circle,-38.10919952392578,176.31700134277344,1,km
Tauranga Airport, circle,-37.67190170288086,176.1959991455078,1,km
Timaru Airport, circle,-44.302799224853516,171.22500610351562,1,km
Woodbourne Airport, circle,-41.5182991027832,173.8699951171875,1,km
Wanaka Airport, circle,-44.722198486328,169.24600219727,1,km
Whakatane Airport, circle,-37.92060089111328,176.91400146484375,1,km
Whangarei Airport, circle,-35.7682991027832,174.36500549316406,1,km
Westport Airport, circle,-41.73809814453125,171.58099365234375,1,km
Wanganui Airport, circle,-39.96220016479492,175.02499389648438,1,km
One Audience with Multiple Locations
Creating one audience with multiple locations requires you to use one audience_name with multiple coordinates. The following example creates one audience with multiple circles:
audience_name, shape_type, latitude, longitude, radius, unit
Medium NZ Airports, circle,-38.73970031738281,176.08399963378906,1,km
Medium NZ Airports, circle,-43.810001373291016,-176.45700073242188,1,km
Medium NZ Airports, circle,-45.9281005859375,170.197998046875,1,km
Medium NZ Airports, circle,-38.663299560546875,177.97799682617188,1,km
Medium NZ Airports, circle,-42.713600158691406,170.98500061035156,1,km
Medium NZ Airports, circle,-37.8666992188,175.332000732,1,km
Medium NZ Airports, circle,-35.26279830932617,173.91200256347656,1,km
Medium NZ Airports, circle,-35.06999969482422,173.28500366210938,1,km
Medium NZ Airports, circle,-39.00859832763672,174.1790008544922,1,km
Medium NZ Airports, circle,-39.465801,176.869995,1,km
Medium NZ Airports, circle,-41.298301696777344,173.2209930419922,1,km
Medium NZ Airports, circle,-46.41239929199219,168.31300354003906,1,km
Medium NZ Airports, circle,-44.970001220703125,171.08200073242188,1,km
Medium NZ Airports, circle,-40.32059860229492,175.61700439453125,1,km
Medium NZ Airports, circle,-45.0210990906,168.738998413,1,km
Medium NZ Airports, circle,-38.10919952392578,176.31700134277344,1,km
Medium NZ Airports, circle,-37.67190170288086,176.1959991455078,1,km
Medium NZ Airports, circle,-44.302799224853516,171.22500610351562,1,km
Medium NZ Airports, circle,-41.5182991027832,173.8699951171875,1,km
Medium NZ Airports, circle,-44.722198486328,169.24600219727,1,km
Medium NZ Airports, circle,-37.92060089111328,176.91400146484375,1,km
Medium NZ Airports, circle,-35.7682991027832,174.36500549316406,1,km
Medium NZ Airports, circle,-41.73809814453125,171.58099365234375,1,km
Medium NZ Airports, circle,-39.96220016479492,175.02499389648438,1,km
Upload a Location CSV File
- Click the "Import CSV" button at the top-right of the Audience page.
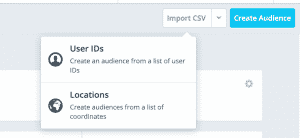
- Select the "Locations" option.
- Select the CSV file you wish to upload using the "Choose file" button followed by the "Upload" button.
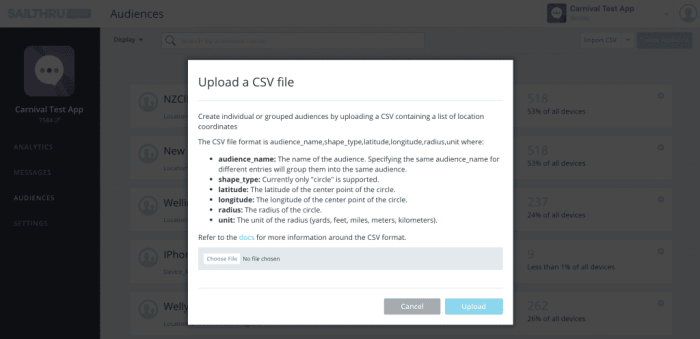
- The file will be uploaded and processed. You will receive an email with a link to the audience page when the audiences have been generated.
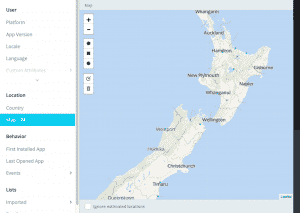
- If you create a single audience with multiple locations, your mapped audience will resemble the following:
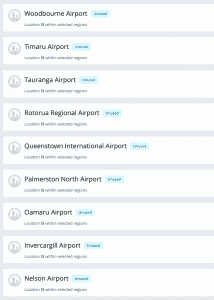
- If you created multiple audiences, you'll see the generated audiences:
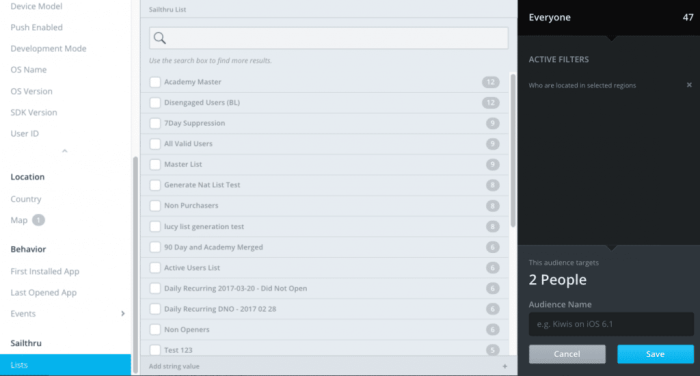
Lists
If also use the main messaging platform, you can take advantage of Lists that you've created and set up the List as an Audience.
