Configure an Email Load and Send Campaign: Message
The Message sub-section is used to enter and preview the Email message content.
The features and options available from the Message sub-section are described below.
Enter Content
Define Message Content
The Message section allows you to define the header fields, content, and Format Versions of the email message that will be sent to your customers.
To define the header fields:
-
The From Address drop-down menu is populated with all of the From Addresses defined for the selected Sender Profile. The From Address indicates to the recipient from where the email is coming. From this drop-down menu, selected the desired From Address.
-
The From Name field is populated with the Friendly From value that's defined for the From Address you selected in step 1 (see Sender Profiles for more details on defining the Friendly From value). Optionally, you can override this value and enter a custom Friendly From value. You can also use Personalization options in the Friendly From field.
-
The To Name field displays what will appear in the recipient’s email client as to whom the email is addressed. Similar in concept to the Friendly From value defined above, this field is the Friendly To value, allowing you to display something other than just the recipient's email address. By default, the platform utilizes the recipient's first name and last name as the To Name value. Optionally, you can override this value and enter a custom To Name value. You can also use other Personalization options in the To Name field.
-
In the Subject Line field, enter a subject line for your message. This value is displayed in the Subject area of the recipient's email client. Optionally, you can use Personalization options in the Subject Line field. You can also add symbols, or emoticons, into a subject line. Simply copy-and-paste the symbol directly into the Subject Line field (you don't need to include the UTF code for the symbol).
-
From the Message Encoding drop-down menu, select an encoding option. The most common encoding method in North America is "Unicode (UTF-8)."
-
The Summary field is used only if you're utilizing a Facebook Like Button within your message content. This Summary consists of a short message that appears on the interstitial webpage after the recipient clicks the Like button. Optionally, enter your message in the Summary field. This field supports the use of Personalization options.
For Email Campaigns, you must select the Content Source for your message. Click an option below for more information on using a content source:
Provide Content
-
In the Content section click change.
-
In the Choose Content Source pop-up window, click provide content.
-
Click edit to open the Content Editor screen.
Template
-
In the Content section click change.
-
In the Choose Content Source pop-up window, click template. The Browse Templates pop-up window is displayed.
-
From the Browse Templates pop-up window, you can click on a folder in the directory structure to see a list of all the Templates stored within that Folder. Or, if you want to search across the entire system, click the double-left arrow icon near the top of the directory structure; the system collapses the directory structure and shows every Template in the system. This pop-up window also allows you to search based on Tags, or by name. When you find the desired Template, click on its name.
Note: Templates have to be created using the same source table as the Campaign in order for them to be available as a selection.
-
The Content section is refreshed to show the name of the selected Template.
Dynamic Block
-
Click change. The Choose Content Source pop-up window is displayed.
-
Click dynamic block. The Browse Dynamic Blocks pop-up window is displayed.
-
From the Browse Dynamic Blocks pop-up window, you can click on a folder in the directory structure to see a list of all the Dynamic Blocks stored within that Folder. Or, if you want to search across the entire system, click the double-left arrow icon near the top of the directory structure; the system collapses the directory structure and shows every Dynamic Block in the system. This pop-up window also allows you to search based on Tags, or by Dynamic Block name. When you find the desired Dynamic Block, click on the Dynamic Block name.
Note: Dynamic Blocks have to be created using the same source table as the Campaign in order for them to be available as a selection.
-
The Content section is refreshed to show the name of the selected Dynamic Block.
Content Block
-
Click change. The Choose Content Source pop-up window is displayed.
-
Click content block. The Browse Content Blocks pop-up window is displayed.
-
From the Browse Content Blocks pop-up window, you can click on a folder in the directory structure to see a list of all the Content Blocks stored within that Folder. Or, if you want to search across the entire system, click the double-left arrow icon near the top of the directory structure; the system collapses the directory structure and shows every Content Block in the system. This pop-up window also allows you to search based on Tags, or by Content Block name. When you find the desired Content Block, click on the Content Block name.
Note: Content Blocks have to be created using the same source table as the Campaign in order for them to be available as a selection.
-
The Content section is refreshed to show the name of the selected Content Block.
Add Personalization Fields
Personalization fields are used to populate your message with customer specific values from the database. For example, in the "Dear Customer" greeting, you could replace the word "Customer" with the customer's actual first name.
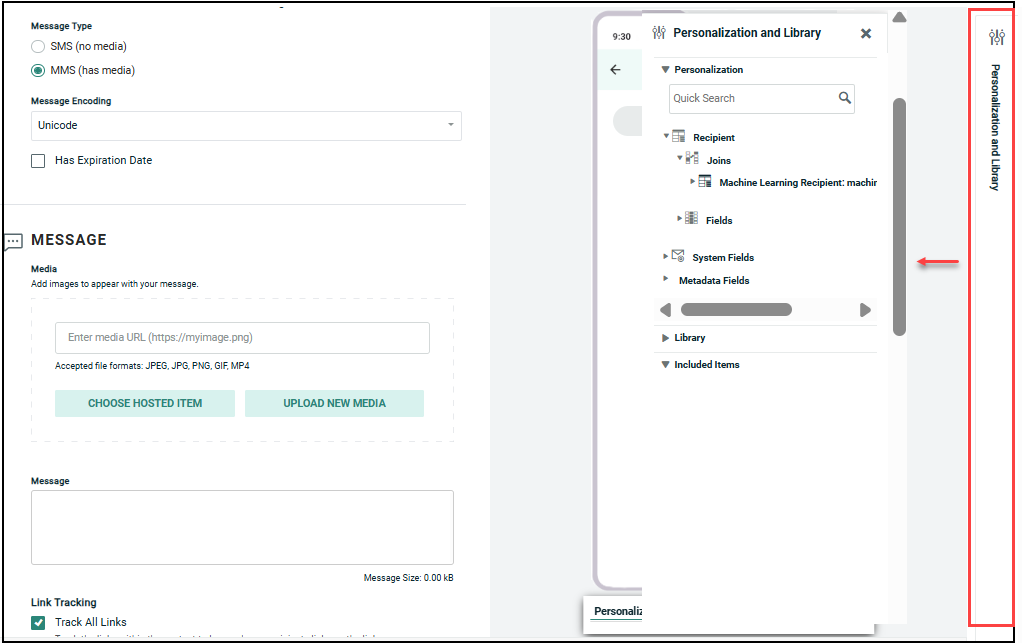
The available personalization fields are displayed within the Personalization and Library Pane on the right-hand side of the screen.
The Personalization Pane appears collapsed on the right-hand side of the screen. Within this panel, the available fields are organized into different expandable / collapsible groups. For example, you'll see a section for your Campaign source table. You may see another section called Joins if your source table is joined to another table, or a section called System Fields that contains system-generated fields, or a section called Metadata Fields that contains the Metadata fields defined in your account.
You can include various Dynamic content such as Dynamic Block, Looping Block, Content Block etc., in the message from the Library folder.
To add personalization to your message:
-
Place your cursor in the field where you want to add personalization.
-
Within the Personalization Pane, expand the desired group.
-
Double-click on the Personalization field name. Or drag the desired personalization field from the Personalization Pane, and drop it into the text field. An Insert Field Value popup dialog is displayed.
-
Optionally, enter a default value for this personalization field in the Default text box. The default value is used if their is no recorded value to personalize the message.
-
Optionally select a formatting mask from the Formatter drop-down menu. The formatting mask is used to control the appearance of the text in the personalization field. For example, you can format date fields as mm/dd/yyyy. The system includes formatting masks for currency, dates, numbers, and URLs. You can also use a formatting mask to truncate or encode the personalization field.
-
Click Ok. The system creates a new Merge Symbol for this personalization field.
Configure PURL Options
A Personalized URL (PURL) is a website address that contains one or more personalized elements, such as the consumer's first name and last name, for example.
Before you can use a PURL in your Campaign, you must complete the following setup steps:
-
Create a PURL Field
-
Bind that PURL Field to a PURL Domain
-
Assign the PURL Domain to a Web Form
After you've completed all those steps, you can bind the Web Form to your Campaign. When you bind the Web Form to the Campaign, the platform will automatically generate the values for the PURL Field.
To bind the Web Form to your Campaign:
-
In the Tool Ribbon, click Options > Add PURL Options. Within the Message section of the Campaign screen, the system adds a new PURL Setup section.
-
The PURL field is used to select the Web Form. Either begin typing in the form name, or click the search button (magnifying glass icon) to search for it.
-
From the URL Type drop-down menu, select either Prefix or Suffix to control where you want the personalization fields inserted into the URL.
For more information on setting up Personalized URLs, see the PURL Domains topic.
Add Reply Handlers
In some cases, recipients of a message may attempt to respond to that message. The platform can be configured to perform an automated action with these responses. These automated actions are referred to as Reply Handlers. The platform supports two different types of Reply Handlers -- Auto Reply Handlers and Forwarding Handlers.
Auto reply handlers
The platform can be configured to submit an automated reply message back to the recipient. The message could contain, for example, instructions on how to contact your company, a thank you for their reply, or other information.
To assign an Auto-Reply Handler profile to a Campaign:
-
In the Tool Ribbon, click Options > Add Reply Handlers. A new Reply Handlers section is added to the Message section of the Campaign screen.
-
From the Auto-Reply Handler drop-down menu, select the desired profile.
For more information on setting up Auto Reply Handlers, see the Auto Reply Handlers topic.
Forwarding handlers
The platform can be configured to automatically forward the consumer's reply (without any images or attachments), along with a standard message and subject, to a specified person or group. For example, you could forward all consumer replies to a sales team, or a customer service representative, for follow-up.
To assign a Forwarding Handler profile to a Campaign:
-
In the Tool Ribbon, click Options > Add Reply Handlers. A new Reply Handlers section is added to the Message section of the Campaign screen.
-
From the Forwarding Handler drop-down menu, select the desired profile.
For more information on setting up Forwarding Handlers, see the Forwarding Handlers topic.
Configure Email Headers
Most of the Email Header fields, such as From and To Addresses, are available from the main Campaign details screen. The platform also allows you to add optional Blind Carbon Copy (BCC) and Reply-to fields.
To add additional Email Header fields:
-
In the Tool Ribbon, click Options > Set Email Headers. The Email Headers pop-up window is displayed.
-
Optionally, enter a BCC email address into the BCC Address field. This email address will receive a copy of the Campaign message, but this address is not visible to the recipient.
-
Optionally, enter a Reply-to email address in the Reply-to field. This address instructs the recipient's email client where to send reply messages.
-
Click ok.
Add Attachments
The platform allows you to assign one or more Attachment files to a message (up to a maximum total file size of five megabytes).
To assign an Attachment to a Campaign:
-
In the Tool Ribbon, click Options > Add Attachment. Within the Message section of the Campaign screen, the system adds a new Attachment field.
-
In the Attachment field:
-
To select an existing Attachment, begin typing in the name of the desired Attachment. The system displays a pop-up menu of Attachments with this text string in the item name; select an Attachment from this menu. Or, click the browse button (magnifying glass icon). A Browse Attachments dialog box is displayed, showing all Attachments. Click on an Attachment.
-
To create a new Attachment, click the new button (plus-sign icon). A New Item dialog box is displayed. Enter a name for this Attachment, and select a location. Click Save new item. A blank Attachments screen is displayed (see Create a New Attachment for details on how to define and upload a new Attachment). When finished, click the Campaign tab in the Top Navigation Pane to return to the Campaign screen.
-
-
Beneath the Attachment field, the system displays the selected Attachment name, the file name, and the file size. Repeat step 2 as needed to add more Attachments to this Campaign. Optionally, to remove an Attachment, click the delete button (X) next to the Attachment.
For more information on setting up Attachments, see the Attachments topic.
Preview
The Preview window allows you to view a rendering of your message content as it will appear to your recipients. The Preview window also provides additional features as described below.
Preview Message Content
To see a preview of your Campaign message content:
-
In the Message sub-section, click preview. The system displays a simulated version of your message.
Note: Depending on the channel, you can also optionally access the Preview feature from within the Content Editor by clicking Edit Content > Preview in the Tool Ribbon.
-
If your message contains multiple format versions (such as an HTML version and a Plain Text version), you can view previews of each version. In the Tool Ribbon, click Preview Content > Message Type. This drop-down menu lists all of the versions defined for your message. Select the desired version; the preview is refreshed to show that format version
-
When finished, click Preview Content > Close Preview to return to the Campaign screen.
Test Personalization Fields
To test the personalization fields in your message content:
-
In the Message sub-section, click Preview. The system displays a simulated version of your message.
-
The pane on the right-hand side of the screen lists all of the personalization fields within the message content. In one of these fields, type in a test value; the system refreshes the preview with this value inserted into the message.
Test Dynamic Content
To test the dynamic content in your message content:
-
In the Message sub-section, click Preview. The system displays a simulated version of your message.
-
If your message contains dynamic content (such as Dynamic Blocks), the different content variations are displayed in the pane on the right-hand side of the screen. Click the left-right arrow icon to expand this pane in order to see a list of all the dynamic content variations.
-
Select a content variation. The preview is refreshed to show that variation of the content.
Check Spam Score
Most consumers have anti-spam filters in their email client software which will attempt to detect and delete inbound email messages that they consider to be "spam" (or, unsolicited bulk email). In order to prevent your legitimate email Campaign messages from getting deleted by a consumer's anti-spam filter, Cheetah Digital is integrated with a third-party tool called SpamAssassin. This tool runs a test that parses the content of your marketing message to look for things that might cause an anti-spam filter to flag your email as spam. This test looks for a wide range of potential issues, such as text formatting, particular phrases or keywords, and incorrect HTML code.
The result of this test is a Spam Score -- a number that indicates how likely it is that your email message will be flagged as spam. Higher values are "bad," and represent a greater likelihood of your email message being considered spam. The default threshold for many email clients is "5," meaning that a score of 5 or higher will not be delivered to its intended recipient (although please note that this threshold can be customized).
To run the Spam Score test on your email message:
-
In the Message sub-section, click preview. The system displays a simulated version of your message.
-
In the Tool Ribbon, click Preview Content > Check Spam Score. The system runs the Spam Score test.
-
When the test is complete, the results are displayed within a pop-up window. This window shows the Spam Score, and indicates whether this email message would be flagged as spam. The window also lists the various "rules" or conditions that this message triggered, along with the resulting score for each rule (different rules have different scores, depending on how critical they are).
-
When finished, click close.
Note: If your email message fails the Spam Score test, we highly recommend that you correct as many conditions as possible before deploying your Campaign. The Spam Score pop-up window lists each condition that your message triggered, so you can use these conditions as guidelines for what you need to fix in your email, in order to improve your Campaign's deliverability.
The Spam Score is also available as part of the pre-launch Audits, which allows you to see the Spam Score for each version of your message content.
