
Welcome Journey Template
The objective of the Welcome Journey template is to introduce new subscribers, who have shared their email or mobile number, to your brand's offerings and keep them engaged.
Start by watching this introductory video:
We'll use the scenario where a consumer signs up for promotional emails, such as newsletters. Success is achieved if the consumer completes the journey without unsubscribing, indicating effective communication and retention for future promotional messages.
After building your Journey, you need to test it, go live, and report on its performance. These steps are covered in separate user guides.
Implementation Details
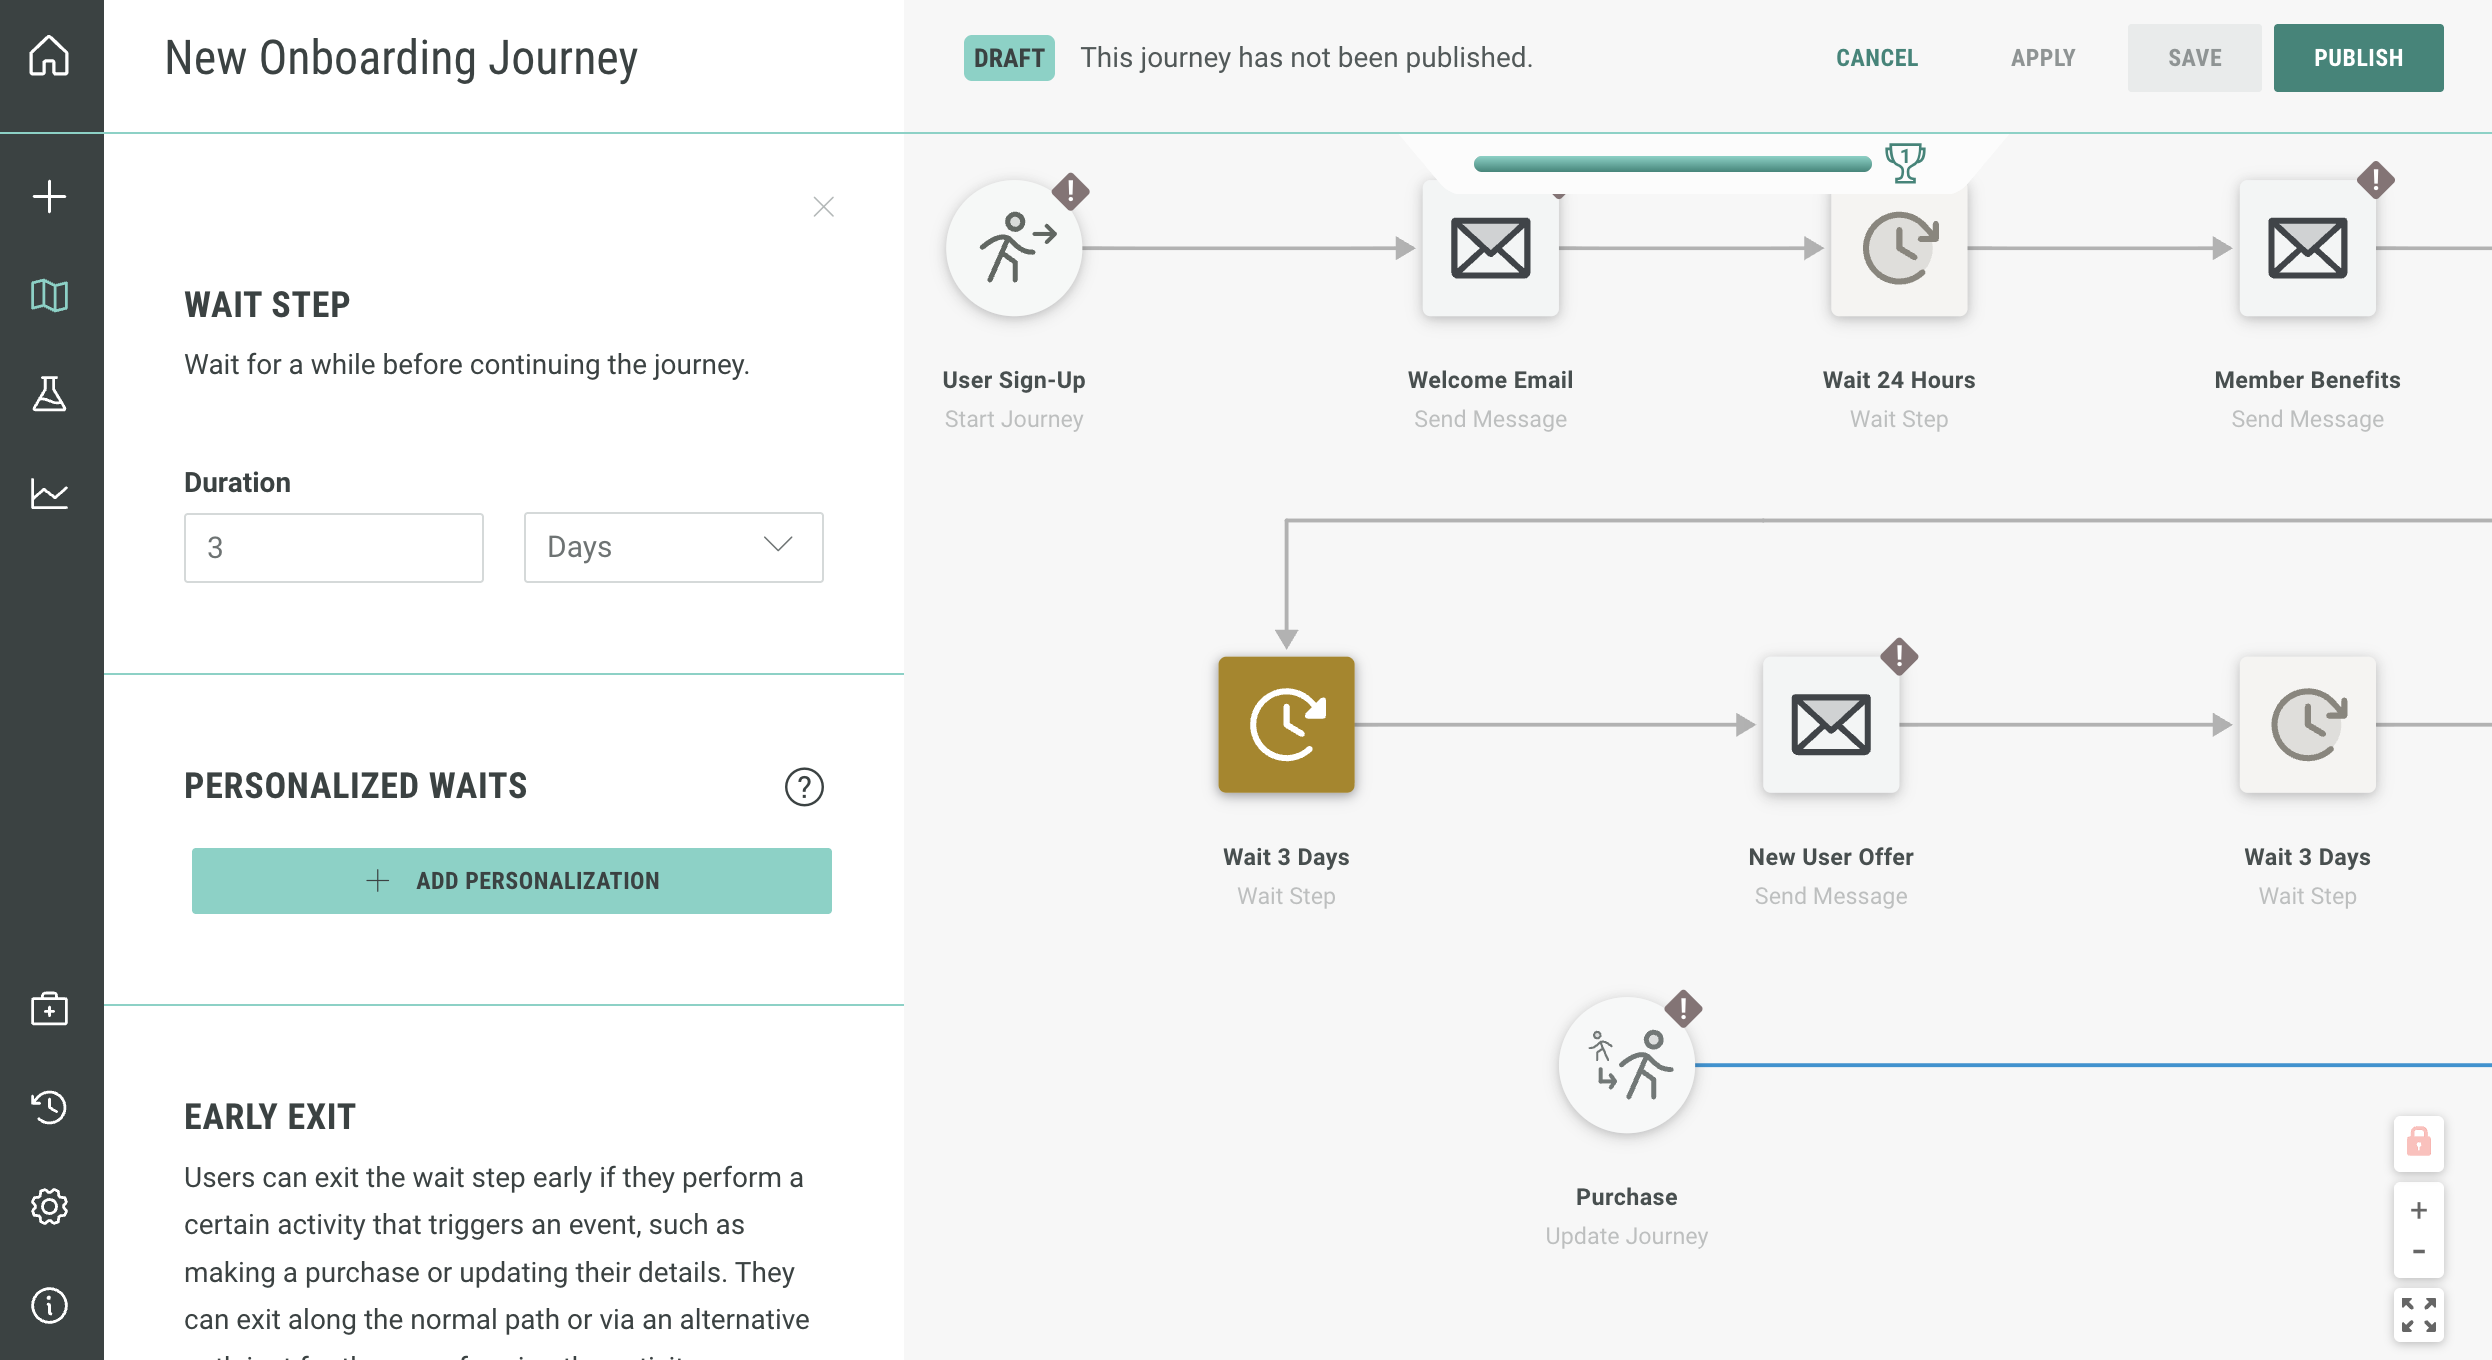
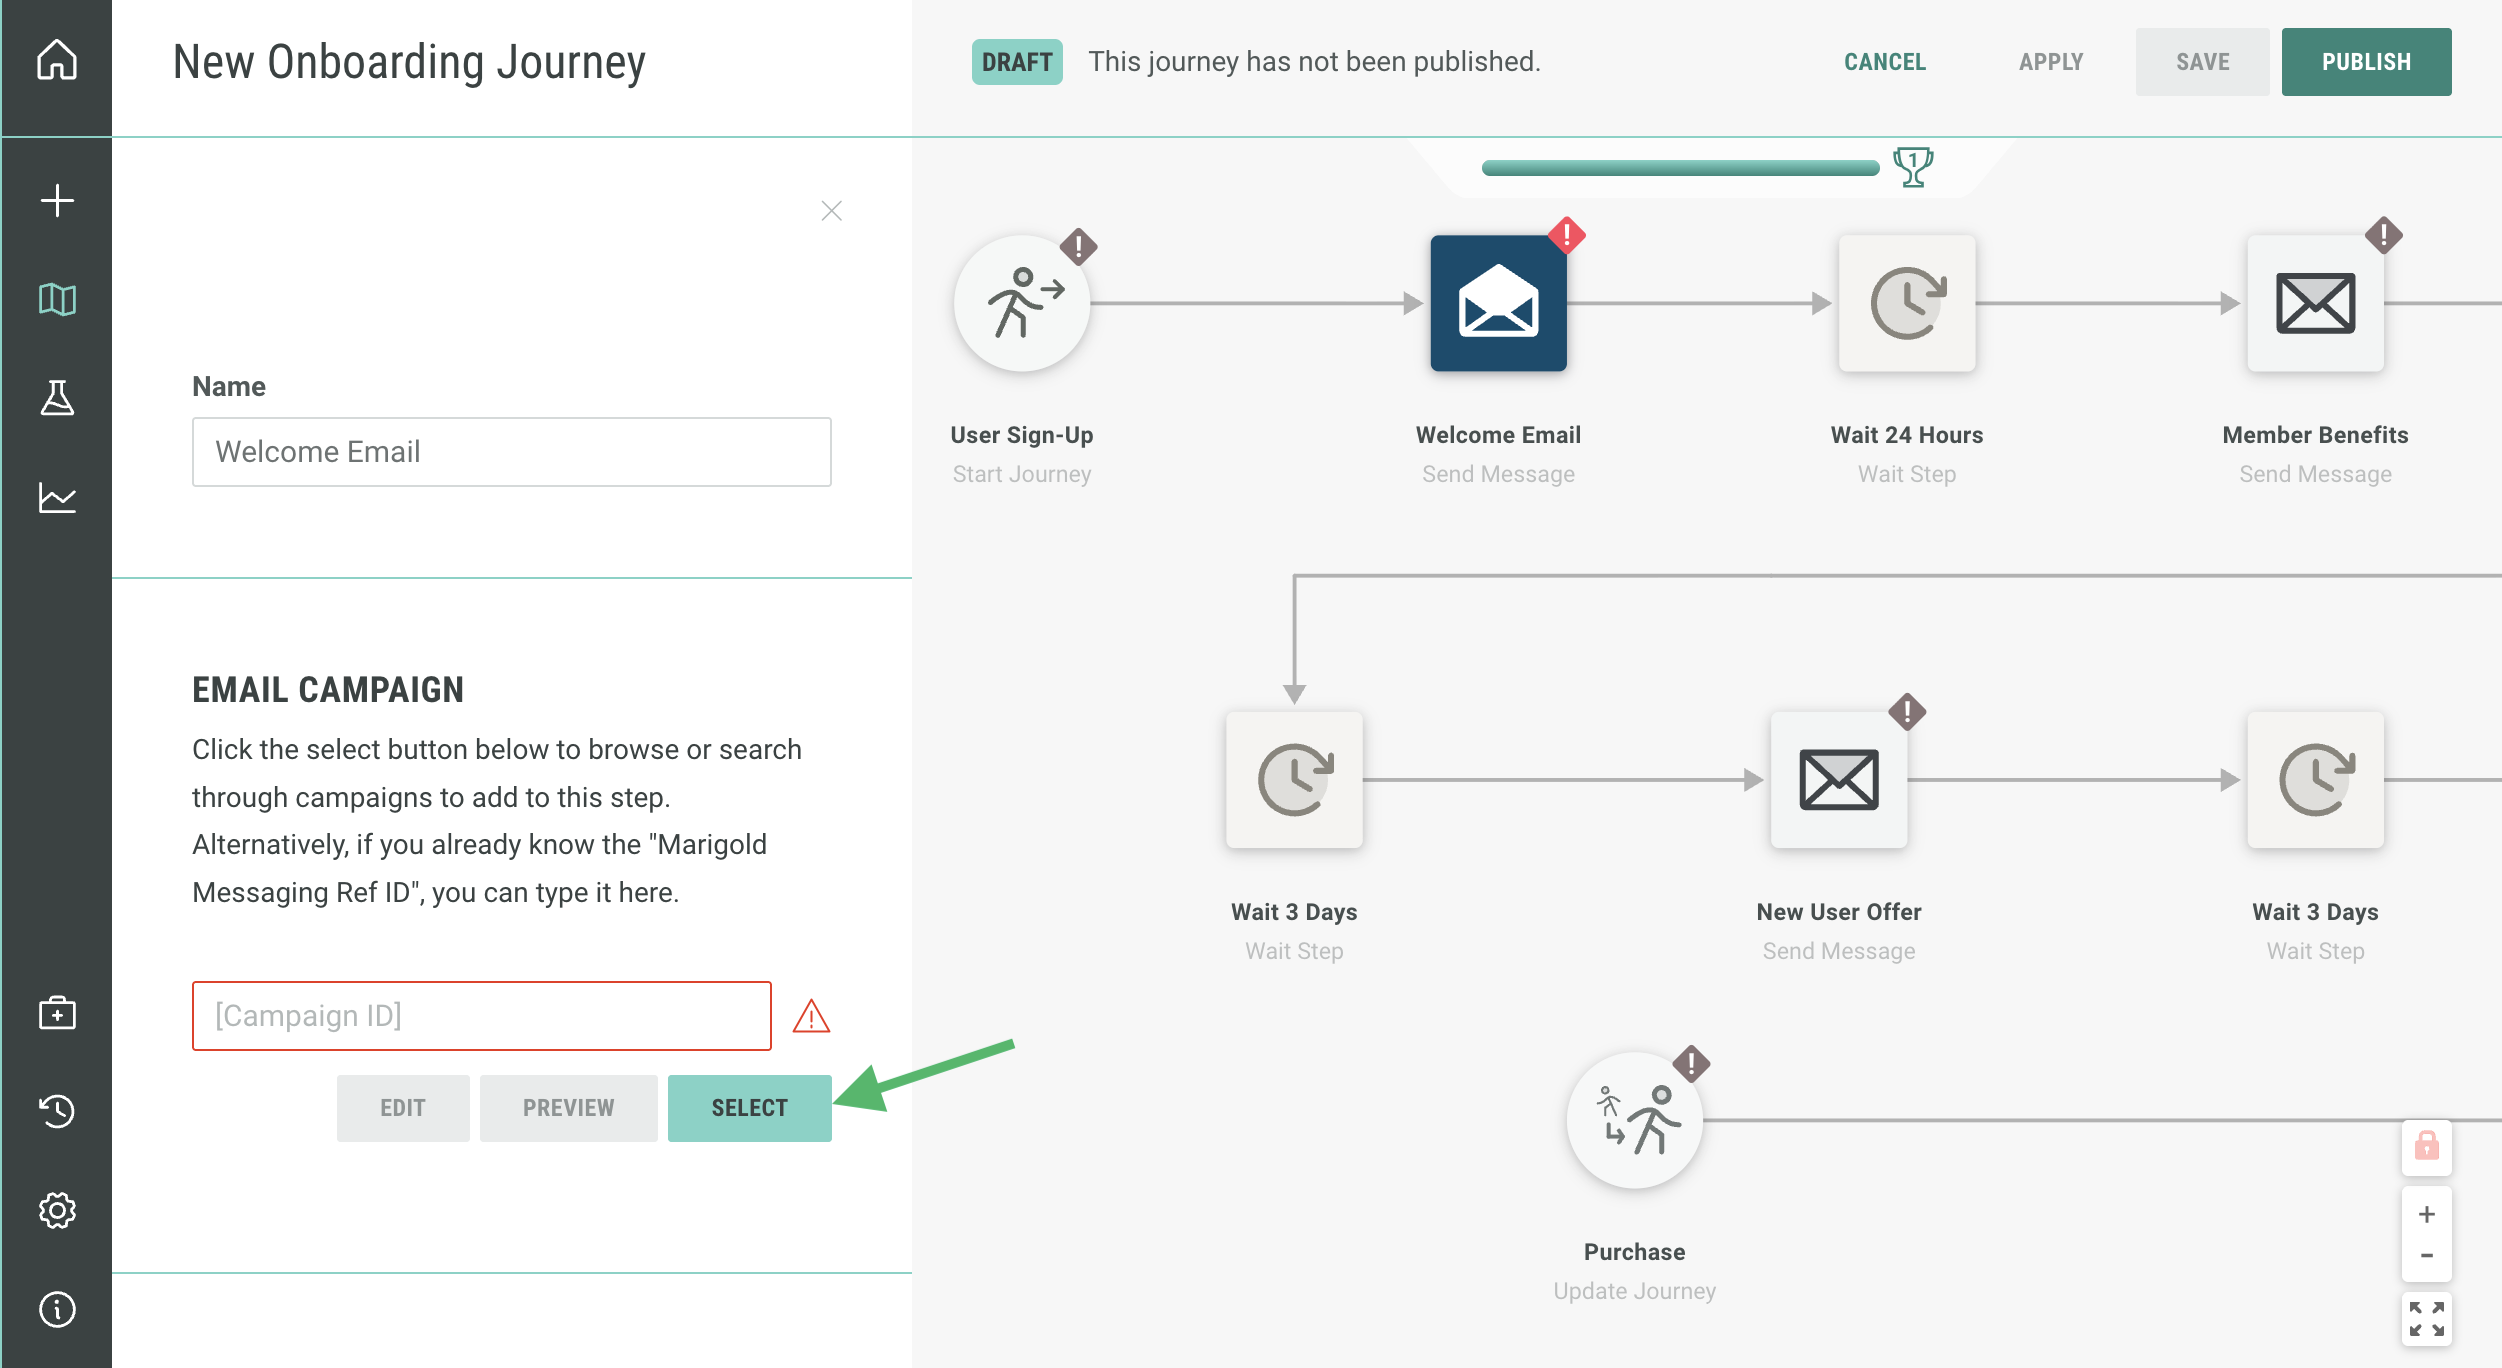
In the default implementation of this Journey, the objectives of the various steps are as follows:
-
Welcome Aboard: As soon as a user signs up, they’re greeted with a personalized Welcome Email to kick off their Journey.
-
Discover the Perks: After a brief pause of 24 hours (timing customizable), the user receives a Member Benefits Email highlighting the exclusive advantages of being part of the community.
-
Special Offer Inside: Three days later, we follow up with a New User Offer—an enticing incentive designed to encourage that first purchase.
-
Last Call: Another three days on, we send a Last Chance Email, giving the user one final nudge before the introductory offers expire.
-
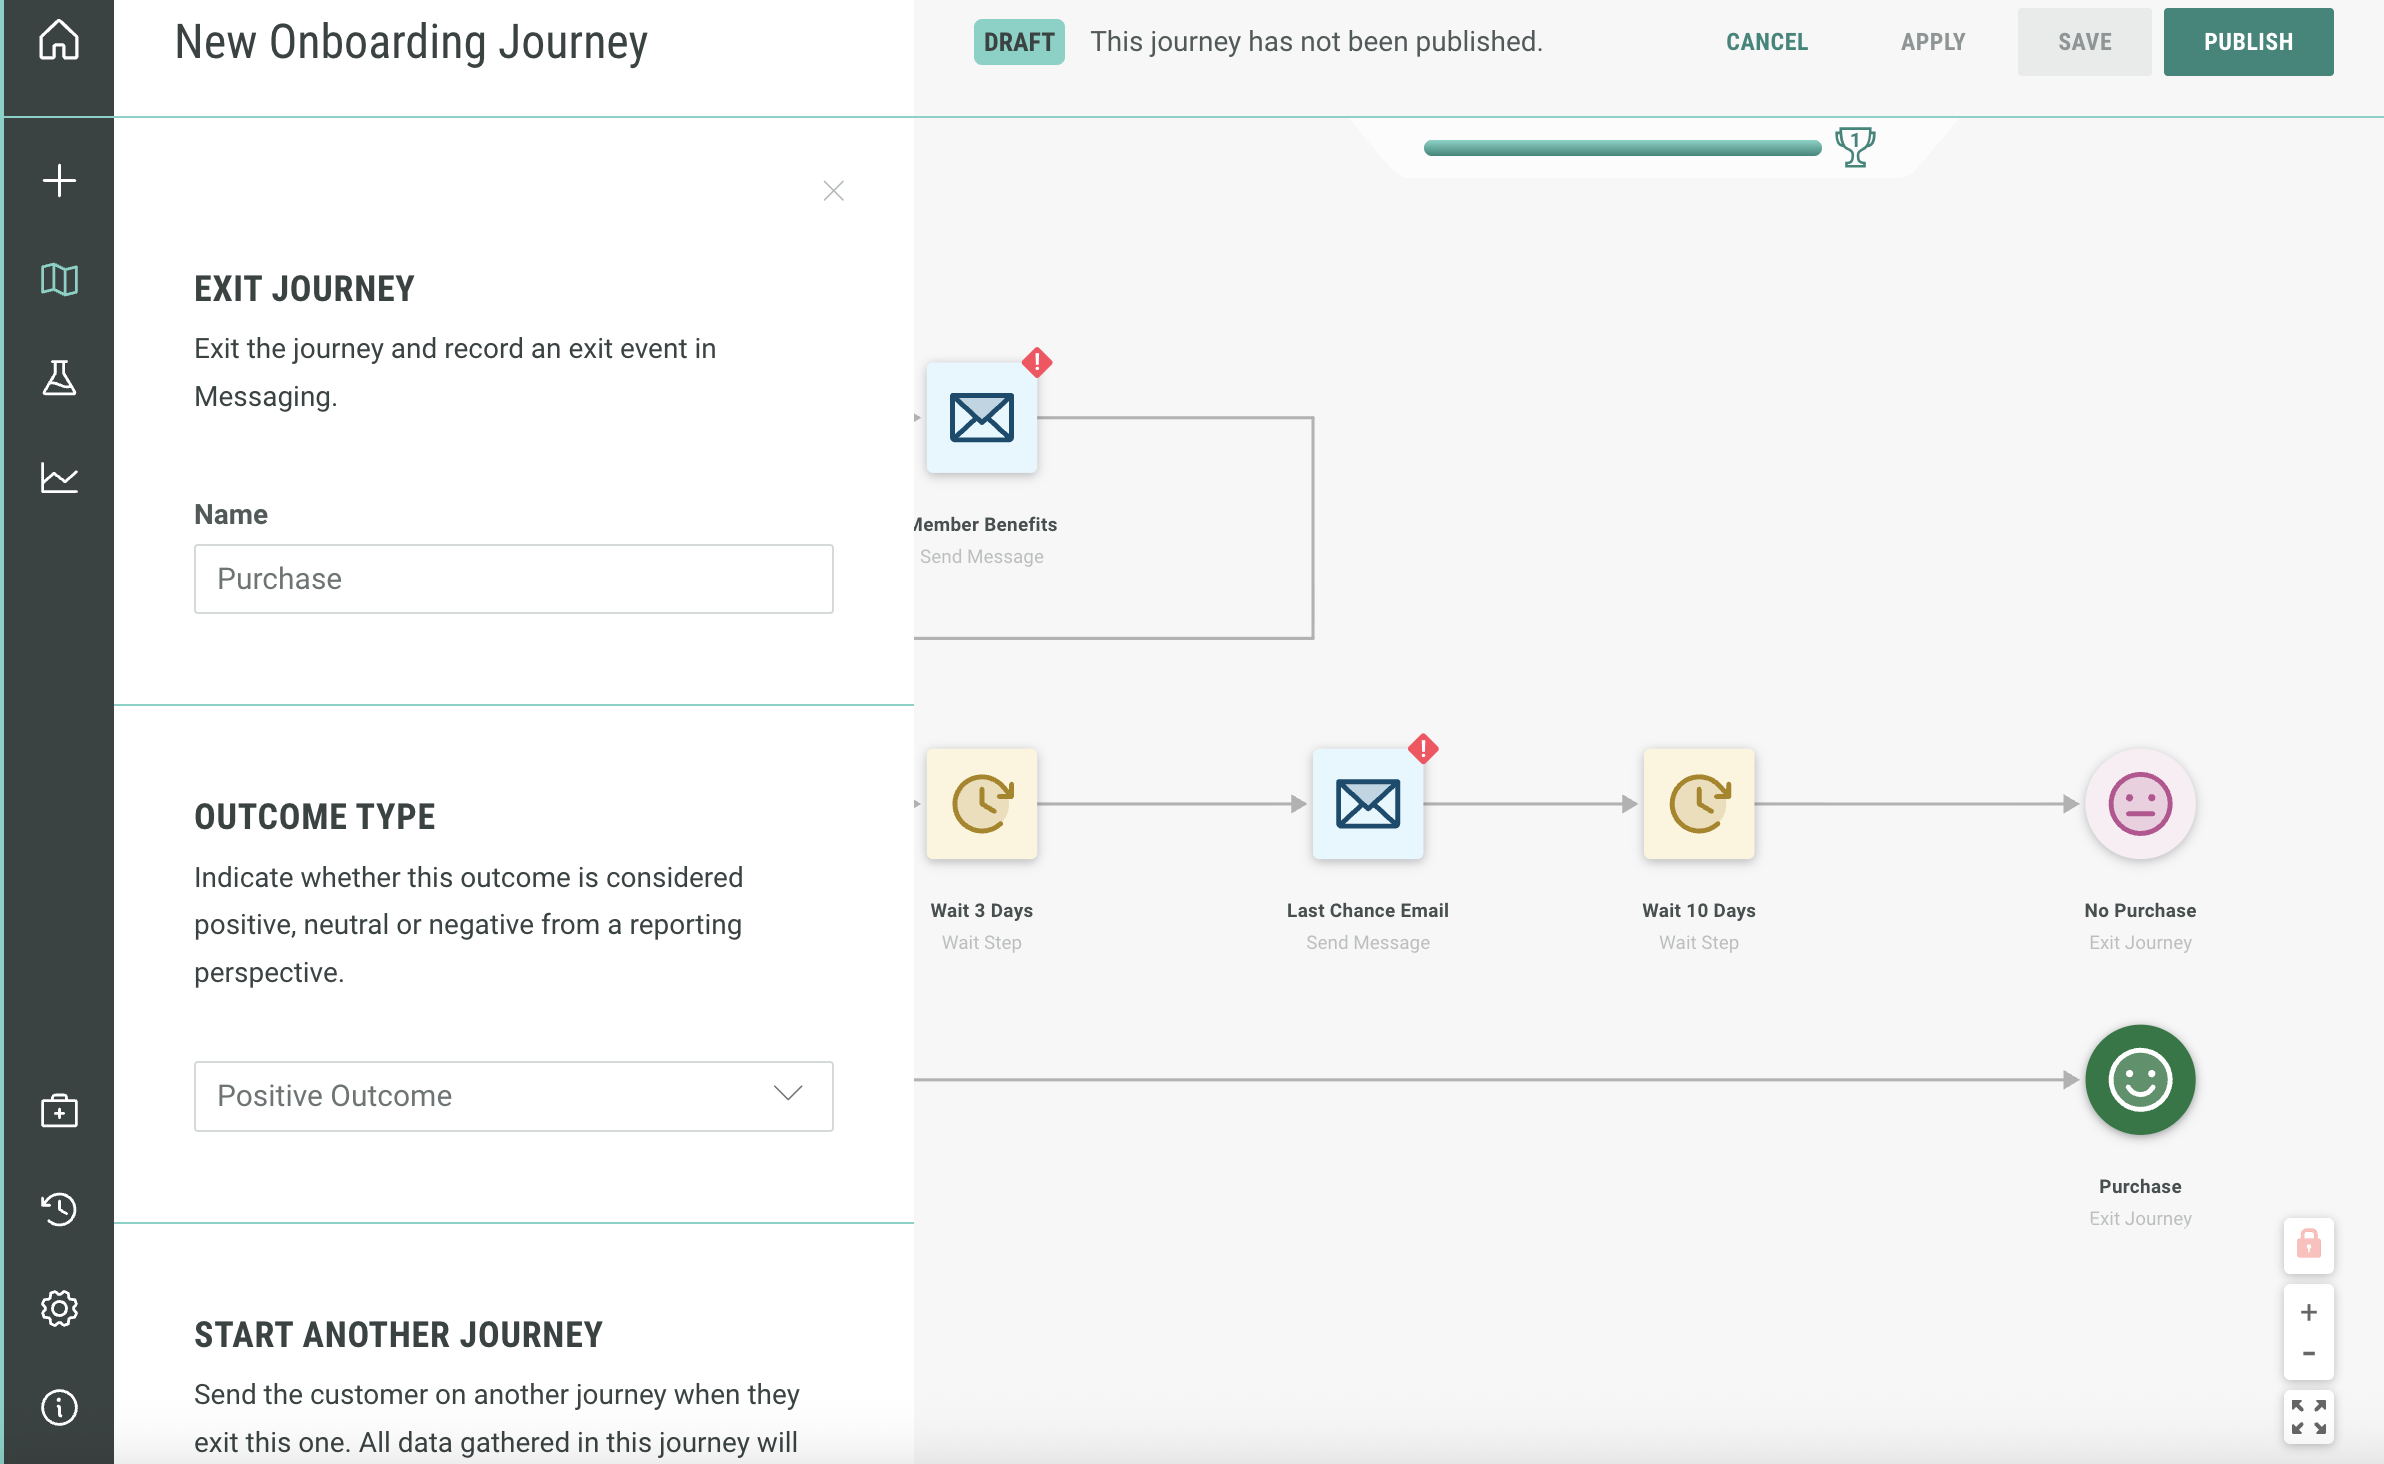
No Action, No Problem: If the user remains inactive after this final step, the Journey ends in the No Purchase state, marked as a Neutral Outcome.
-
Success Path: On the other hand, if the user completes a purchase at any point, the Journey transitions to the Purchase step, concluding with a Positive Outcome and confirming their engagement.
Build the Journey
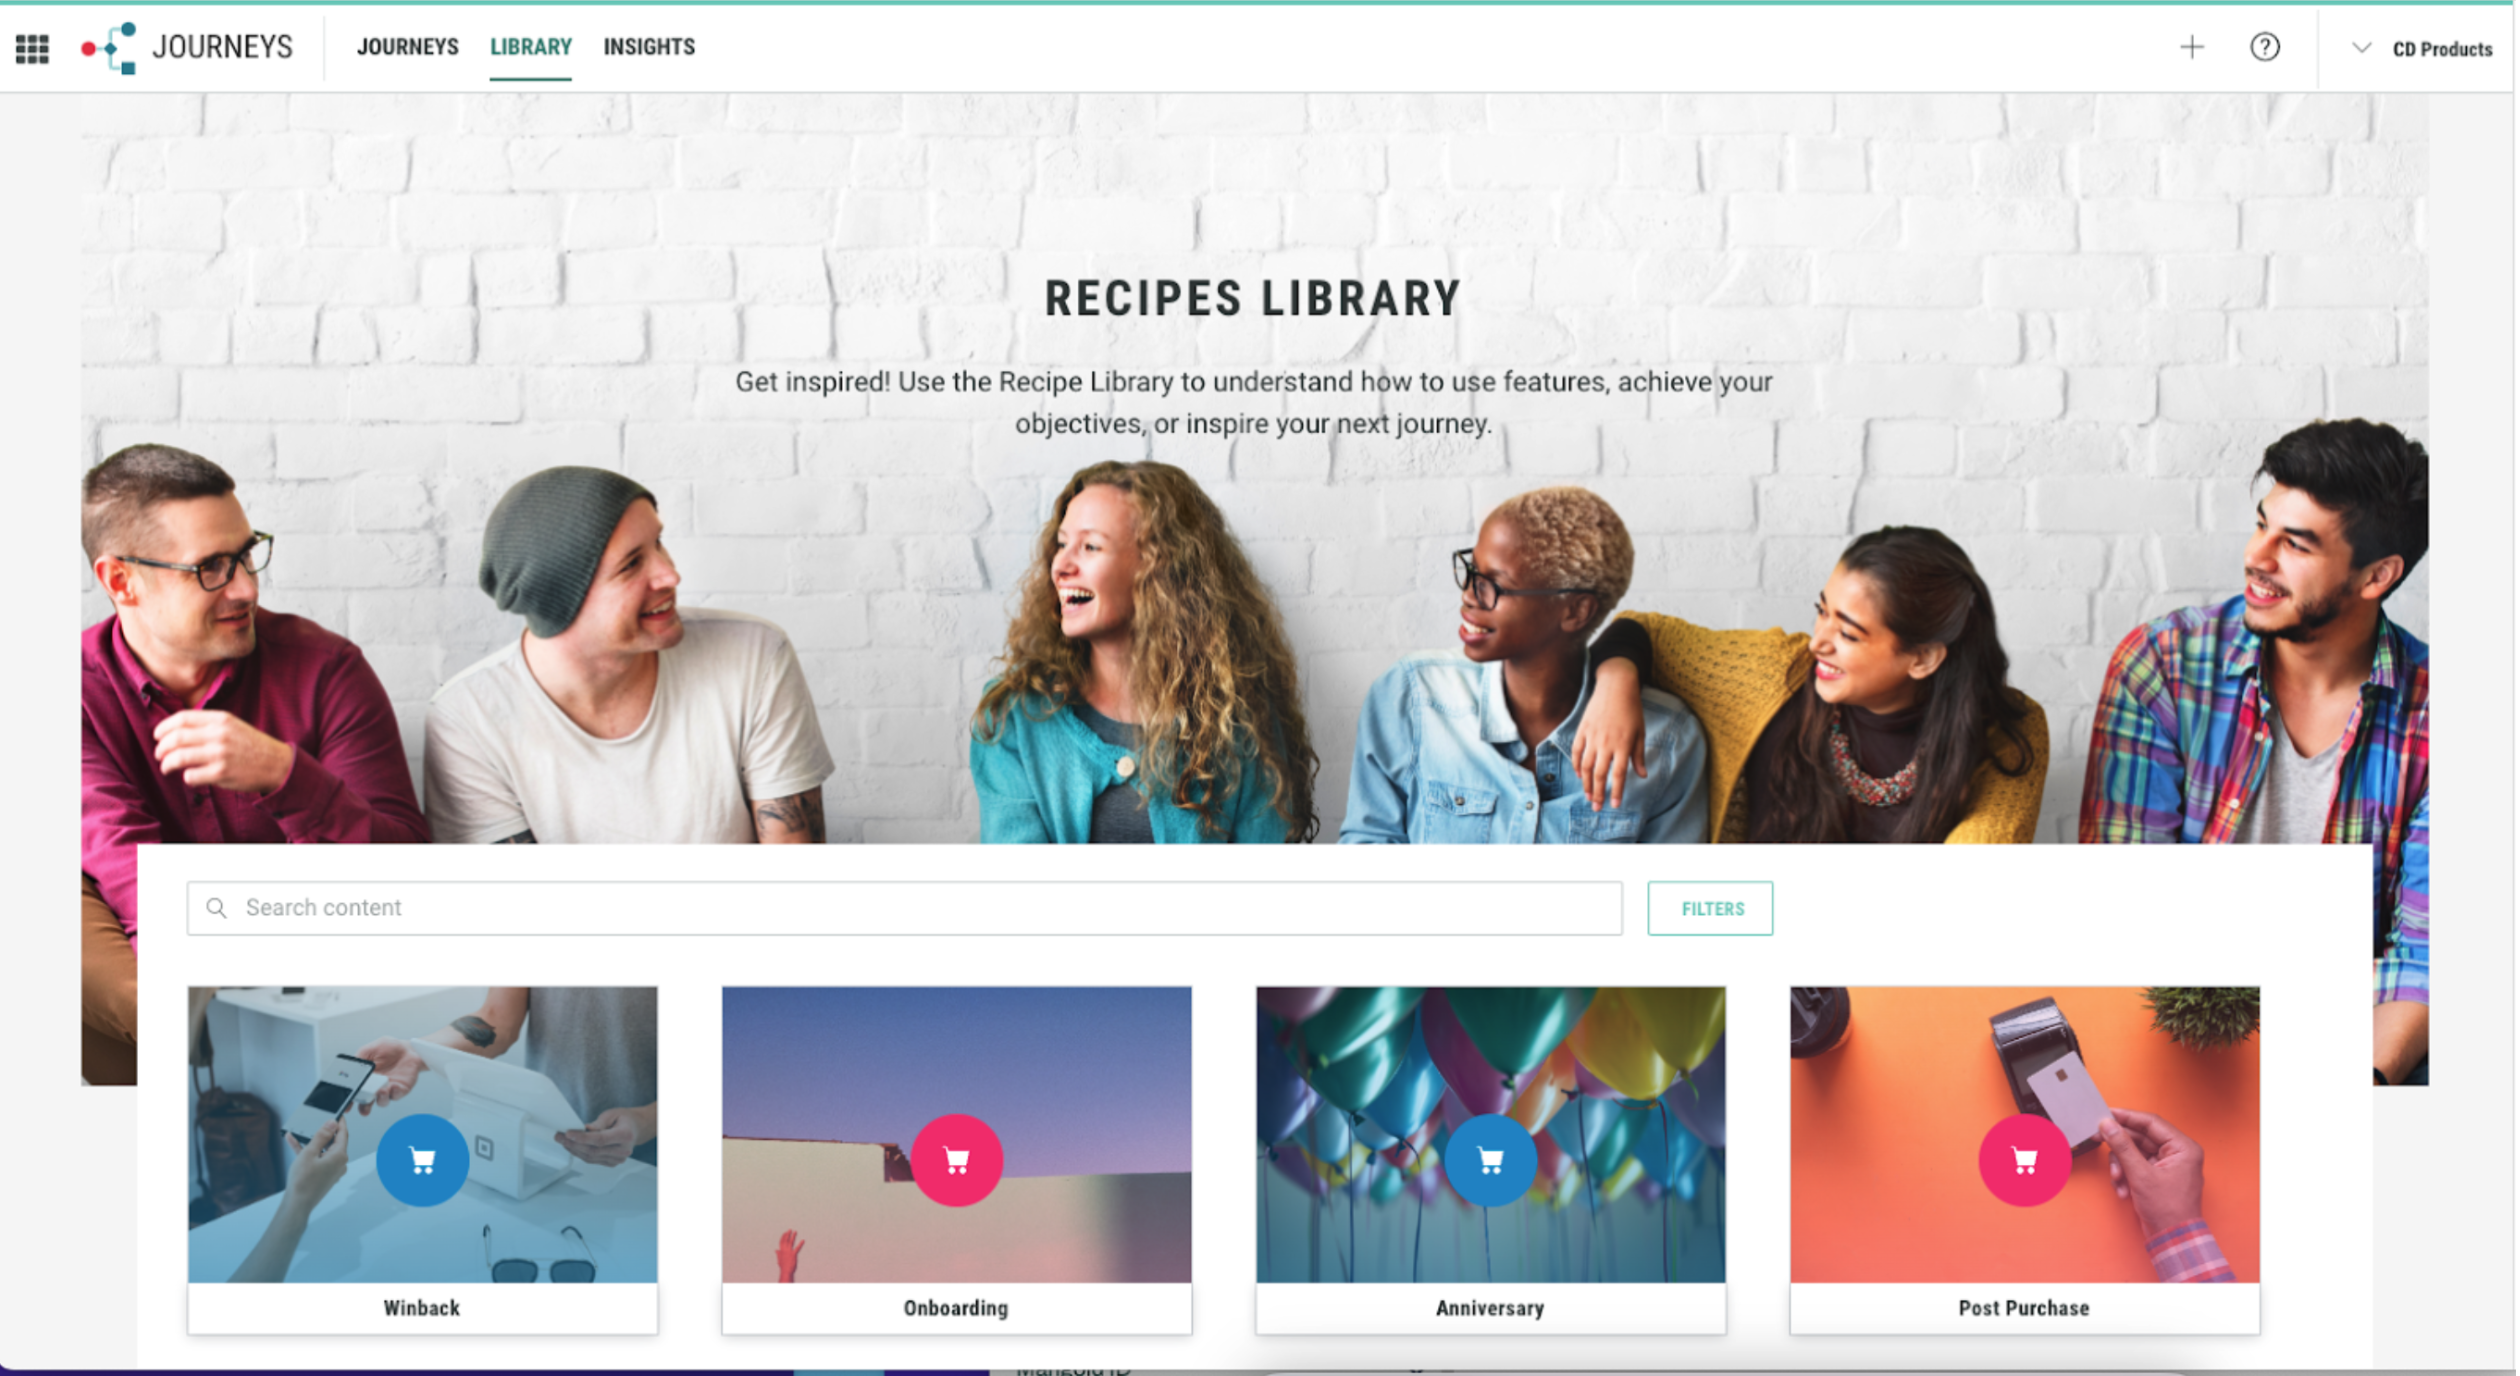
From the Journeys landing page, navigate to the top left and click Library. In the Library screen you will be able to see various types of Journey templates.
-
Select the Onboarding template. Click Use this template.
-
Name your new Journey, then click Create.

-
In the Onboarding Journeys environment, select the positive purchase exit within the journey. This is how we track how many people have unsubscribed.
-
The sidebar will pop up from the left side. Fill out the sidebar accordingly:
-
Name — Change from Purchase to Unsubscribe.
-
Outcome type — Change Positive Outcome to Negative Outcome.
-
-
Click the X or anywhere outside the left bar to close the panel and finish your edits.
-
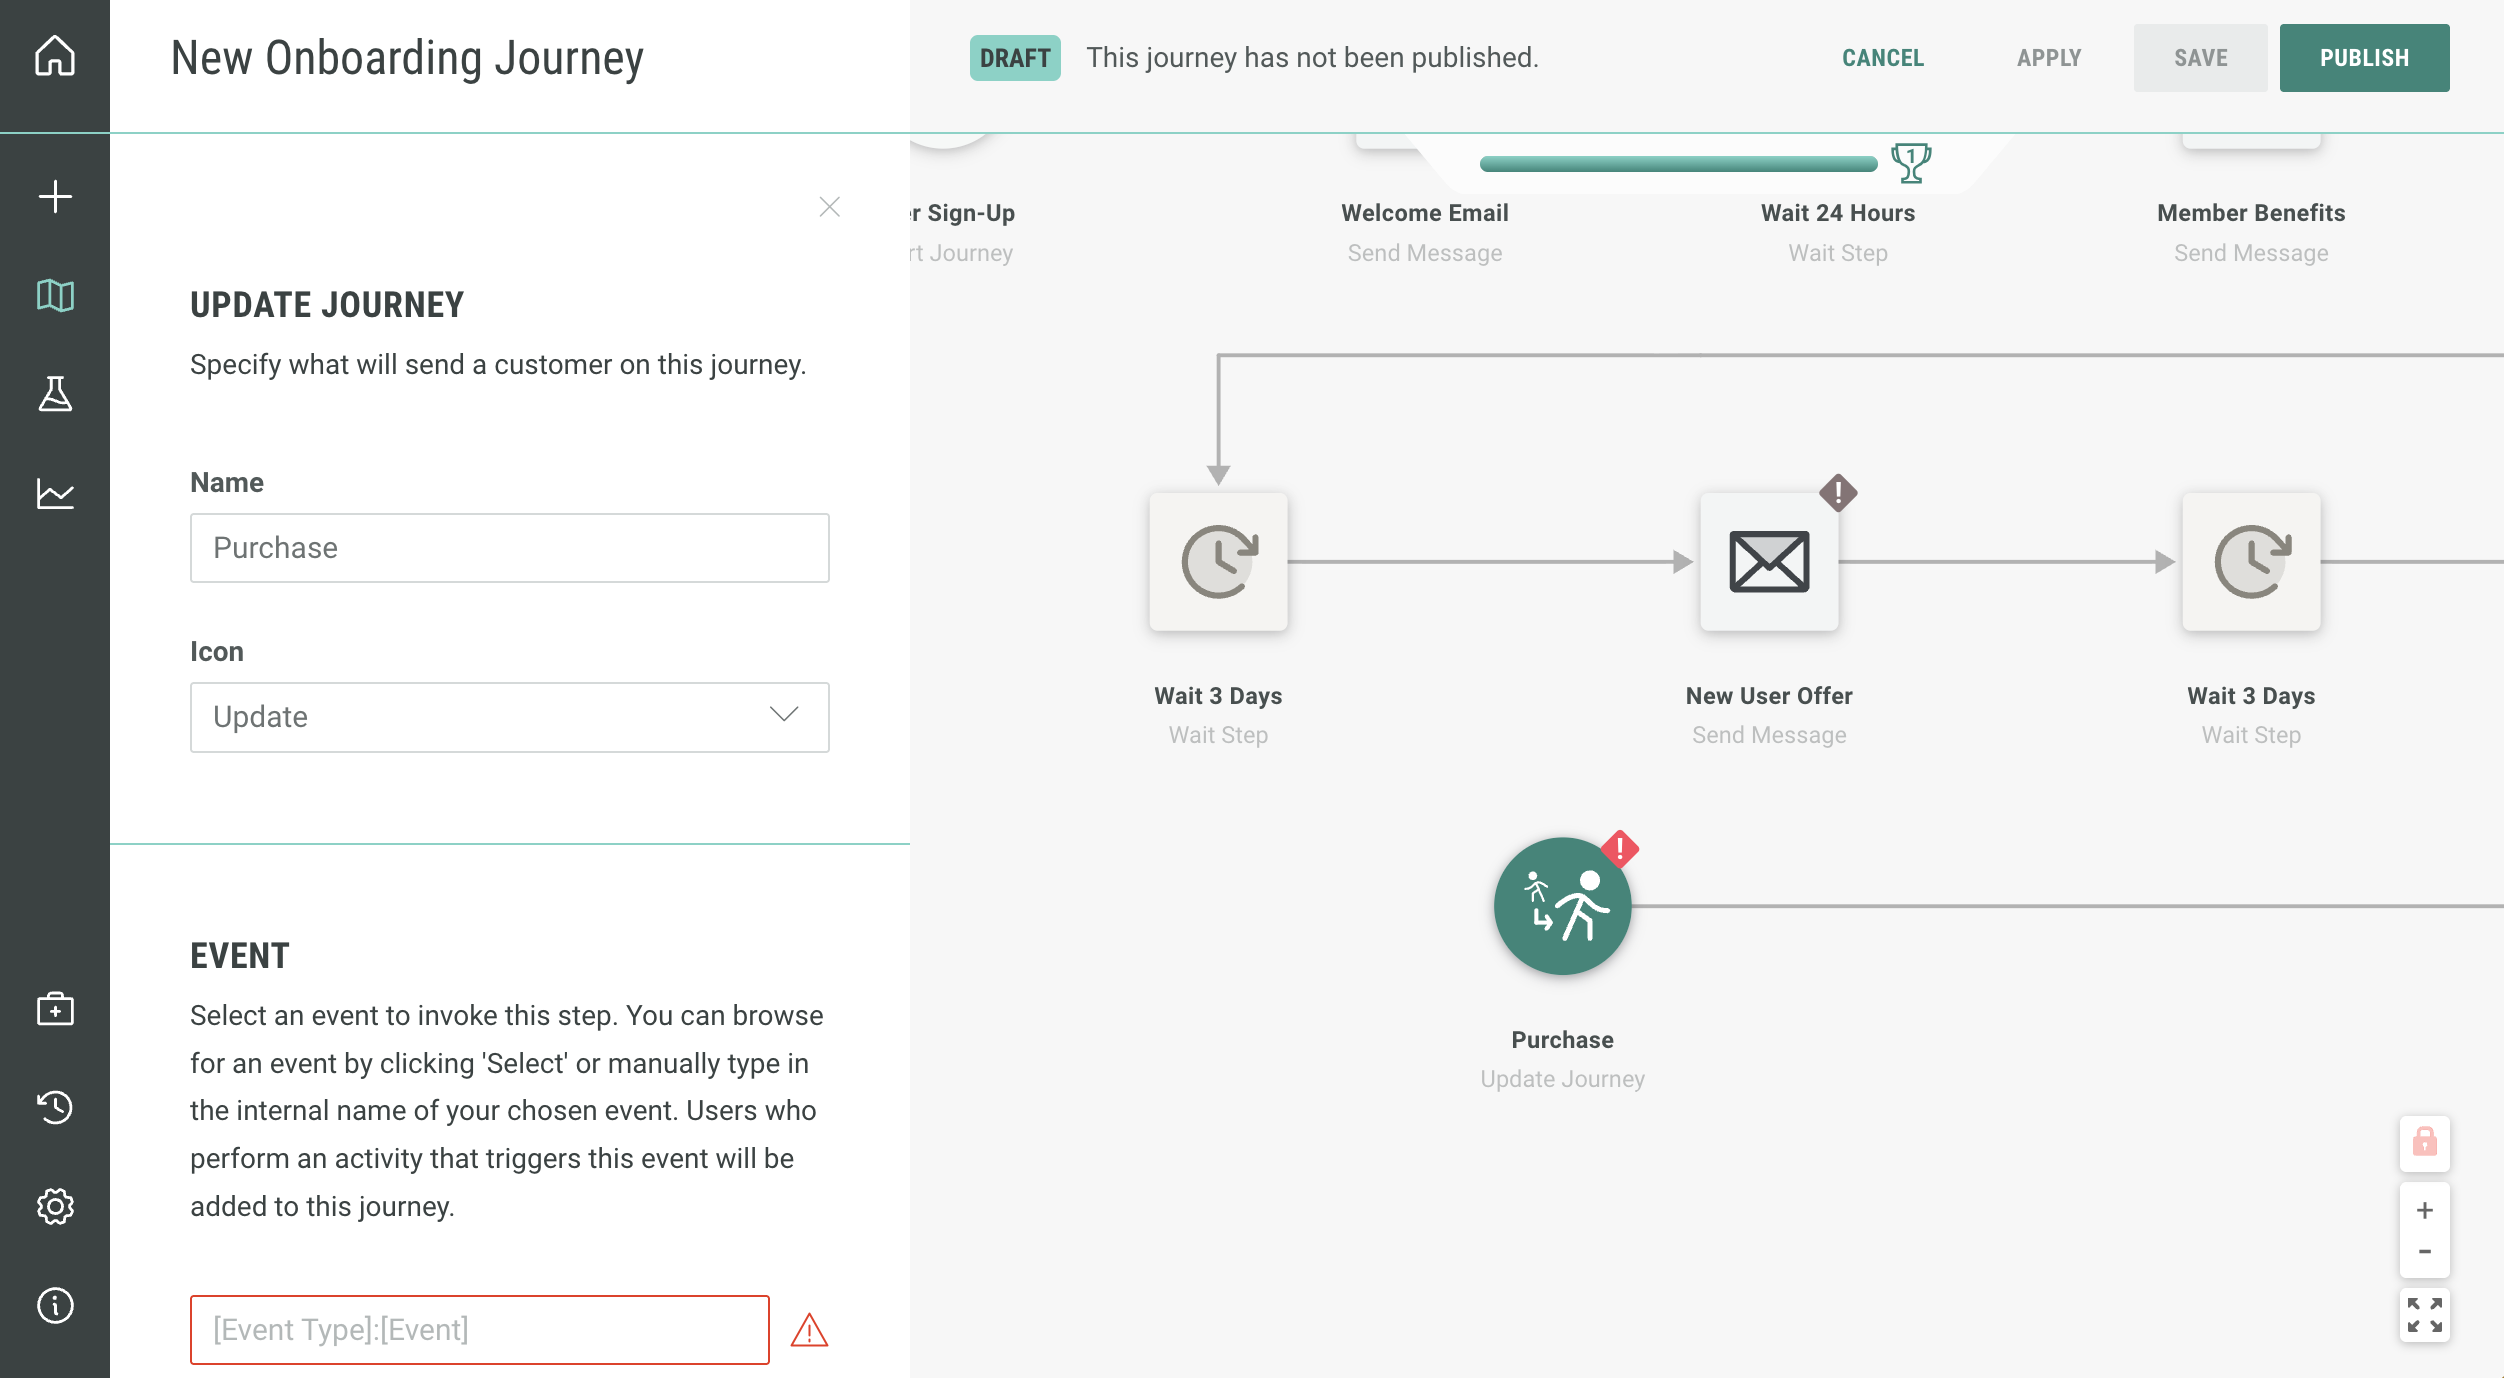
Select the Update Journey step and the left sidebar will pop out. Fill out accordingly:
-
Name — Leave as is (the name will be updated automatically).
-
Event — Click on Select to view all the different types of event tables you can choose from. Select Unsubscribe.
-
-
Click outside the sidebar to complete.
Note: The update step is a system level event. This is why you don't need to set this up in Cheetah Digital by Zeta.


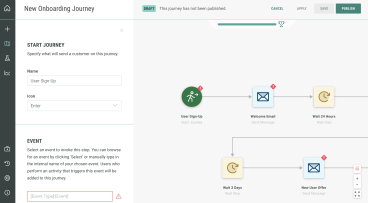
Configure the start step
-
Select the Start step, and the left sidebar will pop out.
-
Navigate to Event and click Select to open the selector.
-
Choose Signup, then click Select. The Name field will automatically change.


Configure wait steps
The wait steps are already configured with the recommended settings. While you have the option to change these settings, we suggest sticking with the default configurations to ensure optimal performance.
Configure send email steps
-
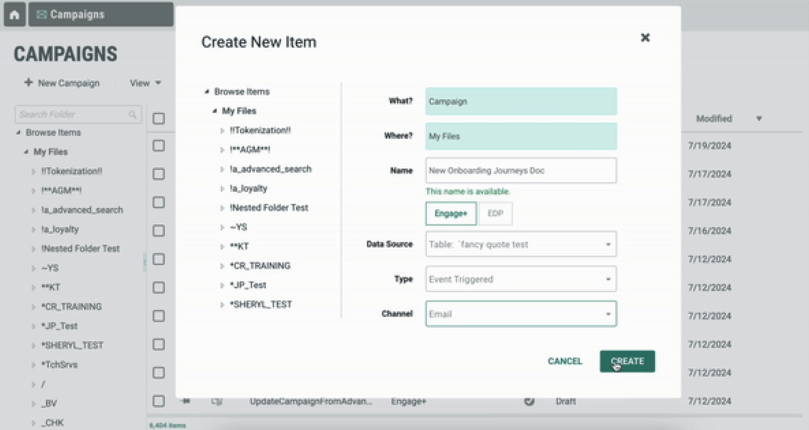
If your Campaigns haven’t yet been created, you need to log into Cheetah Digital and create a new campaign. Once logged into Cheetah Digital, head to Production > Campaigns. Create a campaign on the same table and fill out accordingly:
- What — Campaign.
- Where — Select file location seen on the left side.
- Name — Name your campaign.
- Select Cheetah Digital.
- Data source — Select the table that matches in the Journey settings.
- Type — Set the type to Event Triggered.
- Channel — Select the Email channel.
-
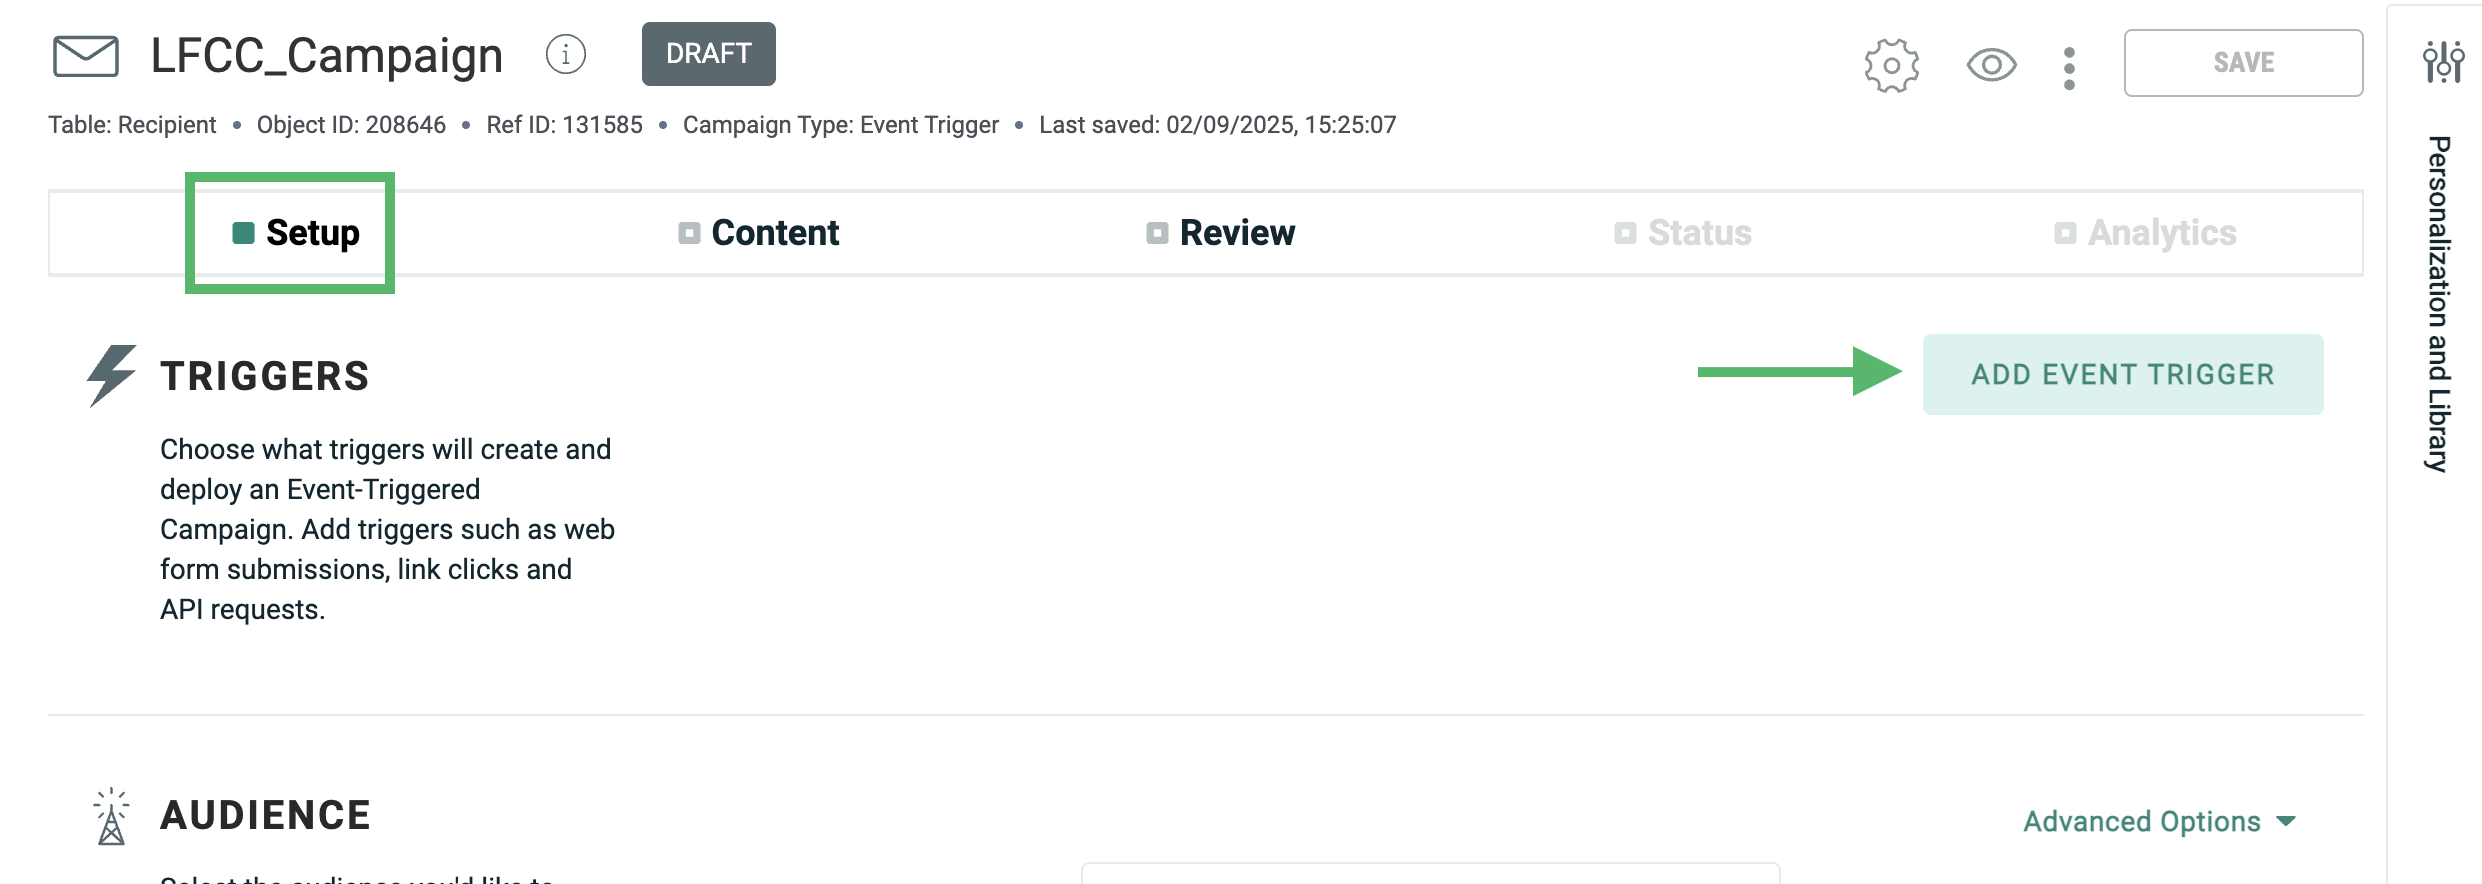
Now that you have created your campaign, navigate to the Setup tab. This where we can setup a Simple Event Trigger.
-
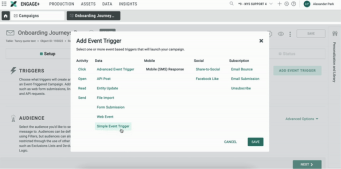
Click the Add Event Trigger button located at the right side of the Triggers row.

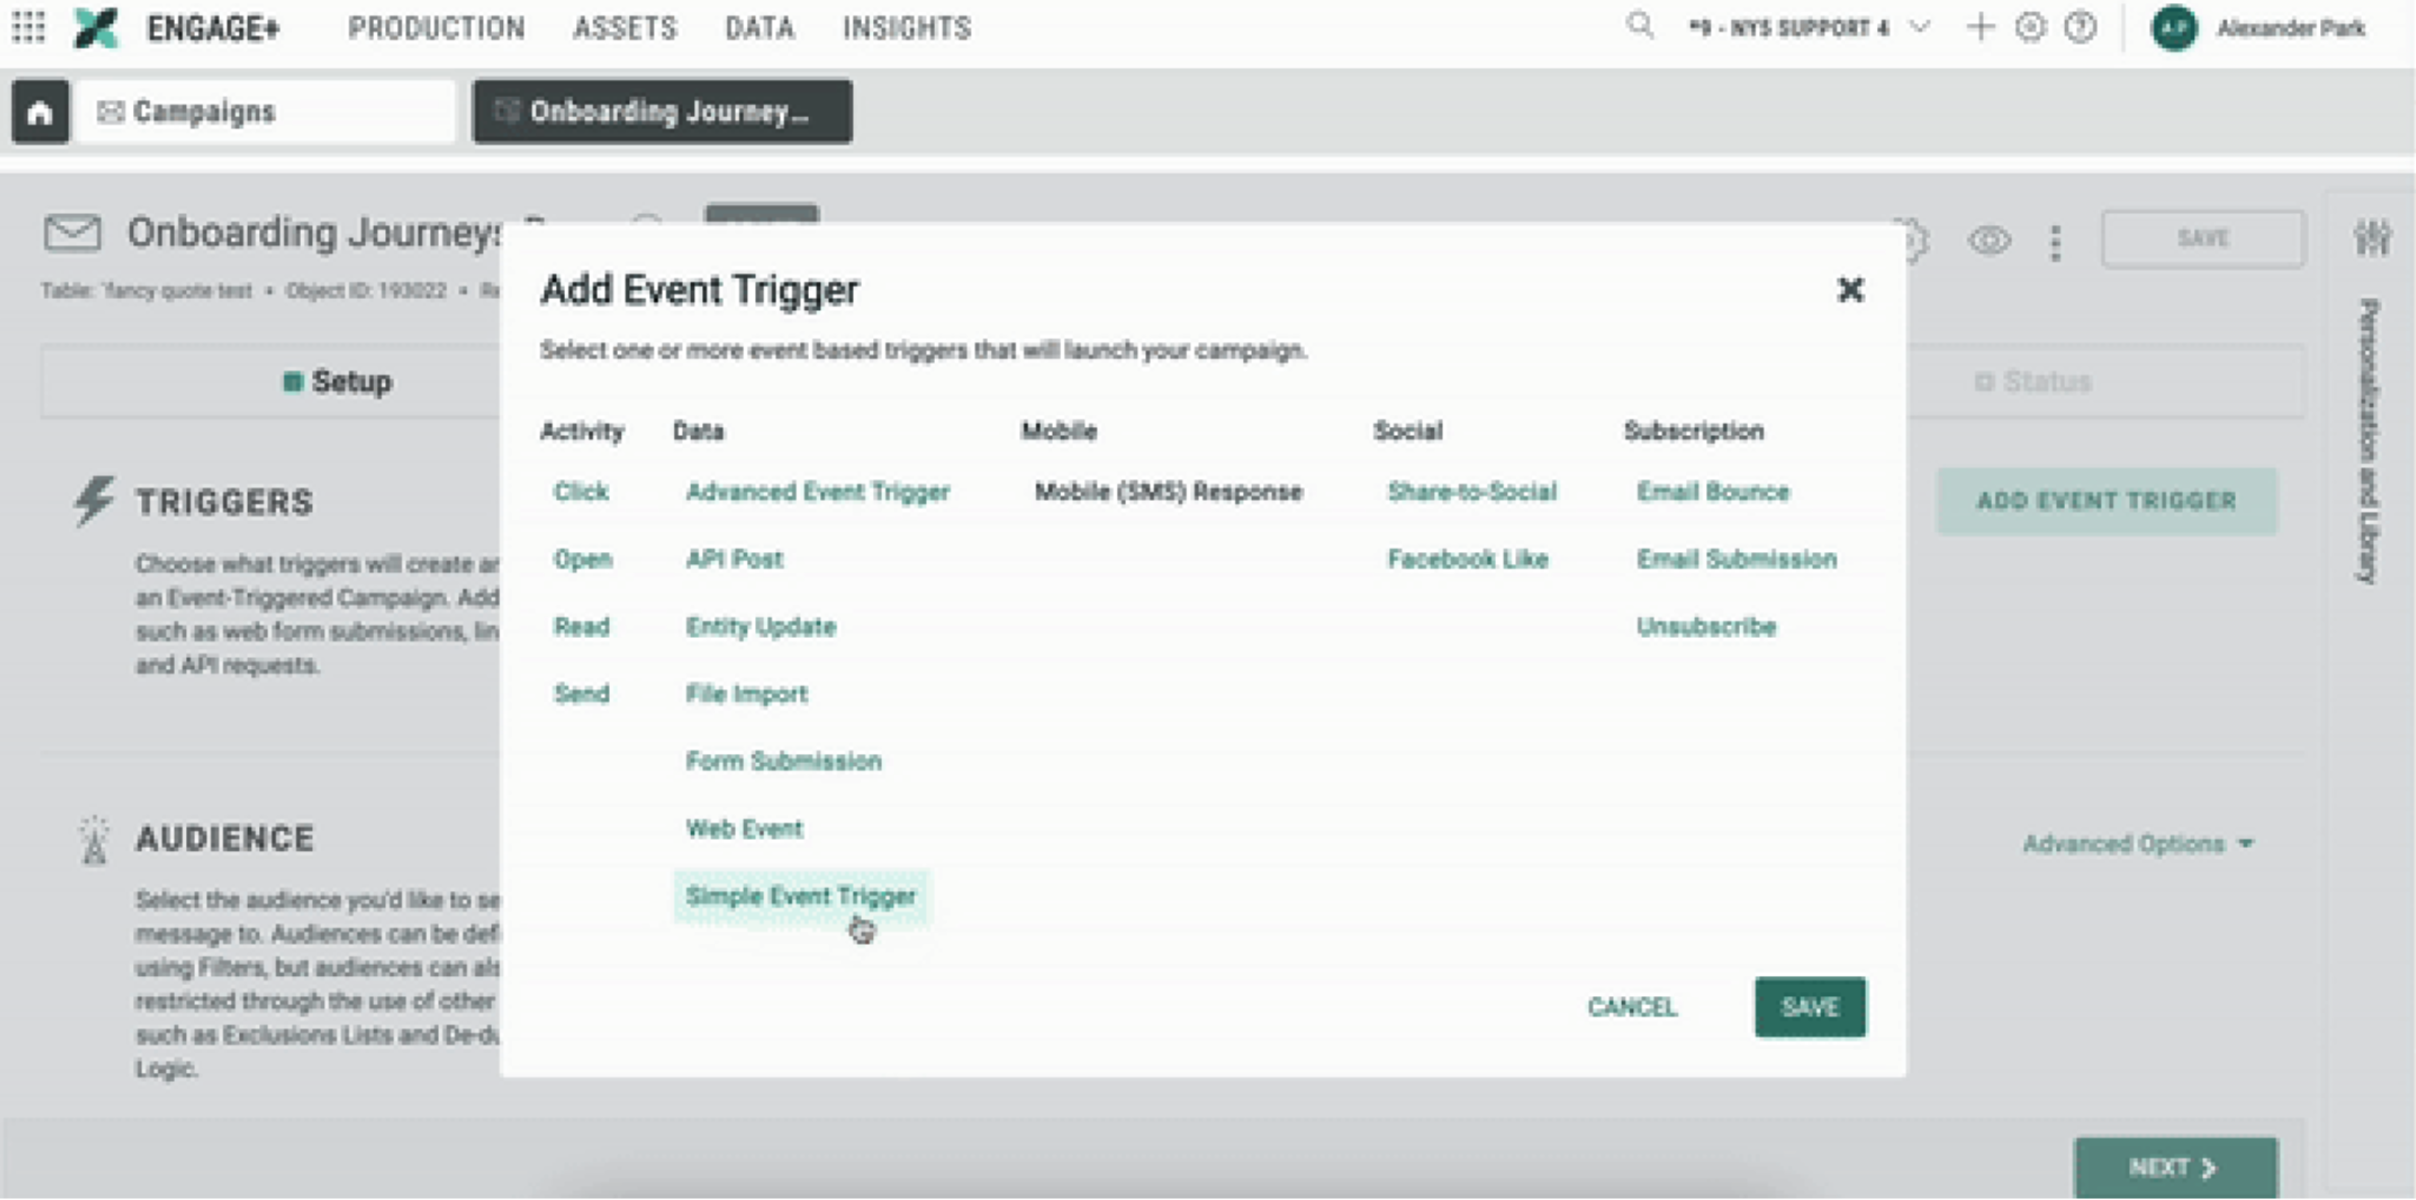
You will be prompted with the Add Event Trigger screen.
-
Find and select Simple Event Trigger. Click Save.
-
Return to Journeys and find the campaign in the selector.
-
Click on your desired step. Navigate to the left pop out screen.
-
Go to Email Campaign > Select.
-
Step will take on the name of the campaign.
-
Repeat the above steps.

Find the step you want to add to the campaign.
If you don’t see the campaign you are looking for, redo steps/look in files
Configure Sign-Up event
To configure your Sign-up Event, you need to create a new map for Sign-up using the same table as your journey and campaigns.
-
Navigate to tabs at the top left and select Data > Event Maps.
-
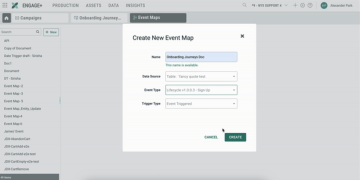
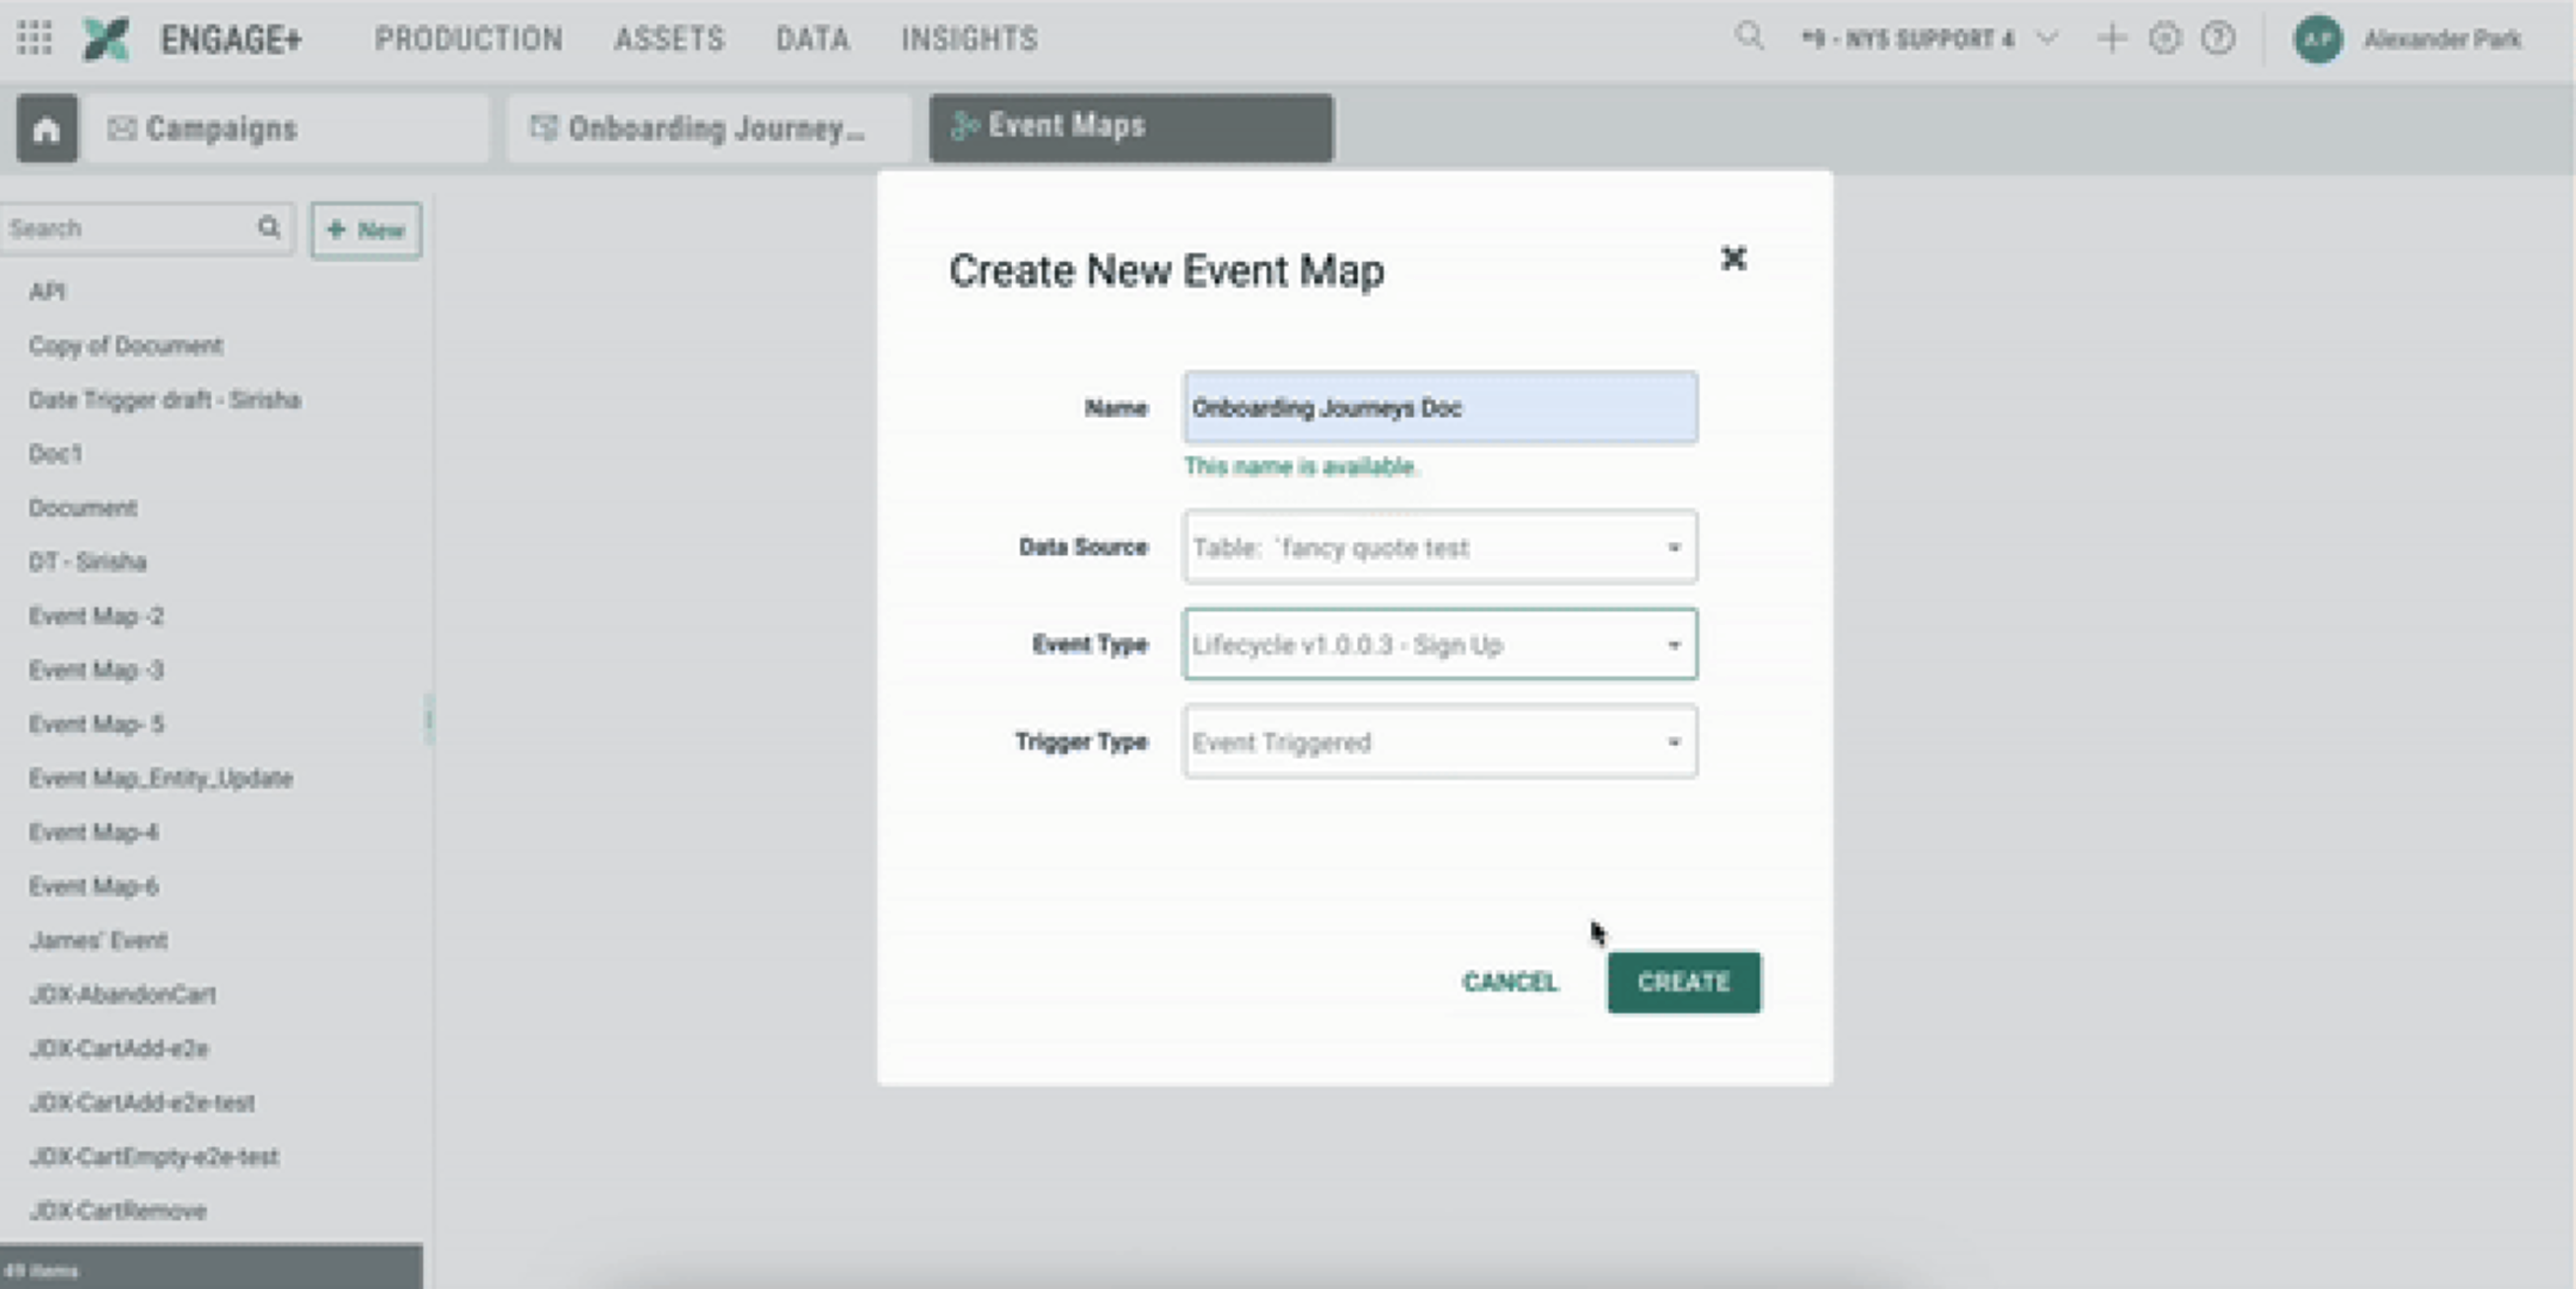
At the left toolbar, click New. Now you are prompted to Create a New Event Map:
- Name — Name your new Event Map.
- Data Source — Select your table.
- Event Type — Find Sign-Up in the drop down.
- Trigger Type — Set the trigger type to Event Triggered.
-
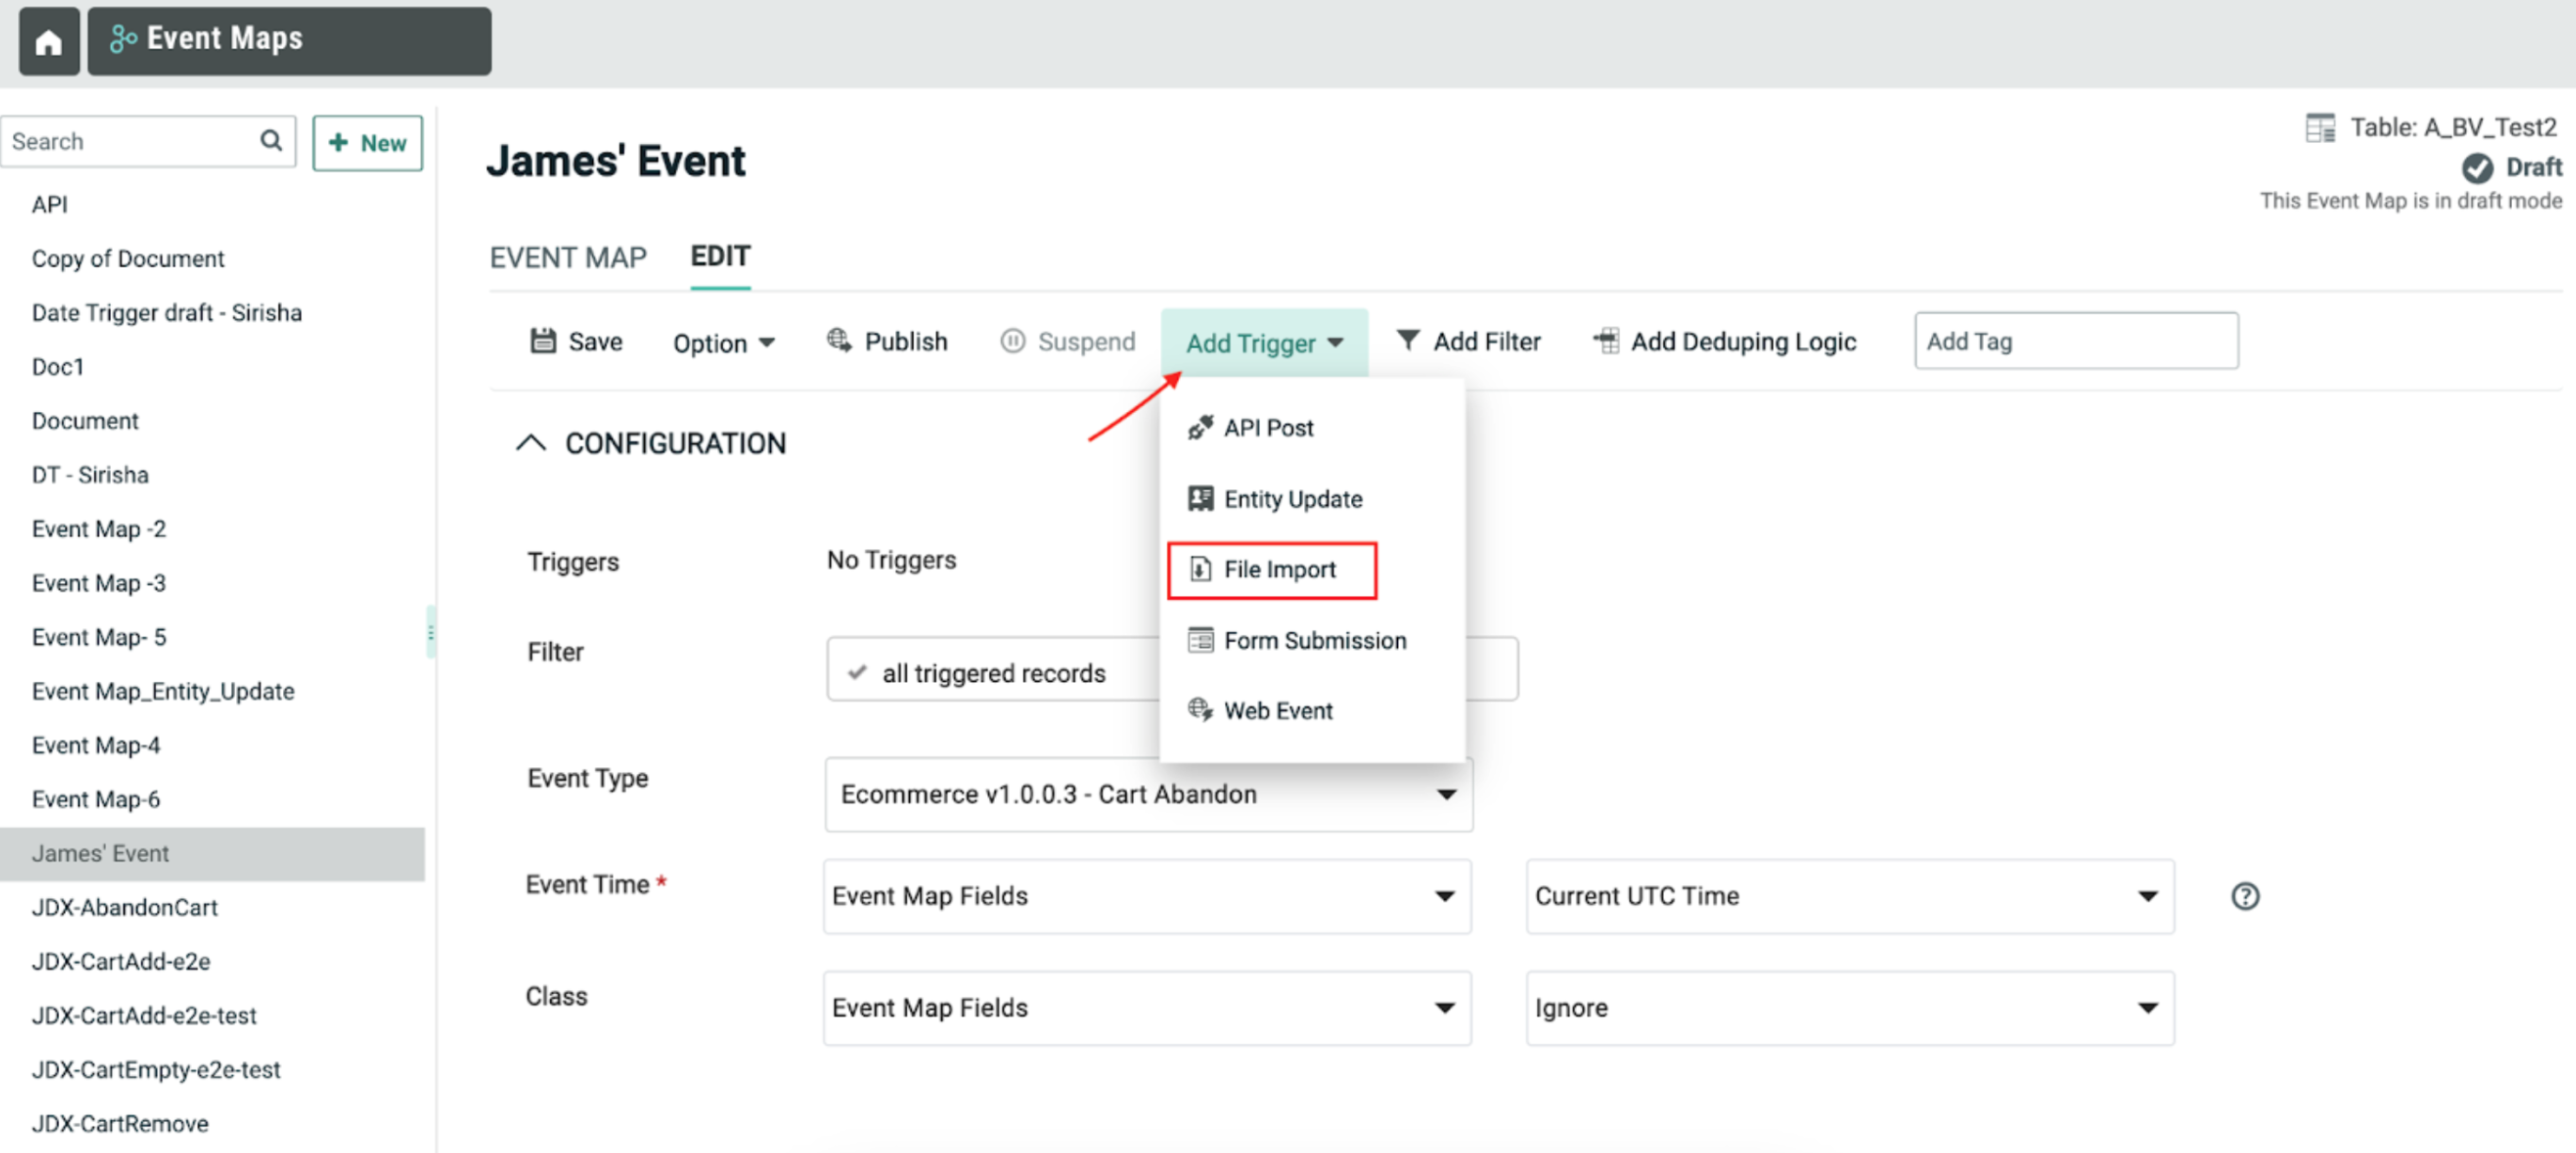
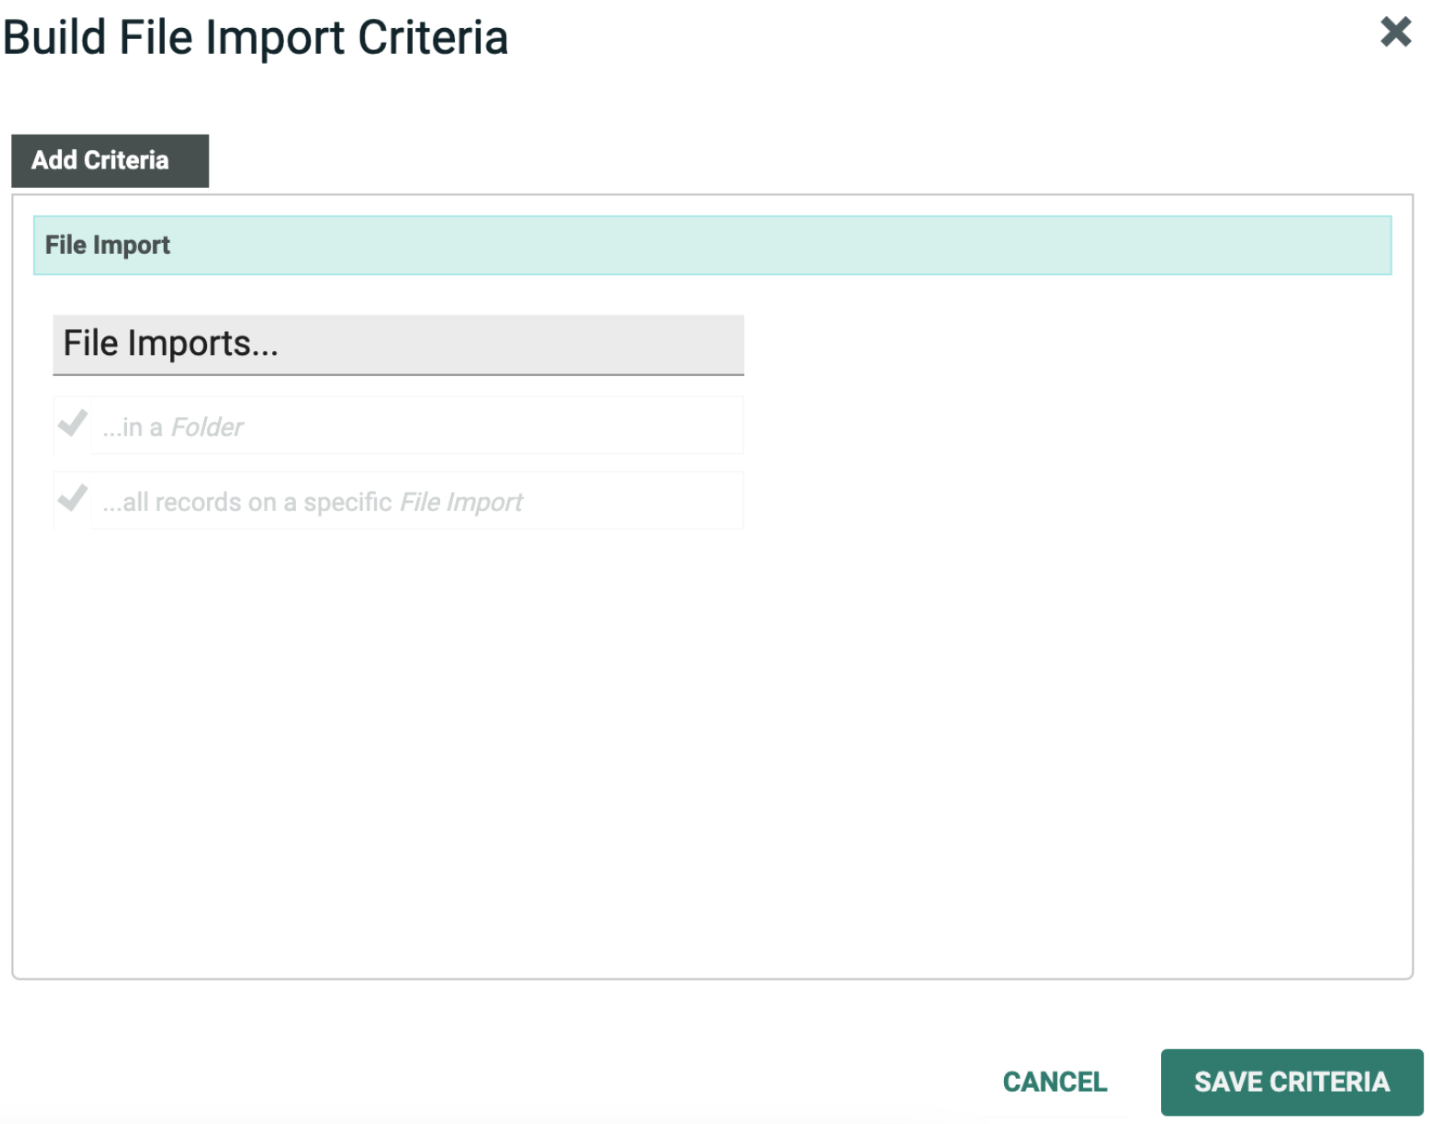
In your Event Maps screen click the Add Trigger drop-down. Then select File Import.
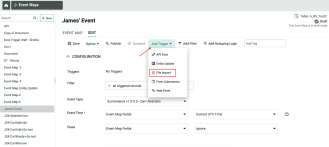
-
After selecting file import, you will have a pop-up screen for your Build File Import Criteria.

-
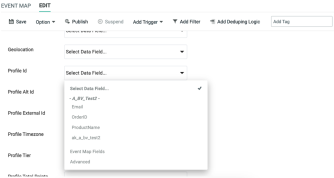
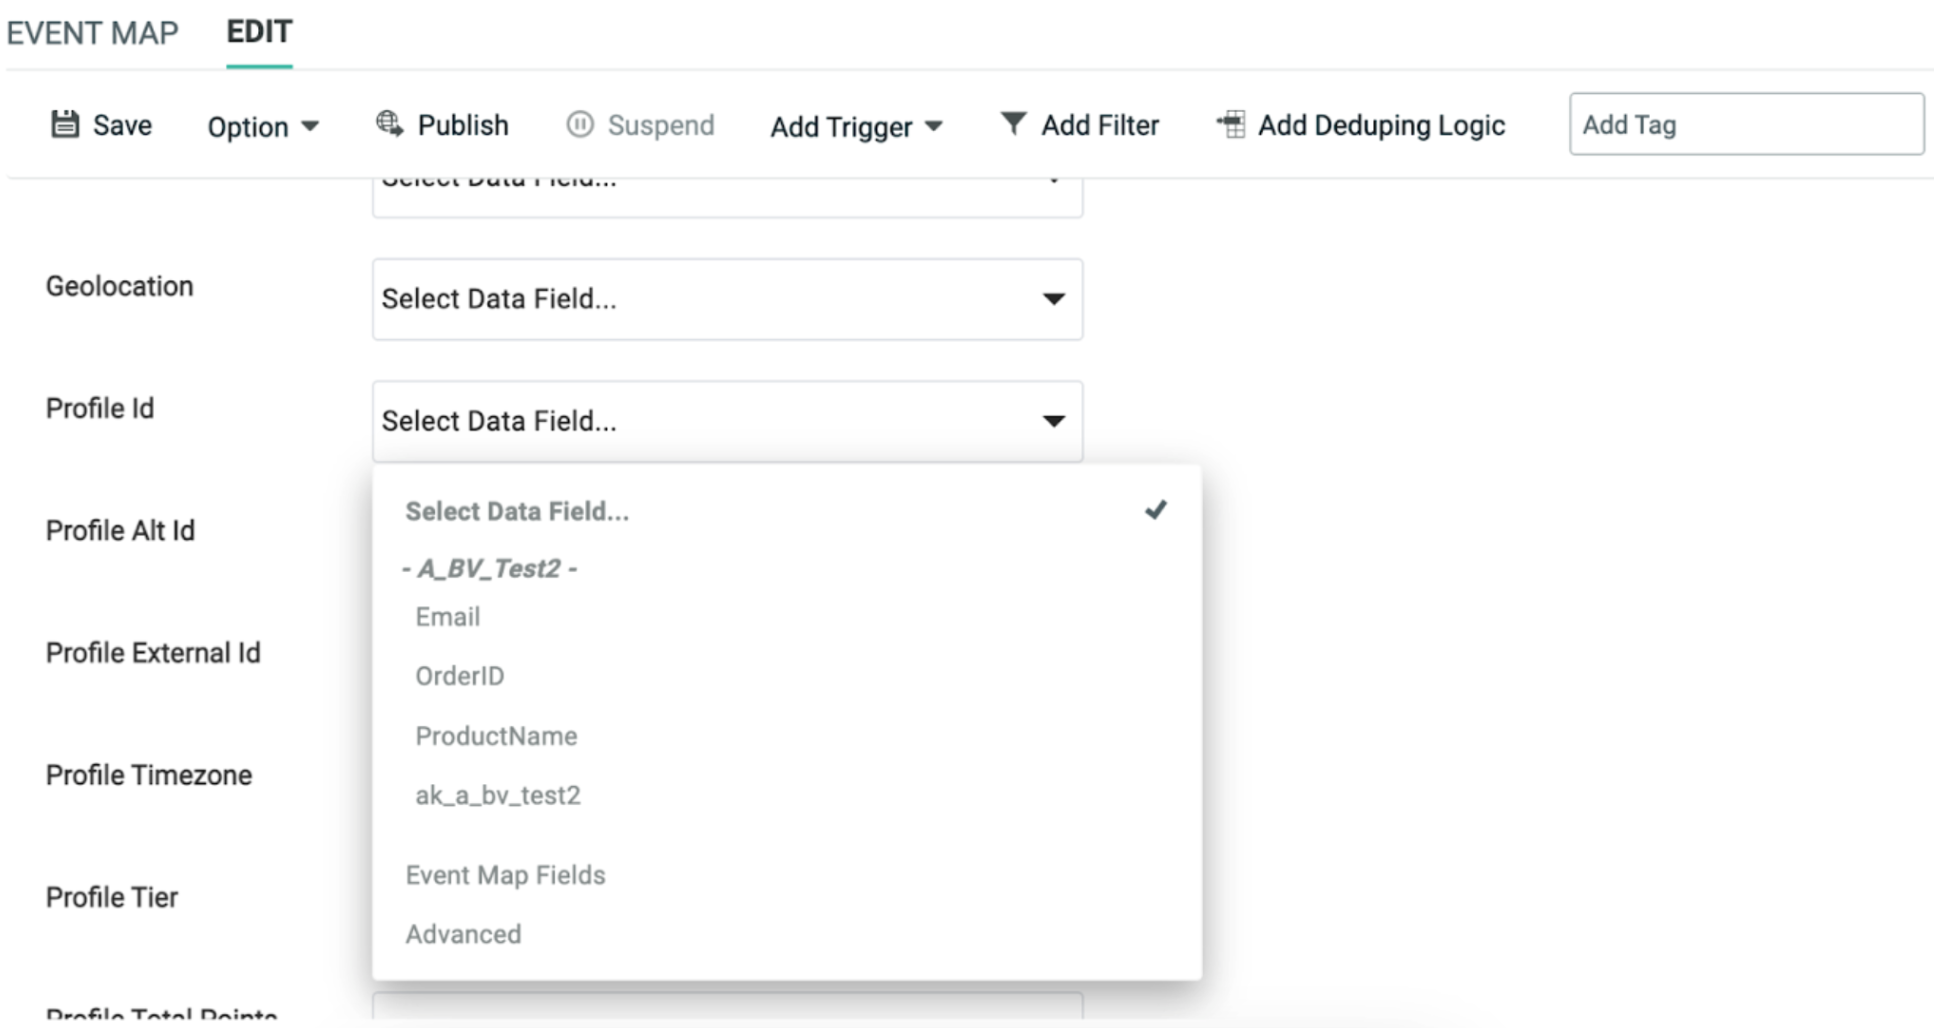
The last step is to set your PKID.
Scroll down in the event map section and find Profile ID. Select the Data Field drop-down and select PKID:
For this use case, we are going to add a trigger using a file import.
Configure Welcome Moment
You can also use Welcome Interactive Moments as an other source to subscribe to customer actions. Refer the prerequisites instructions here to setup Interactive Moments.
Refer here for instructions to create Welcome Moment using the Welcome Template.
Ensure your Journey is configured to use the Interactive Moments in the Journey Settings.
