
How to: Add Rewards to an Experience
A Reward is an incentive offered to customers for participating in a Grow Experience, with the ultimate goal of learning something new about that customer or driving engagement with your brand. Rewards, like prizes, offers, or coupons, can be provided in real-time and have been shown to boost overall engagement. They can be structured as everyone wins or with set odds with consolation rewards as an option. Inclusion of a reward in your experience will boost participation.
In this article you will learn how to add a reward to an Experience.
You can also watch this video which explains the steps to take.
Add a new reward to an existing Experience
As an example we’re going to add a 10% discount coupon reward for everyone signing up to our newsletter. The other possible configuration options will be covered so you can add any reward to any Experience.
- Find your Experience under the Experiences tab and edit the Experience by clicking on the edit icon on the right hand side.

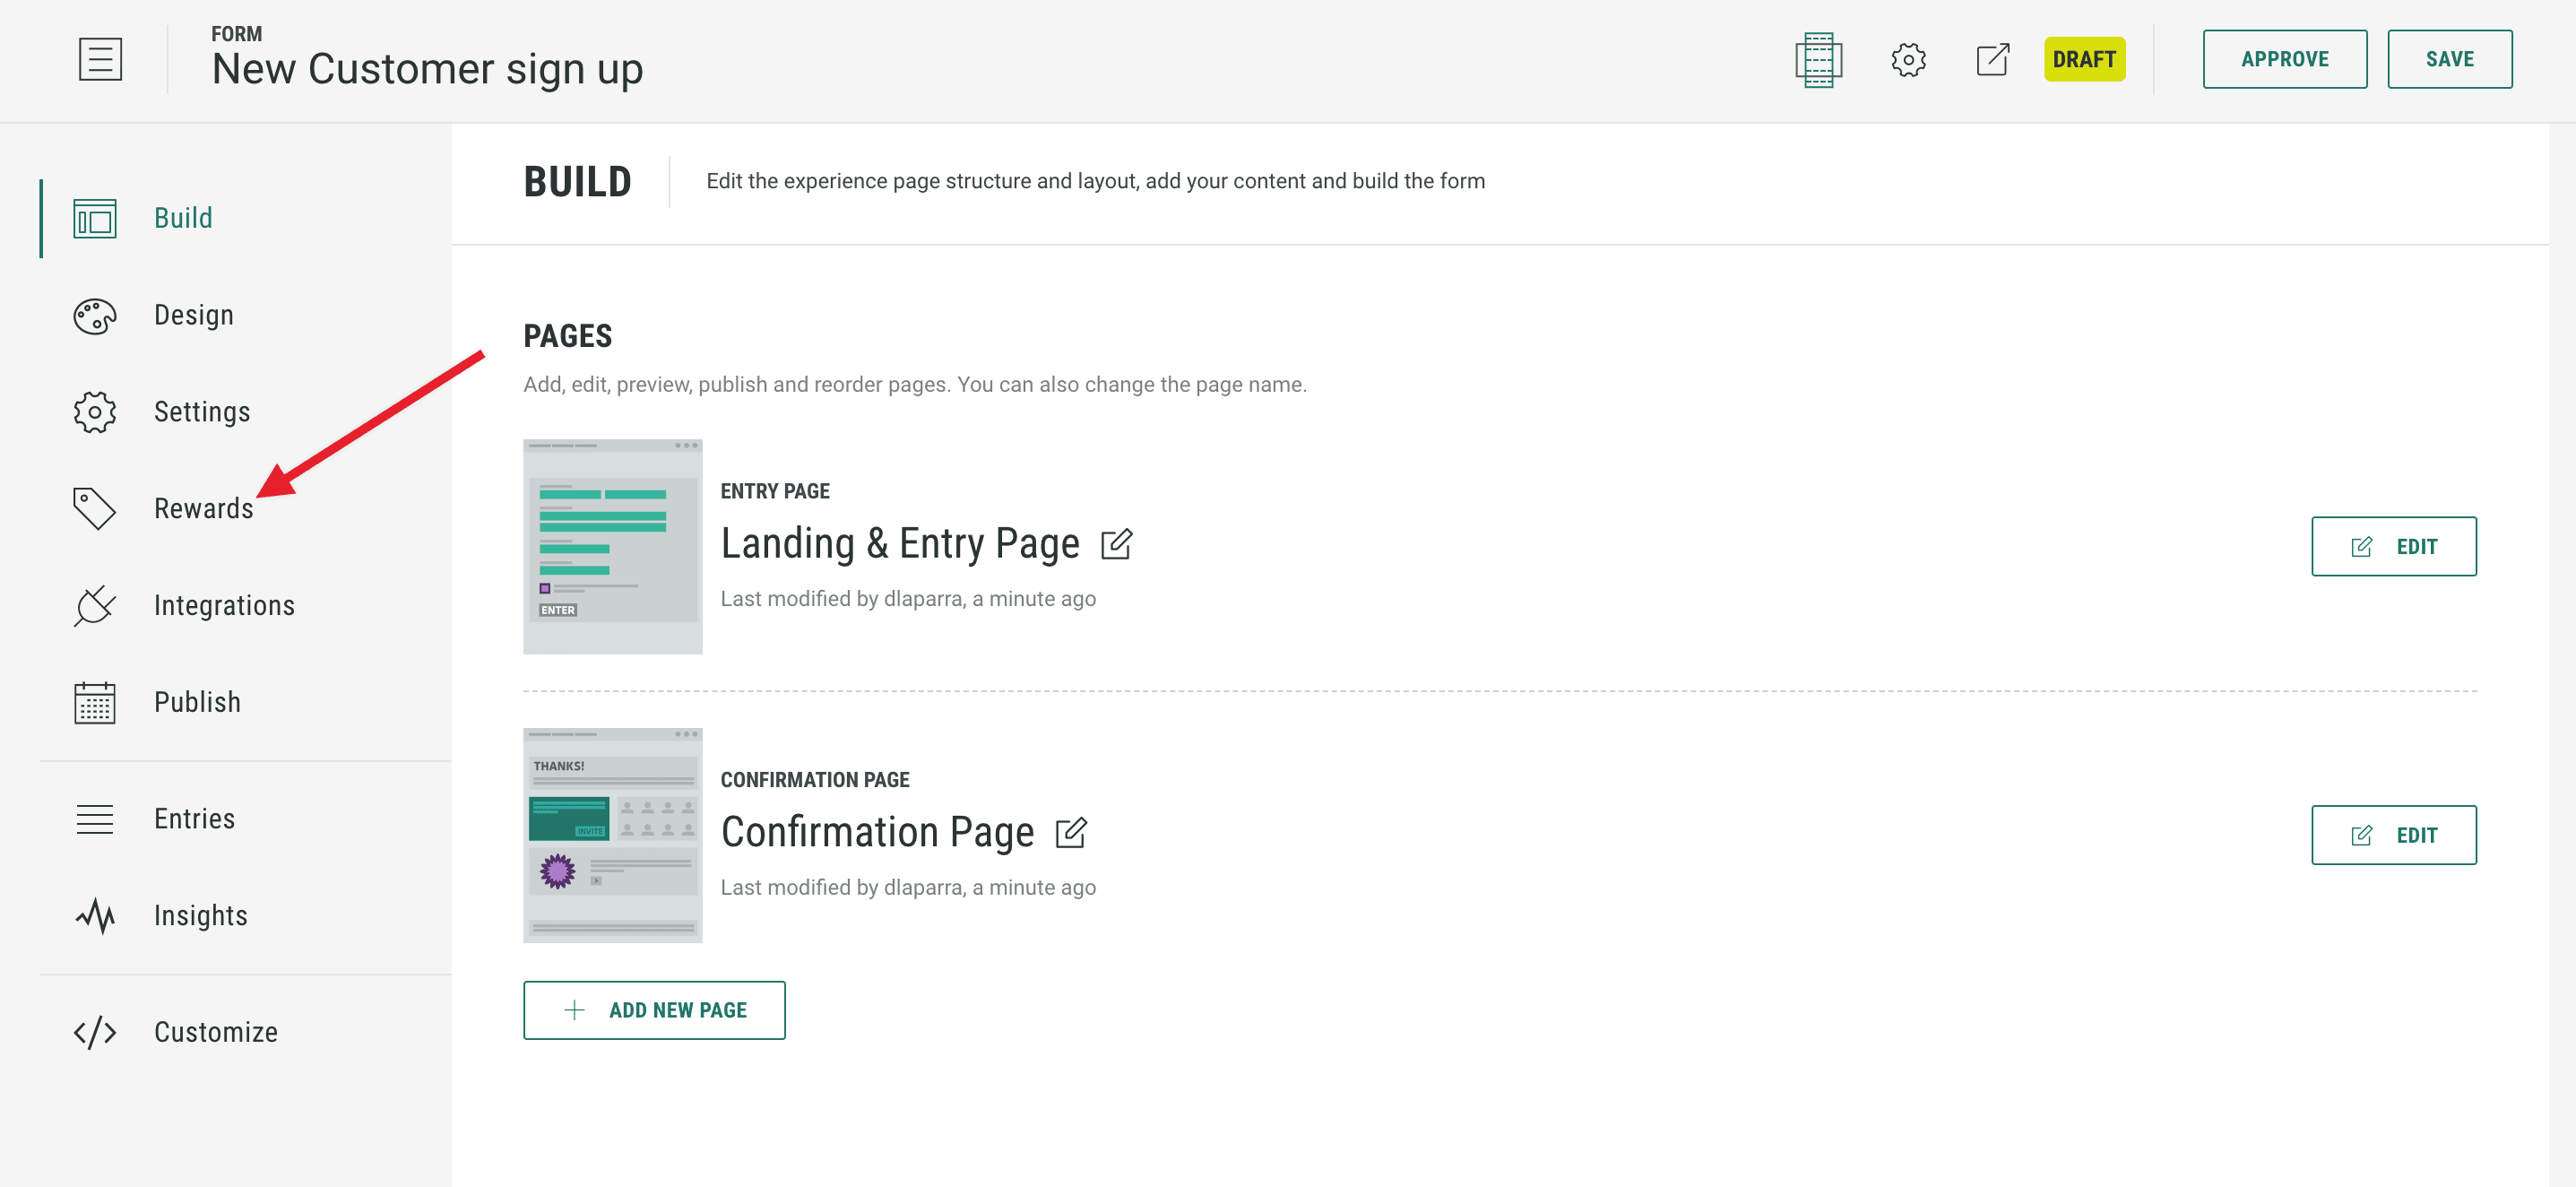
- You will enter the main Experience workspace where you then click on Rewards in the left-hand side navigation menu.
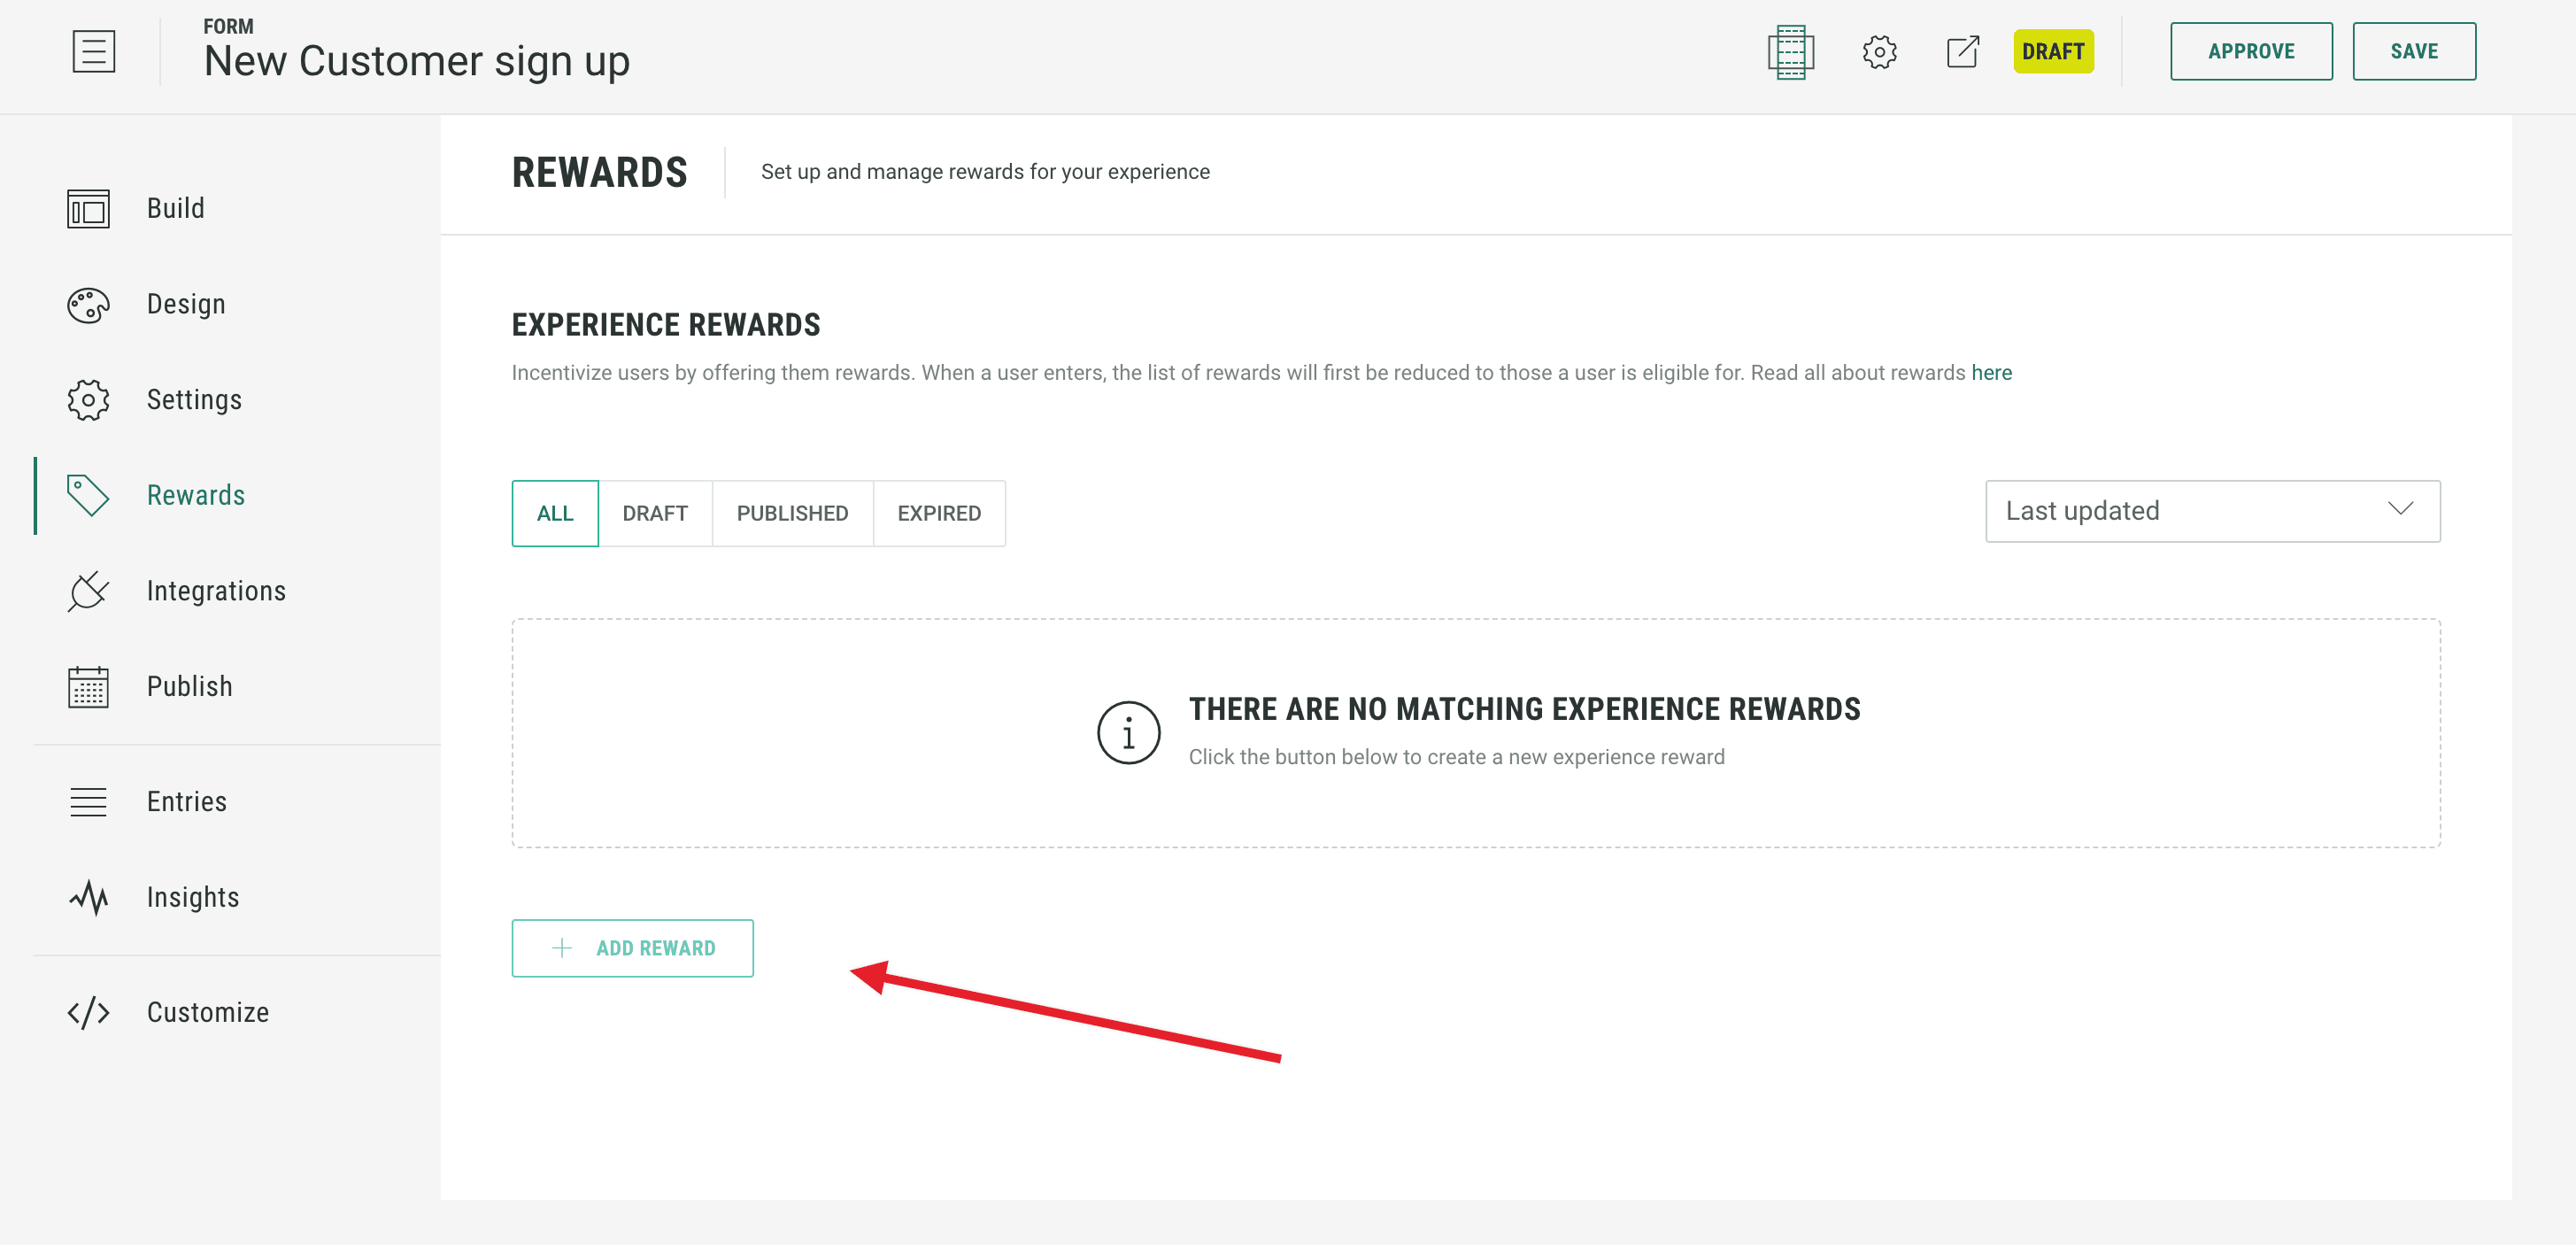
- Click on the + Add Reward button at the bottom left of the main workspace to take you into the settings screen for creating a new reward.
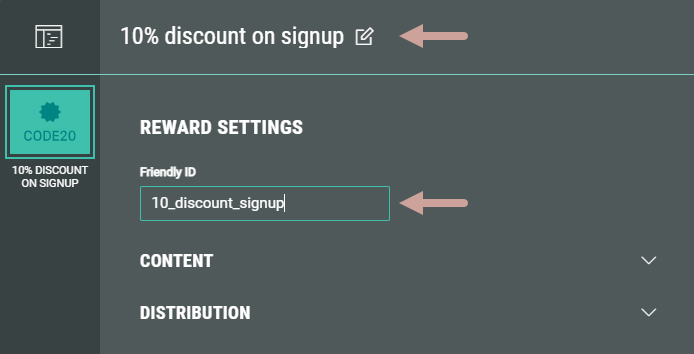
- Starting at the top, Name your reward, then if you need to synchronize data with external systems you can enter a Friendly ID which would be the ID you want to use in those external systems.
- Below, there are two configuration sections: Content. and Distribution.
Content
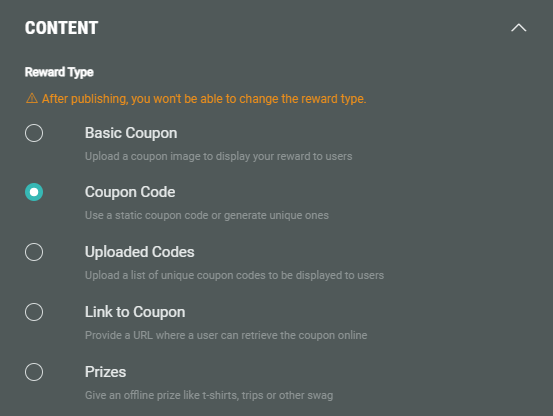
- In Content, select the Reward Type.
For our example we’re using a static Coupon Code. This is a static code that will be used for all customers receiving the reward to redeem it.
Images or coupons can be displayed to customers on the confirmation screen when the Experience is completed. This method does risk the code being harvested by BOTs and sold or published elsewhere. An alternative option is to send a notification with the coupon via an integrated email system or using a Grow email notification in settings.
This display or notification is to show any rewards customers are entitled to, including information where applicable on how to redeem the rewards, either online, in store or both.
Any required limits on redemptions would need a mechanism outside Grow.
Reward types
The possible reward types are:
Basic coupon. This will simply display an image to your customer and would enable manual redemption in-store.
Coupon Code. In addition to the static code used in our scenario you can also generate codes inside Grow. (See below on how to do this when you add a coupon code.) Customers can redeem the code online or in-store, including where the sales assistant is using an integrated POS system.
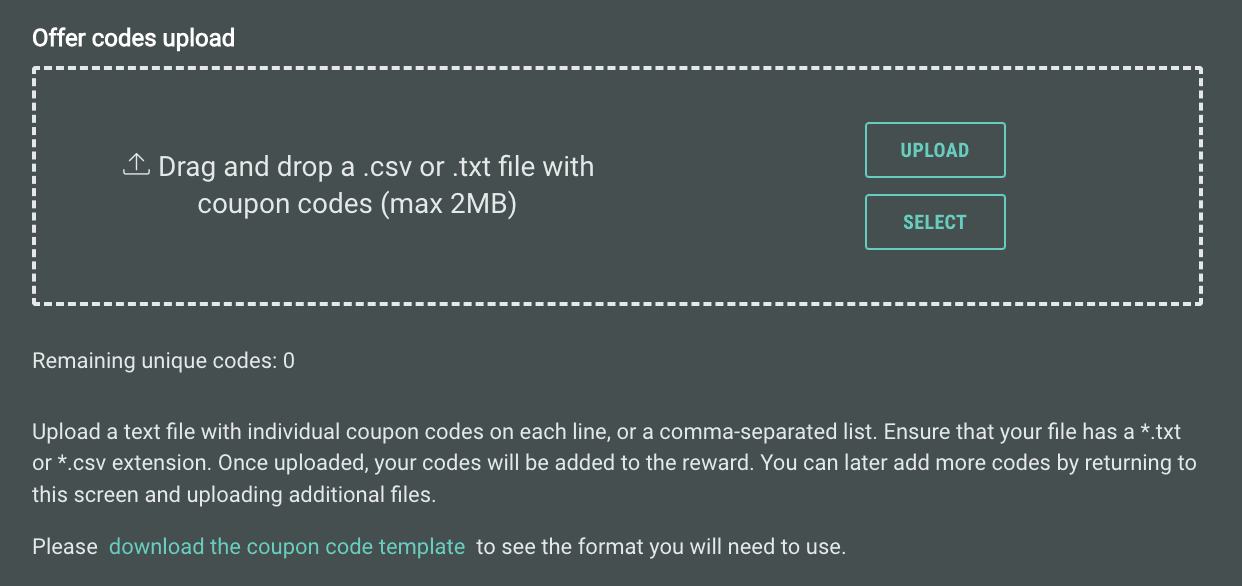
Uploaded Codes. You can upload a list of coupon codes generated outside Grow via a CSV file. Additional files can be uploaded with new codes and be uploaded if the existing codes run out. Customers can redeem the code online or in-store, including where the sales assistant is using an integrated POS system.
Link to coupon outside Grow. You can generate codes in an external system and make them available via a URL which you surface instead of a coupon code. Customers can redeem the code online or in-store, including where the sales assistant is using an integrated POS system.
Prizes. These are physical items fulfilled offline such as t-shirts, trips or other swag.
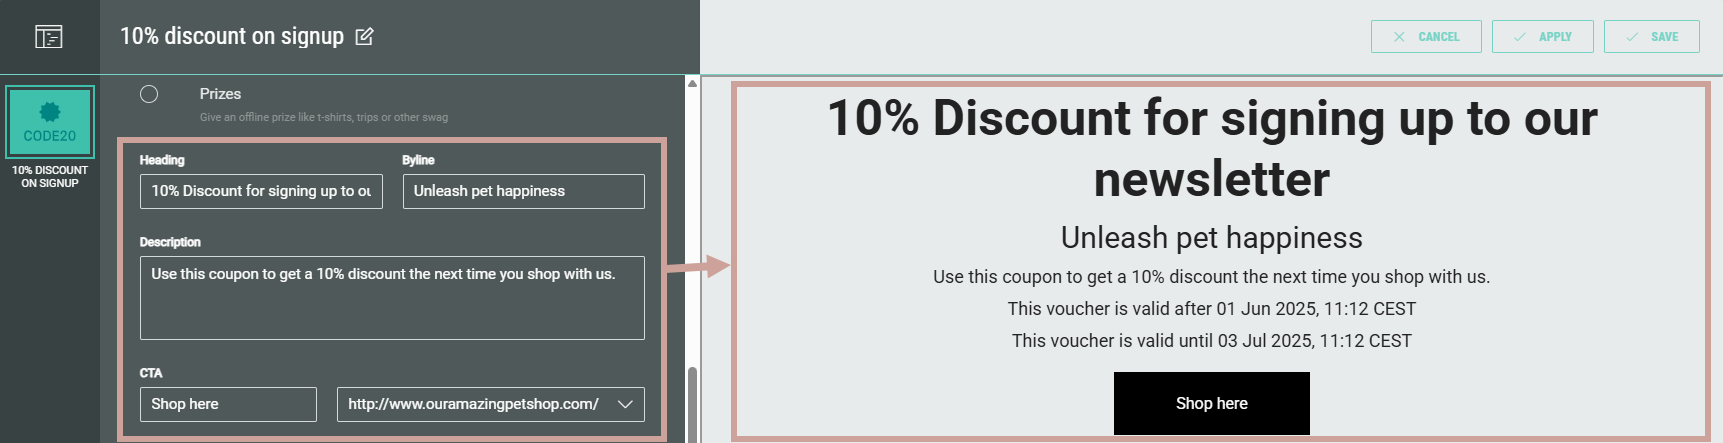
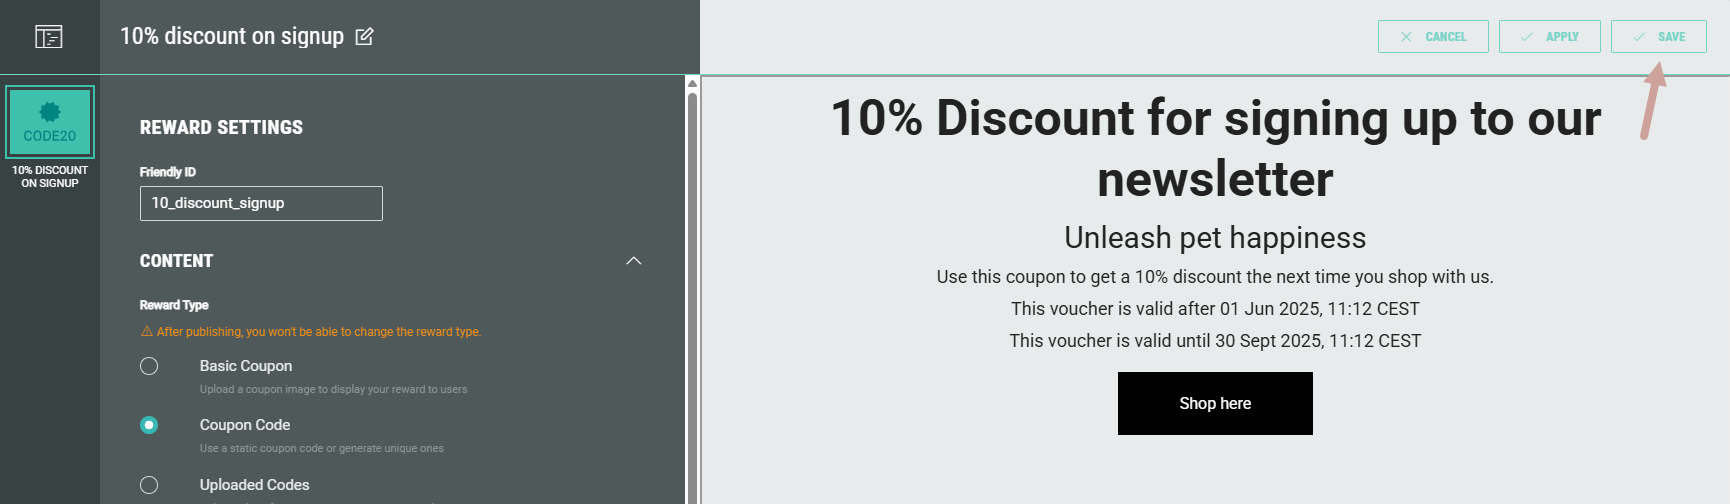
- Next enter the reward content : Heading, Byline and Description.
Additionally, you can add a CTA button with a link to a URL (for example, to your online shop).
At the right, you can see a preview of your content.
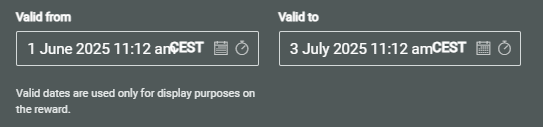
- You can add the dates and times to the Valid from and Valid to boxes below to show when the reward is valid. This is for display purposes only; there isn’t an automated system to prevent the reward being redeemed outside the stated validity period.
- Coupon Code is a mandatory field if you are using static or unique codes. For our example we’re using DISCOUNT10 as a static code.
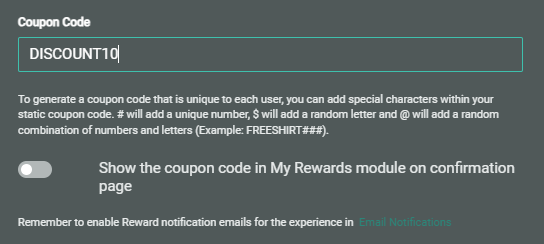
Here you can also generate unique codes using the instructions inside the application, as shown in the image above.
Finally, select whether or not you want to show the coupon code on the confirmation page when the user completes the Experience.
Warning: Showing the coupon code on the confirmation page makes it easier for BOTs to obtain the codes by using randomly generated fake email addresses.
Other reward type configurations
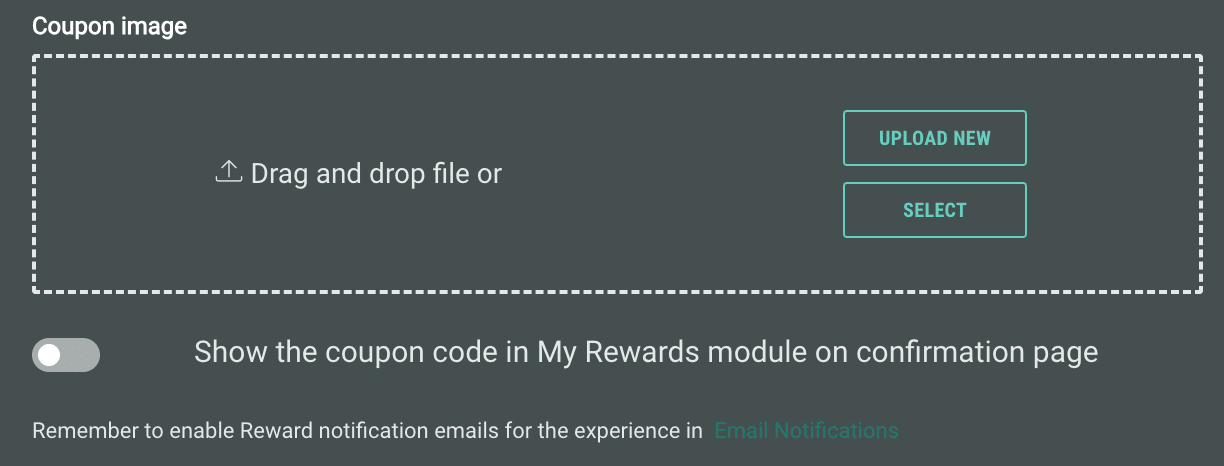
Basic Coupon: You will simply need to upload an image in the box displayed.
Uploaded codes: You will be prompted to upload or drag and drop your CSV file using the code format specified in the file that's accessible through the download the coupon code template link.
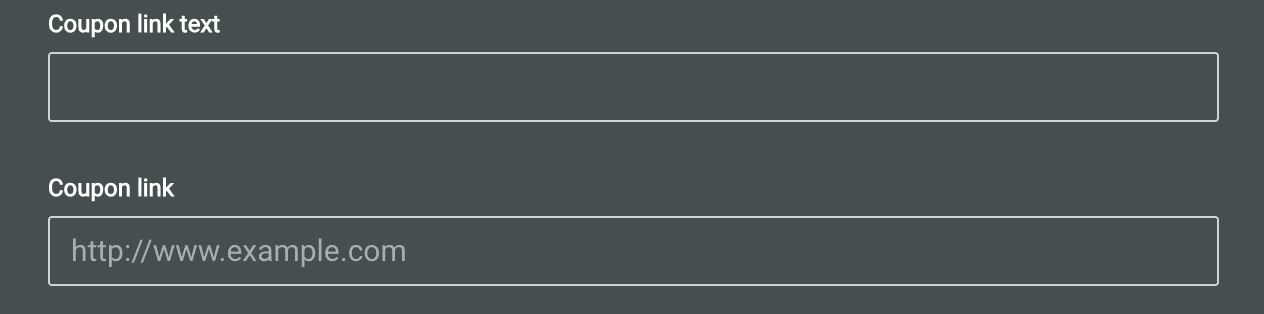
Link to coupon: You will simply need to add the link to the URL where your customers can get their coupon code and the text to display.
- You can enable reward notification emails for your Experience by clicking on the link shown. This option is available whether or not you have chosen to display coupon codes (if you’re using them) in the rewards module on the confirmation page of the Experience.

Note: For help on setting up reward notification emails, click here.
- The last step is to add a Thumbnail asset, either via drag and drop or uploading.

This thumbnail asset is the main image that your customer will see on the confirmation page of the Experience if they are entitled to the reward. In our scenario it’s an always win, so the reward will appear on the confirmation page, whereas for the other distribution methods the reward will be displayed only to those entrants who are eligible for the reward.
In addition, the image can be included in any email notifications you configure (see step 10 above)
Distribution
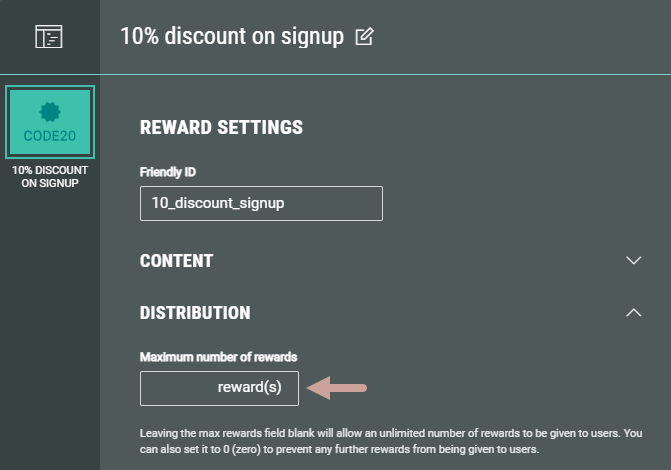
- In Distribution, you can enter the Maximum number of rewards you want to make available if applicable.
Example: You have a limited number of high value prizes to give away.
For our example there will be no maximum number of rewards so we’ll leave it blank.
- Next choose your Distribution Strategy. This includes the time window and the odds for rewards based on randomized winners.
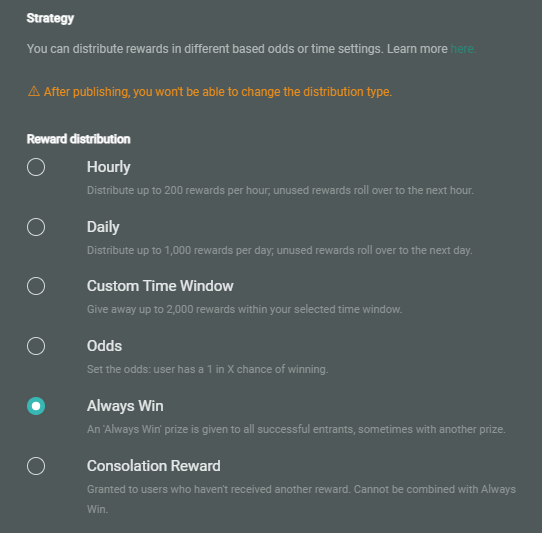
- Hourly — Define the hourly winners, with a maximum of 200 rewards per hour. Unused rewards roll over to the next hour.
- Daily — Define the daily winners, with a maximum of 1,000 rewards per day. Unused rewards roll over to the next day.
- Custom Time Window — Give away up to 2,000 rewards within a selected time window.
- Odds — Set the odds. A user has a 1 in X chance of winning. Default it's 1 in 5, which can be amended to 1 in any number.
- Always Win — A prize is given to all successful Experience entrants.
- Consolation Reward — For entrants who haven’t received another reward when they complete the Experience, and therefore should only be used if you already have or plan to have 1 or more other rewards configured for the Experience in question. Plus, it can’t be used in combination with Always Win. The system will check all completed Experiences each day and issue this reward to customers who did not get any other reward after completing the Experience.
Note:
Grant from and Grant to fields are required for Custom Time Window rewards.
All other reward distributions also allow to set a time window with the Grant from/to fields, but as an optional setting, during which the reward distribution is live.
If not filled out, the reward distribution will be continuous for the time your reward is live.
For our example we’re choosing Always Win as every person completing the sign up will receive the 10% discount coupon.
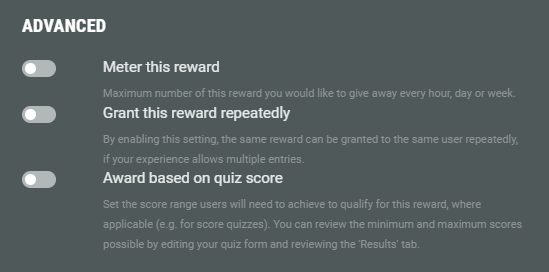
Other options are available in the Advanced reward settings, which are explained alongside each option. We’re not going to select any of these for our example.
- Finally, click Save.
Publish your Reward
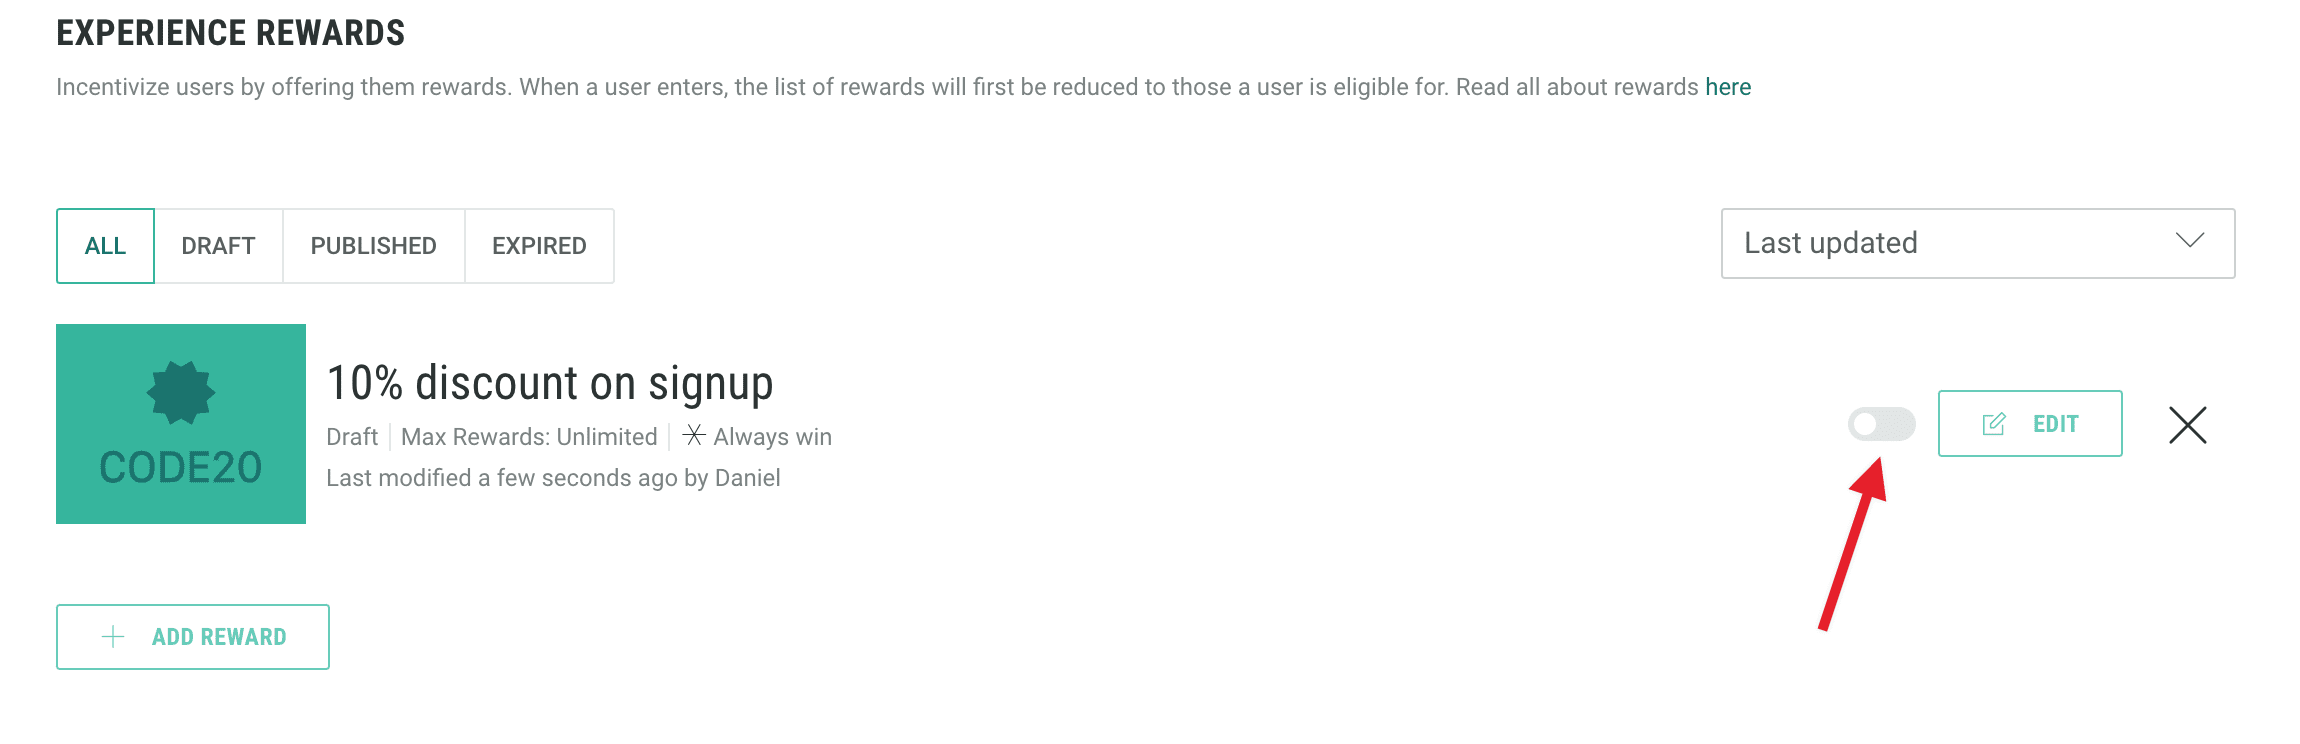
Now that you have configured and saved your reward, you will land back on the Rewards area inside your Experience.
Alternatively, if you are coming back to publish your reward at a later date you can find your reward, first by finding your Experience under the Experiences tab, and then click Rewards in the left hand menu.
You can publish the reward by sliding the button from left to right.
Note: Publishing the reward will only be possible when the Experience itself is published.
Once a reward has been published, some settings may no longer be available. For instance, you cannot change the distribution method of a reward once it has been published and you cannot change the time-window for a custom time-window reward. The Reward Editor will indicate the restrictions as you set up your reward and you will be reminded before you publish.
The next step is to make sure the Reward is shown to eligible entrants.
