
Address Module
The Address module can be used within a Form Section to ask Experience participants for inputting their address.
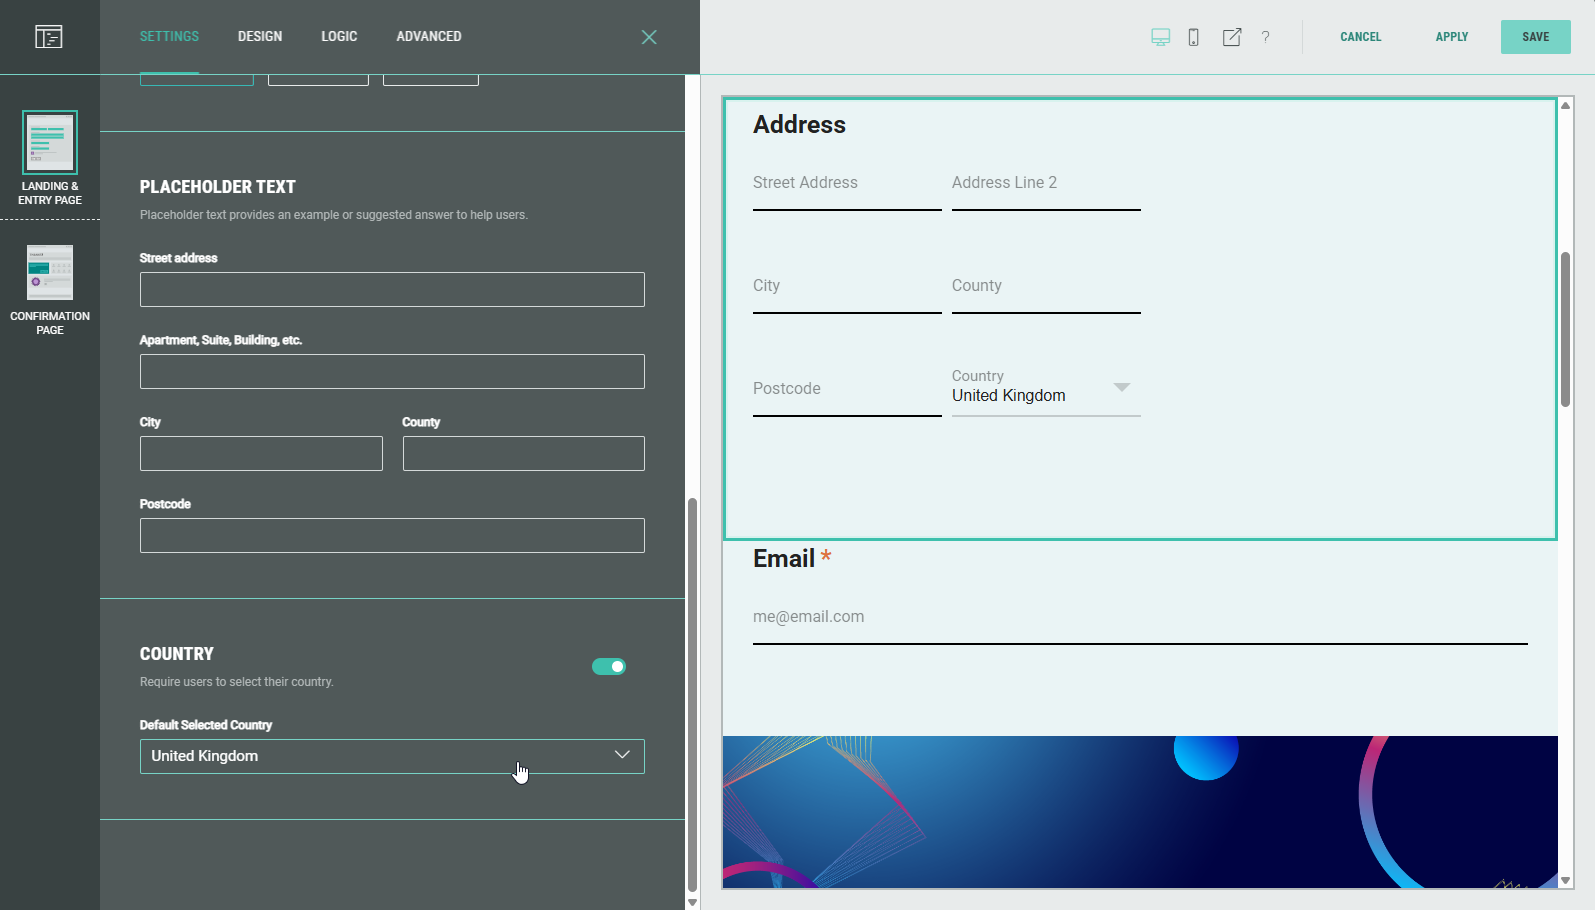
Edit the Address module in the Page Builder by clicking on the Pencil icon.

The following sections are available which can be edited (from the tabs at the top): Settings, Design, Logic, Advanced.
Settings
On the Settings tab, you can configure:
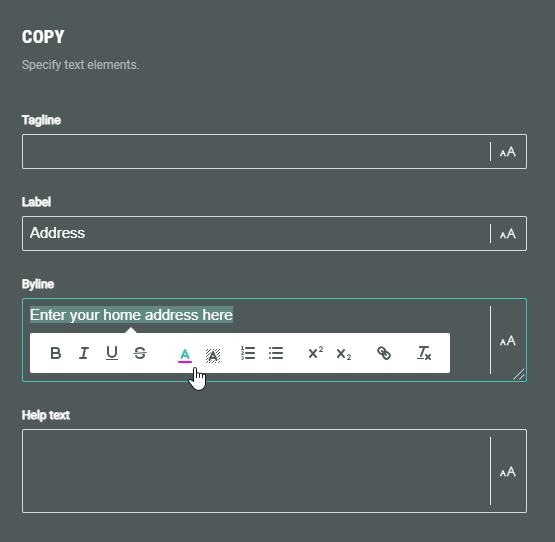
- Copy — Specify text content and apply styling for tagline, label, byline and help text.
- Required — Enable the toggle to make this a required field for the Experience participant to complete.

- Connect — You can add a Friendly ID to help you identify this field when synchronizing data with third party apps (ESP, CRM etc.)

- Format — Select the relevant address format for the target geography: United Kingdom, United States, European or International.
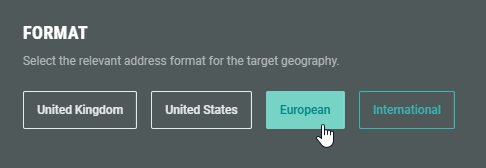
Depending on your choice, the placeholder text fields below adapt accordingly.
The following format-specific input fields are displayed in a specific order:
- United Kingdom — City, County and Postcode.
- United States — City, State and Zip. State is a combo-box field.
- European — Postcode, City and State/Province.
- International — City, State/Province and Postcode.
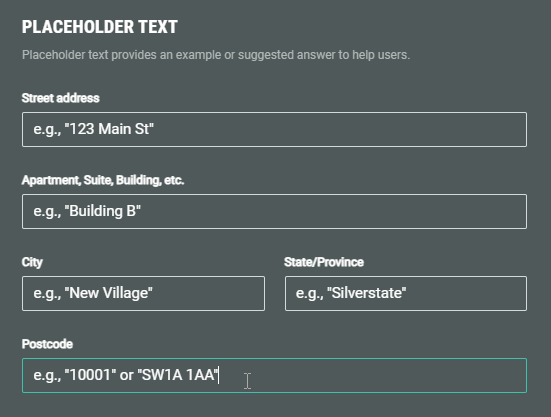
- Placeholder text — You can enter placeholder texts for each field to provide examples or suggested answers to help participants.
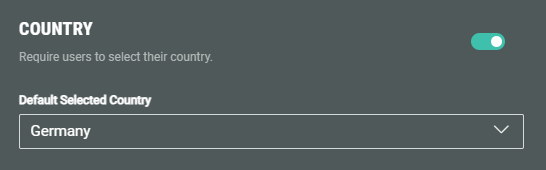
- Country — You can enable the toggle to require participants to select their country. When doing so, you can additionally populate the field with a default country.
Disabling the toggle hides the country field from the Address form.
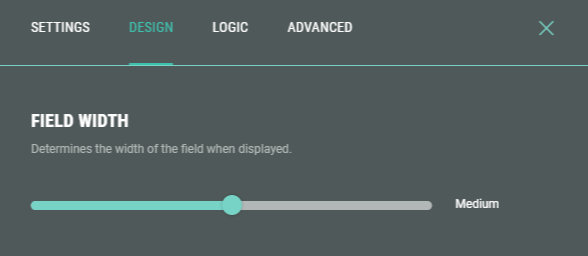
Design
- On the Design tab, you can define the field width by dragging the slider to the left or right (check the preview window on the right to verify the desired field size).
- Additionally, you can assign a CSS classname to the module for using custom CSS styling.
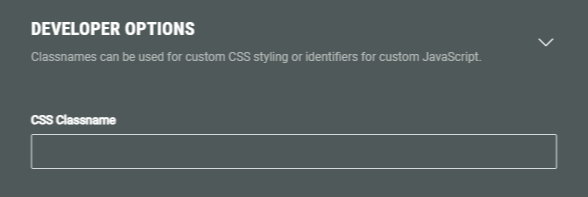
Warning: Using a custom CSS classname will overwrite the default styling.
Only use this when you're familiar with using CSS code.
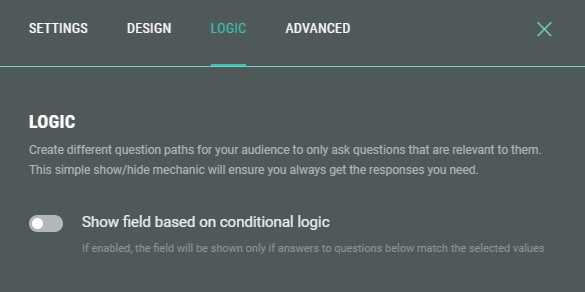
Logic
On the Logic tab, you can create different question paths for your audience to only ask questions that are relevant to them. This is based on conditional logic determined by answers given to quiz questions in this Experience.
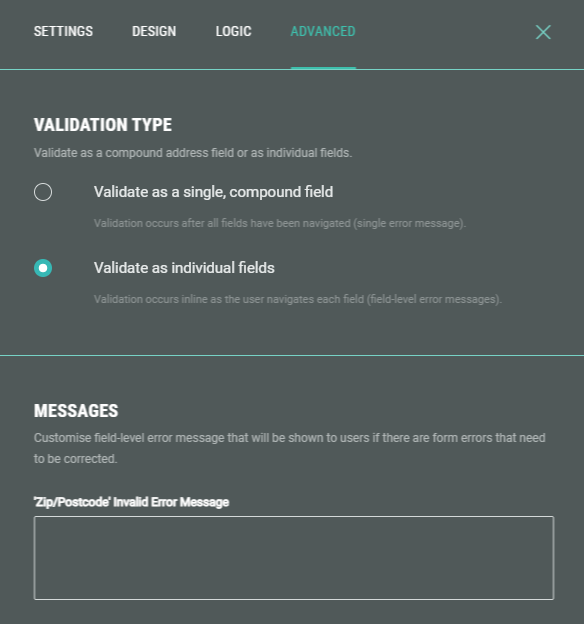
Advanced
On the Advanced tab, you can decide how addresses will be validated.
-
Validate as a single, compound field — A single validation occurs, through a single error message for all address fields combined, after completing them.
At the bottom, you can customize the error message shown when a participants' input is invalid.

-
Validate as individual fields — Validation occurs inline on each field individually, with field-level error messages.
At the bottom, you can customize the Zip/Postal code invalid error message shown when it's invalid.
Note: If you leave the error message blank, we will use the relevant language message from Labels & Translations.
