
When the anonymous contact fills out the form, you need to validate and store the form data in the Audience List. Before storing, we need to check if the contact already exists in the Audience List. If they do, you send them an "already subscribed" email. If not, they will receive the confirmation email so they can confirm their subscription. In both cases we will show the subscribe thank you page.
Create the subscribe journey
1. Select 'Journeys' in the left navigation and create a new journey "Newsletter Subscription Journey" in the same folder where you created the pages and emails. Select the Audience List that was also used for the pages and emails.
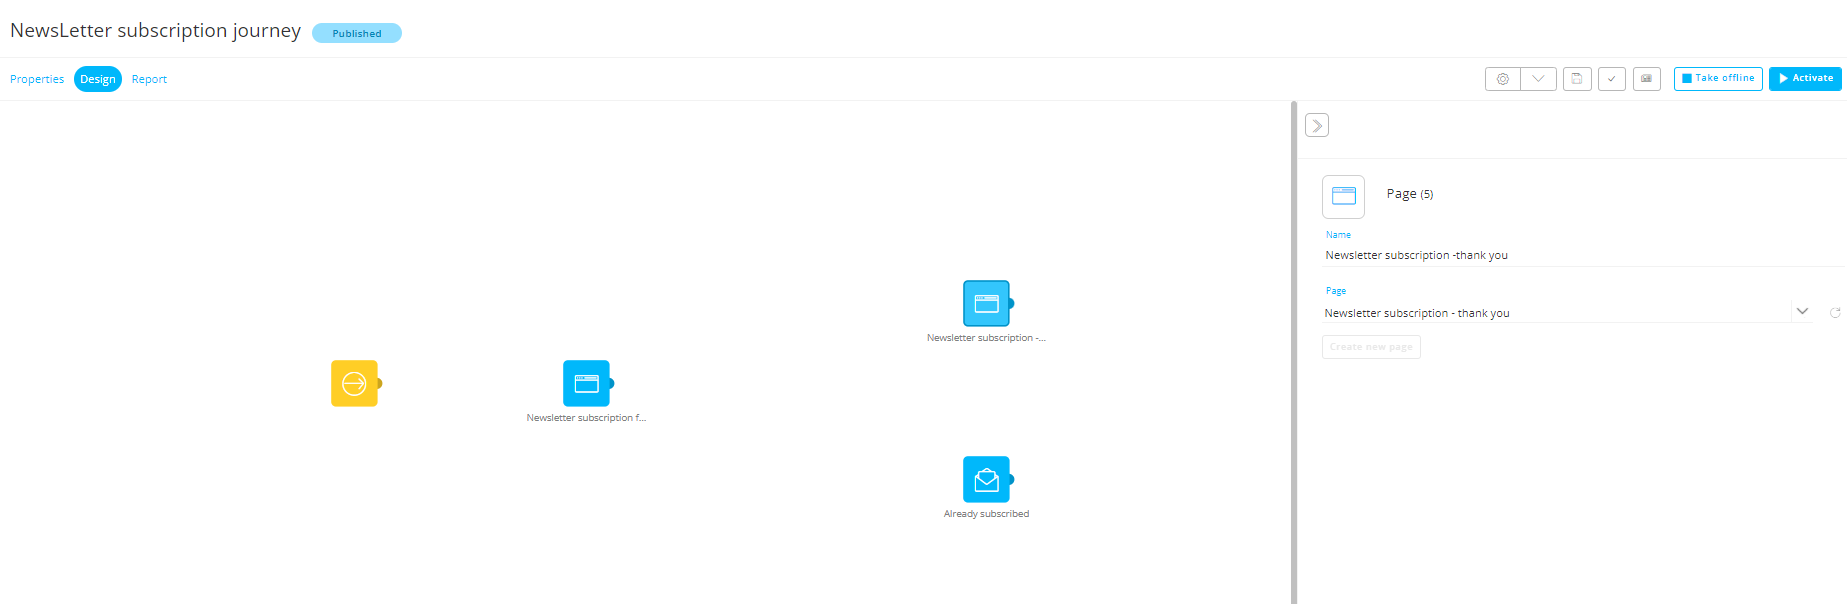
2. From the Components panel on the right, drag an Input Component, 2 Page Components (one for the 'Newsletter subscription form' and one for the 'Newsletter subscription - thank you'), and an Email Component (for the "'Already subscribed' email on the journey.) Select for each of the added components the corresponding assets.
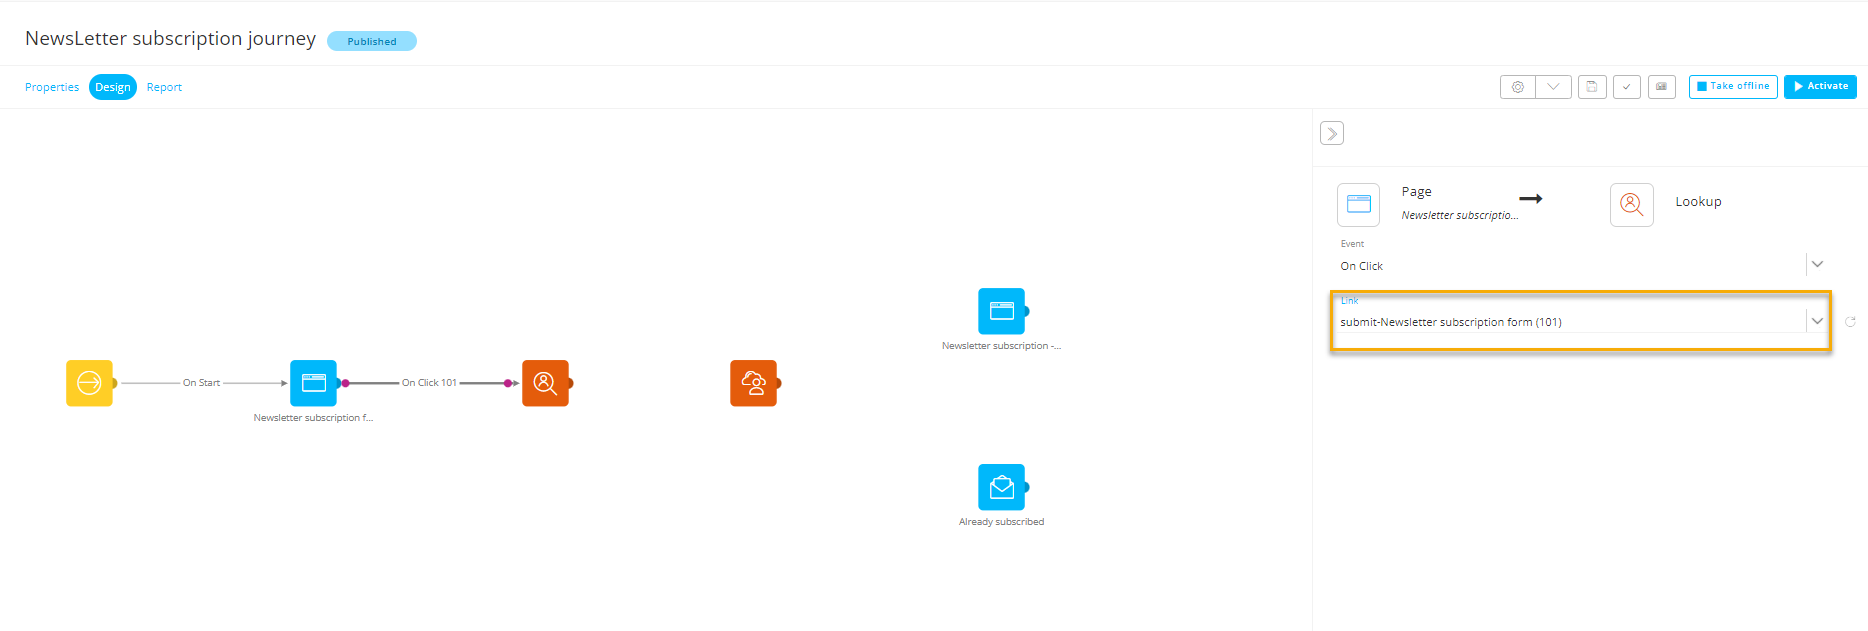
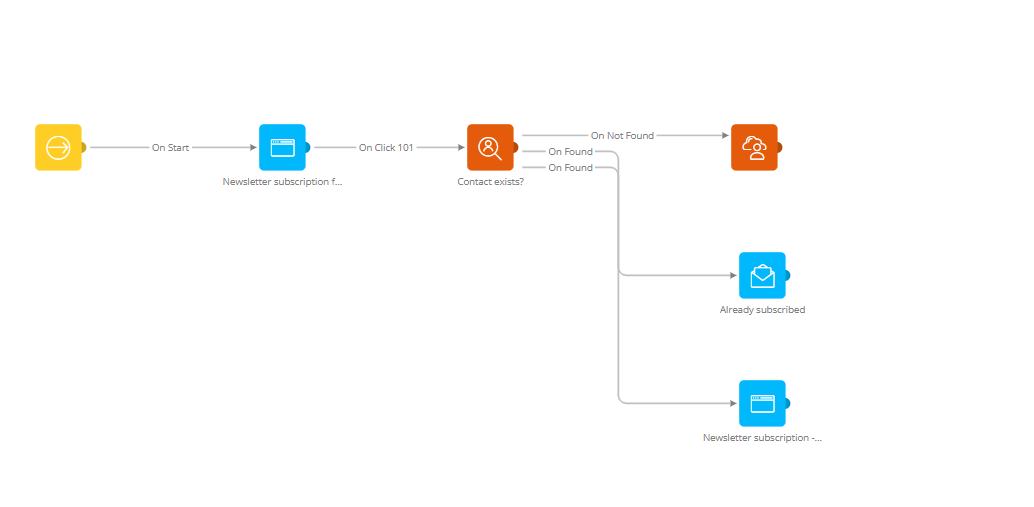
3. Connect the Input Component with the 'Newsletter Subscription form' page. When the contact fills out and submits the form, you need to store the entered form data in a Data Component. But before storing the form data, you need to check if the contact is not already stored in the Audience List. This is done with a Lookup Component. You will test if the contact already exists. If not, store the form data in a Data Component. So drag a Data Component and one Lookup Component onto the design canvas:

4. Link the form's 'Submit' link to the Lookup Component.
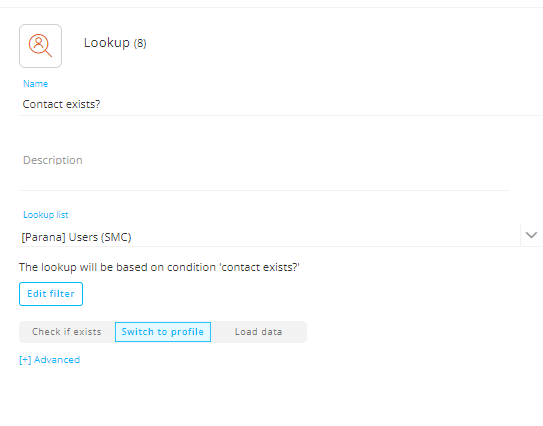
5. In the Lookup Component, check if the entered email address already exists in the database. Make sure the option 'switch to profile' is selected as you want to send the 'Already subscribed' email to the known contact:
The constraint is as following:
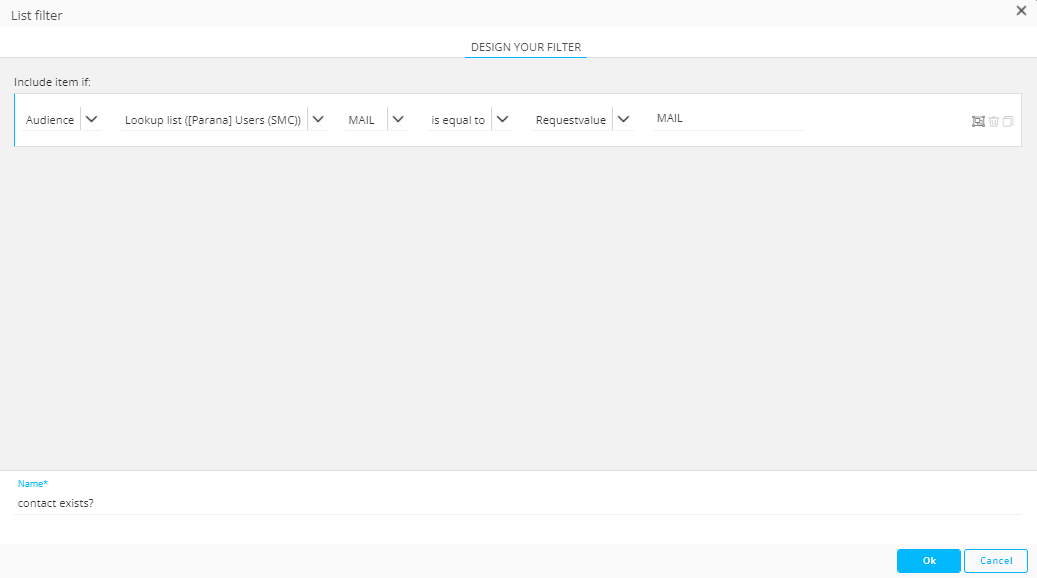
You are testing here if there is an email in the Audience List that corresponds to the email entered in the form. The function used for this is requestValue.
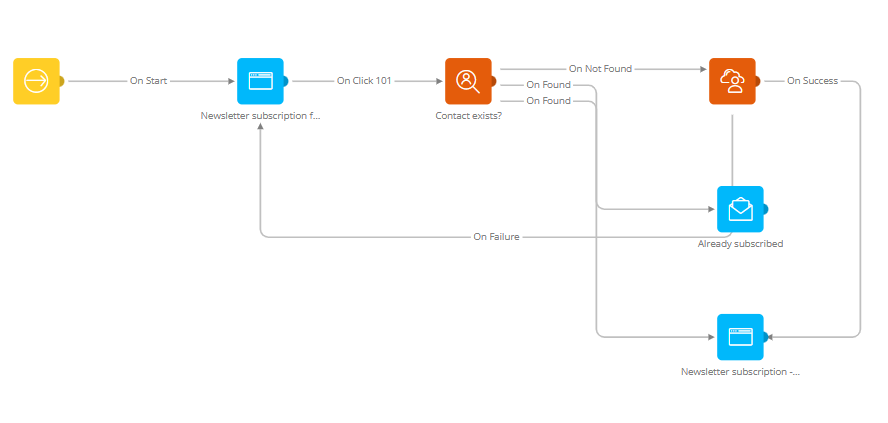
6. Next, drag a link from the Lookup component to the Data Component using the event, OnNotFound. You will only save the record if it does not exists yet. Drag the OnFound link to the 'Already subscribed' email and also to the 'Newsletter subscription - thank you' page. This is necessary because every path needs to end in a page.
7. Configure the Data component to store all the entered values in a record in the Audience List. In the Field column on the left, the drop-down provides access to all the fields in the Audience List and linked lists. In the Value column on the right, click the 'Add request value' icon  to easily select the form field values.
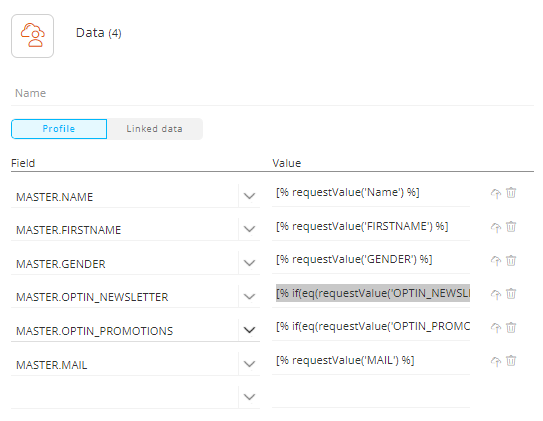
The function [% requestValue('FIELDNAME') %] is used to retrieve the values from the form.
Note that check boxes in a form only return a result if they are checked. Therefor, we are using the following function in the Data component to set the value for the Optin fields.
[% if(eq(requestValue('OPTIN_NEWSLETTER'),'1'),'99',[MASTER.OPTIN_NEWSLETTER] )%]
This function ensures that if the check box is ticked (value returned is 1), the value 99 is stored and if it is not ticked (no value is returned) the original value is kept. Store the value 99 for now, as the contact still needs to confirm the subscription. Only then, after confirmation you will update the NEWSLETTER_OPTIN/PROMOTIONS_OPTIN field with value 1. These values are of type text as the fields in the Audience List expect a text. If you use a numeric field in the Audience List to store the subscription, the following function should be used, without quotes around the values:
[% if(eq(requestValue('OPTIN_NEWSLETTER'),'1'),99,[MASTER.OPTIN_NEWSLETTER])%]
8. A Data Component has 2 events 'OnSuccess' and 'OnFailure'. Point the 'OnFailure' trigger back to the 'Subscribe form' in the journey. If saving the data fails, you want to present the form again and try once more. The 'OnSuccess' trigger can continue to the 'Newsletter subscription - thank you' page.
Subscribe confirmation
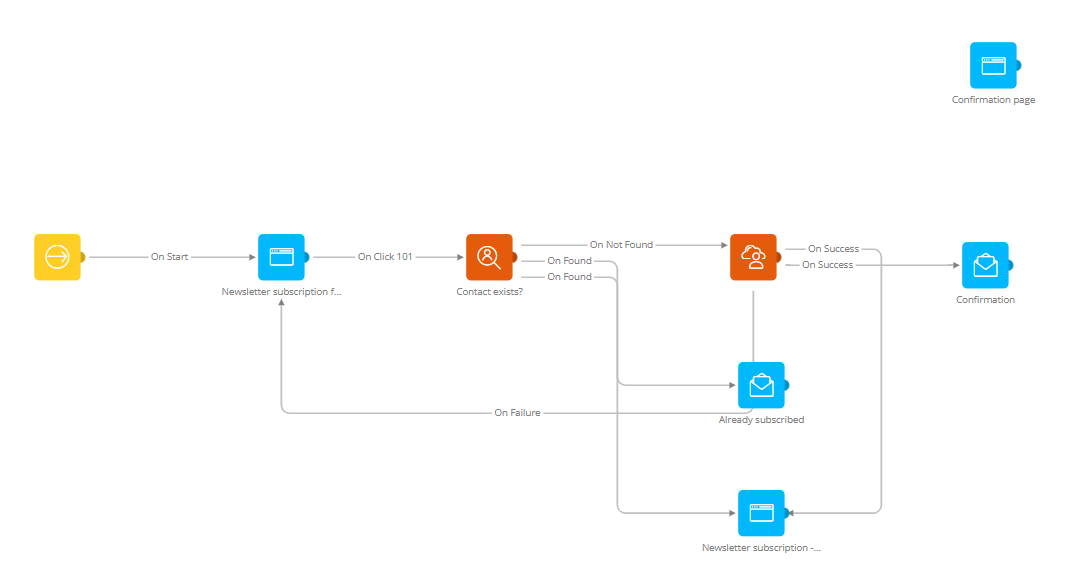
9. The contact still needs to confirm his subscription. Drag an Email Component for the 'Newsletter Subscription Confirmation' and a Page Component 'Newsletter subscription Confirmation' on the canvas. When everything is stored successfully you will send them the 'Newsletter subscription confirmation' email. Drag the Data component's 'OnSuccess' trigger to the 'Confirmation' email. The person filling out the survey must also see the result page.
10. Finally, when the contacts clicks the 'Confirm' link in the 'Newsletter subscription Confirmation' email, you still have to update the opt-in values from 99 to 1. By using 99 earlier, you can identify which newsletter opt-ins they chose. Drag a Data Component on the canvas and link the Confirmation email 'Confirm' link to the Data Component.
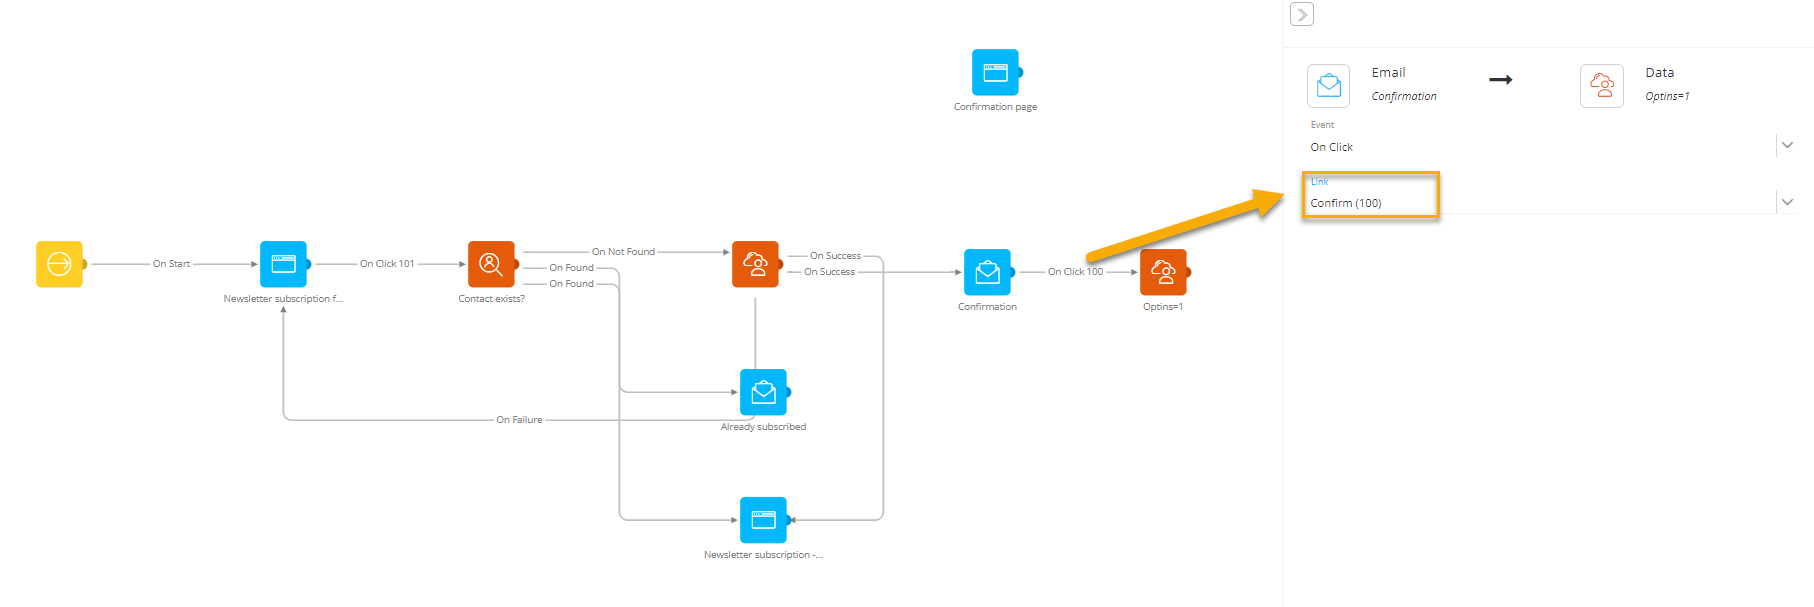
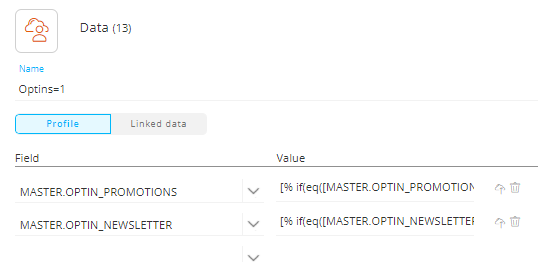
Double-click the Data component, name it 'Optins=1' and enter the list of fields that need to be updated. We use an IF-function to verify if the stored value is 99 (OPTIN_NEWSLETTER=99). If it is, the value 1 is stored to replace 99, otherwise leave whatever value was in the OPTIN_NEWSLETTER Audience List field. Use the following function:
[% if(eq([MASTER.OPTIN_NEWSLETTER],'99'),'1',[MASTER.OPTIN_NEWSLETTER])%]
Do the same for the other optin fields as well.
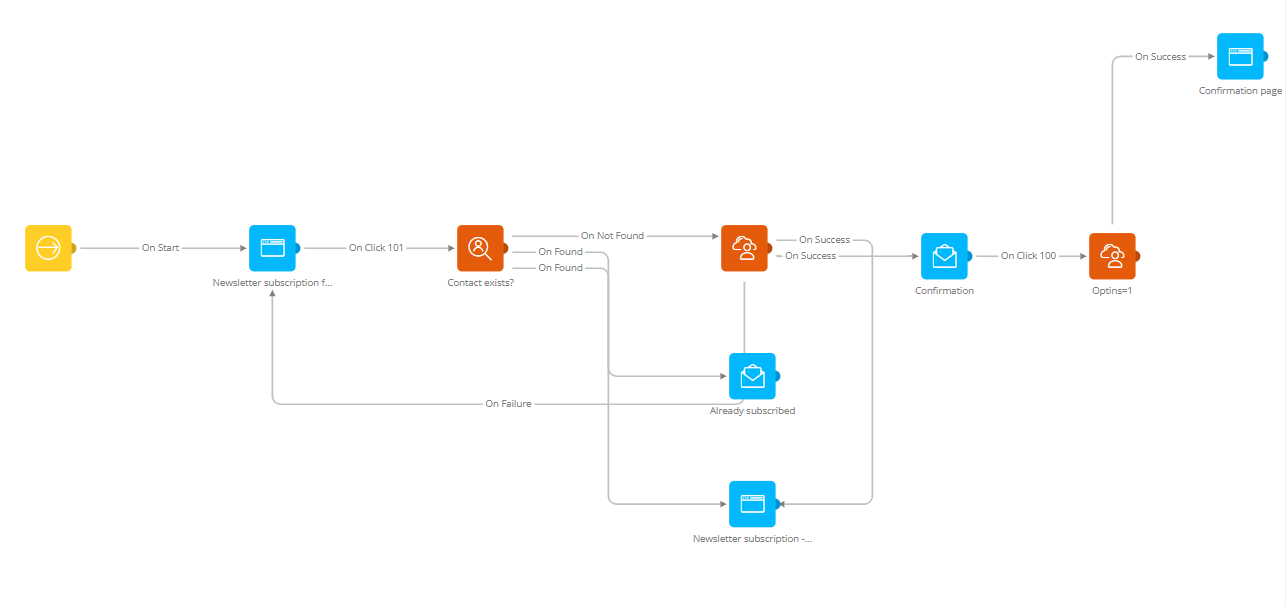
12. Drag the Data component's 'OnSuccess' trigger to the 'Confirmation OK' page. You also need to draw the "OnFailure" trigger to a 'Subscription failed' page (not shown in this example) otherwise the journey save will fail.
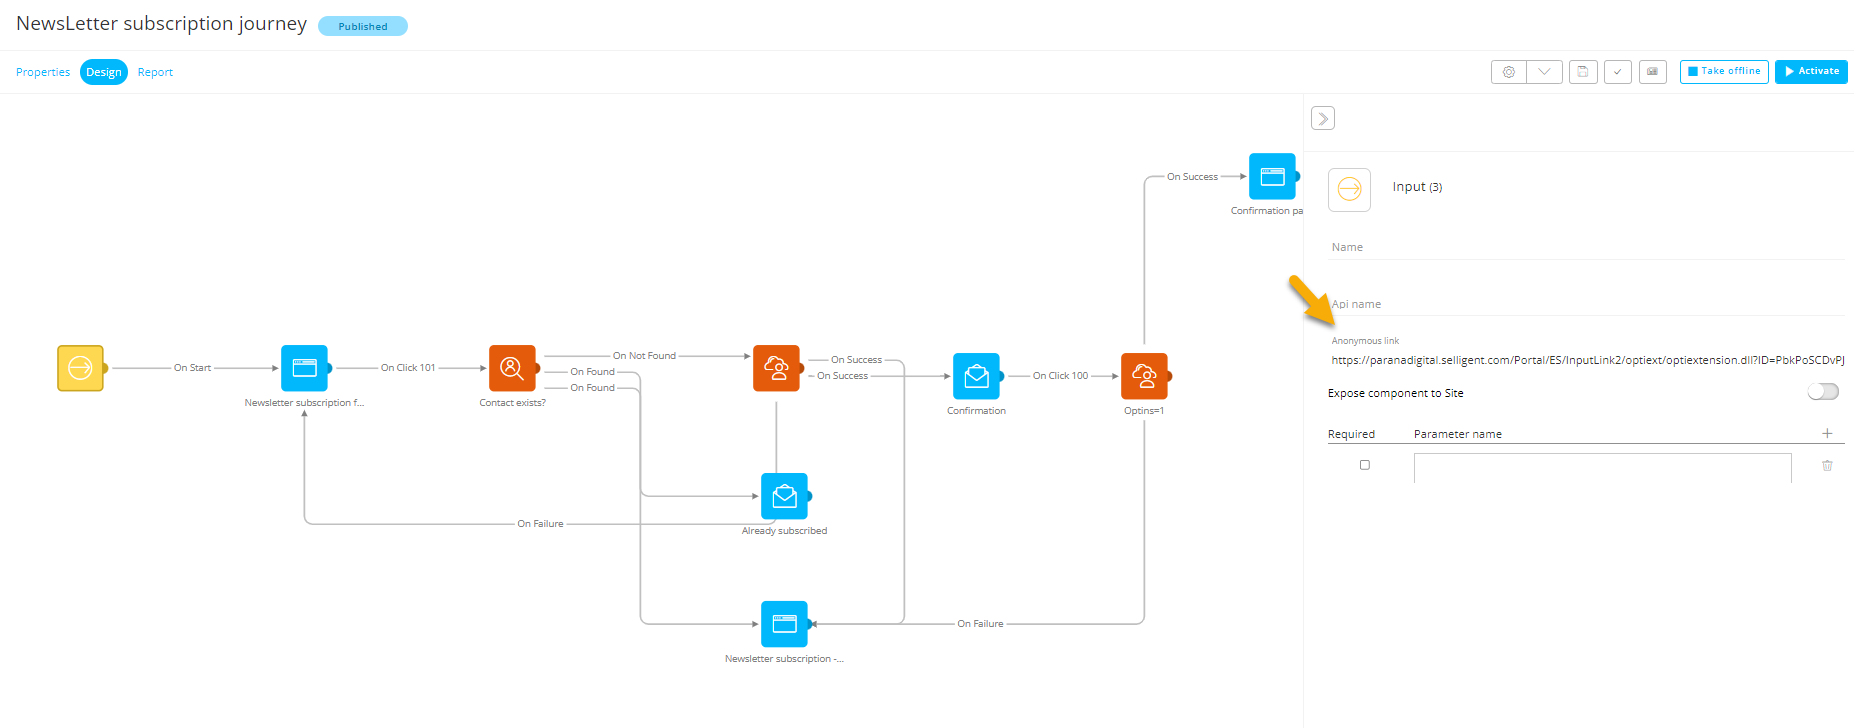
Save your journey and Publish. Publish is required to be generate the anonymous URL link allowing us to test the journey. The final journey should now look like this:
Test the subscribe journey
1. You can test the journey by going to the Input Component an double clicking the URL link. Note that in the screenshot below the OnSuccess trigger for the last Data Component points to the "Already subscribed" email as every path needs to end in a page. If you want, you can create a dedicated page for this specific event: 'Subscription successful'
2. The form is displayed. Fill out every field and check the Promotions check box. Leave the Newsletter check box unchecked. When done, click the Submit button.

3. A Confirmation page is displayed telling that an email will be sent to confirm the subscription.
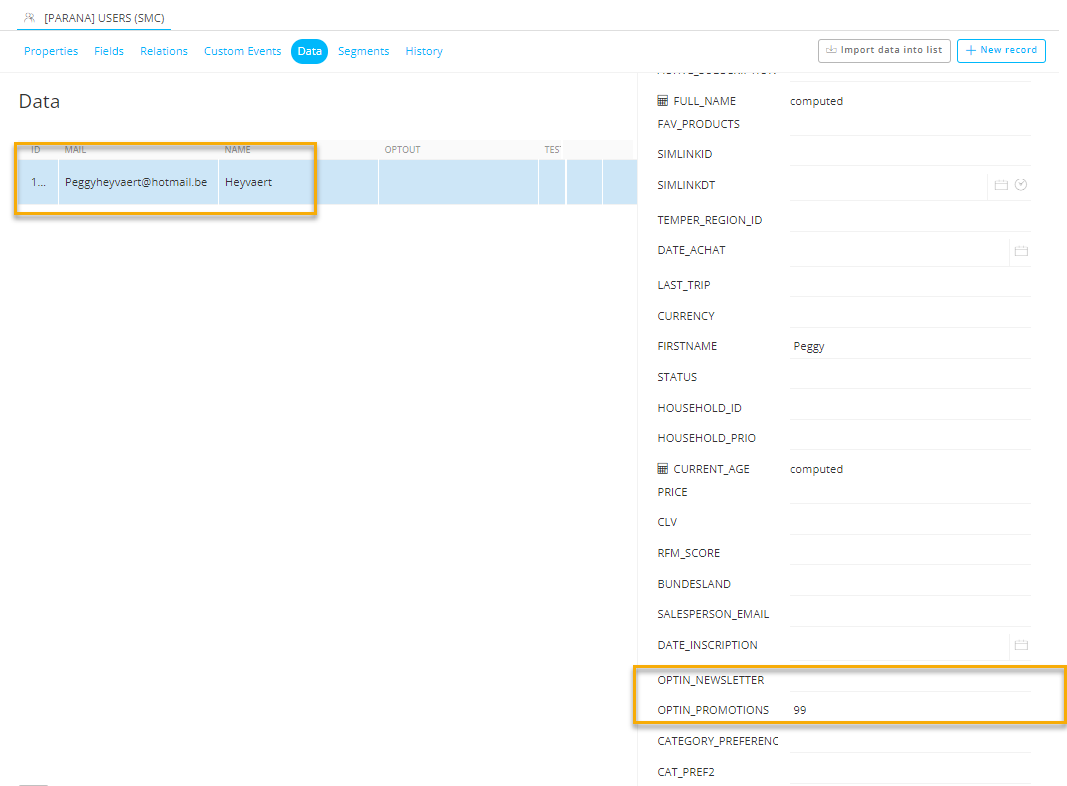
4. Before confirming, let's check the Audience List. There should be a record now for the entered contact, with a value 99 for the OPTIN_PROMOTIONS field and empty value for the OPTIN_NEWSLETTER field.
5. Next, look for the confirmation email in your inbox and confirm the subscription: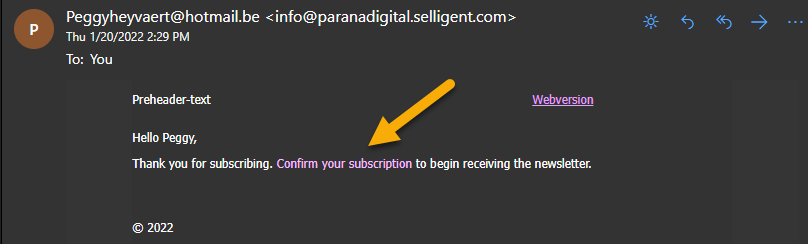
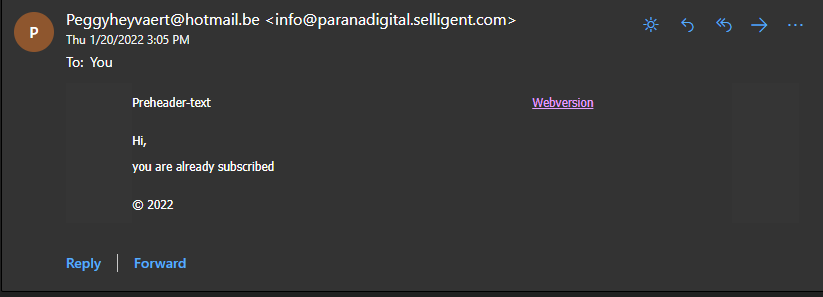
Note: If your record already exists, you will receive the following email and the subscription process stops.
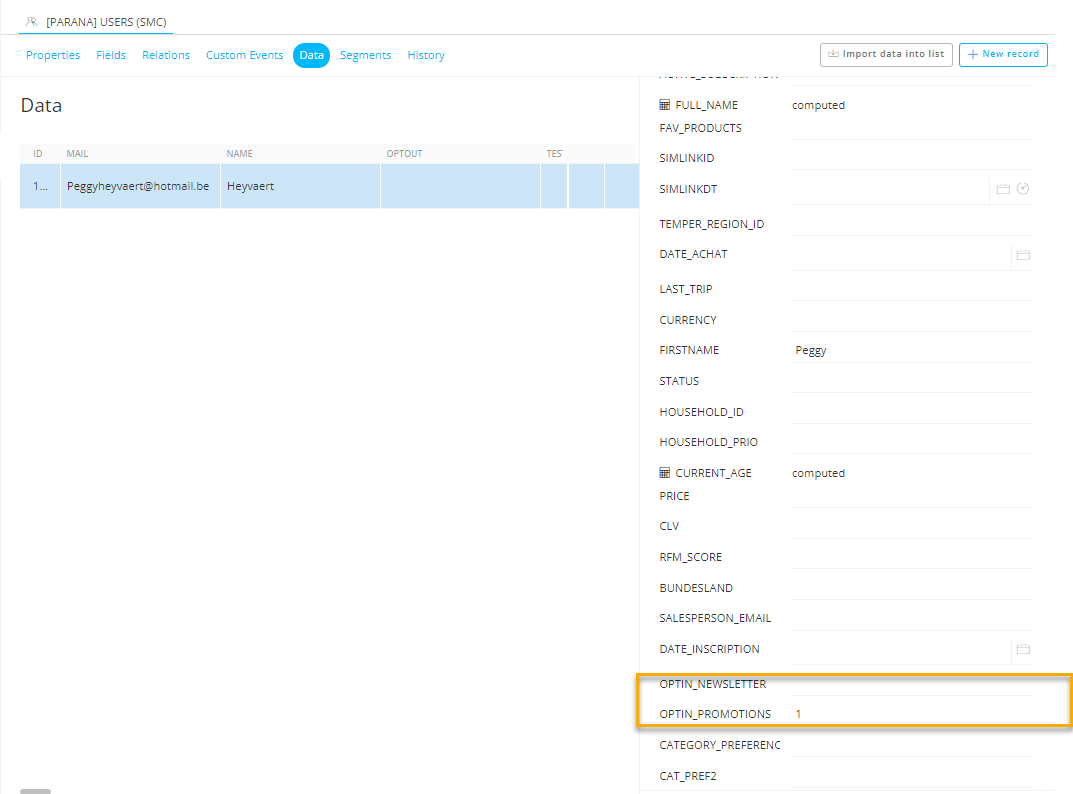
6. Check the Audience List once more and verify that the value for OPTIN_PROMOTIONS is now set to 1, while the value for OPTIN_NEWSLETTER is still empty.
Congratulations! You have finished the subscribe double opt-in tutorial.
See also:

