Recurring Batch Journeys are typically used to send the same messages at regular time intervals for a certain period of time. For example, you could use a Recurring Batch Journey to send a Birthday message every day at the same time, to contacts in the audience having their birthday that day. The user can set the time frame in which the journey must be executed and can select a segment of the audience to target with the recurring message.
Create the Recurring Batch Journey
To create a Recurring Batch message, perform the following steps:
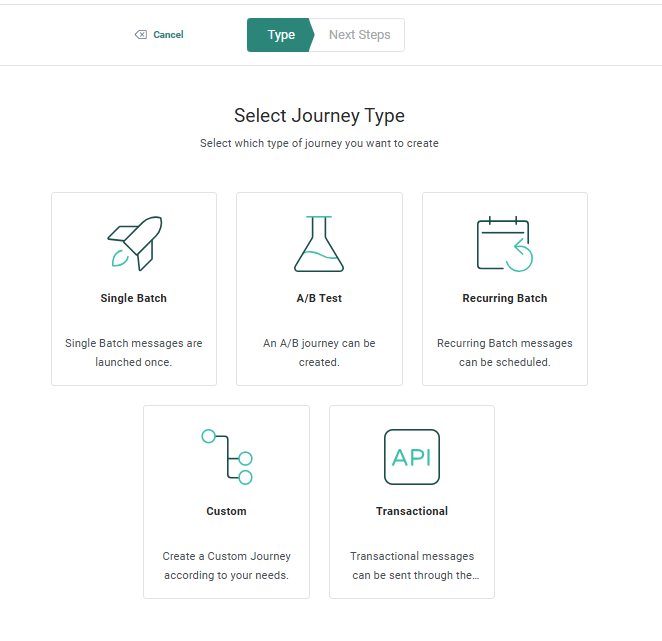
1. Go to the Journey entry, and from the fly-out menu select New and then Recurring Batch from the wizard.
2. Set the following properties. The journey properties are grouped by type of information. By default only the Basic fields are displayed. Switch to the All fields tab to display all other fields. On the left hand side of the properties, on-screen help is provided. This helps the user to fill out the form with accurate and comprehensive information.
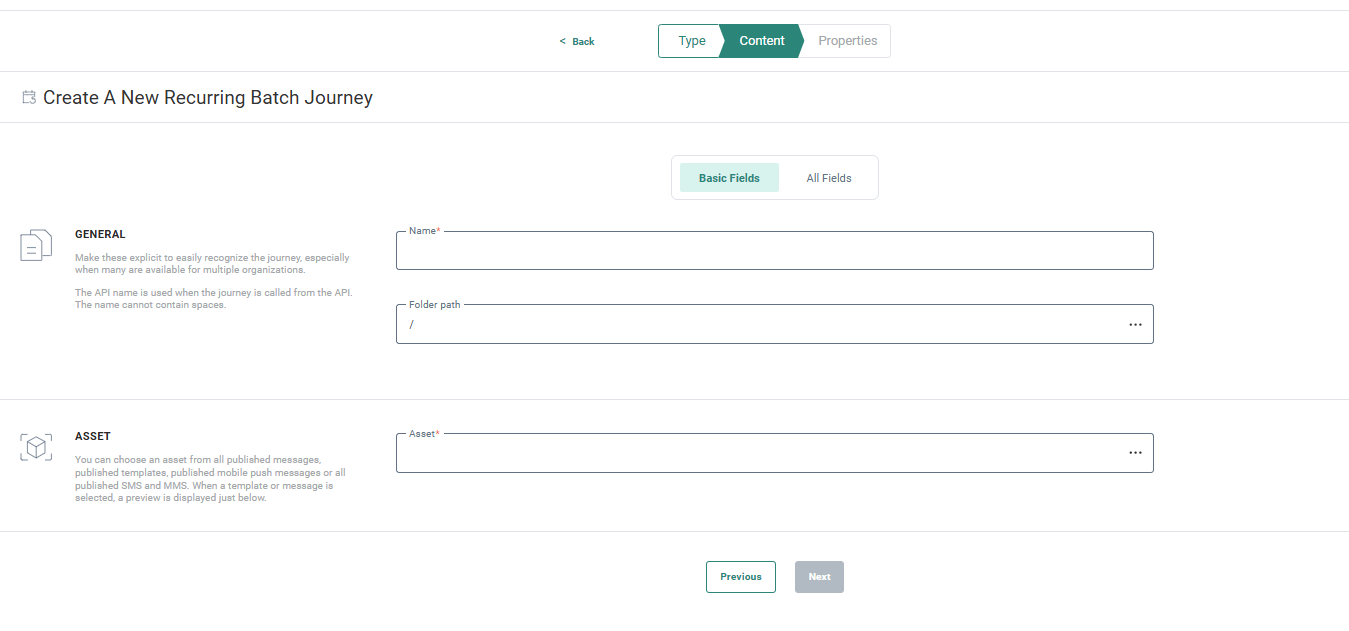
Basic Fields
General
- Name and Description — Set a name and description for this Recurring Batch Journey. The name is used in reports, Start pages, etc.
- Folder Path — This is the folder in which the asset is created. By default it takes the folder that is currently selected on the Start page when the asset is created. You can modify the path if required. Click the folder field to access the dialog and select a different folder.
Asset
- Asset — Select the message that needs to be sent in a recurring way (birthday message, password update reminder, Welcome message). An Asset selector is available to choose the content from. You can use published email messages, mobile push messages, SMS, RCS and MMS. The audience of the selected message is also the audience of this journey.
Note: When choosing a content that uses assets in a folder with no access, a warning explains that this content cannot be selected.
Seed group
-
Seed group — Toggle the option Send to all seed groups on if you want the message also to be sent to all the contacts in all the Seed groups linked to the Audience List.
Toggle the option off if you do not want to send the message to any of the Seed groups, or, if you only want to send it to a select number of Seed groups. You can select a specific Seed group from the field below:
All Fields
General
- API name — Set the API name for the Recurring Batch Journey. This name is used when the journey is executed via the API.
- Labels — The label(s) assigned to this asset. Select one or more labels from the drop-down. (These labels are configured in the Admin configuration.) Users with the proper Access permissions can also create new labels here by typing the new label value in the field.
Analytics Tag
- Campaign & Message analytic tag — The values entered for these analytic tags are passed on to a tracker when a tracker is activated.
3. When done, click Next. A page is displayed to configure further details for this journey:
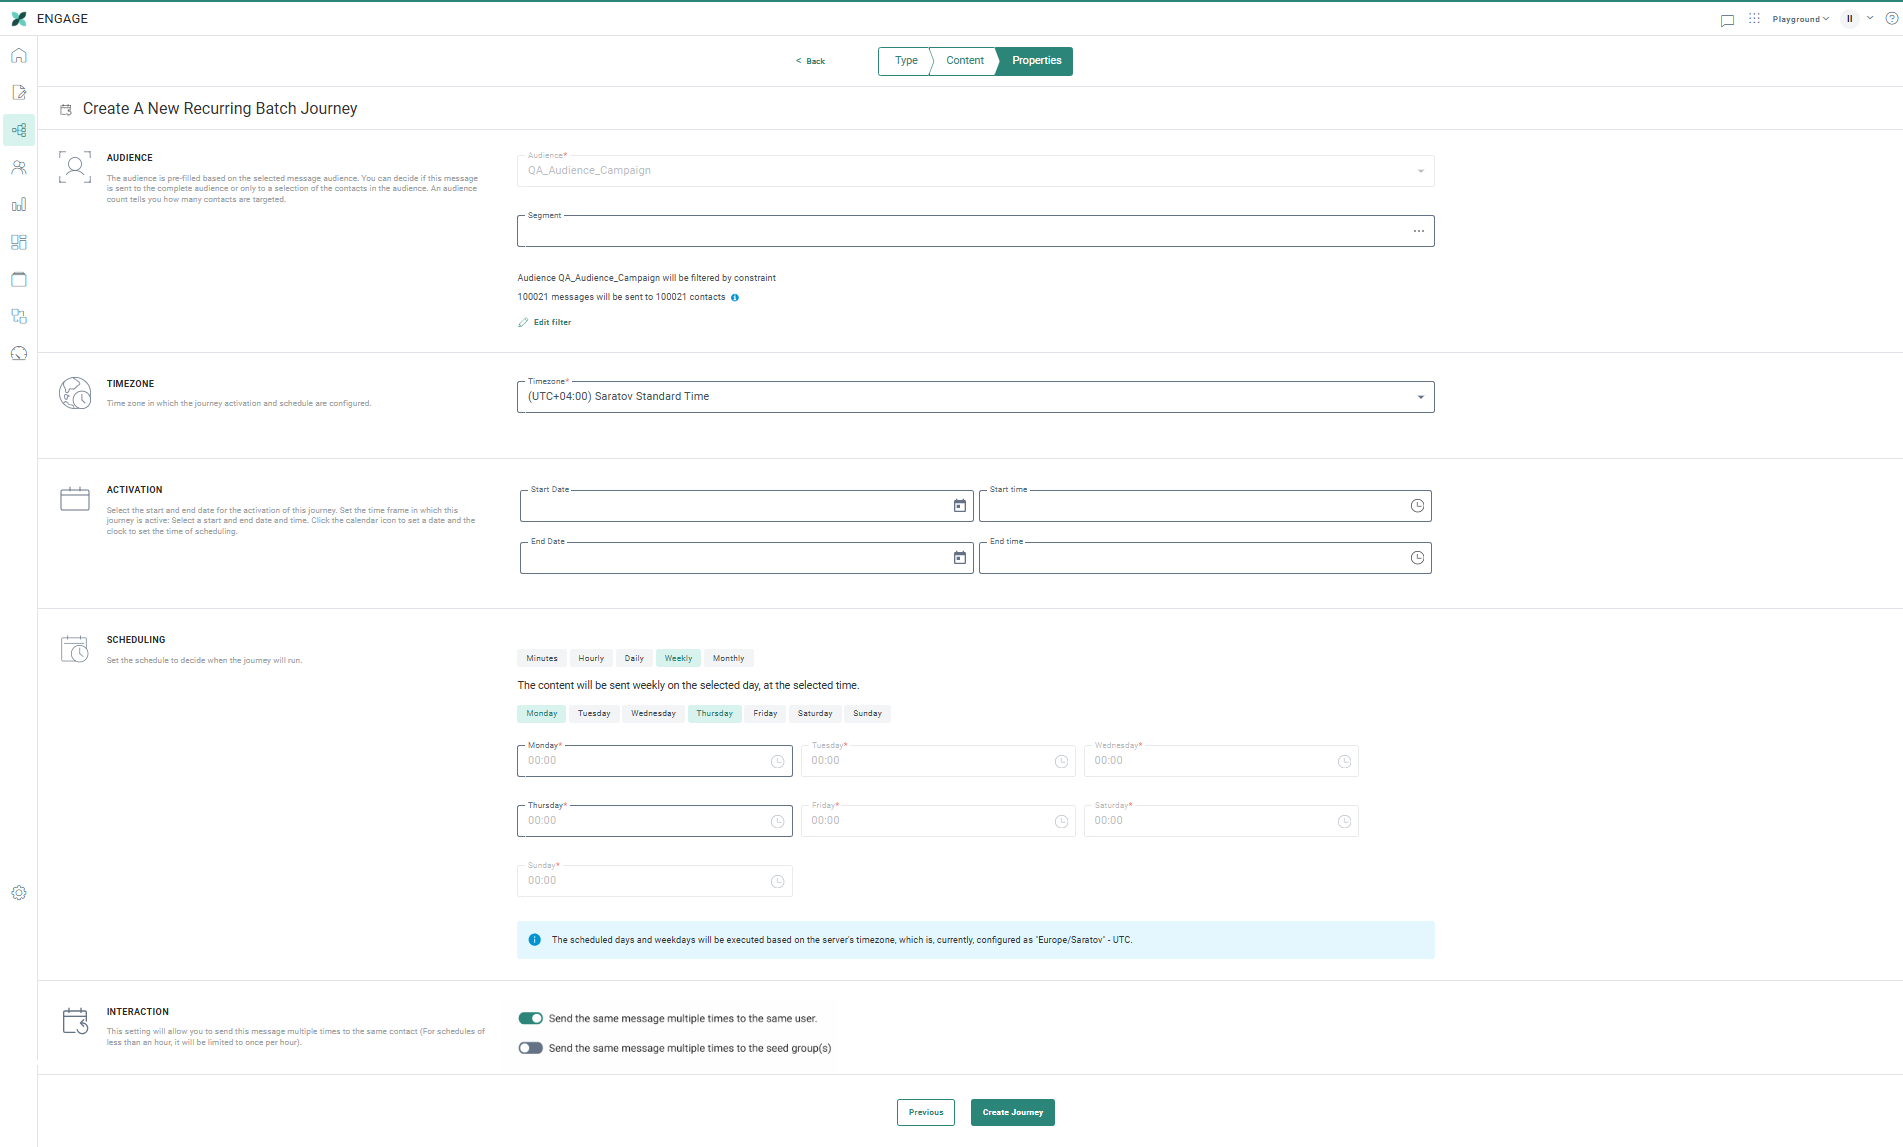
Audience — The audience is pre-filled based on the selected message audience. You can decide if this message is sent to the complete audience or only to a selection of the contacts in the audience. An audience count tells you how many contacts are targeted.
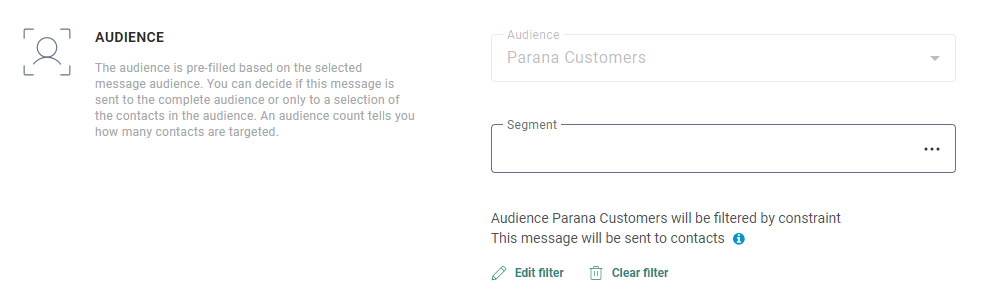
The ![]() icon provides additional details about:
icon provides additional details about:
- The languages available
- The fallback for contacts without a language or with a different language
- Audience limited to contacts with these languages
- Unsubscribes excluded
- If a segment is selected
- If deduplication is enabled
- If a sending limit is applied
If segments exist for the selected audience, they can be selected from the Folder selector. You can choose from static and dynamic segments. The audience count is automatically updated when a segment is selected.
Note: If the selected list is configured to require segment selection, you MUST select a segment for this list. The journey won't be executed as long as no segment has been selected.
In addition, you can apply filters to the audience. Click the Edit Filter button to open the Audience filter dialog where a constraint can be defined. This constraint can use fields from the following sources:
- The selected Audience List, including 1:1 and 1:n linked lists
- Any profile extension linked to the audience.
- Behavioral data (based on Engagement Metrics and Interest tags: mails sent, delivered, viewed, clicked and last viewed, clicked, delivered)
- Historical channel interaction data registered in Custom Journeys, Recurring Batch, Single Batch and AB Journeys
- Segments of the selected audience by including or excluding records in the selected segment
For more information on how to build constraints and use them, check out the topic Constraint Builder.
Note: The Constraint Builder for the segment definition does not allow to create complex filters. For instance, a filter that compares the birthday of a contact with the date of today. For these kind of more complex filters, we advise to create the segment on the Audience List itself and use this audience segment in the message.
Timezone — The time zone in which the journey activation and scheduling are configured.

Activation — specifies the work window when the journey is considered active. Select a start date/time and end date/time. Click the calendar icon to set a date and the clock to set a time.
Note:
- If the start date/time is omitted, the journey becomes primed to send at the next occurrence defined by Scheduling.
- If the end date/time is omitted, the journey will continue to run indefinitely until paused or stopped.
Note: When a user defines an activation start date/time (and/or end date/time), it takes the time zone set above into account. Underneath the start date/time (and end date/time), the date and time are converted to your user's time zone (also taking Daylight Saving Time into account when applicable for the conversion).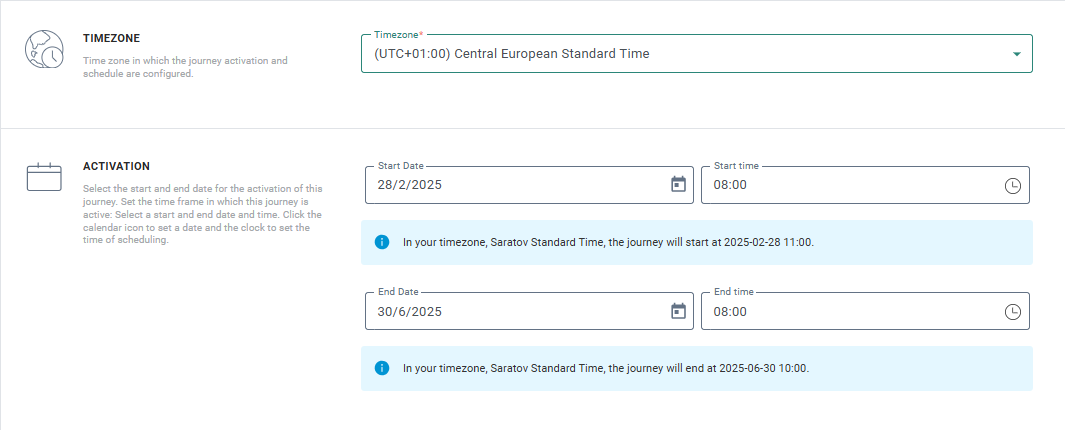
Example:
The time zone set for the journey activation and scheduling is UTC -8 (Pacific Standard Time).
The activation start date is set to 2024-08-13 02:00.
The activation end date is set to 2024-10-19 03:00.
User A has a user time zone that is set to UTC -5 (Eastern Standard Time).
This means that their local time has a 3 hour difference compared to the time zone set in the journey.
User A sees the following translated values:
- Start date: "In your timezone, Eastern Standard Time, the journey will start at 2024-08-13 05:00."
- End date: "In your timezone, Eastern Standard Time, the journey will end at 2024-10-19 06:00."
User B has a user time zone that is set to UTC +1 (Romance Standard Time).
This means that their local time has a 9 hour difference compared to the time zone set in the journey.
User B sees the following translated values:
- Start date: "In your timezone, Romance Standard Time, the journey will start at 2024-08-13 11:00."
- End date: "In your timezone, Romance Standard Time, the journey will end at 2024-10-19 12:00."
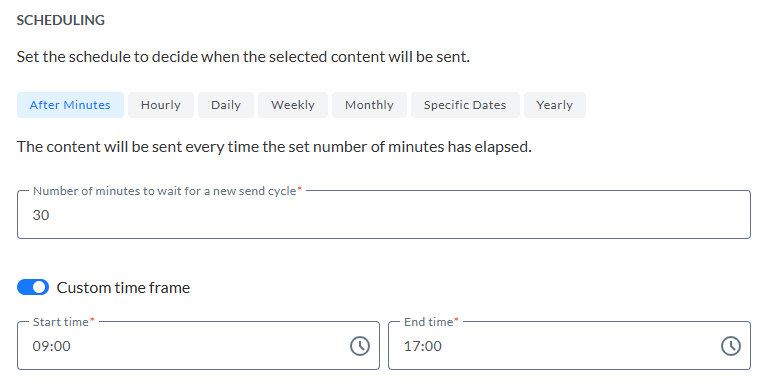
Scheduling — determines the frequency at which the journey is (re)triggered. At each iteration, the Audience List is scanned for contacts meeting the target group.

Note:
- If Send the same message multiple times is toggled on, contacts that already received the message are targeted again for communication (same email but possibly different content for that particular day/week/etc).
- If Send the same message multiple times is toggled off, contacts that already received the message are not part of the next batch of recipients, i.e.: the journey will only target new contacts.
The following scheduling options are available:
-
After Minutes — The message is sent every time the set number of minutes has elapsed. Use the Custom time frame option to define the start and end time in between which this rule needs to be executed. For example, send the message every 30 minutes between 9 AM and 5 PM.
-
Hourly — The content is sent every hour within the activation period.
Note that the sending of the first batch will happen immediately, when the journey is launched. -
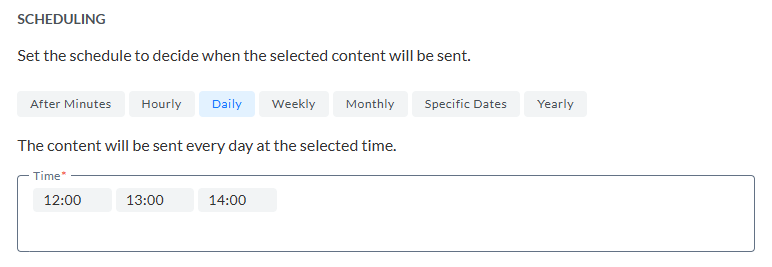
Daily — Send at a given time in the day (e.g., Every day at 12 PM, 1 PM and 2 PM).

-
Weekly — The journey is executed on one or more selected days of the week. The time at which the execution can take place can be different per selected day.
For example, send the message every Tuesday at 12 PM and every Thursday at 7 PM.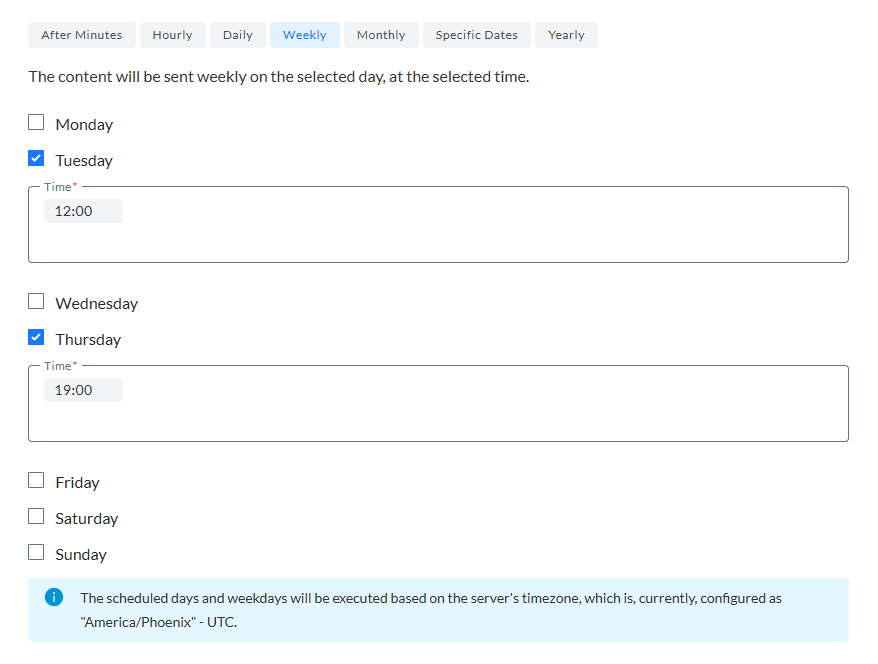
-
Monthly — For the monthly execution, you can choose between days and dates.
Use Days if you want the journey to be executed on specific weekdays and their corresponding times. More than one weekday can be selected. To indicate which weekday of the month, options are available to choose the first, second, third, fourth and last one of the month. For example, the first and third Monday at 9 AM, and the first and third Wednesday at 7 PM.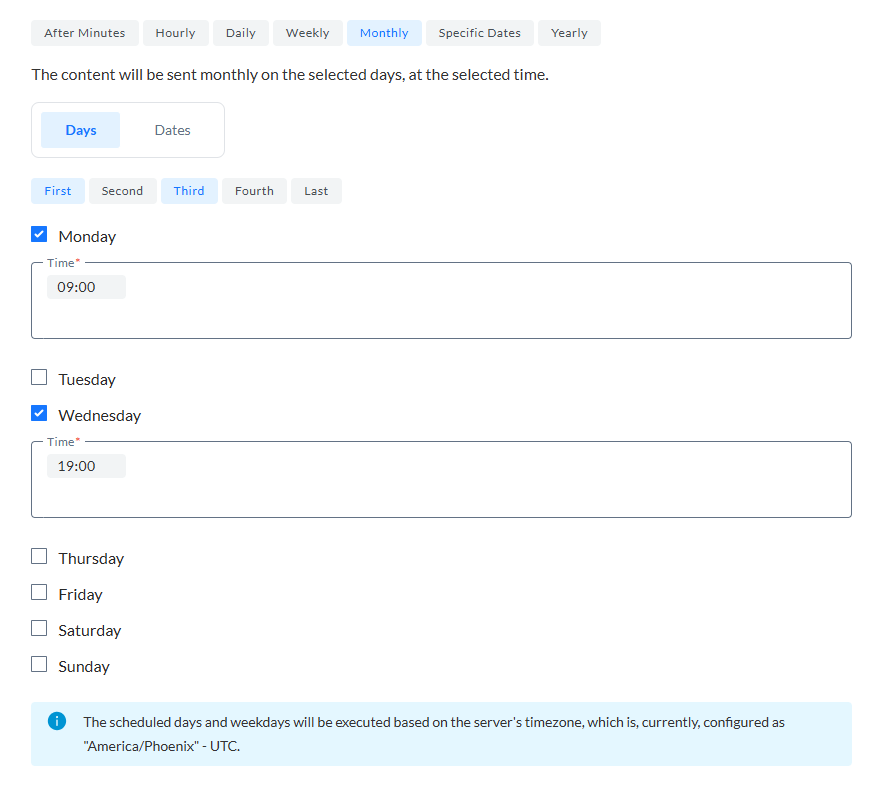
Use Dates to select the days of the month and the time of the day. For example, the first day at 12 PM, 1 PM and 2 PM, the second day at the same times, and the 8th, 19th and the last day of the month at other specific times.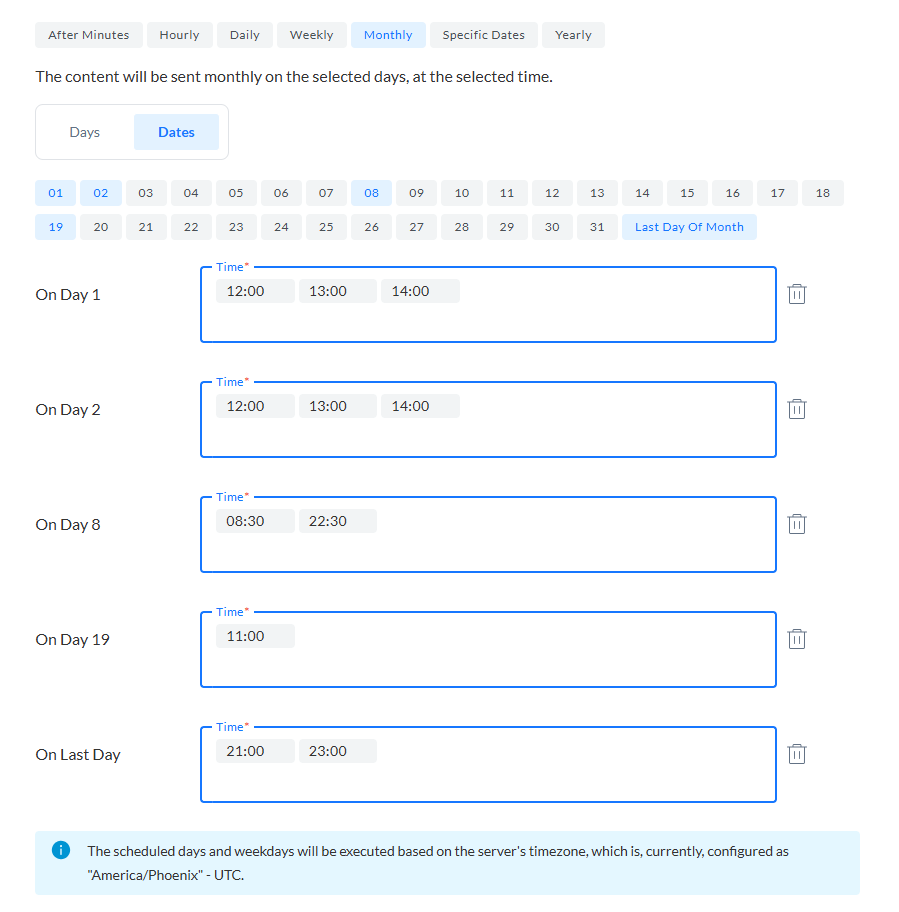
-
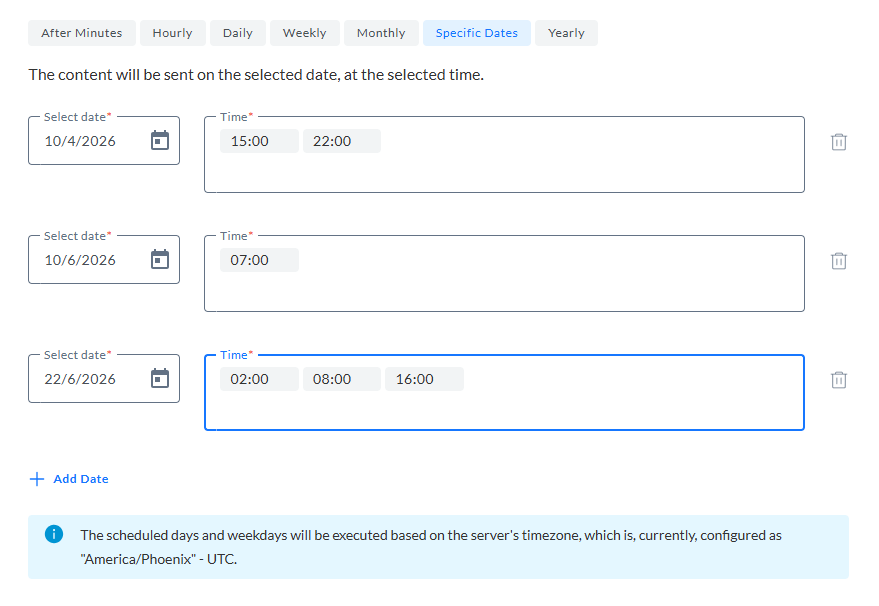
Specific dates — The journey is executed on specific dates and times. Different times can be selected for the different dates. Use the Add date option to add additional dates to the scheduling.
-
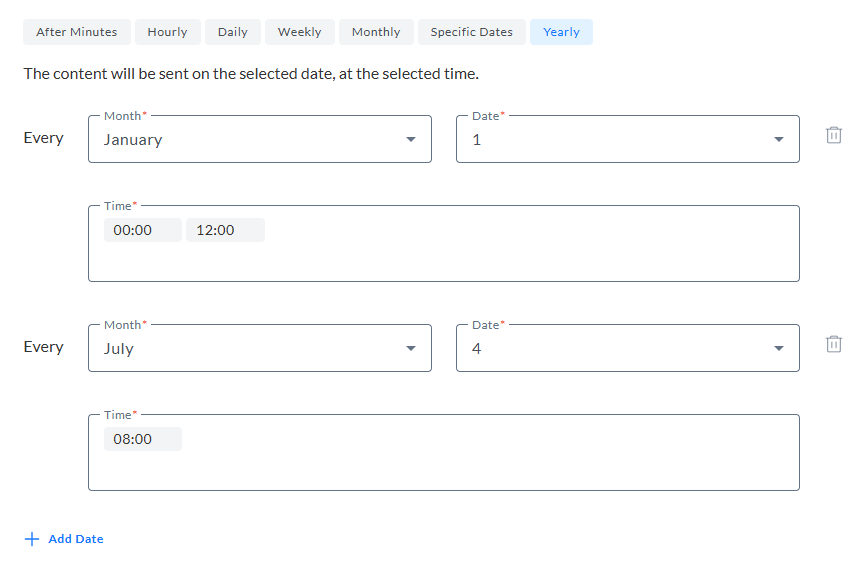
Yearly — The journey is executed every year on one or more specific days. A month and a day of the month is selected and for every selected day different times can be selected.
Note: The scheduled days and weekdays will be executed based on the server's time zone.
Note: When no start date is set for the activation of the journey, activating it will cause the content to be sent from the moment it's activated, with the scheduled time (hourly, daily, weekly, monthly, custom) still taken into account.
For example :
A Recurring Batch Journey without start date set, is scheduled to run daily at 1 PM (13:00).
- If this journey is launched (activated) today at 10 AM (10:00), then the first execution will be today at 1 PM (13:00), as scheduled.
- If this journey is launched (activated) today at 2 PM (14:00), then the first execution will be tomorrow at 1 PM (13:00), as the scheduled time for today has already passed.
Send the same message multiple times — Activate the option if the message can be sent multiple times to the same contact. This is for instance required when a password reset message is sent every month.
Send the same message multiple times to the seed group(s) — Activate the option if the message can be sent multiple times to the same Seed group. This means that at every execution of the journey, the message is sent to the contacts in the Seed group(s) linked to the journey audience.
4. When done, click Create journey. The journey properties page is displayed.
Recurring Batch Journey properties
You can still make modifications to this journey on the Properties page.
In the navigation bar on the left, multiple entries are available. You can access the properties in each of these entries either by using continuous scrolling on the properties page or by clicking the entry on the left.
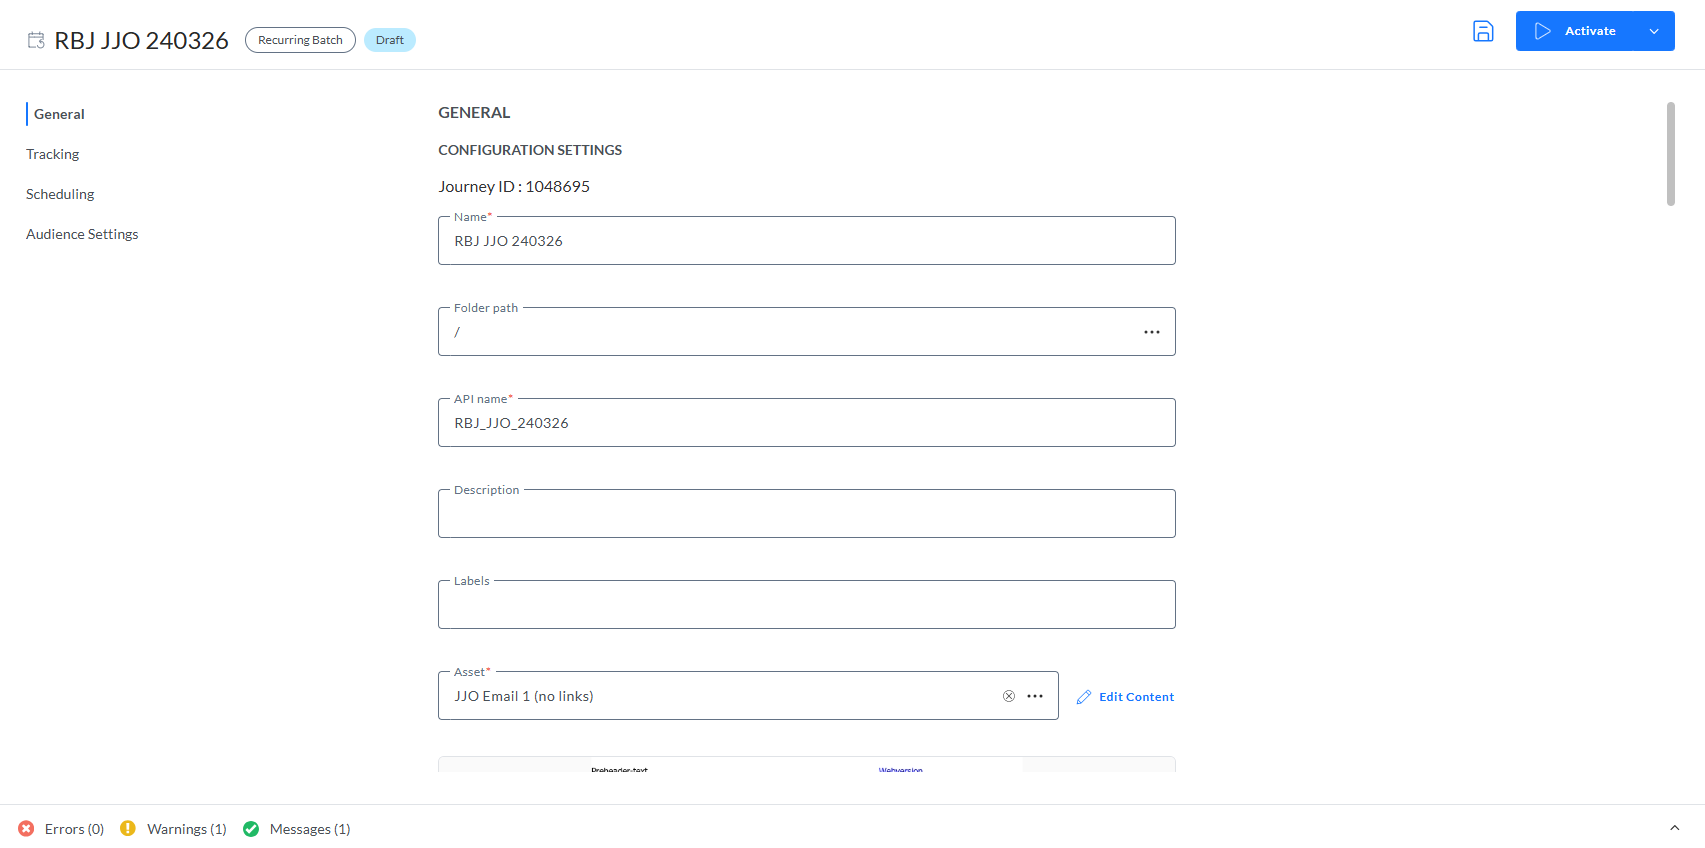
- General — This is a summary of the properties set during the creation, such as name, description, selected asset.
- Tracking — Properties linked to journey tracking, external and interaction.
- Scheduling — Scheduling times for the journey as well as settings for sending limits, waves, cadence and priority.
- Audience settings — Properties linked to the selected Audience and Segment, filters and pre-calculation and deduplication.
- Channel settings — Custom input fields for SMS, MMS, RCS.
General
This is a summary of the properties set during the creation. Check out the above for more details on these properties.
Tracking
![]()
Two options are available:
- Interaction tracking
- External analytics tracking
By default, these trackings are enabled. Toggle the option off to disable the tracking.
Note: In some cases you don't need the journey to be tracked.
For example, a Password reset journey does not require tracking.
Interaction tracking
Interaction covers email opens, email clicks, link tracking(emails and pages), and unsubscribe tracking. Disabling this will ensure all these interactions are not logged. This will have an impact on:
- Journey reporting
- Segmentation based on journey metrics
- Send-Time Optimization
But this will not have an impact on:
- Unsubscribe functionality — So when contacts unsubscribe, this will still work
Technical note: When emails are sent, a tracking pixel is automatically included. This pixel enables us to track how contacts interact with the message. For an email, this obfuscated URL of the tracking pixel (image) allows our systems to identify:
* which contact record opened the email
* which email was viewed
* Which journey delivered that email
The tracking pixel contains identifiers for both the contact and the message, but does not include any personal data such as name, email address or mobile phone number.
When the pixel is fetched, our systems record further information volunteered by the viewing software, for example:
* The application (Firefox, Chrome, GMail client, mail.app, outlook.exe) and version
* Operating system details (Windows, MacOS, Android, iOS) and version
Also recorded at the moment of opening will be date and time of the request
From the information gathered, we derive insights insight into viewer behavior: platform popularity, mail client, opening times, engagement levels of different communications, etc.
Disabling interaction tracking will turn off tracking at the Journey level for all contacts. This is only necessary when you don't care about who read your email and when (e.g.: password reset, system notifications, etc)
To manage tracking preferences on a per-contact basis, you can use a custom field (e.g., “Track / Do Not Track”) to store each contact’s preference and adjust your targeting accordingly.
External analytics tracking
External analytics tracking covers all the external trackers like for example Google UTM, Site tracker, Shop tracker.
When this type of tracking is disabled, no parameters from external trackers will be added to domain related links and hence the information can not be used by the external tracker. This will have an impact on:
- External analytics — e.g. Google analytics
- Site CRM identification — The m_bt parameter will not be added for domain links and hence CRM identification will not be done
- Shop tracker — The parameters that are added for the shop tracker will not be added and hence this will have an impact on revenue reporting
Scheduling
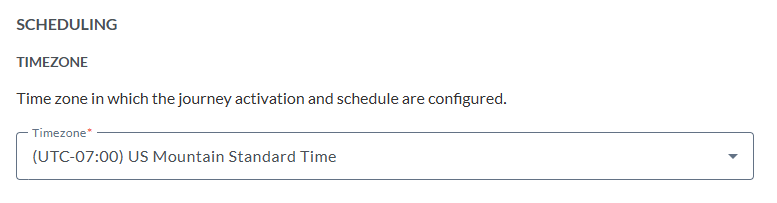
Timezone
The timezone in which the journey activation and scheduling are configured.
Activation
Activation specifies the work window when the journey is considered active.
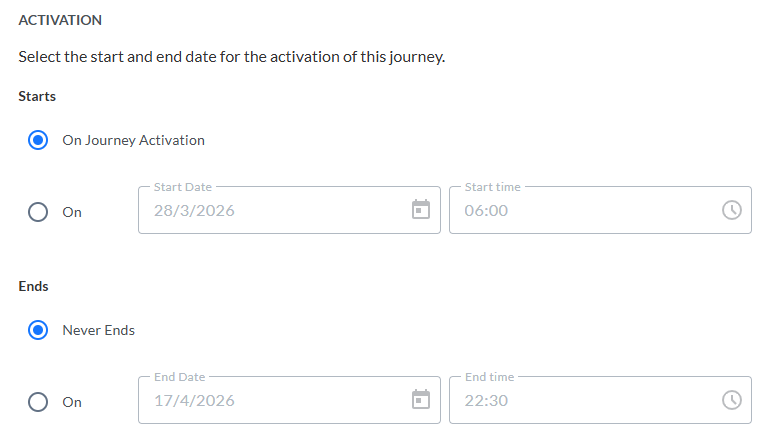
Define when the journey starts:
-
Select Starts on journey activation to ensure the journey becomes primed to send at the next occurrence defined by the scheduling.
-
When a specific starting date and time needs to be set for this journey, click On and select a date and time.
Define when the journey ends:
-
Select the option Never ends to ensure the journey will continue to run indefinitely until paused or stopped.
-
When a specific ending date and time is required for this journey, click On and selected a date and time.
-
When the journey needs to end after a specific number of times it has been executed, click After and select the number of occurrences.
Note: When a user defines an activation start date/time (and/or end date/time), it takes the time zone defined earlier into account. Underneath the start date/time (and end date/time), the date and time are converted to your user's time zone (also taking Daylight Saving Time into account when applicable for the conversion).
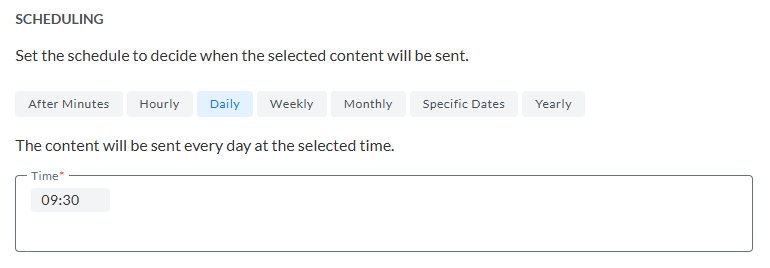
Scheduling
Scheduling determines the frequency at which the journey is (re)triggered. At each iteration, the Audience List is scanned for contacts meeting the target group.
Note:
- If Send the same message multiple times is toggled on, contacts that already received the message are targeted again for communication (same email but possibly different content for that particular day/week/etc).
- If Send the same message multiple times is toggled off, contacts that already received the message are not part of the next batch of recipients, i.e.: the journey will only target new contacts.
The following scheduling options are available:
-
After Minutes — The message is sent every time the set number of minutes has elapsed. Use the Custom time frame option to define the start and end time in between which this rule needs to be executed. For example, send the message every 30 minutes between 9 AM and 5 PM.
-
Hourly — The content is sent every hour within the activation period.
Note that the sending of the first batch will happen immediately, when the journey is launched.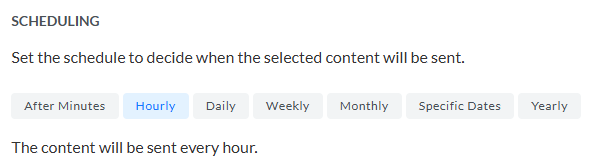
-
Daily — Send at a given time in the day (e.g., Every day at 12 PM, 1 PM and 2 PM)
-
Weekly — The journey is executed on one or more selected days of the week. The time at which the execution can take place can be different per selected day.
For example, send the message every Tuesday at 12 PM and every Thursday at 7 PM. -
Monthly — For the monthly execution, you can choose between days and dates.
Use Days if you want the journey to be executed on specific weekdays and their corresponding times. More than one weekday can be selected. To indicate which weekday of the month , options are available to choose the first, second, third, fourth and last one of the month. For example, the first and third Monday at 9 AM, and the first and third Wednesday at 7 PM.
Use Dates to select the days of the month and the time of the day. For example, the first day at 12 PM, 1 PM and 2 PM, the second day at the same times, and the 8th, 19th and the last day of the month at other specific times. -
Specific dates — The journey is executed on specific dates and times. Different times can be selected for the different dates. Use the Add date option to add additional dates to the scheduling.
-
Yearly — The journey is executed every year on one or more specific days. A month and a day of the month is selected and for every selected day different times can be selected.
Note: The scheduled days and weekdays will be executed based on the server's time zone.
Sending limit
The number of records that should be targeted by the journey can be limited to only a sample of the records.
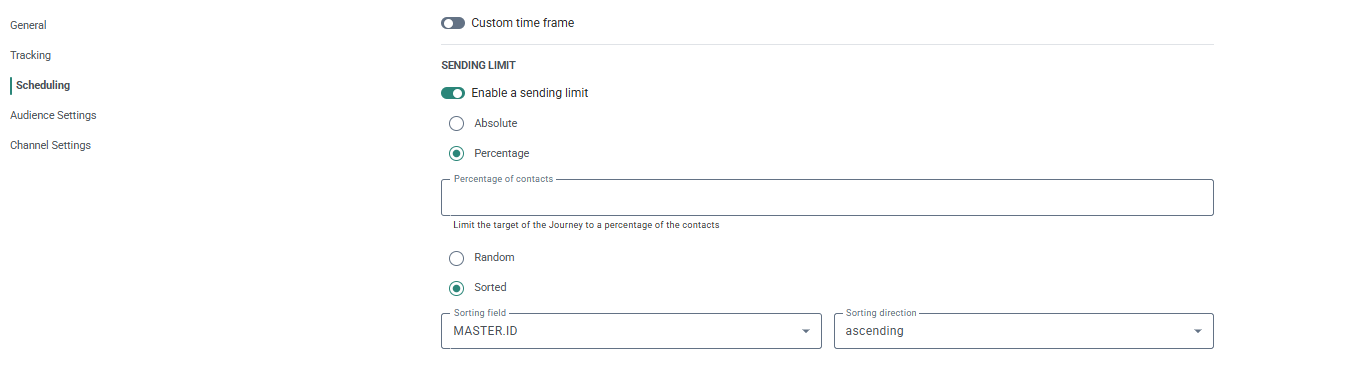
Enable the option to target only a sample of your audience and define the number of contacts in the list that should be targeted. You can choose from the following:
- Absolute — Target an absolute number of contacts, ex. a sample of 100. An additional option Top selection counts per single execution is available to define if the given number is for a single execution or for all executions. Select the option if the number of contacts applies for each execution.
- Percentage — Target only a percentage of the contacts, ex. a sample of 10% of the target. These contacts can be selected in 2 ways: random or based on a sorting order.
- Random — The records are chosen randomly.
- Sort by — The records are first sorted using the indicated sorting field and order. Then the first x % is chosen.
Example: Select Sort by and descending for the Creation Date field, to return the most recent records first.
Cadence
Journeys can be added to a Cadence Plan so that communications over the different channels happen in a controlled way, respecting the rules of the plan. By activating the Cadence functionality and selecting a plan from the drop-down, marketers can now add journeys to a Cadence Plan. When a journey is added to a plan, it is at the lowest priority. If you want to change this, you need to go to the Cadence Plan priority tab and change the order of the journey in the list.

Note: The user needs access rights for Cadence to be able to do this and the journey needs to be published.
Journey execution priority

When multiple journeys are scheduled for execution at the same time, it is now possible to ensure that one journey will take priority over another. Some journeys might be more time sensitive or important than others, and this option allows you to prioritize journeys. By default the priority of the journey is set to medium, but priorities can range from low, over medium and high, to very high.
Example:
Journey A with high prio is scheduled at 9 AM, Journey B with Medium priority is also scheduled at 9 AM. Journey C with high priority is scheduled at 9:01 AM.
Journey A is executed first. When execution is finished, Journey B and C are in the queue, but Journey C has higher priority than B and will be executed before Journey B.
Audience
Audience and segment
Upon creation of a template or message, you need to select an audience to allow you to use audience fields to personalize the content.
When that message is used in a journey, the defined audience is displayed and the number of contacts in the current selected audience is calculated. This audience itself cannot be edited but you can define a segment here.
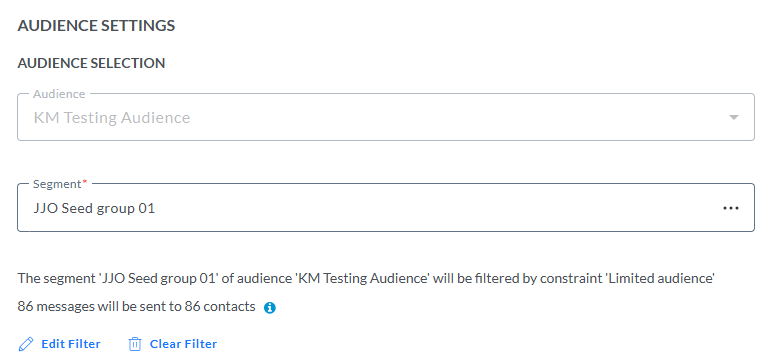
If segments exist for the selected audience, you can select one from the folder selector. The count for the number of contacts targeted is adapted automatically.
Note: If the selected list is configured to require segment selection, you MUST select a segment for this list. The journey won't be executed as long as no segment has been selected.
The ![]() icon provides additional details about:
icon provides additional details about:
- The languages available
- The fallback for contacts without a language or with a different language
- Audience limited to contacts with these languages
- Unsubscribes excluded
- If a segment has been selected
- What happens to contacts with multiple devices
Define a filter on the audience if required
Click the Edit Filter link to open the Audience filter dialog in which a constraint can be defined. This constraint can use fields from the following:
- The Audience List
- Any profile extension linked to the Audience List, including 1:1 and 1:n linked lists
- Behavioral data (based on EMIT such as mails sent, delivered, viewed, clicked and last viewed, clicked, delivered)
- Historical data captured from the contact's channel interaction in a Custom Journey, Recurring Batch, Single Batch and AB Journeys such as general interactions on email (not) viewed, (not) clicked any link, (not) clicked the Unsubscribe link, (not) delivered, etc. you are presented with a list of all journeys and a list of channels for each journey. Any interaction can be used.
- Segments of the selected audience by including or excluding records in the selected segment
For more information on how to build constraints and use them, check out the dedicated topic on that.
When done with the filter, the result after applying the filter to the audience is calculated and the number of contacts is displayed.
Audience pre-calculation
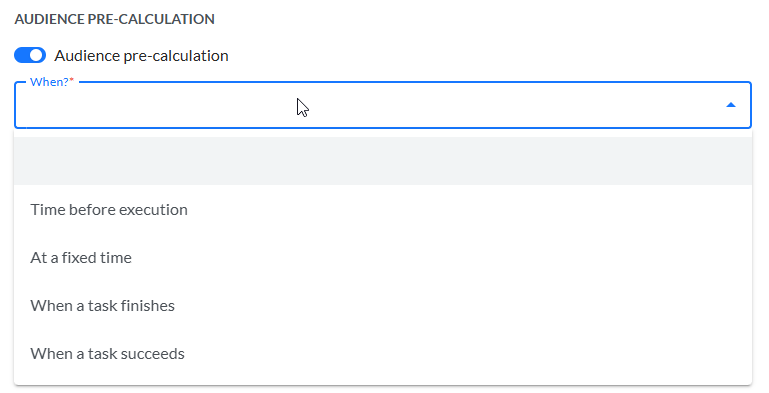
For some customers, it is beneficial to pre-calculate the audience for an action in a journey well before the actual go-live, or when there’s less load on the environment. The actual journey execution will use the pre-calculated audience when it’s available to save time. The option is by default disabled.
- When — Only displayed when the audience pre-calculation is activated. You can choose from following options:
- Time before execution — The audience is calculated at a specific time interval (expressed in minutes) before the journey is executed. The journey must be scheduled in this case.
- At a fixed time — The audience is calculated at a specific day and time.
- When a task finishes — The audience is calculated when the selected task is finished. You can select a task from a drop-down list of tasks.
- When a task succeeds — The audience is calculated when the selected task succeeds. You can select a task from a drop-down list of tasks.
Deduplication
If there are duplicate contacts in the journey's audience, you can use Deduplication to select a unique contact based on a field or a combination of fields. This avoids sending the email more than once to the same contact because the contact is in the Audience List more than once.
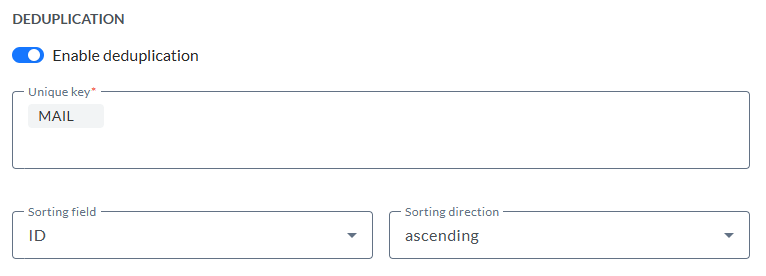
For each journey you can define if deduplication should be activated.
Unique key — You can define the field in the audience that should be used to perform deduplication. This can be a combination of fields as well, for example the name and email for a contact can be used to detect duplicates.
Note: A maximum of 5 fields can be selected. Fields of type longtext, boolean, float and datetime are not allowed.
Sorting field — Here you define what field in the audience should be used to define the record that has priority over the others in case duplicate records are found. For example, you can use the last update date as a prioritization rule.
Sorting direction — Choose from ascending or descending to define the record that should be kept.
Seed Group
Seed group — Toggle the option Send to all seed groups on if you want the message also to be sent to all the contacts in all the Seed groups linked to the Audience List.
Toggle the option off if you do not want to send the message to any of the Seed groups, or, it you only want to send it to a select number of Seed groups. You can select the specific Seed groups from the field below.
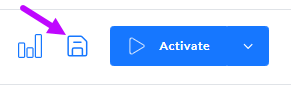
When done, click the Save icon at the top-right of the screen:  .
.
Channel Settings

This option is only available when using an SMS, MMS, or RCS message in the journey. It allows setting the custom input fields that are allowed by the provider used for the message. SMS providers often support additional output fields which are specific to the provider. As a result, the marketer is able to customize the sending of the SMS/MMS/RCS.
Saving the journey
When all properties have been configured, click Save:
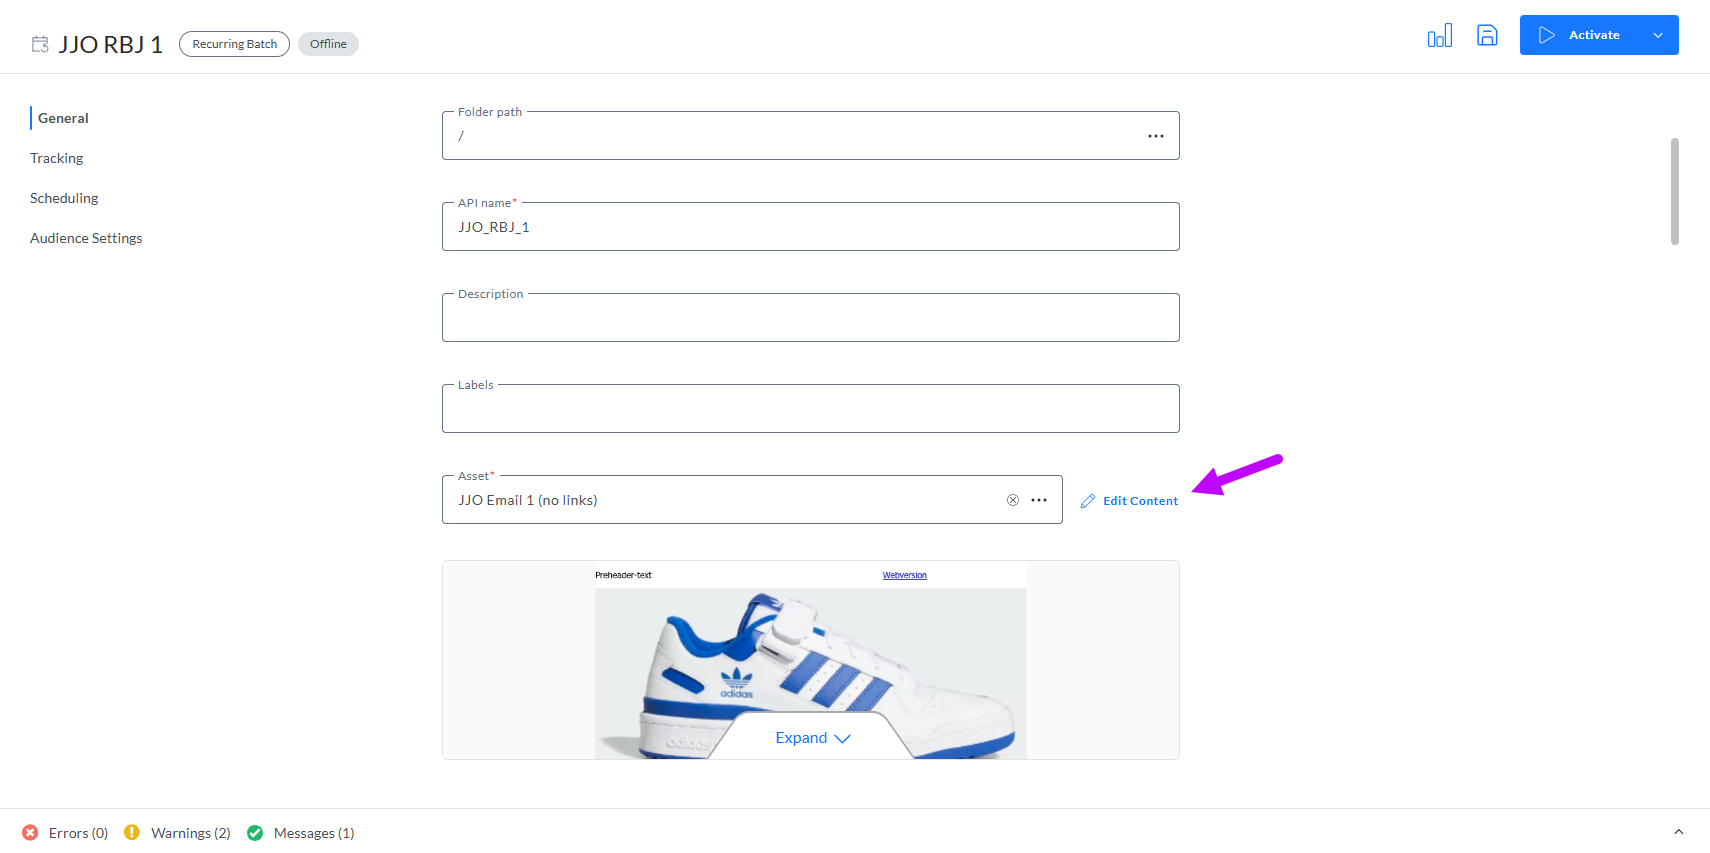
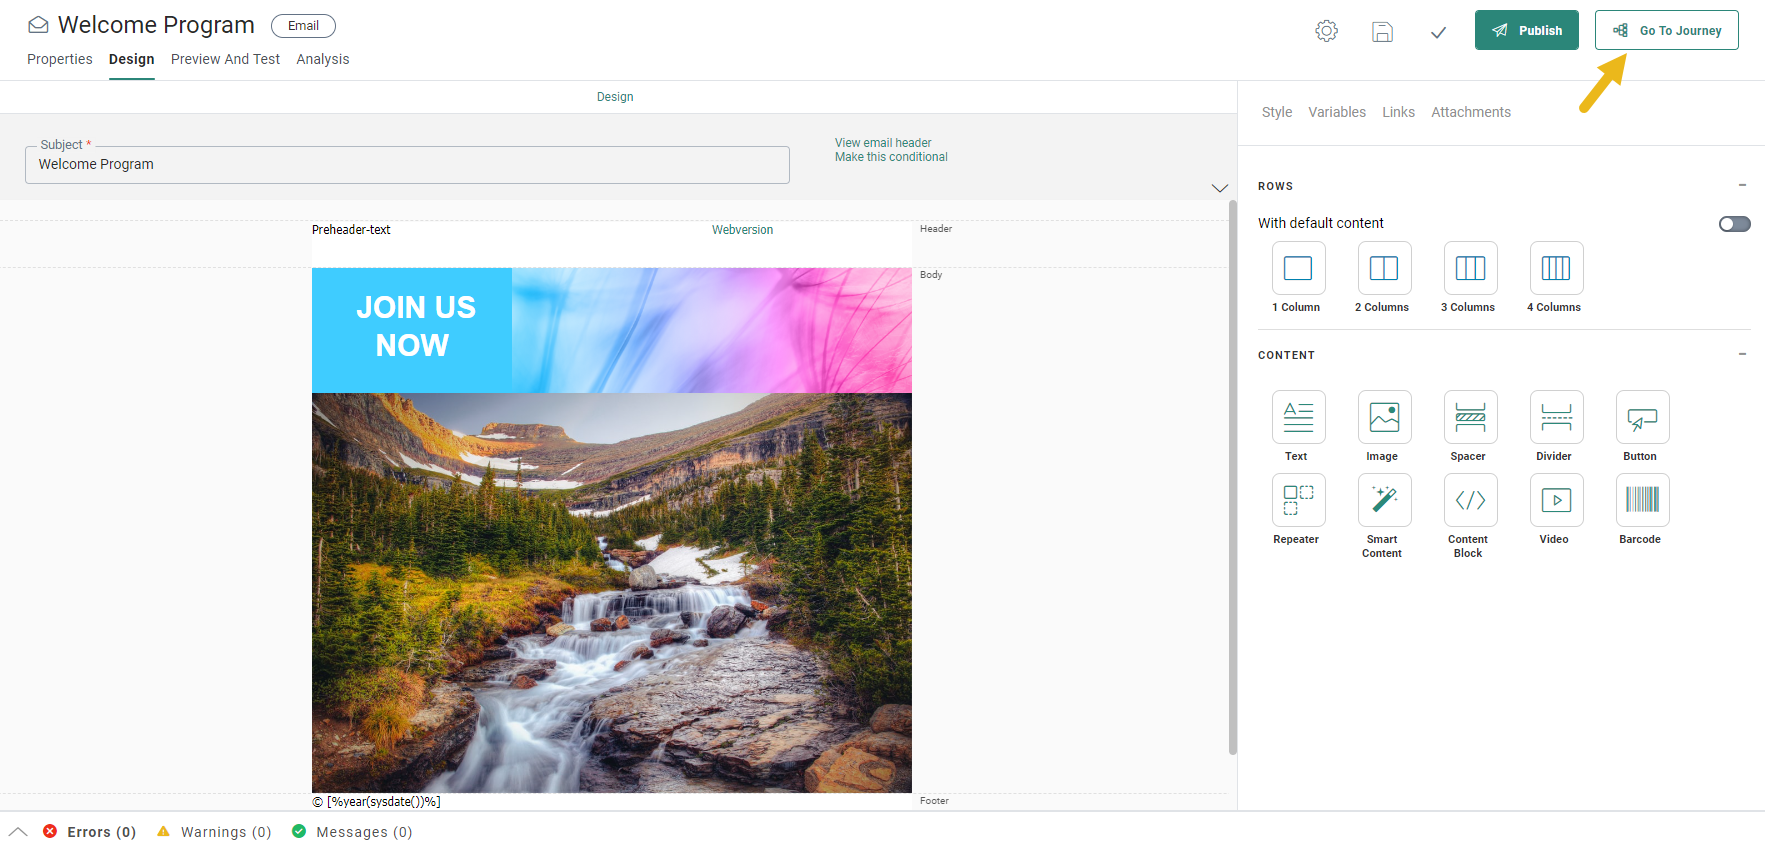
Editing content in the journey
When you create a Recurring Batch Journey using a message, you have the possibility to make changes to this message, while creating the journey.
1. To do so, use the link Edit content next to the asset in the General properties:
Note: When moving away from the journey to the content, you are prompted to either save the changes to the journey, move to the content without saving any changes in the journey or canceling.
2. The Message editor is launched where you can modify the message according to the needs. (For more information on how to add content to a message, check out this section.)
3. To return to the journey, click the button Go to journey in the toolbar.
Note: When changes are made and the message is used in other journeys, these changes will also impact those journeys.
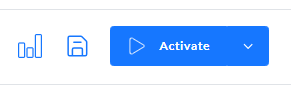
Activating the Recurring Batch Journey
If the journey is ready for execution, click Activate. This is the default action available from the Action button when the journey has not been activated before.
When activating the journey, you are informed about the content that will be sent, the audience and filter applied and the number of contacts that will be targeted. A dialog is displayed with this information. The counts displayed in the dialog take into account the deduplication of records as well as the sending limit defined for the journey.
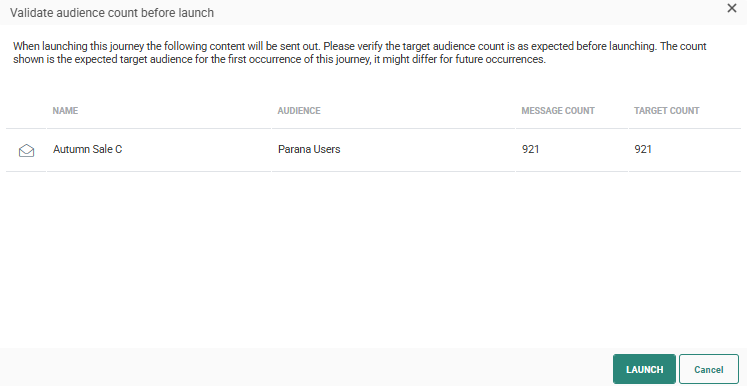
Note: This dialog is displayed only for users who have the right of Audience validation. This right is set by default for every user.
You need to confirm that the audience count is as expected and then launch the journey. If the count is not yet available, you can only cancel the journey launch.
Note: The
journey will be visible from the Journey Start page in a dedicated section.
Journeys that have been activated cannot be edited and all form fields are read-only.
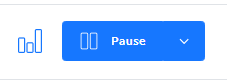
Pausing the journey
When pausing the journey, links in emails and pages will remain available. Only the sending of messages is paused. While a journey is paused, changes can be made, saved, validated and published. The journey can then be resumed, and newly processed messages will contain the changed content.
Example: A Recurring Batch Journey is launched every Saturday. However, when only one email per day is allowed and another journey needs to be executed once on that Saturday, it is now possible to pause this Recurring Journey for a few days and then resume it again.
The Pause action is the default action shown on the Action button when a journey is active.
A paused journey can be activated again or taken offline completely.
Canceling the journey
It is possible to cancel a journey after it has been launched. As long the journey processing is not finished, you can cancel the journey. This option is available from Actions button drop-down.
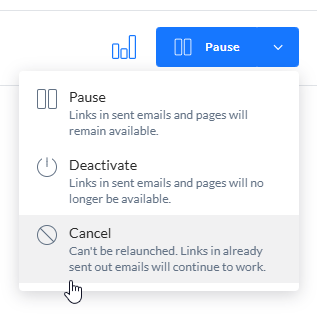
Canceling the journey will stop sending out the new emails but if currently something is still being processed, best effort is made to ensure these will not be delivered to the inbox of the recipients. Also, all links in already sent out emails will continue to work. The status of the journey will be available from the status bar at the top.
When you cancel a Journey different alerts are displayed, depending on the execution status of the journey:
Some messages have been processed: A progress bar gives a very clear and visual representation of what has been processed. You can choose to cancel or keep the journey running.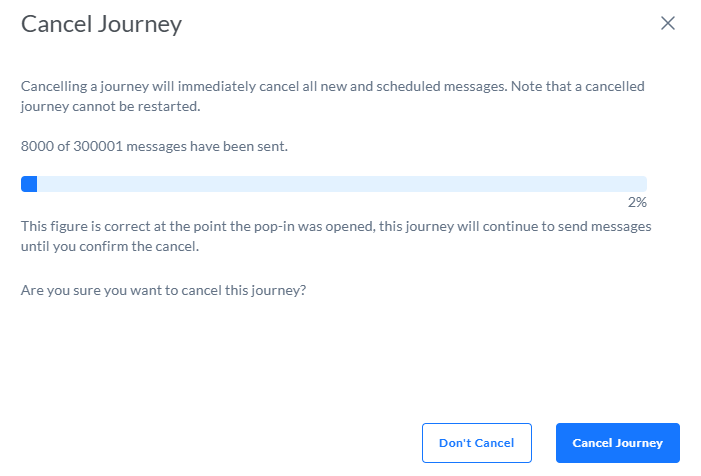
No processing data is available yet: You can choose to cancel the journey anyway or keep the journey running.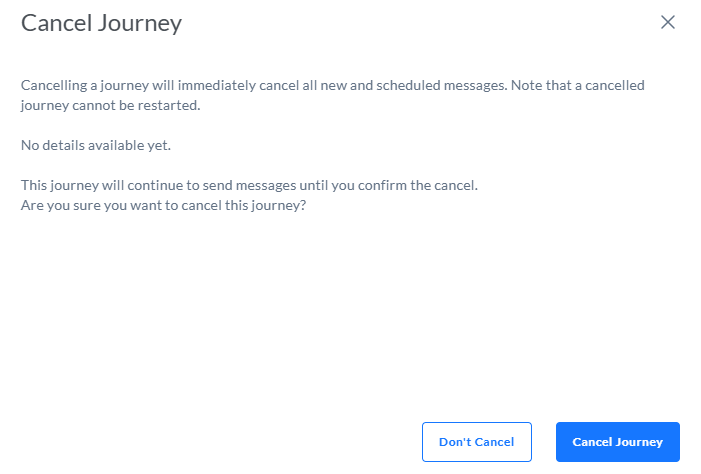
All messages have been processed: In this case, canceling is no longer possible, and the user is informed.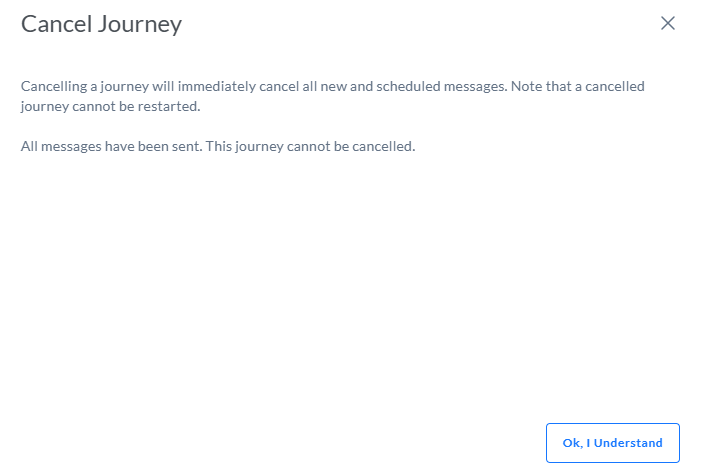
Note: Canceled journeys cannot be resumed and not edited. All form fields are read-only.
Deactivate the journey
When taking a journey offline or deactivate it, no messages are sent and links in emails and pages will no longer be available.
The toolbar contains an additional Deactivate button that becomes available when the journey has been activated. The Deactivate option is available from the Actions button drop-down.
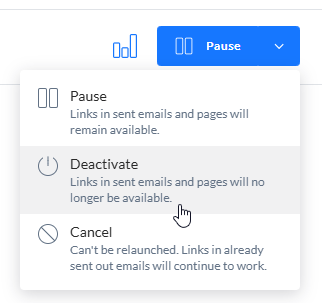
An offline journey can be activated again or canceled.
Reactivating the journey
While a journey is paused or deactivated, it's possible to edit the content through the journey by clicking on Edit content next to the selected asset.
If you don't publish the content after you made changes to it, returning to the journey and reactivating it, shows a pop-up explaining that there are unpublished content changes.
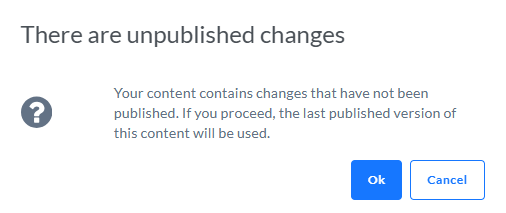
- Click OK to launch the journey with the last published version of the content (without the most recent non-published changes to the content).
- Click CANCEL to go back to the journey wizard and publish, if needed, your last content changes. That way, you can choose to reactivate the journey once more and launch it with the updated published version of the content.
Accessing Journey reports
Once the journey has been activated, a Report icon is shown in the toolbar giving access to the journey reports :