Transactional Journeys use messages that have been designed specifically for use in a Transactional Journey and are only available for execution by the API.
Create Transactional Journey
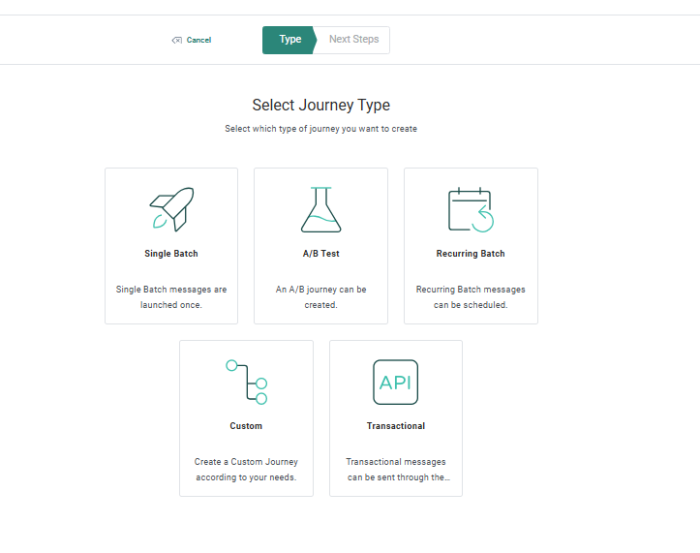
1. From the Journey entry, click New and select Transactional Journey from the wizard.
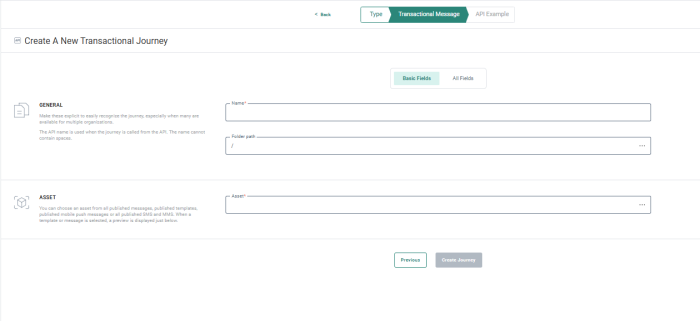
2. The following properties need to be set. The journey properties are grouped by type of information. By default only the Basic fields are displayed. Switch to the All fields tab to display all other fields. On the left hand side of the properties, on-screen help is provided. This helps the user to fill out the form with accurate and comprehensive information:
Basic Fields
General
- Folder Path — This is the folder in which the asset is created. By default it takes the folder that is currently selected on the Start page when the asset is created. You can modify the path if required. Click the folder field to access the dialog and select a different folder.
- Name — The name given to the journey. This is the name by which the journey will appear on the Start page and in reports
Asset
-
Asset — Select the transactional message that should be used for this journey. An Asset selector is available to choose the content from. Only messages marked as transactional are listed. These messages can either be email messages, mobile push messages, SMS, RCS or MMS. When the message has been selected, a preview is shown.
The selected asset automatically sets the target audience for this journey.
Seed Group
-
Seed Group — Toggle the option Send to all Seed Groups on if you want the message also to be sent to all the contacts in all the Seed Groups linked to the Audience List.
Toggle the option off if you do not want to send the message to any of the Seed Groups, or, it you only want to send it to a select number of Seed Groups. You can select the specific Seed Groups from the field below: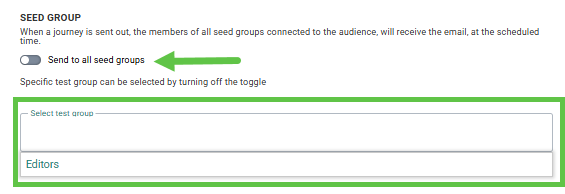
All Fields
General
- API name — This name will be used by the API to execute the journey.
- Labels — The label(s) assigned to this asset. Select one or more labels from the drop-down. (These labels are configured in the Admin configuration.) Users with the proper Access permissions can also create new labels here by typing the new label value in the field.
Analytics Tag
-
Campaign and Message analytics tags can be defined. These will be used when a tracker is activated.
-
Toggle the option Enable journey on to activate the journey and make it available to the API.
-
Interaction tracking — Interaction covers email opens, email clicks, link tracking(emails and pages), and unsubscribe tracking. Disabling this will ensure all these interactions are not logged.
This will have an impact on:- Journey reporting
- Segmentation based on journey metrics
- Send-Time Optimization
- Unsubscribe functionality — So when contacts unsubscribe, this will still work
-
External analytics tracking — External analytics tracking covers all the external trackers like for example Google UTM, Site tracker, Shop tracker.
When this type of tracking is disabled, no parameters from external trackers will be added to domain related links and hence the information can not be used by the external tracker. This will have an impact on:- External analytics — E.g. Google analytics
- Site CRM identification — The m_bt parameter will not be added for domain links and hence C RM identification will not be done
- Shop tracker — The parameters that are added for the shop tracker will not be added and hence this will have an impact on revenue reporting
Important note: When creating a message for the Transactional Journey, an Audience List must be selected for the journey. When Transactional Journeys are executed, this Audience List is checked.
* If the recipient of the transactional message matches an existing contact in that Audience List, the message is immediately sent, and existing information from the Audience List can be used to personalize the message. Note that sending out a transactional message does not automatically update the profile, a dedicated API call needs to be made to do so. However, in case of a Loyalty integration triggering a transactional journey, the existing profile will also be updated with any missing or updated information.
* If the recipient does not yet exist, it will be added as a new contact in this Audience List so that the message can be sent.
Note: By default the matching key is the email address - this can be changed in the API call to trigger the Transactional Journey. If duplicates are found in the list - multiple contacts with the same email address - the first match with the lowest MASTER.ID is used.
Note 2: The mandatory LANGUAGE field in the API call will set the language of the new contact, providing the language code matches one set up for this Business unit)
Note that new contacts created as a result of the Transactional Journey will have a blank OPT-OUT field. If that Audience List is also used for bulk messaging (such as newsletters), those new contacts may inadvertently be included in the target for bulk messaging and other communications.
Possible approaches:
- Use the same Audience List for all communications but manage opt-ins for different communications in an extended profile, e.g.: store newsletter preferences elsewhere and ensure that all journeys use this preference information from the extended profile and not the standard OPT-OUT field.
- Use a different and dedicated Audience List for Transactional Journeys. This may require additional journeys and stored procedures to migrate Transactional Data back to the main Audience List for segmentation, personalization and reporting.
3. Click Create journey.
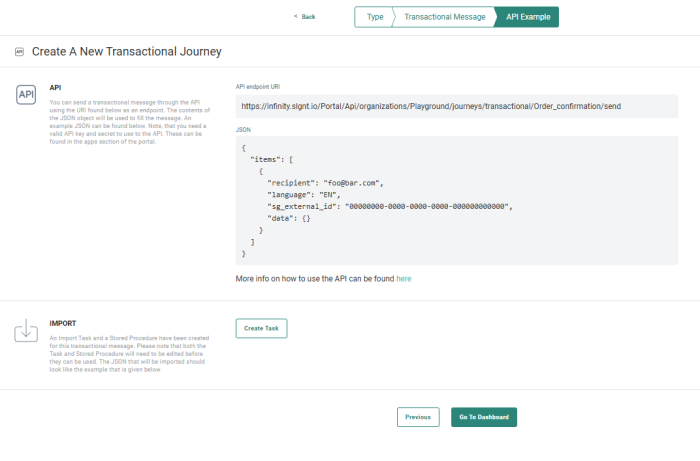
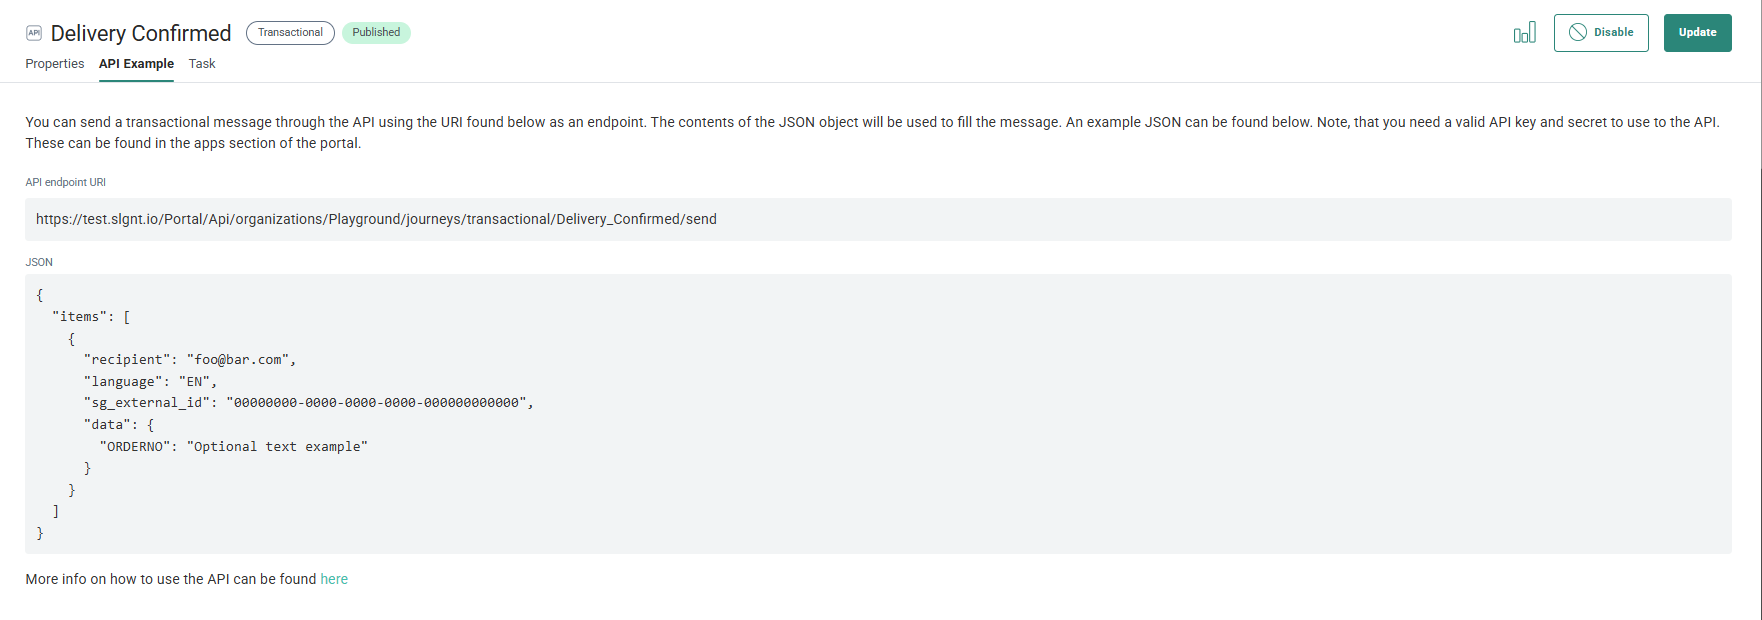
On the next screen, an example is shown of the JSON script that is used to fill out the message. This can be used directly in the API where the user only needs to fill out the right values.
From this screen you can then jump straight to the API explorer and test. (Documentation on the API explorer is available here)
4. At the bottom of the page you can see an import section to create an Import Task. This is optional and only used for transactional bulk sending. If you do not yet have an import procedure to get the data in Selligent, you can set this up now.
Note: You need to have the appropriate permissions to create a task. If not, the option Create task is not available and the user is informed.
Technical Note: Creating a task and Stored Procedure makes it possible to execute a bulk Transactional Journey. The journeys will be executed at given time intervals and for a number of contacts. The content of the message may differ for each contact.
An import procedure will import a source file that contains all the information about the targets of the journey and the actual content. The content to be sent to a contact needs to be in a specific JSON format.
Here is what happens:
1. Import the source file into a temporary table. This source file may be a Text or CSV file and, in the most simplified version, contain only a column for the User ID and one with the JSON for the content. In more complex files, the content may be stored in separate columns in the source file. In that case the Stored Procedure will have to process the data and ensure it is converted into a valid JSON.
2. Execute a Stored Procedure that reads the temporary table and creates records in an action list. This action list will contain a record for each target and the content to be sent in JSON format. The content can either come straight from the temporary table if it is already available in the correct JSON format, Or, the Stored Procedure needs to do the necessary processing to convert it into the right JSON.
3. Trigger the journey execution to send the transactional message to all the targets in the list.
Click Create task to automatically create a task and a Stored Procedure based on the transactional template.
- The task is used to import the source file in a temporary table. (An example is provided of what the JSON for the content to import should look like. )
- The Stored Procedure will contain the necessary base code to process the data in the temporary table and generate the records in a list.
Technical Note: The generated task and the Stored Procedure has need to be amended modified by the user.
Once the task is created, you need to edit the template task and the Stored Procedure. This can be done by using the Edit buttons. The task or Stored Procedure is opened in a new window. Or you can go straight to the Tasks and Stored Procedures entries and make modifications there
- Make sure to configure the source, column mapping and schedule for the task.
- The destination for the task is a temporary table, that will be used to store the IDs of the contacts and the content for the email. A default table name is set but you can use any table name of your choice. The table is created when the journey is published.
- By default the Transactional Journey that needs to be triggered after the task is executed is set already
- Edit the Stored Procedure to reflect the required processing of the data in the table.
5. When done, click Go to Dashboard to return to the start screen.
The journey is added to the Journey Start page.
Editing a Transactional Journey
When editing a Transactional Journey, three tabs are displayed:
Properties
Under properties, in the left navigation, different entries are available which can be accessed directly by clicking an entry, or by using continuous scrolling on the properties page.
The General entry contains properties set up during the creation of the journey and provides direct access to the transactional message used in the journey. Click the Edit icon next to the selected asset:
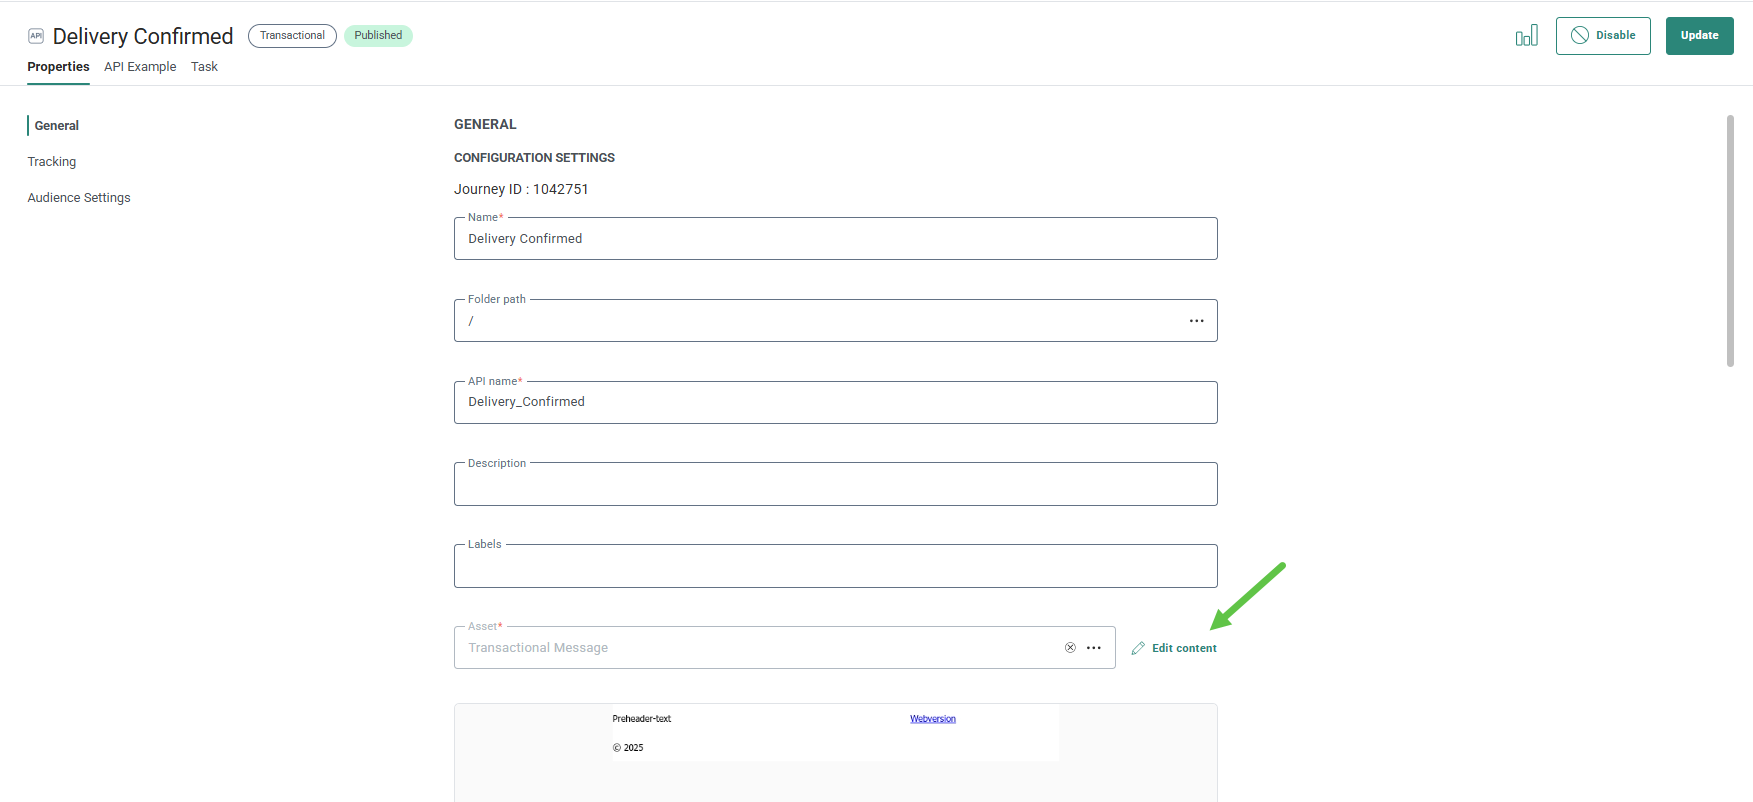
You also have access to the Tracking settings and the Audience settings for this journey. The Audience is read-only and automatically defined by the selected asset.
API example
On the API example tab, you can access the API example used to trigger the send of the transactional journey and the data that needs to be sent with:
Task
Creating a task is only necessary if you want to trigger a transactional journey in addition to using the API. If the journey is triggered exclusively through the API, no task is required.
The purpose of this task is to:
- Import the source file into a temporary table.
- Execute a stored procedure that prepares the data and triggers the journey.
Note: This setup is typically used for file-based or hybrid integrations where the journey is not triggered solely via API.
Check out the explanations earlier in this article.
Enabling/Disabling Transactional Journeys
The top toolbar in a Transactional Journey contains several buttons to manage the journey.
Enable/Disable — When a journey is enabled, it is accessible to the API. Disable the journey if it should no longer be accessed by the API.
Enabling or disabling a journey with pending changes triggers a confirmation dialog. The user can choose to discard the changes or first save the changes.
Update — Save the changes made to the journey by using the Update button.
Report — Open the transactional reports with general information about the journey as well as details on the transactional message
Example : Creating a Transactional Message
Example : Creating a Transactional Journey
Test your knowledge about the creation of Transactional Journeys
What are the conditions that should be met for messages to be selectable during creation of a Transactional Journey
A: The message has been published
B: The message has at least two languages
C: The message is of type SMS
D: The message is not yet used in another Journey
E: The message is set as transactional
F: The message has been saved
