A transactional message is a solicited message sent in response to an interaction with a contact, such as login request, newsletter subscription, or abandoned basket message.
Transactional messages can only be sent through an API.
When creating a message, the user indicates if it is a transactional message or not. In the properties of the message, transactional fields are defined that can be used to personalize the message. The values for these transactional fields will be filled out by the Selligent API when the Transactional Journey is launched.
To create a transactional message:
1. Create a message. This is done in the same way as for a standard message.
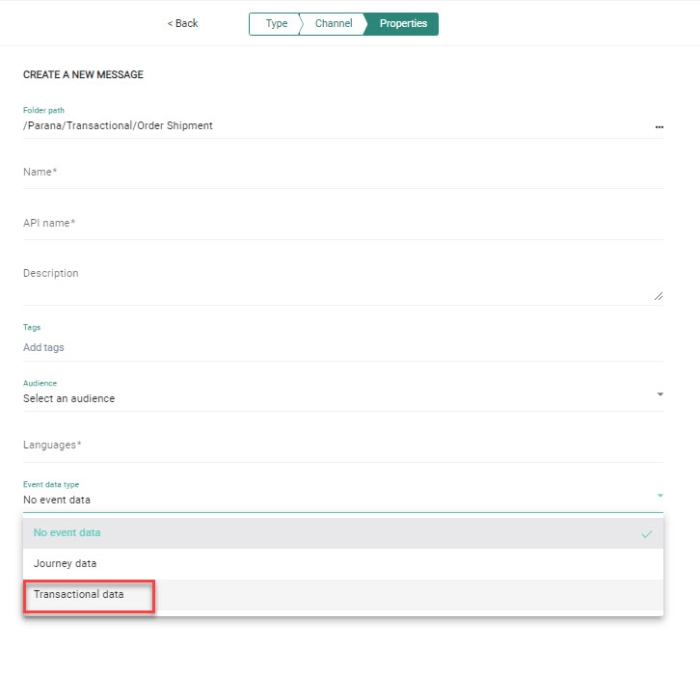
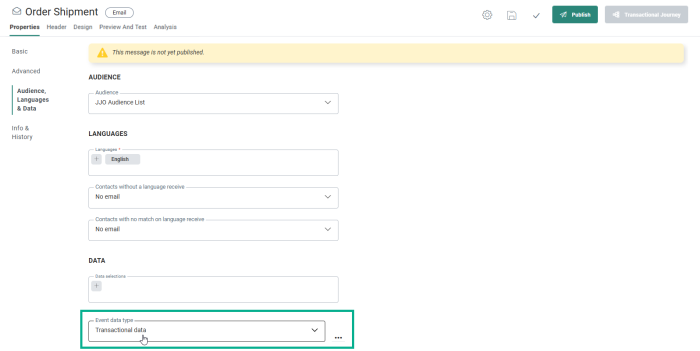
2. To make this message a transactional message, select the option transactional data from the Event data field. This can be done either when creating the message in the message properties panel or after creation, in the properties of the message.
- Selecting the option Transactional data from the Event data field at creation:
- Selecting the option Transactional data in the Event data field in the properties of the message:
3. Save the message.
4. Design the layout and content
as for any other message and personalize
the message including transactional fields. For more information on how
to define transactional fields, check
out this topic.
5. Finally, be sure to create a text version by clicking the 'Add custom text version' option in the Actions drop-down.
6. When done, click Save, Validate and Publish the message.
Note: These transactional fields can only be populated via an API call in a journey, they will not be populated when previewing the transactional message.


