Unlock the most personal marketing channel for your cross-channel strategy and elevate your customer journeys to the next level with SMS.
Getting Started
Send promotional or transactional messages with SMS. The setup and campaign creation process are the same for both types of message; the difference is in the content and the audience. To learn more about transactional messages, see the Transactional SMS section.
Before Creating an SMS Campaign
Create a list in Audience Builder before designing your SMS campaign. You can create your SMS message directly in the SMS Campaign workflow and see the same preview as you would in the SMS template builder.
We currently support the sending of SMS messages to and from the following regions:
- North America (US & Canada)
- Europe (UK)
- Oceania (Australia)
Create an SMS Campaign
Creating an SMS campaign is very similar to getting started with an email campaign. SelectCampaigns from the Messaging menu. This takes you to the Campaign List page
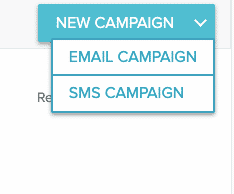
- From the New Campaign drop down menu, select SMS Campaign.
A new SMS campaign screen opens. Rename your campaign first. Select the Edit icon next to New SMS Campaign.
- An editable text box opens. Enter your campaign name.

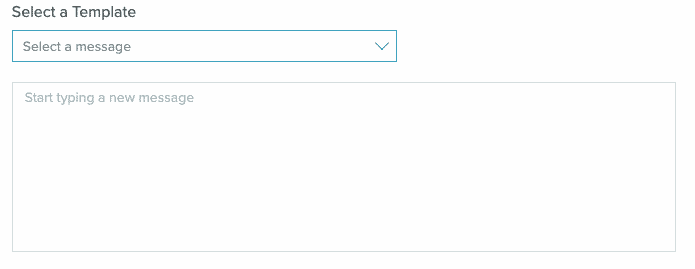
Save your work as you go. - Select an existing template or create a new message in the Message section. You'll also see a preview of your message.
- Select an Audience. The preview will show how many users you'll message.
- Schedule your message. You can send immediately, select a day and time to send your message in the recipient's local time, or schedule a specific day and time in your account's local time.
- Select Schedule Campaign send immediately or schedule your message.
SMS Campaign Builder
The SMS Campaign Builder is a single screen workflow. The Message and Audience sections include a preview window, so you can see what your message will look like before you send and how many people you'll message
Message
From the Message section, select an existing template from the drop down menu or create a new message. The message box allows Zephyr, so you can personalize your messages. After you select a template or as you create a new message, a preview shows.
Message Preview
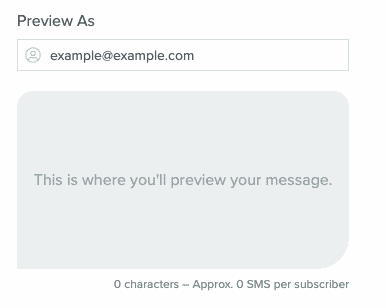
The preview window shows:
- Your SMS message as your recipients will see it (including any Zephyr).
- An approximate character count. One SMS message is roughly 160 characters.
- Approximately how many SMS messages will be sent per subscriber based on the character count.
Personalize with Zephyr
The same Zephyr variables that work in email messaging also work in SMS messaging. In the following preview, example@example doesn't have a first name in the system. 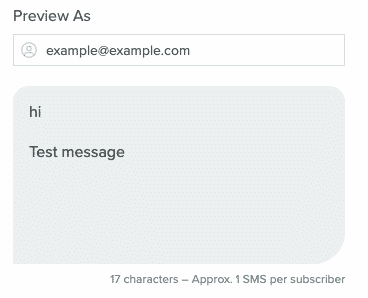
The previewed message included a simple Zephyr statement to pull a first name from a user profile.
            Hi {firstName}

Test Message
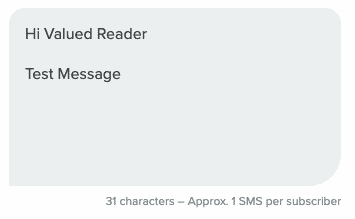
To keep users from seeing a blank field instead of a personalized message, include a fallback value:
            Hi {firstName ? firstName : 'Valued Reader'}

Test Message
MMS
Create MMS messaging campaigns.
- Select a template or create a new message.
- Select the image icon in the gray bar at the bottom of the message textbox.
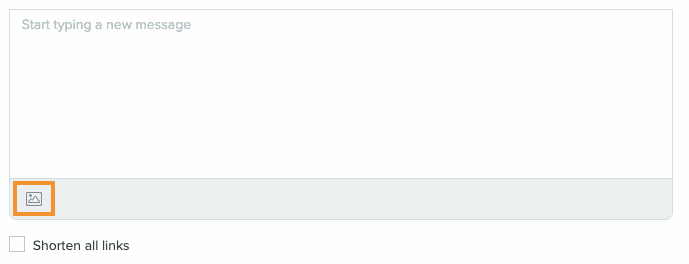
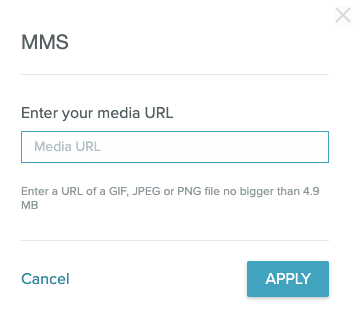
- Enter a publicly available URL in the MMS modal and select Apply. Note: The GIF, JPEG, or PNG file must not exceed 4.9MB. The entire MMS message is size-limited to 5MB.
- When you successfully add your media, the file name and size appears above the gray bar in the message textbox and a preview of the file shows above the text preview.

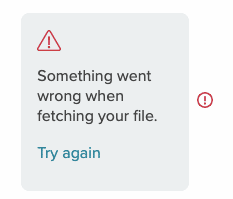
- If there is an issue with the file, it will not attach to your message and you'll see an error message.
- When your message is complete, continue with scheduling and sending.
From SMS
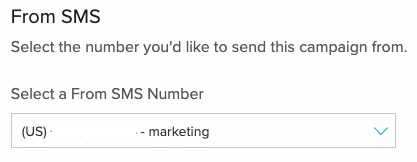
Use the From SMS drop down menu to select your From number. If there are multiple numbers enabled on your account, you'll be able to select one from the list.
Audience
Create an audience for your SMS message in Audience Builder.
- From the Audience Builder page, select your base list (see Audience Source in the Audience Builder documentation).
- Select the SMS Consent Status filter from the User section.
- Select IS for the profile matching.
- Select the customer status and SMS consent status from the dropdowns:
- Customer Status
- Opted-in: profile has opted-in to receiving SMS messages
- Opted-out: profile has opted-out of receiving SMS messages
- Not confirmed opt-in: profile SMS value does not exist or is null
- SMS Consent Status
- Marketing only checks for
sms_marketing_statusin user profiles - Transactional only checks for s
ms_transactional_statusin user profiles - Marketing and Transactional checks both
sms_marketing_statusandsms_transactional_statusin user profiles - Marketing or Transactional checks if either
sms_marketing_statusorsms_transactional_statusin user profiles is set
- Marketing only checks for
- Customer Status
- Your filter should resemble the following image:

- Select Done, then Save as Smart List. If you wish to save a Natural List, select Other Actions and then Generate Natural List.
- Give your name a unique list and save it.
- Note down the list name to use when building campaigns and Lifecycle Optimizer flows.
SMS Consent (Legacy)
This filter is available for profiles that had SMS numbers captured prior to February 2023.
Note: When creating an SMS audience, the SMS Consent Status and SMS Consent (Legacy) filters should not be used together.
- From the Audience Builder page, select your base list (see Audience Source in the Audience Builder documentation).
- Select the SMS Status (Legacy) filter from the User section.
- Select IS for the profile matching and SMS from the drop down. Your filter should resemble the following:

- Select Done, then Save as Smart List. If you wish to save a Natural List, select Other Actions and then Generate Natural List.
- Give your name a unique list and save it.
- Note down the list name to use when building campaigns and Lifecycle Optimizer flows.
Audience Preview
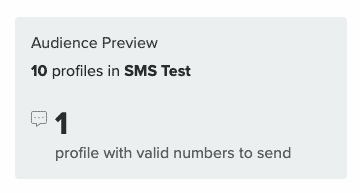
When you select an audience, an Audience Preview loads on the right side of the screen. This shows how many profiles in your audience have a valid number.
Schedule
There are three ways to schedule your SMS message
Send Now
Selecting Send Now allows you to send your message as soon as you confirm it.

Select Send Now to open the Schedule campaign modal window.
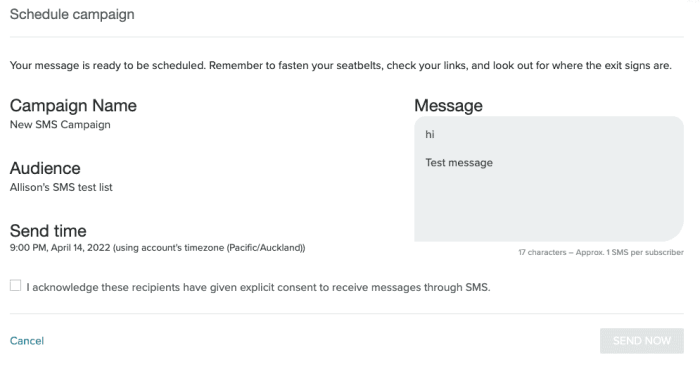
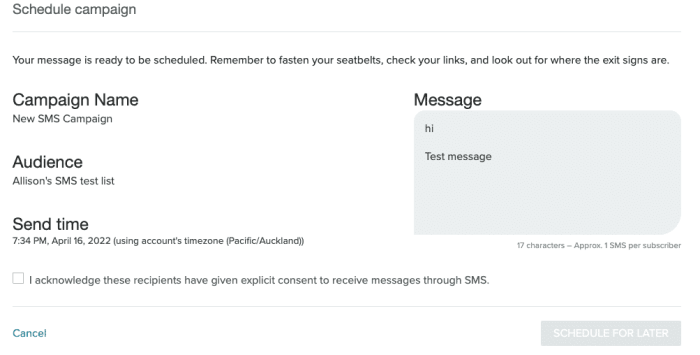
Check that the information in the Schedule campaign modal is correct and select the checkbox to acknowledge that all recipients have given explicit consent. Once you select the checkbox, the Send Now button turns blue. Select the button to send your message.
Recipient's Local Time
Select Recipient's Local Time when you want to send a message at a specific day and time for all recipients. Using this options means that everyone in your audience will receive the message at, for example, 9:00 PM in their own time zone. Note: If a local send time is not attached to the profile or the local send time has passed, send time defaults to the account's sending time.
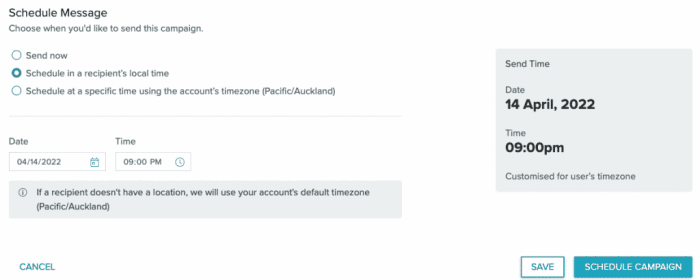
Use the date and time pickers to select the date and time. Select Schedule Campaign to open the Schedule campaign modal window. 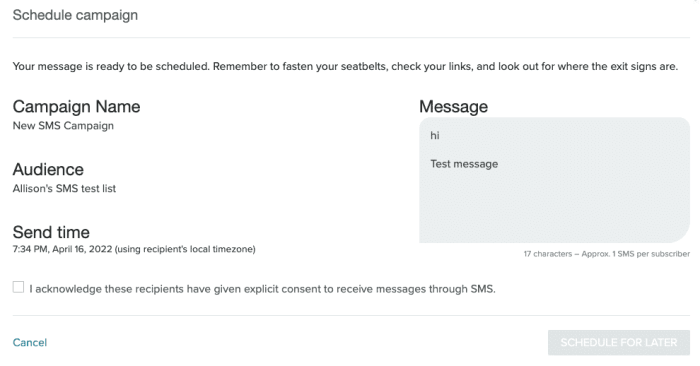
Check that the information in the Schedule campaign modal is correct and select the checkbox to acknowledge that all recipients have given explicit consent. Once you select the checkbox, the Schedule For Later button turns blue. Select the button to schedule your message.
Specific Time
Select Specific Time if you want a message to be sent on a specific day and at a specific time based on the time zone for your account. You will always see what your account's local time zone is when you select this option. 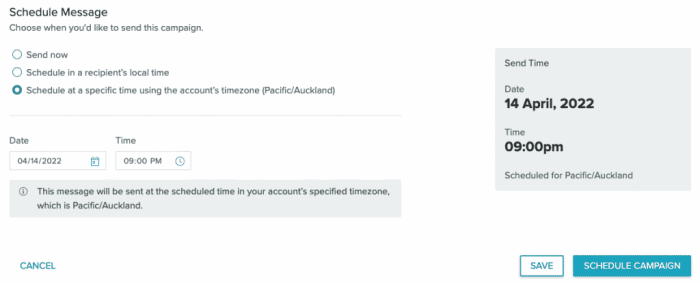
Select Schedule Campaign to open the Schedule campaign modal window.
Check that the information in the Schedule campaign modal is correct and select the checkbox to acknowledge that all recipients have given explicit consent. Once you select the checkbox, the Schedule For Later button turns blue. Select the button to schedule your message.

