
Create hyper-targeted audience segments based on real-time customer data, behaviors, and preferences from any channel. Tailor your marketing messages to specific groups, ensuring that each subscriber gets the most relevant content, offers, and recommendations. This leads to more personalized, effective campaigns that drive higher engagement and conversions.
Navigate to Audience Builder from the Users menu in the platform.
What can i do with Audience Builder?
Audience Builder helps you create different types of lists, quick audience snapshot reports, and even to make bulk updates to some types of subscriber data. The things you can do with Audience Builder are called Actions.
You'll find the available Actions in the black bar at the bottom of the Audience Builder screen.
Create lists
You can create two different types of lists with Audience Builder: a natural list or a smart list.
Note: You cannot use a dollar sign ($) in list names.
Smart lists
The main use for Audience Builder is creating dynamic lists that update without your intervention. You set the filters for a new list, save it, and it automatically updates as your subscriber behavior changes. This ensures that your marketing is always in sync with the latest subscriber insights. With Smart lists, you can focus on strategy while the system handles the segmentation.
You might want to use a Smart list for an automatically updating suppression list for a send, to target new newsletter signups, or to target users who purchased an item for the first time.
Natural lists
Natural lists are static lists that don't update automatically. This kind of list only changes when you make a manual change, like adding more subscribers. Audience Builder allows you to combine more than one base Natural list to create a larger list.
A Natural list can be useful for a paid newsletter list. You can also use them as sources for Smart lists or as a suppression list for a send.
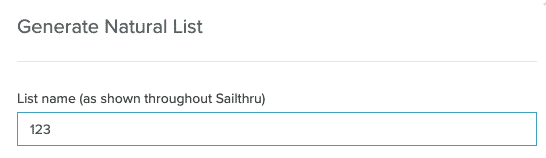
You can generate a Natural list from Audience Builder by selecting Other Actions in the Actions bar. Select Generate Natural List from the menu.
Snapshot reports
Generate a real-time report based on the segmentation choices you make in Audience Builder to get insight into where your list subscribers are from, their interests, site activity, engagement, and more.
For in-depth information on Snapshot reports, see the full documentation.
Bulk update subscriber profiles
Manually update multiple subscriber profiles at once with Audience Builder. Select from three different bulk update options:
-
Custom field (set or unset a custom field)
-
Opt in or out of email
-
Reset the bounce status
Bulk updating profiles is available from the Other Actions menu in the Actions bar.
If you need to bulk update profiles to add a numerical value, use the list file upload or the job or user API. Numerical values added by the bulk update option will be stored as strings and will only be available in Audience Builder if searched for with quotation marks.
Create a list
This section will take you through creating a Smart list in Audience Builder. You'll see how to select a source list, add filters, and then save your list. Before you start building your list, check out the {Filter Reference} documentation to see what kinds of filtering you can do.
Navigate to Audience Builder from the Users menu (Users > Audience Builder).
Select your audience source
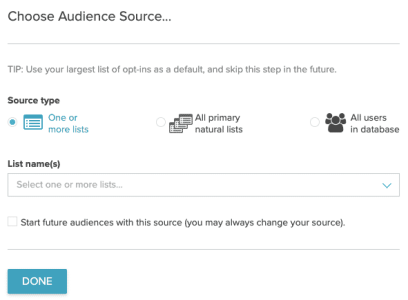
The first screen when you open Audience Builder is the Audience Source selection. This is where you select the list or lists that function as the base of your Smart list.

Select a source list or lists, or use your entire database to build an audience:
- One or more lists - When this option is selected, click the List name(s) field to search and select from your natural and smart lists.
- All primary natural lists - Use all natural lists that are marked as primary.
- All users in database - Use with caution. This option includes all users ever mailed, uploaded, or stored in your account via API calls such as purchase, user, or send. Not all of these users have opted in to campaign mailing, and must not be messaged without consent.
Select a filter or filters
For details on each filter, see the Filter Reference. As you finalize filters, you'll see the information in the sidebar at the right change. See the Audience Preview section for a full discussion.
- In the left pane, click a filter's name to add it to the display.
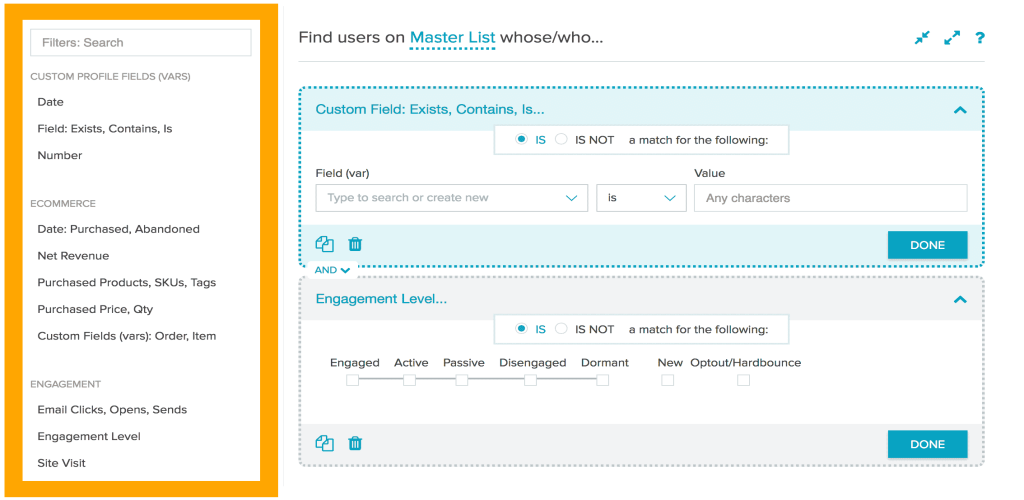
- In the filter, enter criteria for the users to include or exclude.
To include matching users, select IS. To exclude them, select IS NOT.

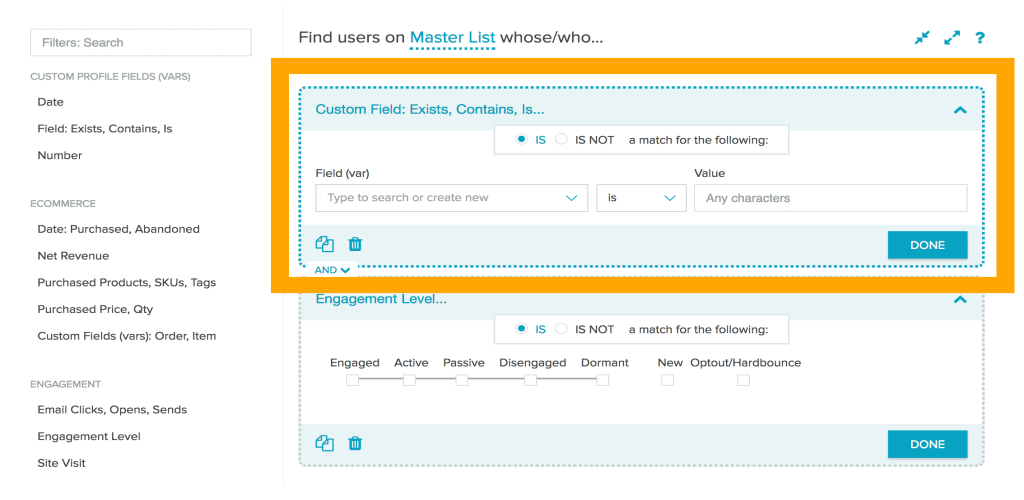
- When you have entered valid criteria, the dotted border around the filter is removed. If the entire filter or an individual field turns red, the criteria you entered is not valid and must be corrected before saving the filter and performing your action.
- Click Done or collapse the filter using the icon at top-right
 .The filter is minimized for easy dragging, dropping, and reordering.
- To delete a filter, while it is expanded, click
 .
.
Add Multiple Filters
- Repeat the instructions above to select and configure one or more additional filters, or click copy
 on an existing filter to start with a duplicate.
- Click
 or
or  to switch the logic connecting all filters or filter groups that exist at the same level.
- AND: all filters must match a user to include the user
- OR: at least one filter must match a user to include the user
- You can also use advanced logic, combining ANDs and ORs. For example:
('Majority Resident' = USORUK) AND ('Engagement Level' = Engaged)
- Click and drag a collapsed filter on top of another to join them in a group.
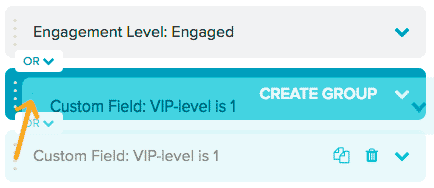
When the destination filter turns blue, drop the dragged filter. The two are now grouped. - You can change their logical operator (AND/OR) independently from the one that connects the group with the other filters.
- You can also create a second level of groupings, where a group is nested inside another group.
- You can add a "NOT" logical operator to a group or subgroup to exclude users who match the result of the group. Hover over the grouping bar, and click IS to change the operator to NOT.
- To remove a filter from the group, drag it just outside the group until a dark box is displayed to preview the new location.
- Click and drag a collapsed filter on top of another to join them in a group.
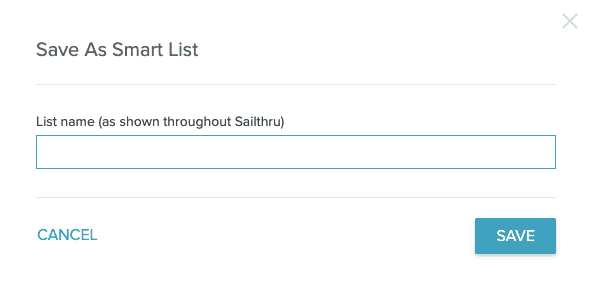
Save your list
- Select Save as Smart List from the Actions bar.
- Enter a list name. Remember that you can't use a dollar sign ($) in your list name.

- Select Save. You'll see a green popup at the bottom of the screen when your save is successful.
Audience Preview
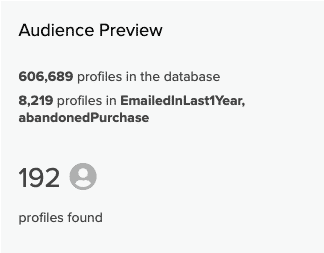
Use a real-time audience preview to see how your filters affect the size of your audience.
When you have selected your lists and have selected Done, Audience Builder loads. Audience Preview will load on the right side of the filter screen. It shows you how many profiles you have available in your database and how many your selected lists contain. Sample profiles load below the preview, showing both valid email addresses and valid phone numbers.
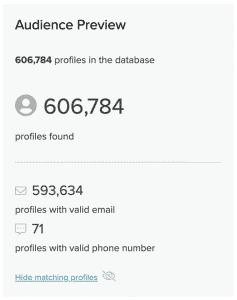
As you add filters, the number of profiles found changes. For example, when filtering for users who have opened an email 1 or more times ever, the available profiles drop from 8219 to 192.
Create a Control Group for A/B Testing
When creating an A/B test, you may wish to use a holdout or control group of users not receiving a specific message. This is useful when you're running a test to see how many users will respond to an offer.
For example, if you're testing against disengaged users, group A could receive an email with an offer, group B could receive an email with no offer, and the control group would receive no email. With this setup, you'll be able to see how many disengaged users return with no offer or contact.
Create the control group in Audience Builder:
- Select your Source List. This can either be a list filtered from All Primary Natural Lists or any single list that contains the full set of users you want to include in your test.
- Select your list filters, if you're using them.
- From the Actions Bar, select Other Actions and then Generate Natural List. The Generate Natural List editor opens.
- From the Generate Natural List editor:
- Enter a List Name, for example, Test - Control.
- Limit the list size by a percentage (for example, 20%).
- Click Start Generate Job.
Create the variable group:
- Follow steps 1. and 2. for creating your control group. Select the same list and filter options as you did when creating your control group.
- Add the Natural and Smart Lists filter.
- Set it to IS NOT on these lists.
- Select your control group list from the drop down.
- From the Actions Bar, select Save as Smart List.
- Enter a List Name, for example Test - Variable.
- Under Criteria, select "Is not a member of list," and in the Value field, enter the exact name of your control group list.
You're set up to create an A/B Split Test. Use the Test -- Variable Smart List as your Audience.
Merge Existing Natural Lists
- Select the lists you wish to merge. For this example, the lists will be called ABC and 123.
- Set your Source list as list 1 (the list called ABC).
- Select Generate Natural List from Other Actions in the bottom left of your screen. This opens the Generate Natural List modal.
- In the Generate Natural List modal, enter the List name of the list you wish to merge into (the list called 123).
- Select Start Generate Job.
When the job completes, list ABC users will be added to list 123 without having to create a new list.
Segmenting Apple Mail Users
Segment your users who are using the Apple Mail client on iOS15 to understand how Apple's Mail Privacy Protection may be affecting user metrics.- In the platform, navigate to Audience Builder from the main menu (Users > Audience Builder).
- Select the list or lists for your Audience Source.
- Search for or scroll to the Browser, Device, Mail Client, OS filter under the User filters and select that filter. By default, the filter includes matching users.
- Select Reads email from the drop down list.
- From the Device, OS, & Browser drop down, search for or select Apple Mail. Your filter should resemble the following image:
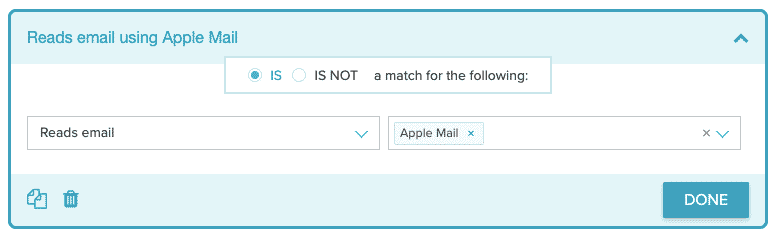
- Select Done to set the filter.
- Select Save as Smart List from the Action Bar at the bottom of the screen.
- Give your list a name and select Save.
- If you want to track your list in the List Growth report, it needs to be a primary list.
- Navigate to the Lists page (Users > Lists).
- Use the filters at the left side of the page to search for the list you just created. Make sure you set the list type filter to View Smart Lists.
- Set the list to Primary.
- Now you can track this list through the List Growth report.
Create an SMS Audience
Create an audience for your SMS message in Audience Builder based on their consent status.
- From the Audience Builder page, select your base list (see Audience Source in the Audience Builder documentation).
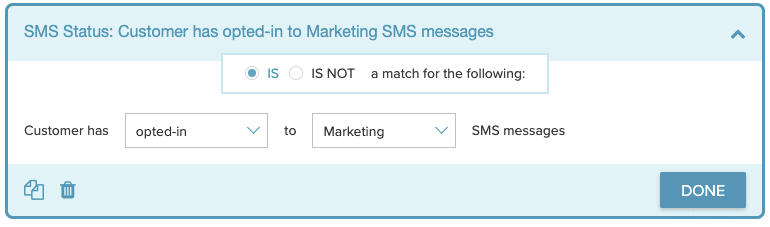
- Select the SMS Consent Status filter from the User section.
- Select IS for the profile matching.
- Select the customer status and SMS consent status from the dropdowns:
- Customer Status
- Opted-in: profile has opted-in to receiving SMS messages
- Opted-out: profile has opted-out of receiving SMS messages
- Not confirmed opt-in: profile SMS value does not exist or is null
- SMS Consent Status
- Marketing only checks for
sms_marketing_statusin user profiles - Transactional only checks for s
ms_transactional_statusin user profiles - Marketing and Transactional checks both
sms_marketing_statusandsms_transactional_statusin user profiles - Marketing or Transactional checks if either
sms_marketing_statusorsms_transactional_statusin user profiles is set
- Marketing only checks for
- Customer Status
- Your filter should resemble the following image:
- Select Done, then Save as Smart List. If you wish to save a Natural List, select Other Actions and then Generate Natural List.
- Give your name a unique list and save it.
- Note down the list name to use when building campaigns and Lifecycle Optimizer flows.
SMS Consent (Legacy)
This filter is available for profiles that had SMS numbers captured prior to February 2023.
Note: When creating an SMS audience, the SMS Consent Status and SMS Consent (Legacy) filters should not be used together.
- From the Audience Builder page, select your base list (see Audience Source in the Audience Builder documentation).
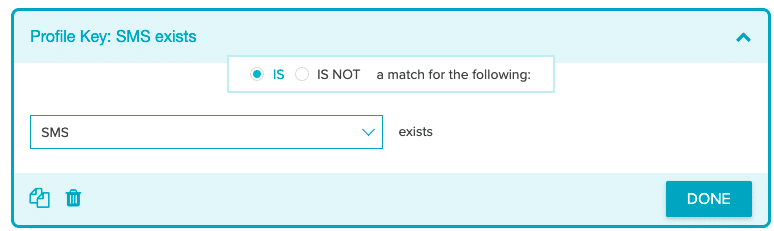
- Select the SMS Status (Legacy) filter from the User section.
- Select IS for the profile matching and SMS from the drop down. Your filter should resemble the following:
- Select Done, then Save as Smart List. If you wish to save a Natural List, select Other Actions and then Generate Natural List.
- Give your name a unique list and save it.
- Note down the list name to use when building campaigns and Lifecycle Optimizer flows.

