
New features in Selligent by Zeta
March 20, 2025
Version 5.90
Subject Line Testing in AB Journeys
AVAILABLE TO ALL USERS
BACKGROUND:
The current A/B testing feature allows testing up to 7 different versions of a message. After analysis, the best-performing version is sent to the remaining target group. However, marketers are required to create multiple versions—up to 7—of the message, which can be time-consuming, especially when the goal is simply to test different subject lines.
SOLUTION:
In this release, Selligent introduces the Subject Line A/B testing feature, an easy and quick way of testing different versions of a subject line and sending the best version to the remaining audience.
What this looks like in Selligent (Selligent):
Subject Line A/B testing is supported in Custom Journeys through a dedicated component as well as in A/B journeys created through the wizard.
Custom Journeys
A new component Subject Line A/B test is now available in the components panel of a Custom Journey to allow marketers to test a subject line before sending out the full communication.
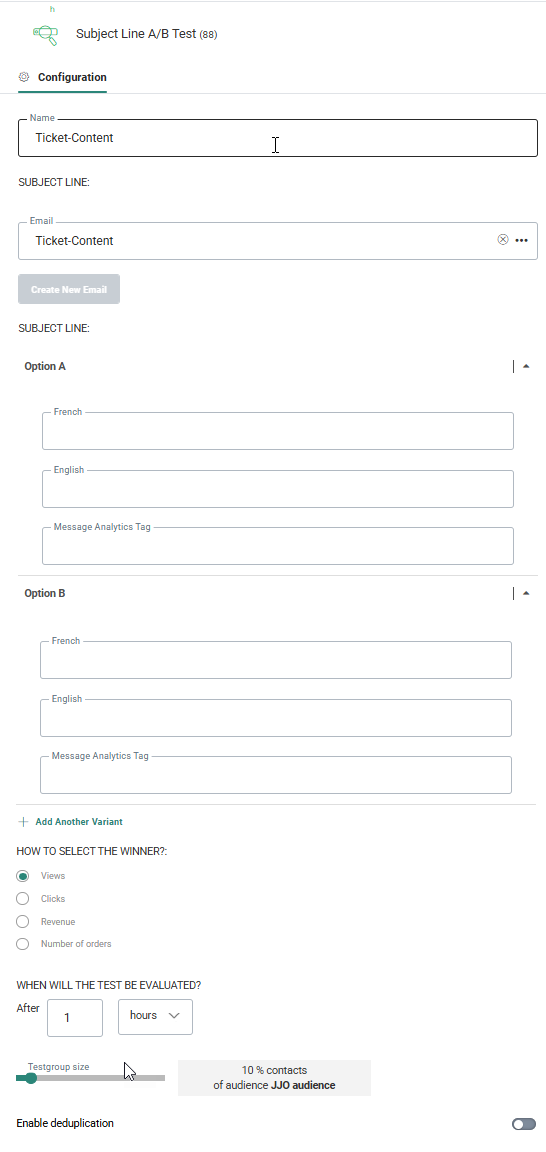
When adding this Subject Line A/B test component, you can select an existing email message or create a new one. Next, you need to define the different versions of the subject line (up to 7), in every language defined in the message. The subject line in the selected message will automatically be set as the first version.
Last, define how the best version will be determined and after how much time the best version will be sent to the remaining audience.
(All details on the Subject Line A/B Test component can be found in this dedicated topic.)
A/B test journeys
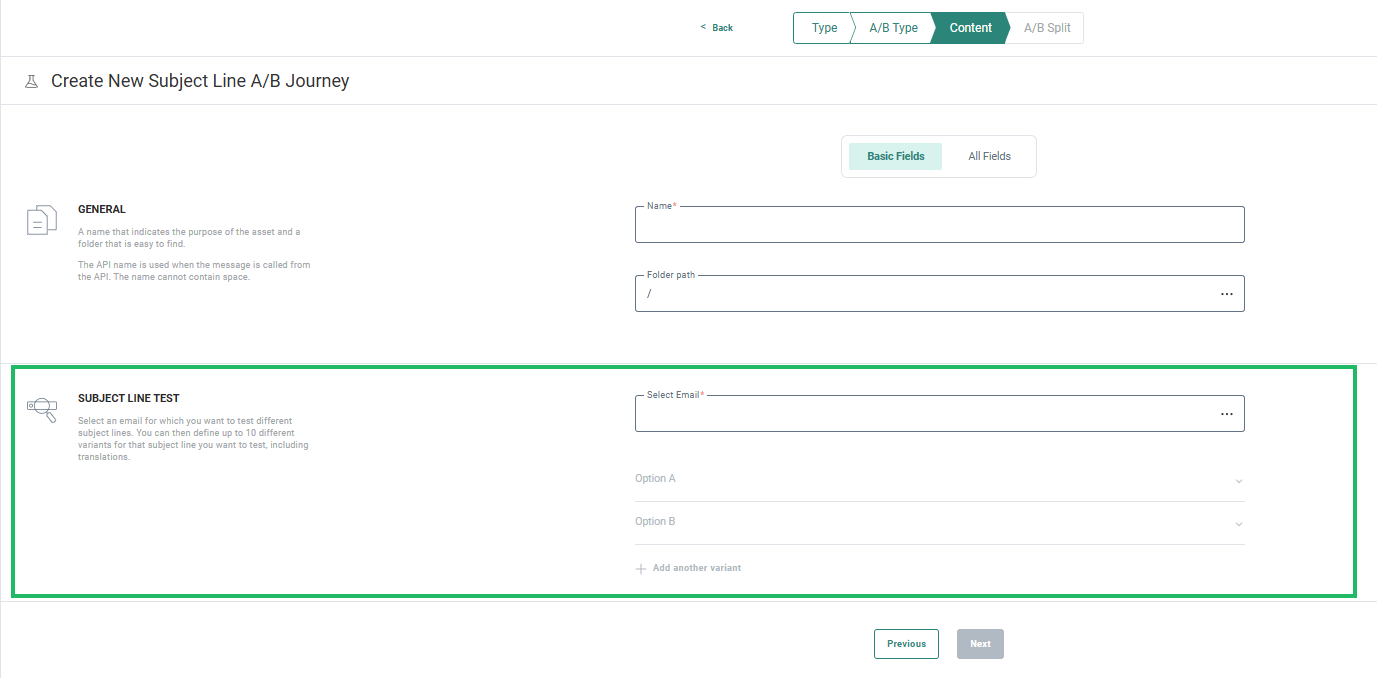
Upon creating an A/B test journey, a wizard guides you through the different steps. In the first step you can now choose between a Single Batch A/B or a Subject Line A/B test.

Once Subject Line A/B has been selected, you are presented with the properties of the Subject Line A/B journey. First select the email message that will be used in this test and next define the different versions of the subject line (up to 8):
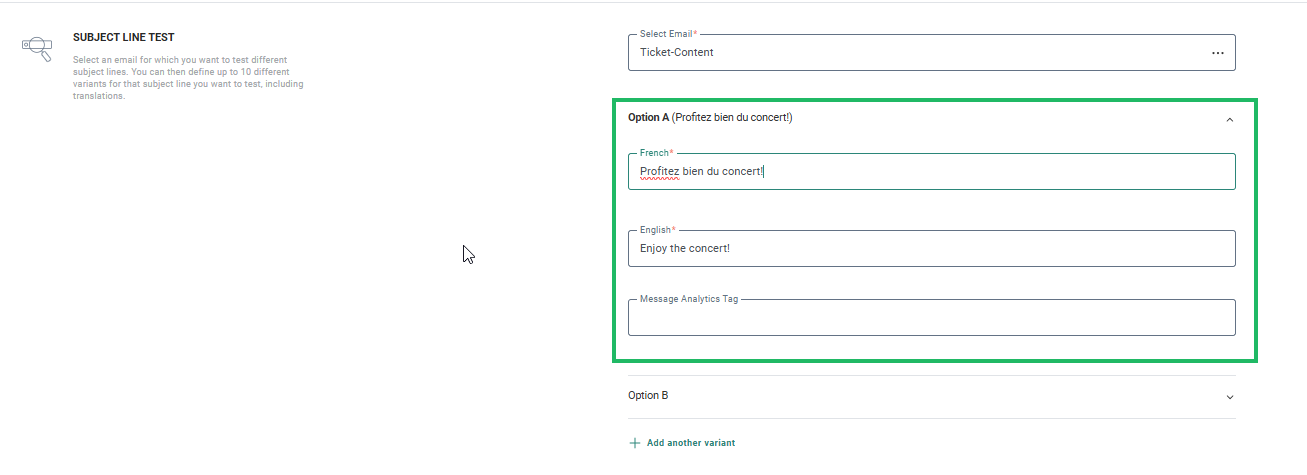
Expand option A to start defining the first version of the subject line in the different languages of the message and then do the same for the other versions:
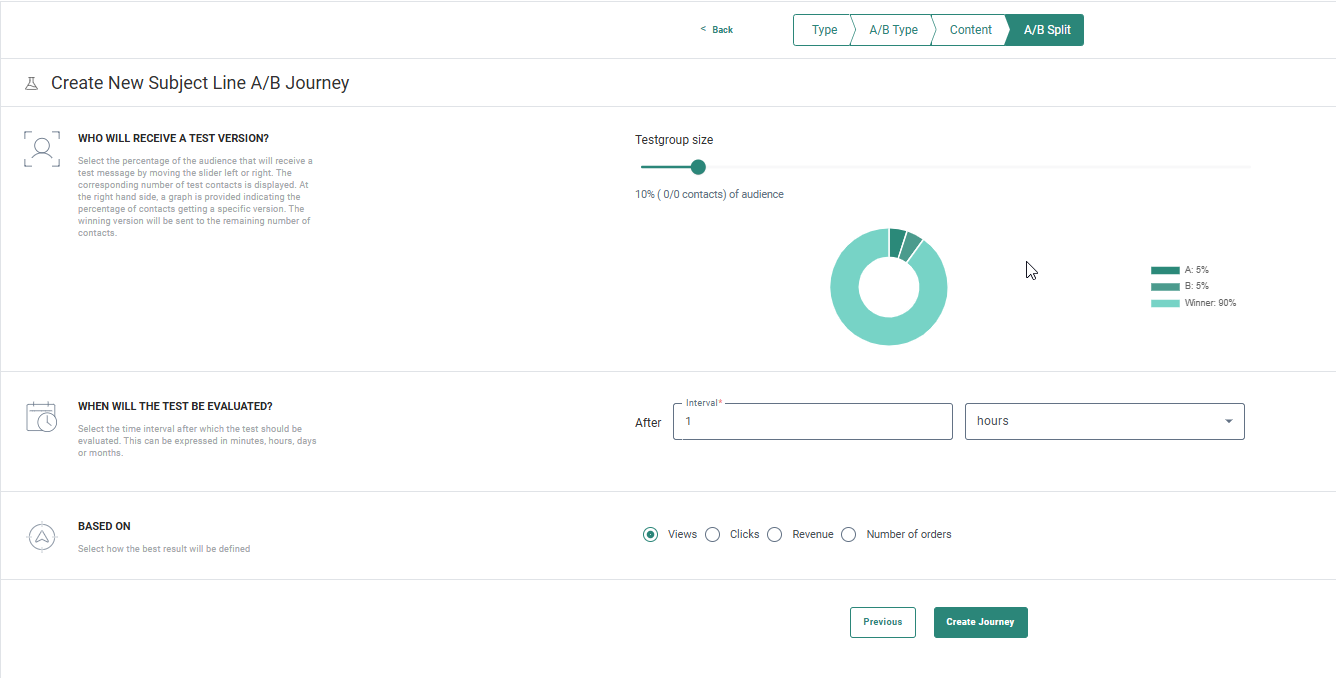
When all versions have been defined, go to the last step of the wizard where you can define the testgroup size, the duration of the test and the metric used to determine the best version.
(All details on the Subject Line A/B journey wizard can be found in this dedicated topic.)
Guard Rails for Contains Operator in Dynamic Segments
AVAILABLE TO ALL USERS
BACKGROUND:
When using the contains operator, calculation of audiences might take a lot longer and impact performance. Users setting up filters for dynamic segments or in the Audience Filter Component in journeys, are not always aware of the impact such an operator might have.
SOLUTION:
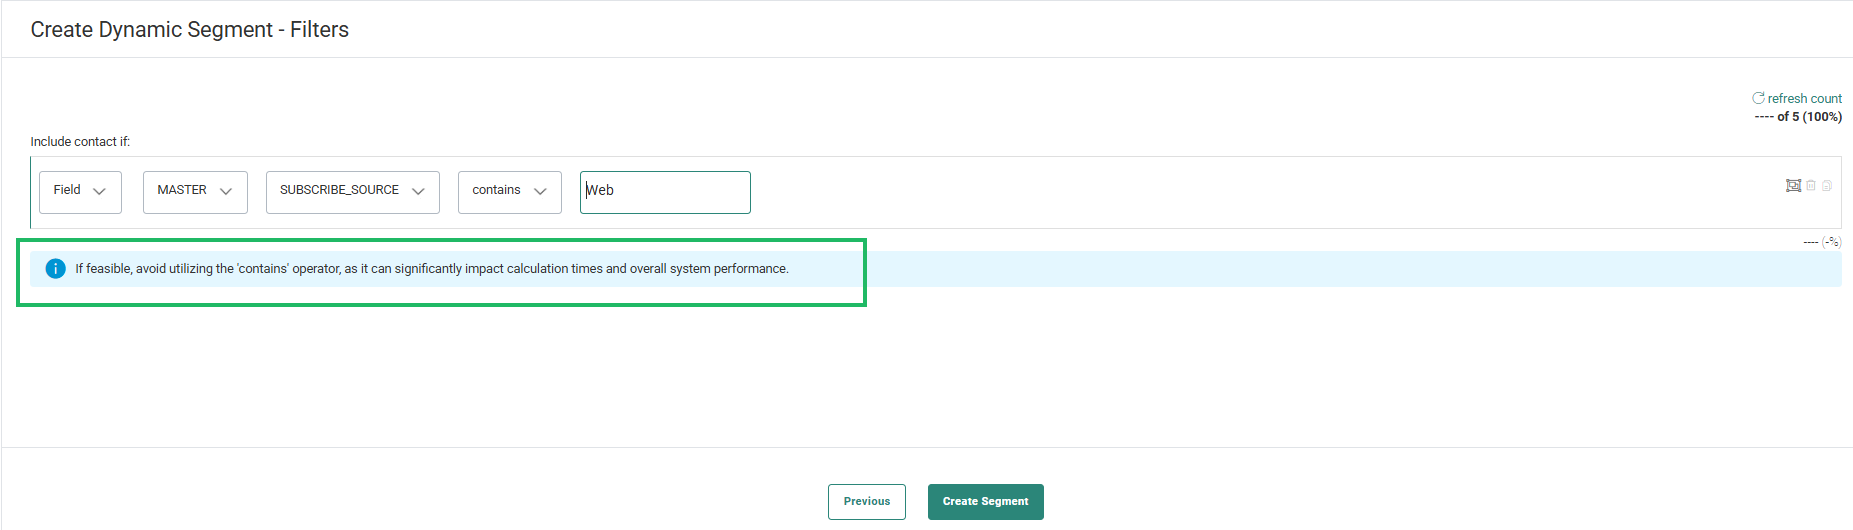
Now, when using the contains operator in a filter, the user is warned that this might have an impact on the calculation times and the performance.
What this looks like in Selligent (Selligent):
Upon creation of a dynamic segment and using the Contains operator, the following message advises the user against using this operator:
(The topic on Dynamic Segments had been updated with this information.)
Library Image Cropping
AVAILABLE TO ALL USERS
BACKGROUND:
Images are an important component when designing messages in the solution. For this, users often use images stored in the library, so they can re-use them elsewhere and have a ready to go repository for all users to choose from. However when previewing or testing the message, images might not be the correct size. Up till now, users had to perform the resizing outside of the tool and then upload these images again into the library.
SOLUTION:
You can now crop images directly within the tool, right from the library. Users no longer need to leave the application to crop their images, streamlining the process for greater convenience.
What this looks like in Selligent (Selligent):
From the Library chapter, in the Files overview, right click an image.
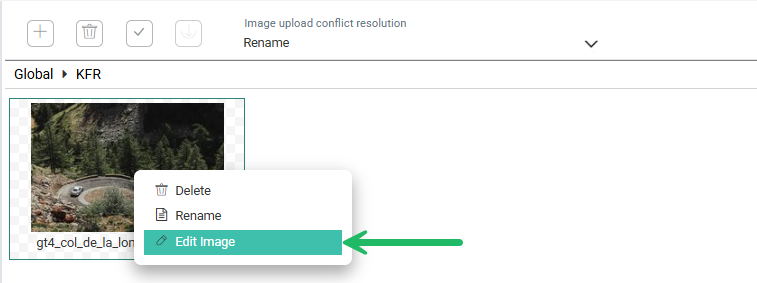
The Edit Image dialog pops up where you can configure your image:
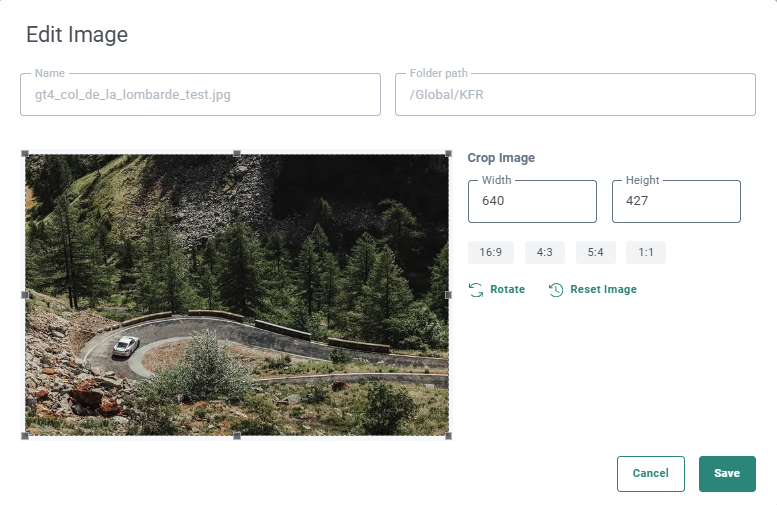
From here you can crop the image using the following methods:
- in the Image preview by dragging the image borders to the required dimensions
- by using the Width and Height fields, defining the exact dimensions of the cropped image
- by using the aspect ratios on the right.
After defining the dimensions of the cropped image, you can move the selected area around to the position of your choice, cutting out anything that falls outside of the area.
A Rotate button allows you to rotate the image. If you are not happy with the results, use the Reset image button to revert to the original image.
When finished, you can save the image as a new image or overwrite the exiting image.
(For more details on the image cropping, check out the Library Files topic.)
Increased File Size Support for File Uploads
AVAILABLE TO ALL USERS
BACKGROUND:
Previously, the file size limit for uploads was capped at 4MB, which could be restrictive for many users.
SOLUTION:
With this new update, the limit has been increased to 50MB, providing greater flexibility and efficiency in managing your data imports. This increased file size is applicable when uploading files into the library, lists, and content.
What this looks like in Selligent (Selligent):
At multiple locations in the application, files can be uploaded. These file sizes are now increased to 50Mb. This is the case when uploading a pre-configured HTML file and images as a template or message into the solution, when uploading dictionary files into the library and when importing data into a list.
UI Enhancements in Admin Configuration
AVAILABLE TO ALL USERS
BACKGROUND:
We are committed to constantly enhancing the user experience by making the interface more intuitive and user-friendly. This latest update is another step toward further simplifying and refining the UI.
SOLUTION:
Several improvements have been made to the Admin configuration UI when defining users and groups in the Access Management section. Goal is to optimize the space available as well as make it easier for users to consult data on these pages
What it looks like in the solution:
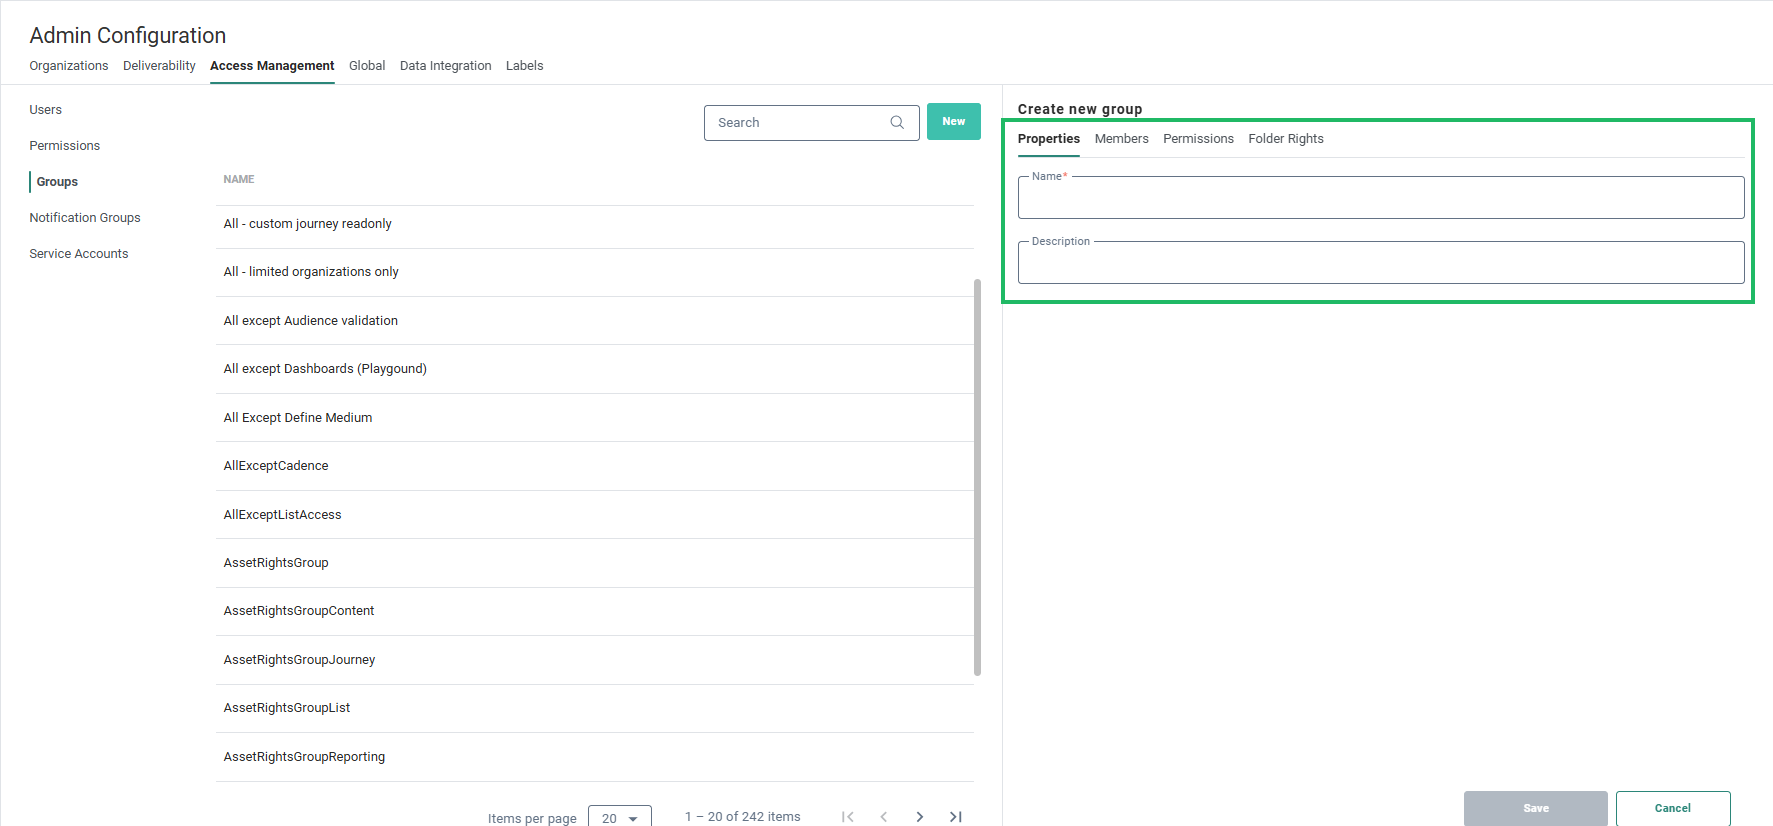
In the Admin tool, in the Groups section of the Access Management configuration, as well as in the Users section, fields have been regrouped under a dedicated tab leaving more space for other information.
Before:
Name and Description of the group were displayed at the top, above each one of the tabs, taking up valuable space and leaving less room to display members, permissions and folder details in the corresponding tabs:
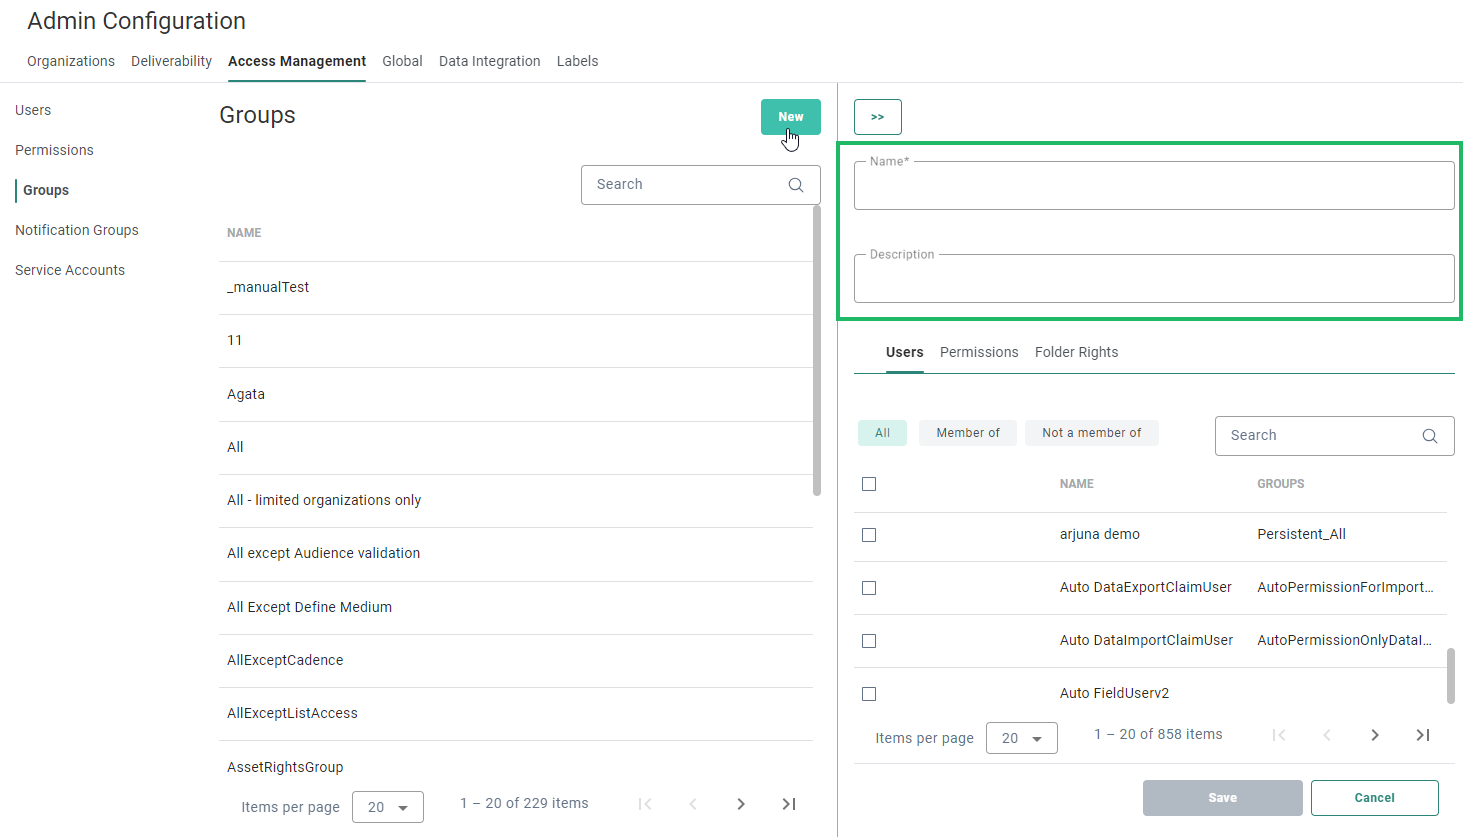
After:
Now, Name and Description have moved to a dedicated tab Personal, leaving more space for the details on the other tabs
(More details on this topic can be found in the dedicated topic for Groups and Users.)
Important Update on the Preview for Real Contact Feature
For customers who integrate externally hosted resources in their content; In order to ensure continued accuracy of the test and preview functionality please make sure that both https://yourtenant-preview.slgnt.[eu|us] and https://yourtenant.slgnt.[eu|us] are granted access in your Content Security Policy (where applicable).
This ensures that Selligent is allowed to load and present your resources during the design and test process.
Update on MSDynamics Integration
BACKROUND:
Microsoft is beginning to roll out Two-Factor Authentication (2FA), which means the MSDynamics connector will require a new authentication method, as the previous one is no longer supported.
SOLUTION:
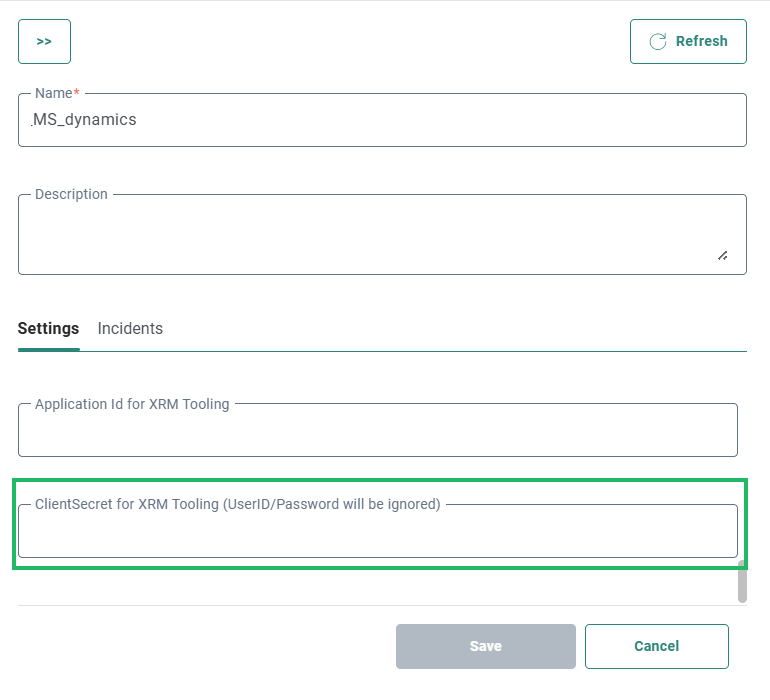
You can now use ClientSecret created in MSDynamics. Once it is filled out in Selligent and saved, the password field is ignored and ClientSecret is used for authentication. This way there is no need to create a new connector, updating the existing one is sufficient.
What it looks like in the solution:
In the Admin Configuration, at the bottom of MSDynamics connector settings, we've added a field ClientSecret for XRM Tooling.
Corrections
- Monaco Editor works now as expected. Previously it was broken due to incorrect css file url
- Page variable is now present in link parameters
- Issues with the the Name/ID locking mechanism in Content Blocks has been solved
