
How to: Publish an Experience
After creating an Experience, it's saved as a draft and you'll need to publish it to your chosen format such as Microsite, Web Embed or Lightbox, depending on where you want your audience to engage.
This article covers how to publish an Experience.
Note: You can only publish Experiences if you have the correct user rights (Admin or Publisher).
What to do
- After an Experience has been created, it's in Draft status.
Select the desired Draft Experience from the Experiences tab.
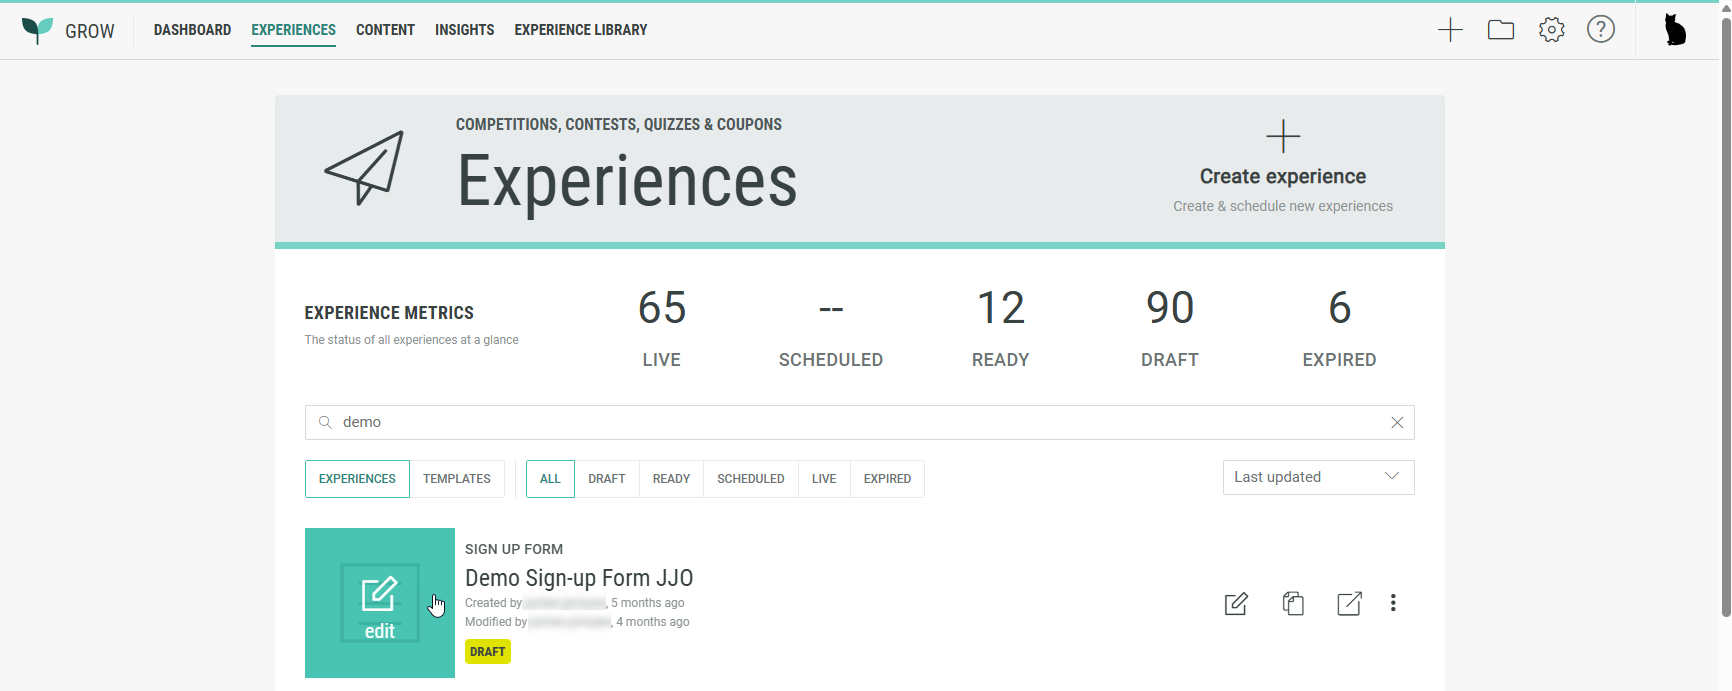
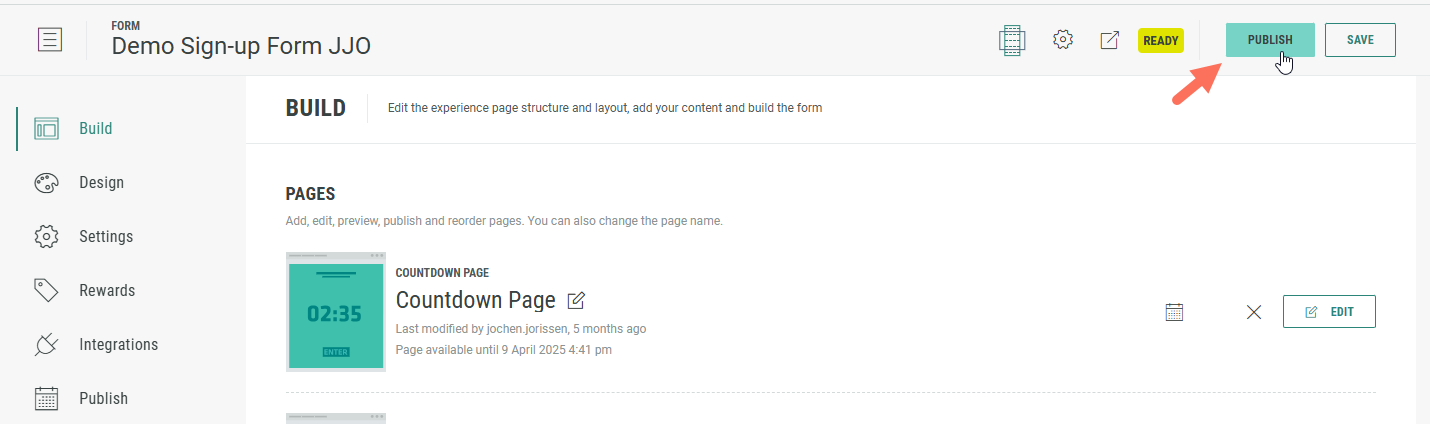
- The Experience opens in Build mode.

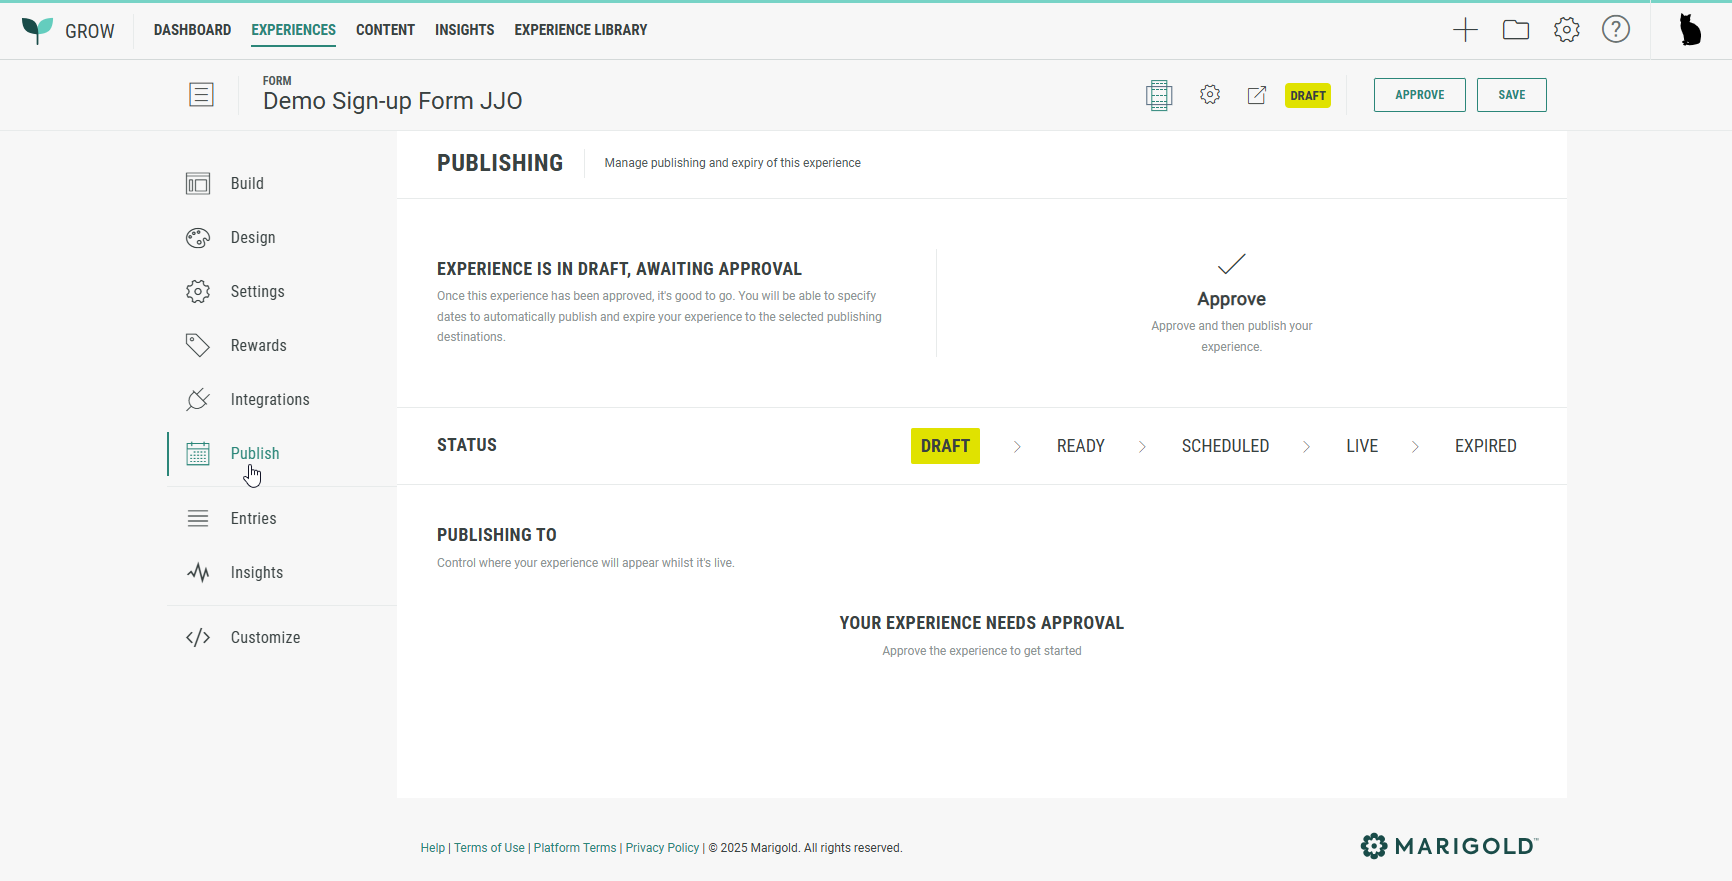
- Then click Approve to indicate the Experience meets all requirements and is ready for publication.
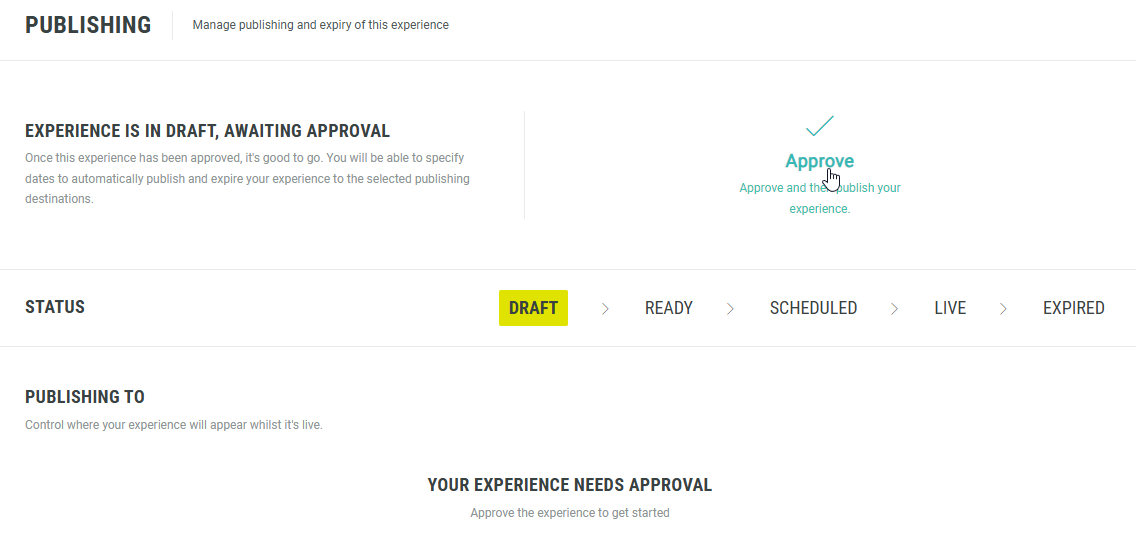
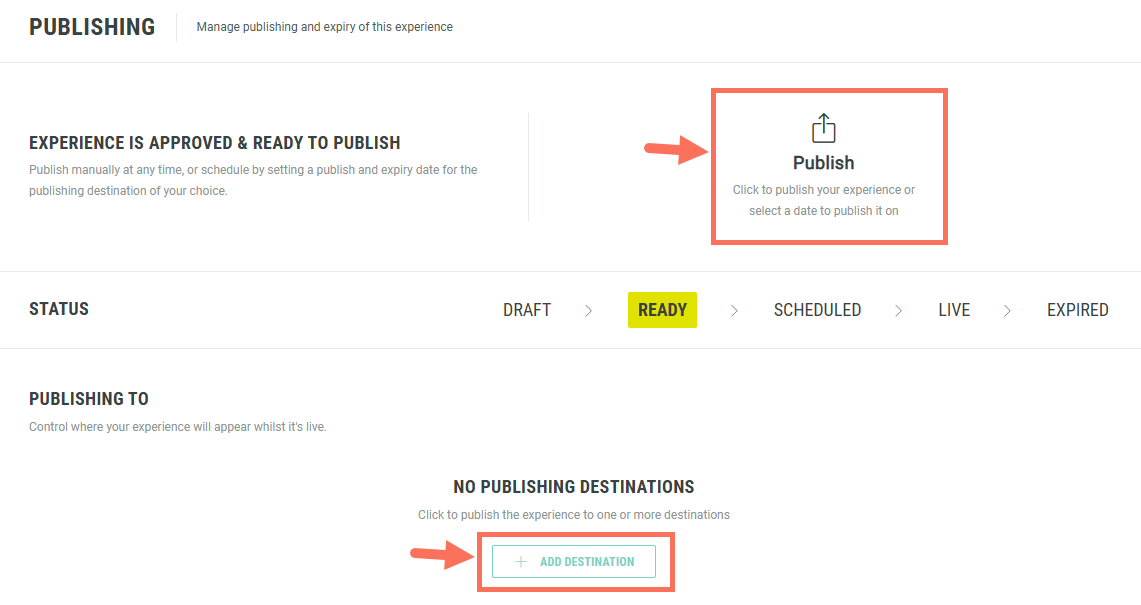
- The Experience moves from Draft to Ready state.
Note: The different states in the flow are explained below.
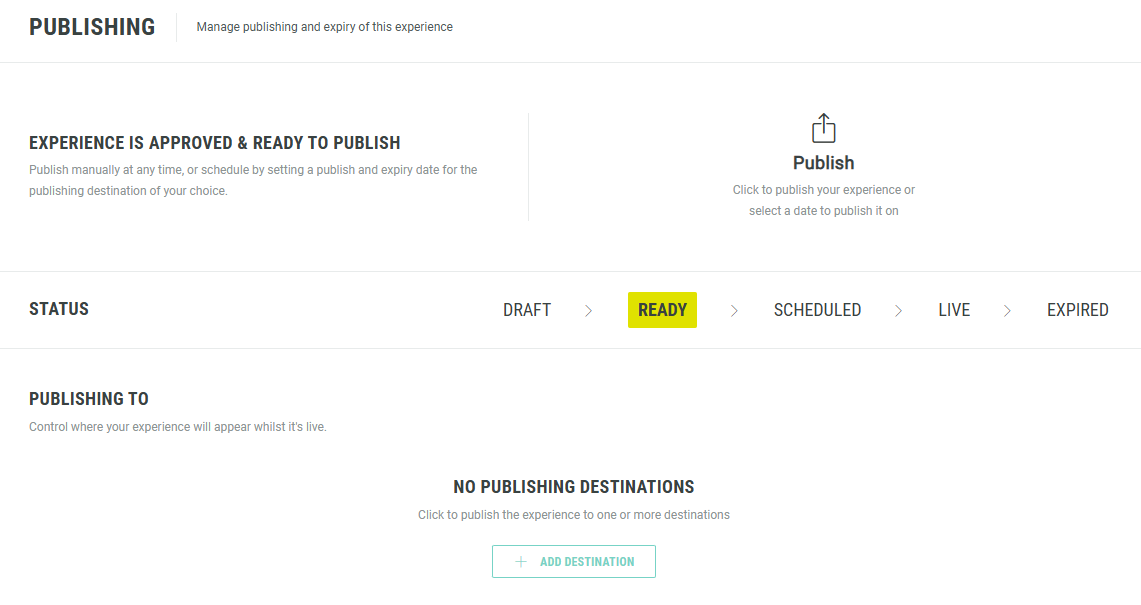
- You can then publish the Experience (for immediate launch or schedule it for launch on a later date), by taking one of the following actions:
- Click Publish at the top right.
- Click + Add Destination at the bottom.
- Click the Publish button at the top-right of the page. This button is available from any section, regardless of the left-hand navigation item selected.
- You're presented with 3 publishing destinations for your Experience in a wizard.
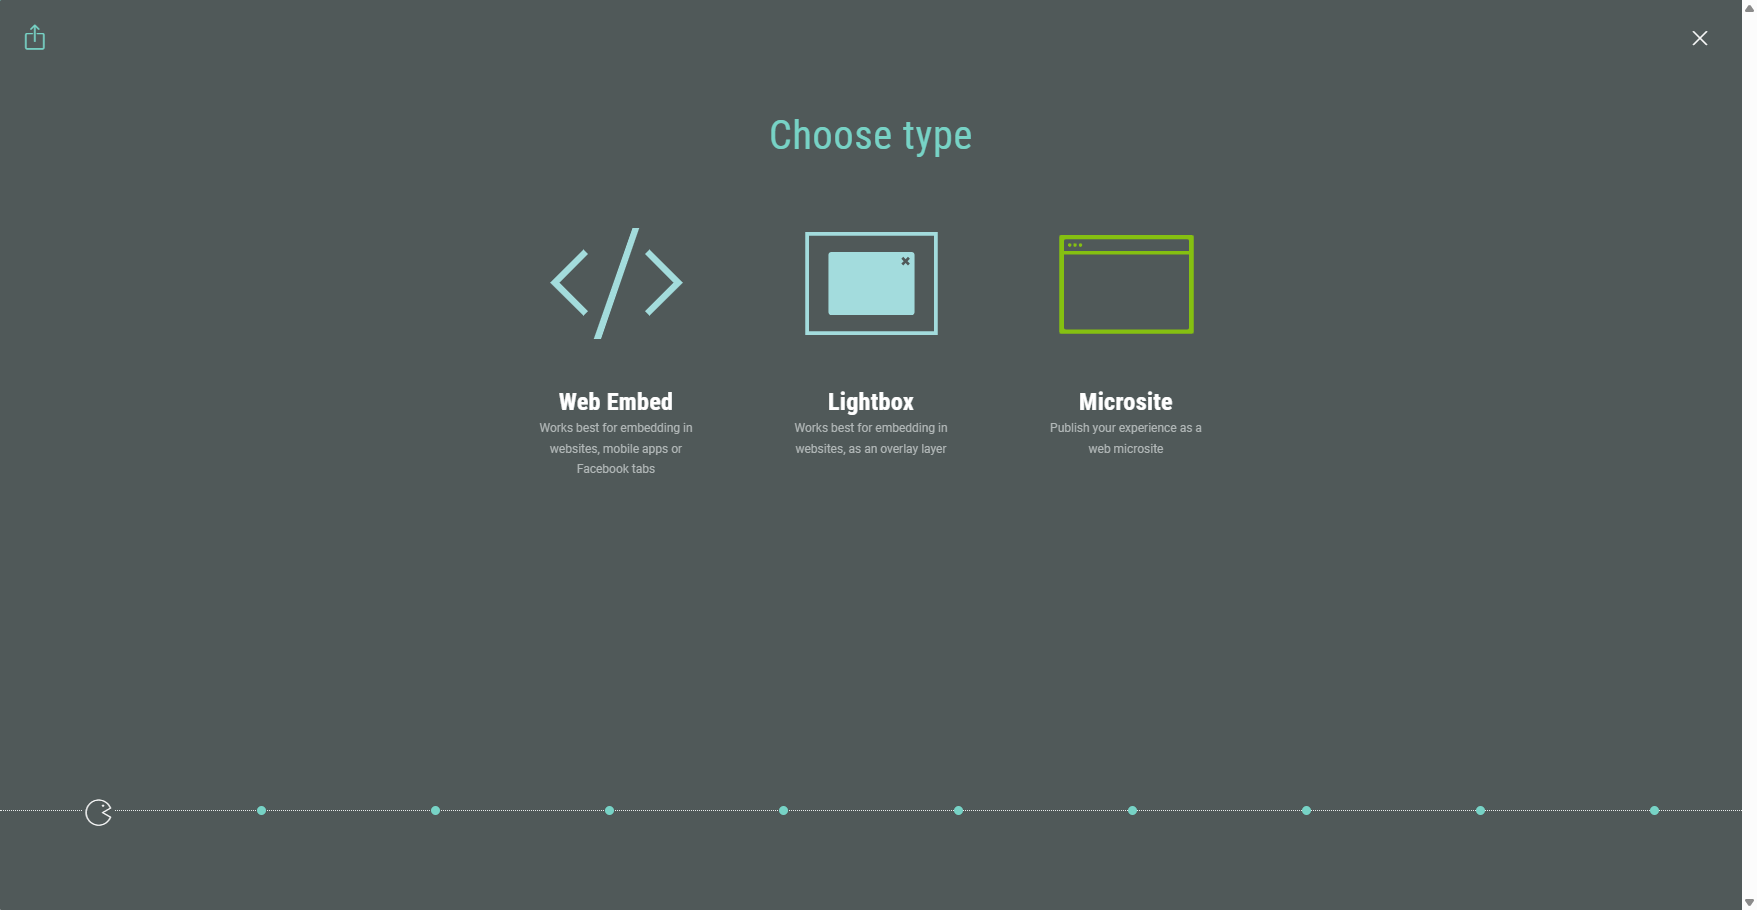
- Web Embed — This generates some code for you to embed the Experience as an iFrame on a web page.
- Lightbox — Launch the Experience as a pop-up on a web page, after a click on a button, link or a specific web event.
- Microsite — Have your Experience appear as a standalone web page.
Note: Each of the publishing destinations is explained in its dedicated article. Click the links above to learn more.
Experience status flow

The lifecycle of an Experience is as following:
- Draft — An Experience is in the Draft phase while you work on it.
- Ready — Once an Experience is approved, it moves to the Ready phase to be scheduled or published.
- Scheduled — Optionally, you can schedule an Experience to be published at a later date/time.
- Live — When you immediately publish an Experience (choosing the Publish Now option in the publication wizard), or when the Publish date of a scheduled Experience is reached, it's in the Live state, which means it's available for Experience participants.
- Expired — An Experience gets expired when the Expiration date is reached, or when you choose to expire it manually yourself. Expired Experiences are taken offline, meaning they are no longer accessible for Experience participants.
Note: You can re-publish an expired Experience within 30 days of expiry.
Beyond 30 days of expiry, it's no longer possible to re-publish it. But you can always clone an Experience to re-use it.
