Goodbye Use Case with Cheetah Digital
The Goodbye use case allows you to target consumers when they unsubscribe from your website, newsletter, game, etc. You can send them a sorry to see you go message or an incentive to remain a member of your community. Also, when people are leaving, it is important to get feedback on the reason why and use this information for future improvements.
To achieve this, the following steps need to be taken. These steps include configuration on the Interactive Moments side as well as on the Cheetah Digital side. Some of these steps might already be set up for other use cases and can be skipped if needed.
Prerequisites
Note: These tasks are to be performed by technical marketers or expert users in partnership with our Technical Services team. Please contact your Zeta Global Representative to learn more.
Before you can use Moments templates, make sure the following items are in place. These are typically set up once by your system administrator or the Zeta Services team.
-
The Audience configuration - If unsure this has been set up, confirm with your system administrator that the correct Audience configuration is set up for your use case.
-
Integration – Ensure that the integration is successfully set up with Interactive Moments. Ask your system administrator if the integration is live and supports your specific use case.
Step 1: In Moments, create the Moment
A Moment is a specific event in the consumer's journey at which timely communication or interaction with the consumer is triggered. It captures certain signals and applies rules, turning a specific event into a Moment you can act upon.
For the Goodbye use case, create a Moment in the Moments application, using the Goodbye Moments template. Depending on the selected type of Goodbye Moment, the Moment is triggered when the visitor signs out of your website, unsubscribes from a webinar, newsletter or event, etc. The Moment also determines the domains from which the Moment can receive cancel signals and which audience is targeted by the Moment.
- For more general information on how to create a Moment and the general settings for a Moment, check out this topic
- For more information on the Goodbye template specific settings, check out this topic.
Note: For a Goodbye Moment, there will only be one Moment per unique user (based on the email address or custom ID).
Step 2: In your messaging workspace, create the necessary messages
When the Goodbye Moment occurs, it needs to trigger a journey that sends out one or more communications to the visitor. These communications need to be designed first.
Create the necessary messages used in the Goodbye Journey. These messages will be sent when the cancel action occurs.
Note: This step requires basic knowledge on how to create messages in Cheetah Digital. For more information, please check out Creating Email Campaigns in the Cheetah Digital help center.
Some things to consider when creating these email campaigns:
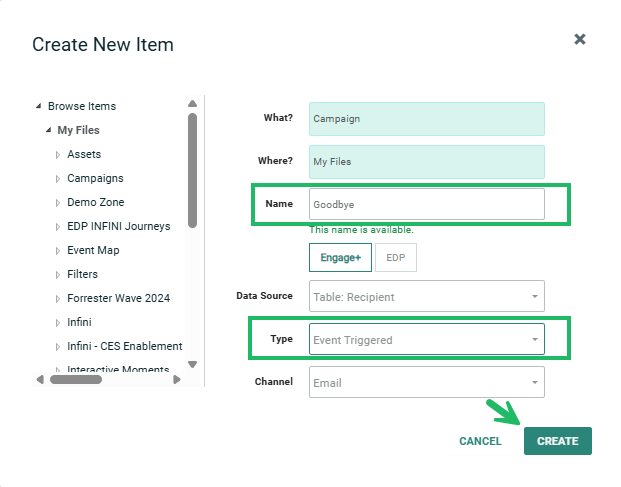
1. The email campaign needs to be of type Event-triggered
2. The email needs to be set up with Advanced Event Triggering activated to allow these messages to be personalized with data from the event. This is done on the Setup tab of the campaign:
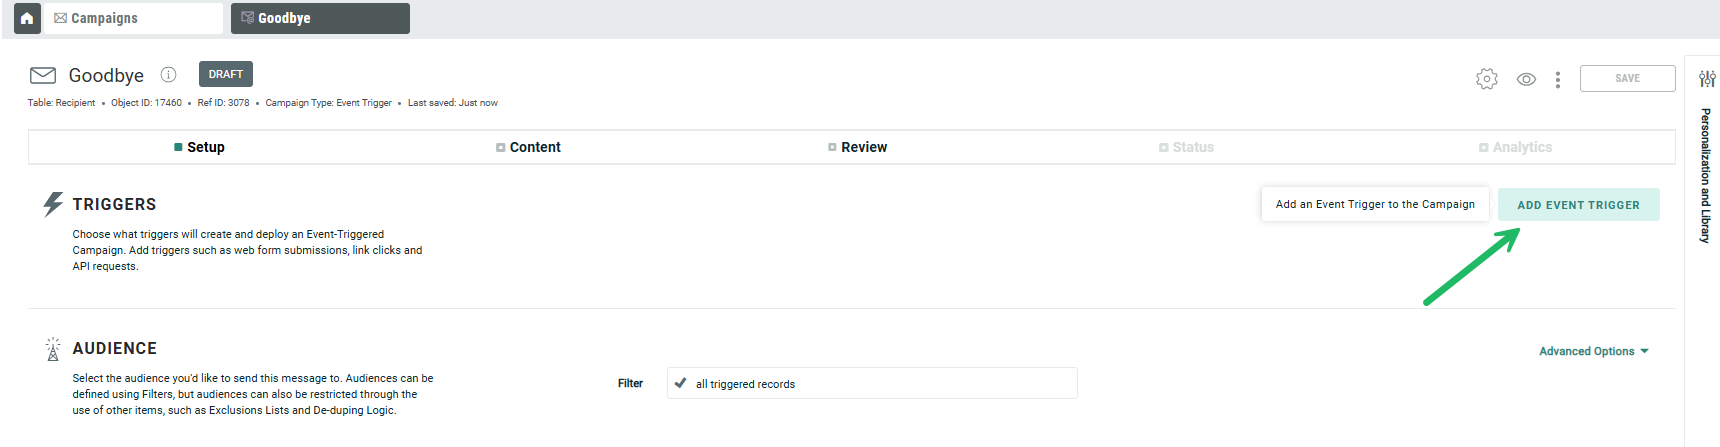
Apply the above steps for all other messages used in the journey. For more details on creating email campaigns and personalization, please check out the corresponding topics on Creating Email Campaigns in the Cheetah Digital help center.
Note: For consistency, all messages used in the journey can be set up with Advanced Event Triggering on. However, when you choose to save the payload of the first email campaign in the journey (this is an option set when adding an email campaign to the journey), you can configure all subsequent messages with Simple Event Triggering on, and only use Advanced Event Triggering for the first email.
Technical note: When Interactive Moments is set up for your environment, a dedicated table is created, storing the event data. The data in this table can then be used to personalize the message. To be able to use this data, it needs to be sent first in the payload when sending signals using the SDK, API or Google Tag Manager.
In the message, you can now add personalization fields from the events generated in the Moment:
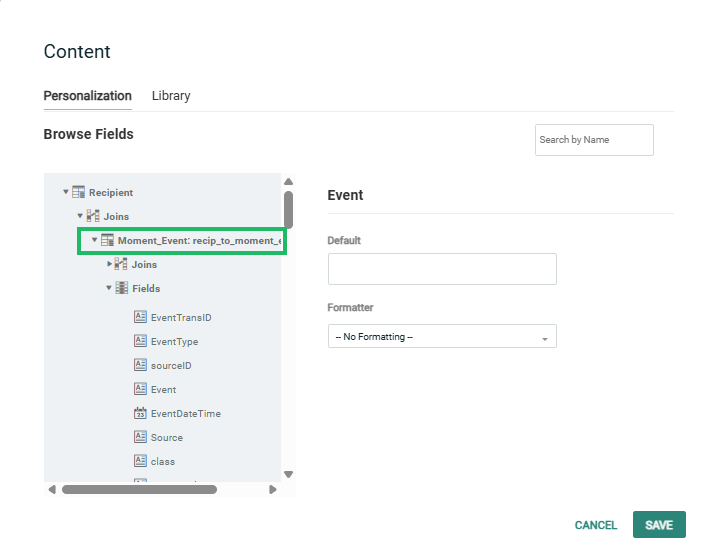
Note: The table Moment_Events, joined to the recipient table, stores the data on event level and can be used directly as such to personalize your message.
The Moment_Event_Item table, joined with the Moment_Event table, stores all the items linked to an event.
These tables contain 1:N data and therefore to use this data for personalization in email campaigns, a looping block is required.
In case of the Goodbye Moment, the information on the signout type and the category in that Moment, can be used to personalize the message. This information is available from the objecttype and objectid fields in the Moments_Events table.
Step 3: In your Journey builder, create the custom Goodbye journey
Note: This step requires basic knowledge of how to create journeys in Cheetah Digital. For more detailed information on all the journey options, please check out the topic on how to build a journey.
In this step you create a journey with all the necessary components for your flow.
Things to consider when creating a journey triggered by the Goodbye Moment.
1. The journey must be of type Real-time
2. The Start component of the journey must be triggered by the cancellation event.
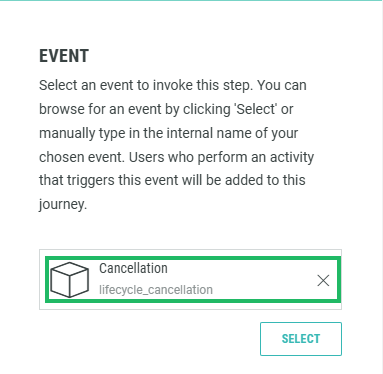
Note: By selecting this event in your journey, the journey is listening to all Moments (created in step Step 1: In Moments, create the Moment) of that specific type. When these Moments come in, the journey is triggered and communications are sent.
Note, that when configuring the Goodbye Moment in the Moments application, you had the possibility to define the type of Goodbye Moment (website, webinar, game, newsletter, etc) as well as a free text field describing the details (sports, weather for the newsletter for example). This information is available in the journey and can be used for filtering or personalization.
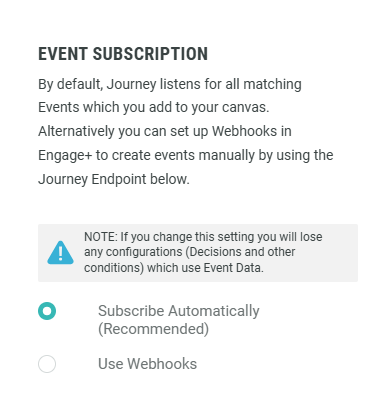
3. In the Settings of the journey, check that the Event Subscription type is set to Subscribe Automatically
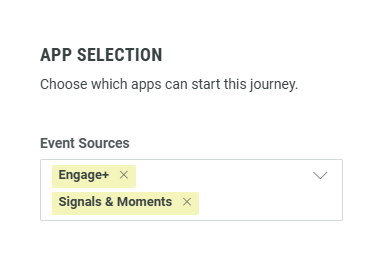
4. Also, in the settings of the journey, if there are multiple sources (for example multiple apps producing the same event) for the incoming moment, you need to select these apps in Settings > App selection > Event sources:
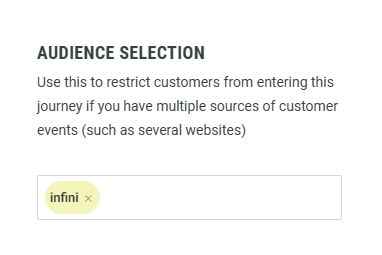
5. In the Audience Selection, you can filter out the audiences for who this journey will be triggered. Typically, this is the audience that has been selected in the Audience configuration in the Moments app. If you leave this field blank and there is more than one audience, the journey is triggered for all audiences.
Step 4: In the Journey builder, select the messages to be sent out in the journey
Once the journey has been created and configured to launch when a Moment comes in, you must replace the messages in the journey with your own messages, created in step 2.
In addition, you must make sure that the messages used in the journey, are configured for Event-based Personalization. (Remember, when creating the message in step 4, the option Advanced Event Triggering was activated. )
1. Click the message component in the journey to access the message properties panel on the left.
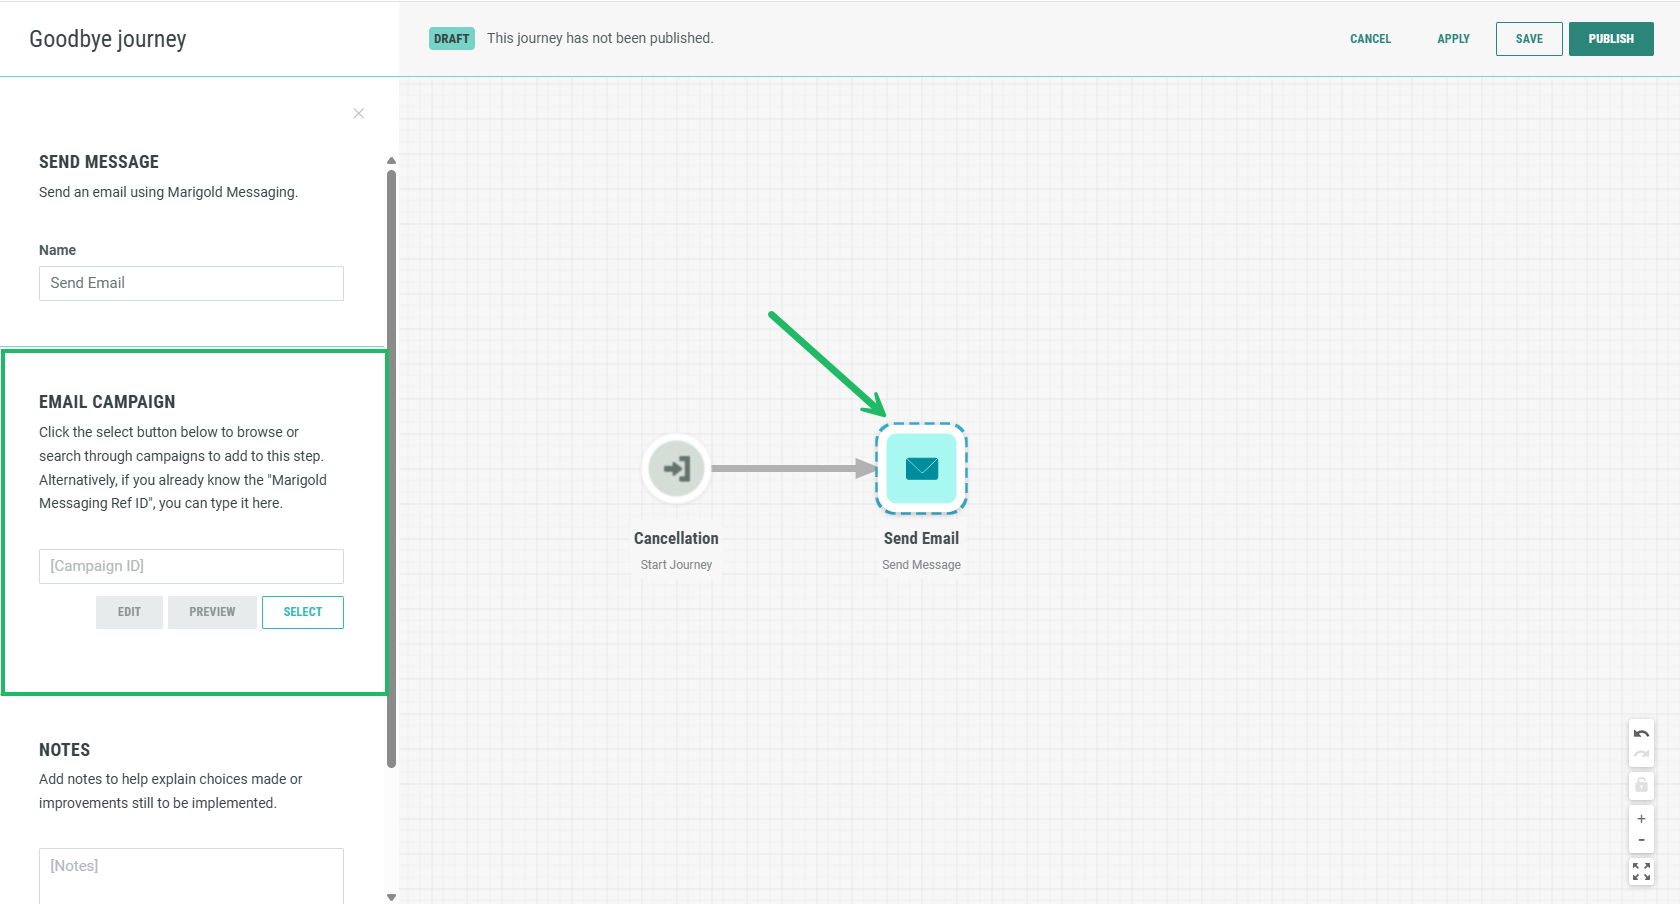
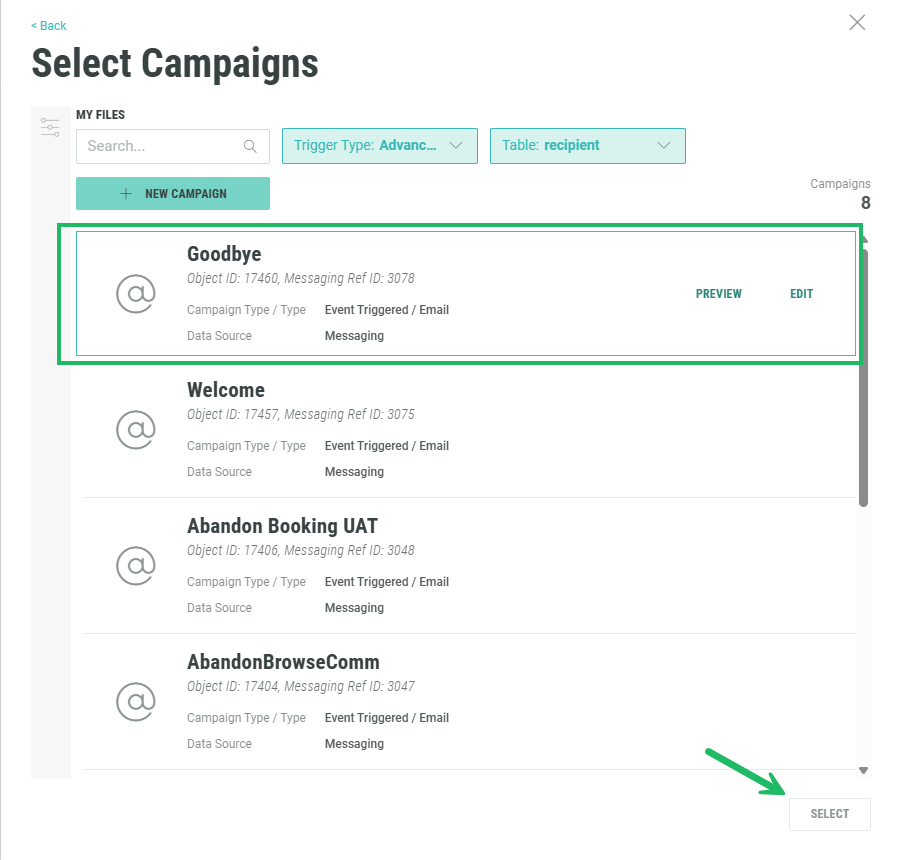
2. First, select the message (created earlier in Cheetah Digital) by clicking the Select button in the Email Campaign section.
Once a message has been selected, an additional Campaign Personalization section is added.
3. Next, in the Campaign Personalization section, ensure Event-based Personalization is selected. This allows for the personalization fields from the triggering event (the goodbye action) to be used in the message.
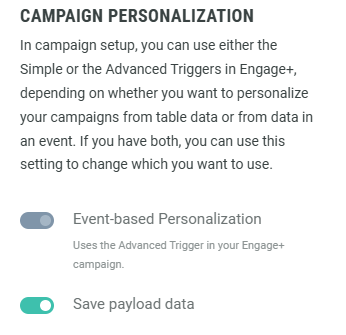
Note: The Event-based Personalization option is toggled on but grayed out by default when the message has been configured for advanced event triggers only . If simple and advanced event triggers were selected for the message, this option will not be grayed out and you will have to toggle it on to ensure advanced event triggers are used.
When Save payload data is activated, you will also be able to see the payload in the activity log: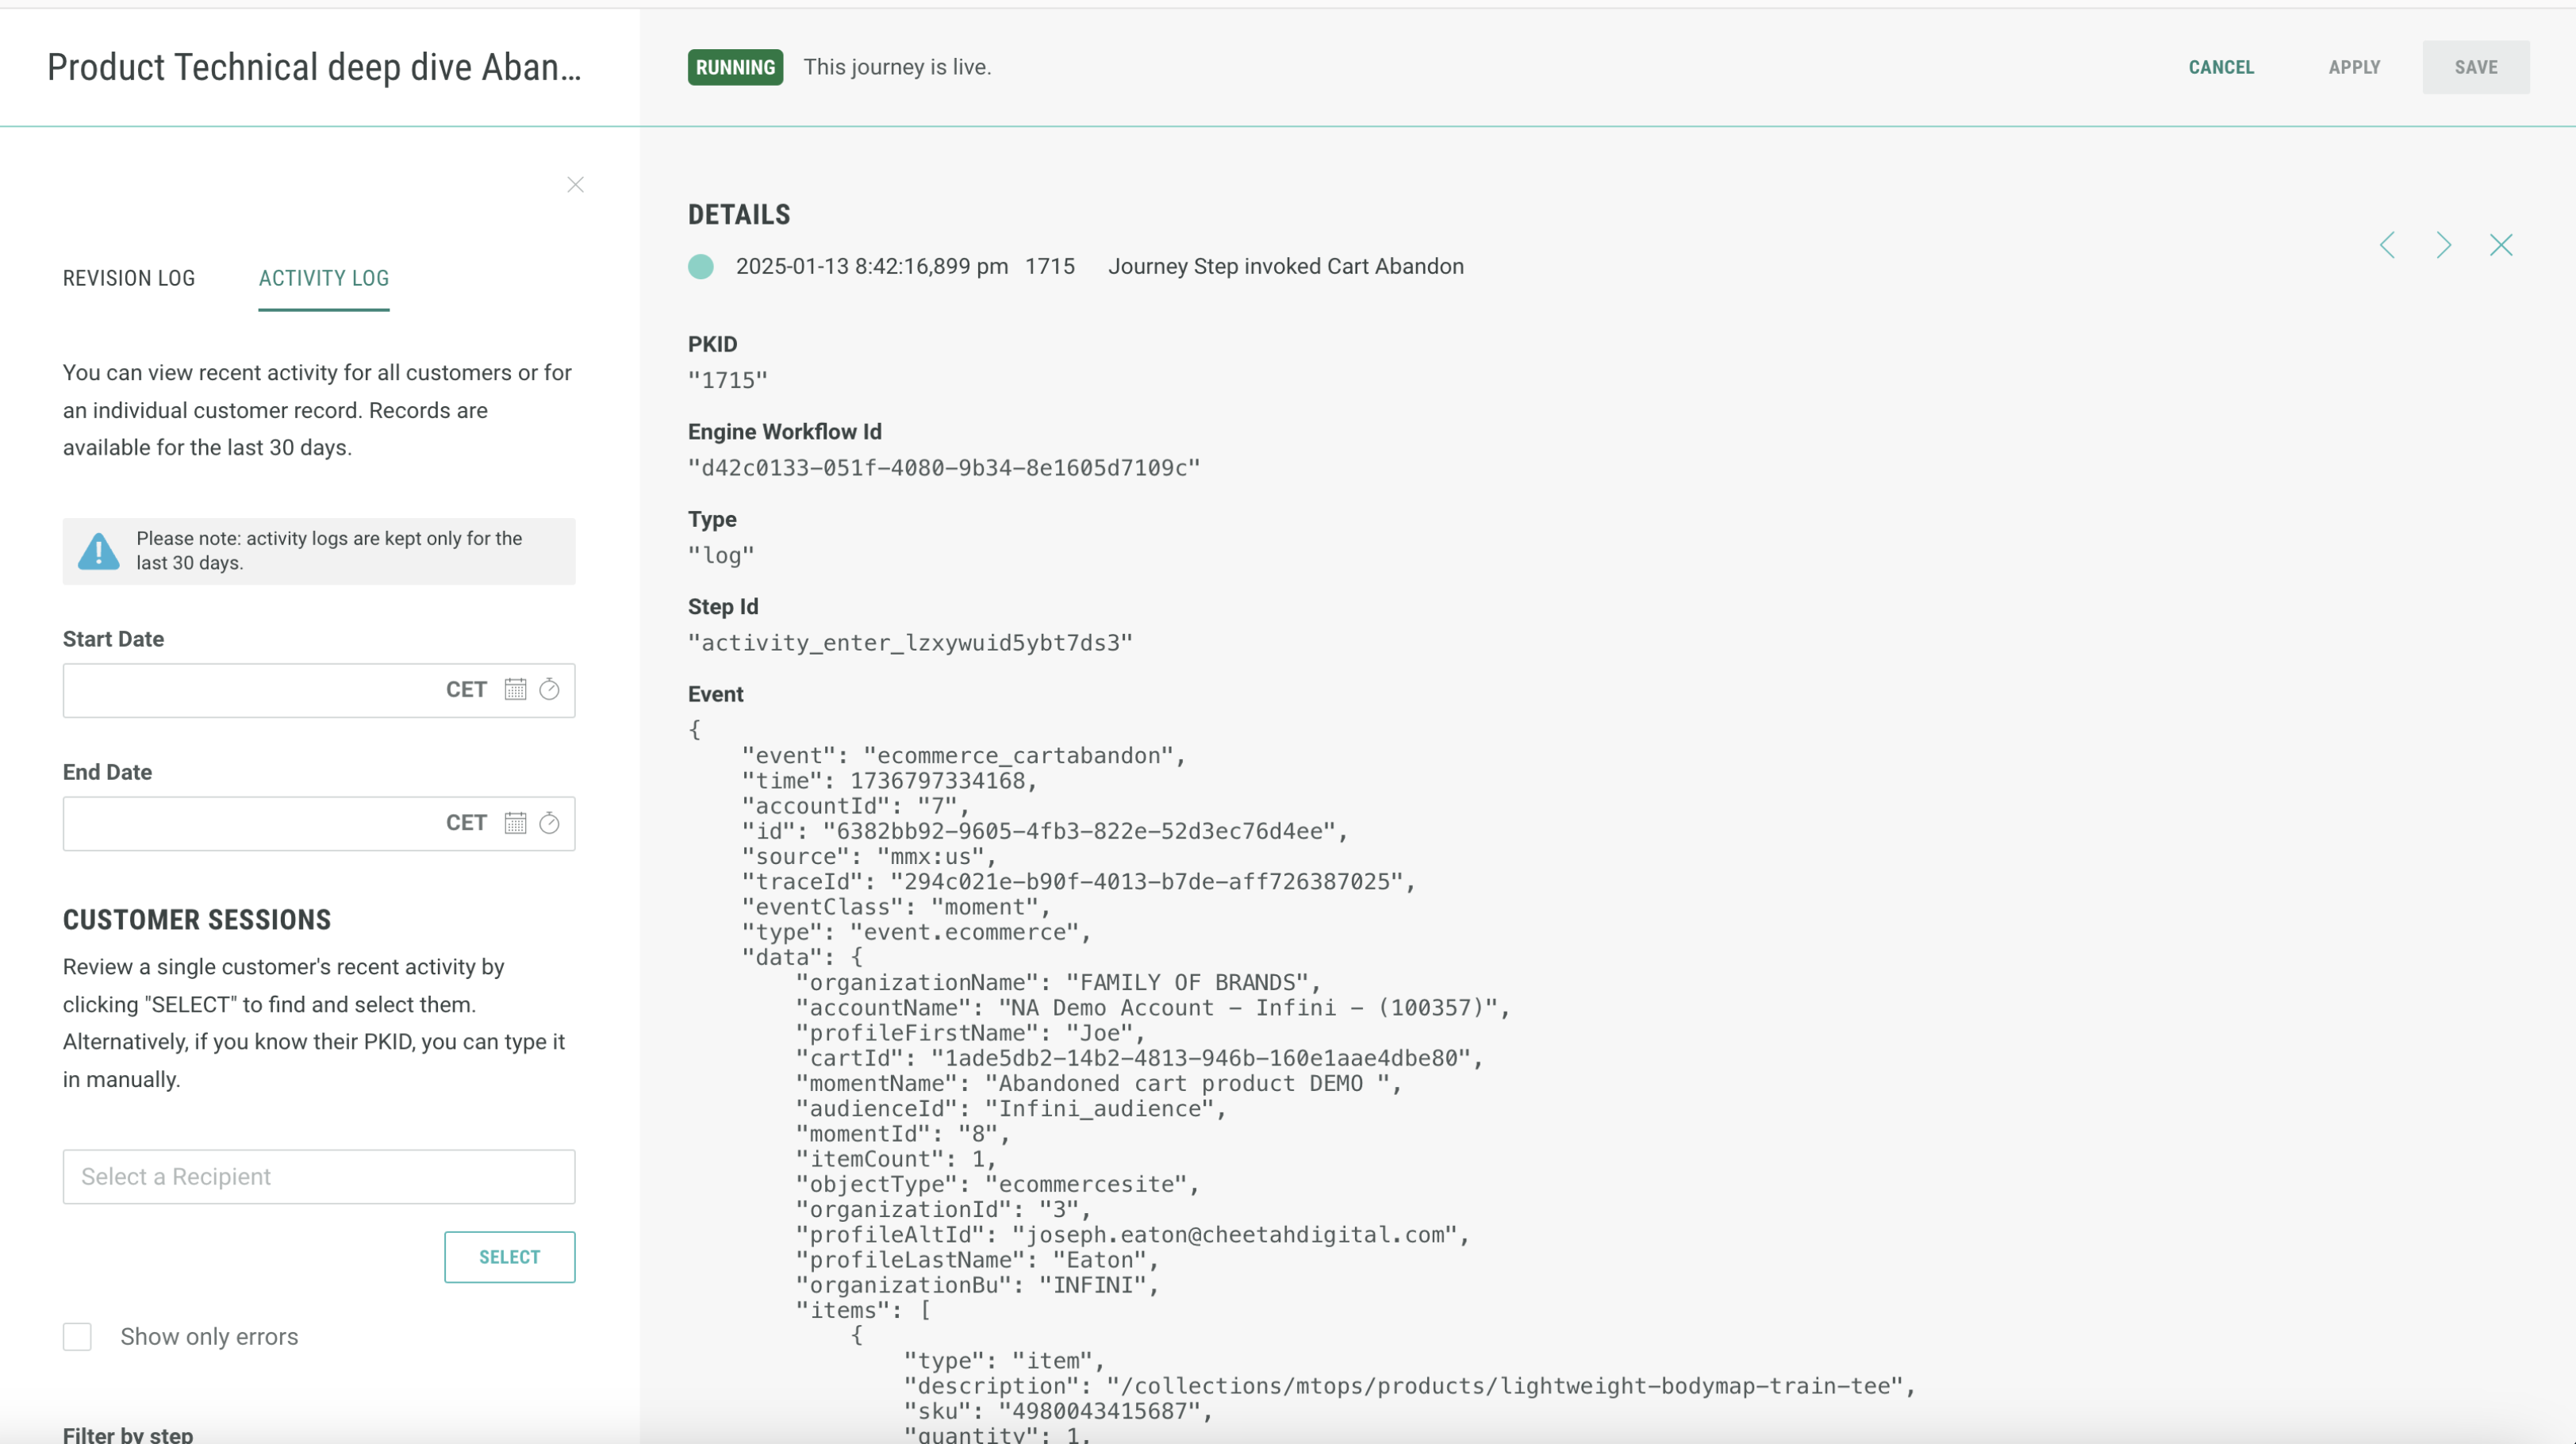
In addition, when Save payload is activated, you will be able to use simple event triggering for all subsequent emails. Only the first email in the journey needs to be set to Advanced Event trigger (see Step 2).