Campaigns Overview
Campaigns are planned messages sent to lists of users based on a specific template or design. Campaigns allow you to target your entire user base--or any segment--with promotional messaging, news updates, or any other content.
Depending on the way you craft your template, your campaign can include personalized content from your Content Library, differing based on each recipient's interests and profile data. Depending on the list you supply for the campaign, your group of recipients can change dynamically as the list membership changes.
Note that messages sent in response to a user's action, such as purchase confirmation, or other user-specific sends, are not campaign messages. This type of message is called Transactional Message, and is configured separately.
Campaign Types
You can select from four main message campaign types:
- Regular - a single campaign sent at scheduled time or on demand. For example, you might send out a notification to a list of your top users offering a limited time discount for every referral.
- Recurring - a campaign sent on a recurring basis, with your latest content or products automatically included. For example, you may set up a recurring weekly newsletter to all subscribers populated with content from a data feed.
- A/B Test - a single campaign with multiple variants to determine which works best. For example, you might want to test three different subject lines to see which results in the greatest number of opened messages. There are multiple types of A/B Tests which are explained in the Choosing Your Campaign Type section below.
- SMS - a single SMS message campaign sent at a scheduled time or on demand. Send promotional or transactional SMS messages.
For a deeper look at campaign types, see the table below.
As you create your campaign, you'll choose settings, such as an audience list, a schedule, and an optional data feed to include your latest content or content which best matches each user's individual interests.
Campaign Statuses
As you create and send campaigns, they will progress through 4 different statuses--from newly created "drafts" to fully "sent" campaigns. You can view your campaigns by status in the platform under Messaging > Campaigns.When searching for a campaign, if the name includes underscores, you must include them in the search.
- Draft - This is the default status of all new campaigns. You will need to add all of the necessary fields for sending, such as a target list, subject line, and a send time before confirming your campaign is eligible to be marked Scheduled and then sent.
- Scheduled - These campaigns will send at their scheduled time if left unchanged. In order to edit them, they must be unscheduled and sent back to the "Draft" status. Campaigns scheduled for a specific time will queue until then, campaigns set to send on confirmation will quickly be picked up and set to "Sending".
- Sending - A campaign currently being distributed to it's target list of users. Sending campaigns can be paused to make changes. Note: If a campaign is paused for 4 days, it will be cancelled automatically.
- Sent - A campaign that sent to all of its users or was marked complete. The campaigns can be reviewed and copied but cannot be altered anymore.
Before You Create a Campaign
Campaign Cloning Tip: Campaign creation best practice is to create a new campaign for each send to avoid sending issues with recurring campaigns. If the new campaign uses the same or a similar template as a previous campaign, you can make a copy of the template. Cloning a campaign should be used for regular campaigns that were sent once and need to be sent once again.
There are a couple of prerequisites to setting up your first campaign. In the platform, you need to first set up:
- One or more Lists - a set of users to whom you will send a campaign.
- A Template which will become the body or content of your message. As a best practice, use a Template to create a new campaign rather than writing code directly in the Campaign editor.
Other than the List and Template you plan to use, you should also plan the following aspects of your campaign, which will be required in the Campaign Editor workflow:
- What to send, including basic information like From Name, Subject and Reply-To Email address as well as the design of your content. These can be pre-filled by the template, if one is used, but can be modified.
- When to send your message. The schedule of the campaign will not be part of the template.
The system uses a failsafe measure to ensure your users will not receive duplicate messages. This means:
- If you create two campaigns with the same Audience and the same Subject within 60 minutes of each other, the second campaign will be canceled.
- If you create two campaigns with the same Audience and the same Subject and try to send to them at the same time, then both campaigns will be canceled. This is a safety measure to ensure that your users will not receive a duplicate message.
Choosing Your Campaign Type
Consider the goal of your campaign when choosing the type of campaign. It's a best practice to establish how you'll measure success before setting up a campaign. To learn about the metrics and reporting available for campaigns, visit the Reporting documentation pages.
Note that there are multiple types of A/B Tests, including A/B Split, A/B Winner and A/B Auto Winner, as described above.
Campaign Type | Description | When To Use | Examples |
|---|---|---|---|
Regular | Singular communication sent to one or more lists of your users. | To send a one-off campaign, or when you're first implementing and not yet ready to use the automation of Recurring Campaigns. | To promote holiday sales, an announcement or limited-time offer. |
Recurring | Delivers a message to a set list on a recurring basis, keeping the same format, but typically delivering new content with each send, using data feeds. | Automate the campaign building and sending process, so that you can spend less time building messages and more time being strategic. | Weekly or daily newsletter. |
A/B Split | Your entire list is split into 2-5 test segments, allowing you to test a different version. Customize the list splits based on your needs. There will be no "winner" for A/B Split tests. | For longitudinal testing of an element of your message such as personalization vs. a static design. Changes are tested over a longer period of time, from a few days up to weeks or months. | Identify which approach is most effective to inform the design of future campaigns. |
A/B Winner | The List is split up into 2-4 test segments and one winner segment that will receive the winning version. You can easily copy the winning version into the final segment manually - then schedule your final segment. | A/B Winner (and Auto Winner) tests are commonly used for subject line testing or other "quick win" tests where you are quickly optimizing based on the test results. Use A/B Winner when evaluating multiple metrics to determine your "winner". | Quickly test different settings to optimize performance (ex. pageviews or revenue) and then manually copy and schedule the winner for the final segment. |
A/B Auto Winner | The List is split up into 2-4 test segments and one final segment that will receive the winning version. You choose how the "winner" will be determined, by open, clicks, or pageviews for each version or -- if you have the Purchase API installed -- you can leverage Revenue or Purchase Count. The "winning" version is automatically sent to the final segment. | A/B Auto Winner (and A/B Winner) tests are commonly used for subject line testing or other "quick win" tests where you are quickly optimizing based on the test results. Use A/B Auto Winner when evaluating only one metric to determine your "winner" (ie: pageviews). This will allow you to automate the build and send (at the time you choose) of the final version. | Quickly test different settings to optimize performance (ex. pageviews or revenue). The winner is automatically sent. |
NOTE:All campaigns support the use of a data feed to populate content, which can be personalized to the user's known interests.
Create Your Campaign
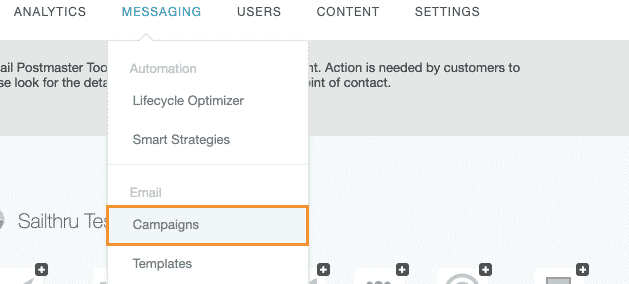
- From the Messaging menu, select Campaigns.

- The Campaigns page displays a list of all of your existing campaigns and a menu on the left for viewing them according to their current state: Drafts, Scheduled, Sending, Sent, or Recurring.
- Click New Campaign to create your campaign. If you're customizing a feed in Recommendations, you can also start a new campaign from there.
- Name your campaign by clicking and editing the New Campaign title at the top of the page.

- Click Email to select your channel.
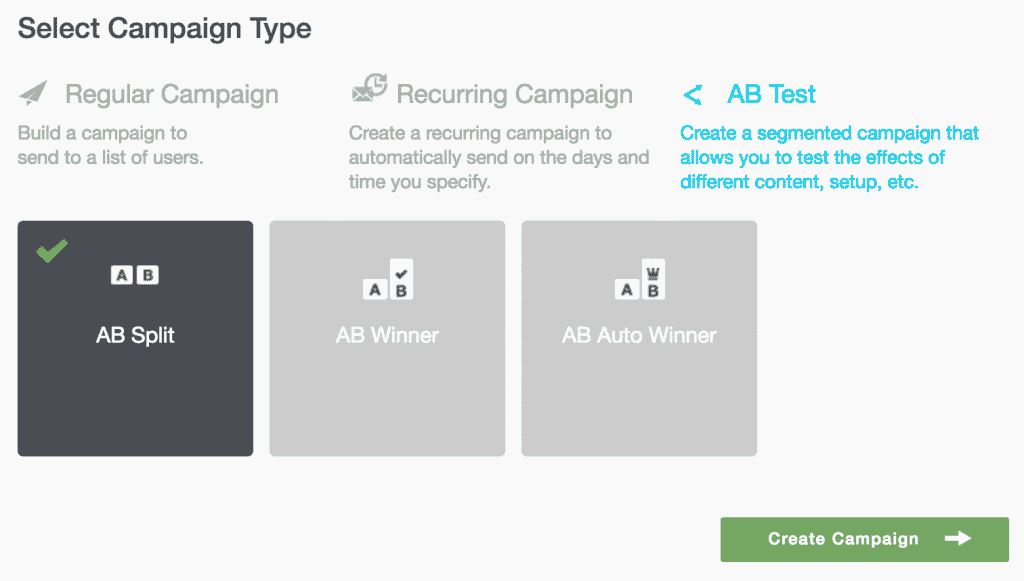
- Choose your Campaign Type and click Create Campaign.
NOTE: When you select A/B Test, you'll have three test types to choose from. An A/B Test allows you to send the same message with to segmented audiences that will each receive a different version of a specified element. For example, you might want to test three different subject lines to see which results in the greatest number of opened messages.

Campaign Settings
As you move through setting up your campaign, you will have different options on each page depending on the type of campaign you are creating. Some of the setting options are the same for all types of campaigns, while others exist only for a single campaign type.
For example, on the Audience page, all campaigns require a Target List, but only A/B campaigns will include Segment options on the Configure page.
Select a campaign type to learn more.

